2018 VOLVO XC60 T8 ignition
[x] Cancel search: ignitionPage 231 of 674

KEY, LOCKS AND ALARM
}}
* Option/accessory.229
In rear door*
Lock button with indicator light in rear door.
Illuminated indicator lights in each door indicate that that particular door is locked. If any door isunlocked and opened, the indicator light in thatdoor will go out. The lights in the other doors willremain illuminated.
Related information
•Lock confirmation settings (p. 229)
• Welcome Light (p. 157)
• Using home safe lighting (p. 157)
Lock confirmation settings Settings for how the vehicle confirms locking and unlocking can be adjusted in the center dis-play's Settings menu.
1.
Tap Settings in the center display's Top
view.
2. Tap
My CarLocking.
3. Tap
Visible Locking Feedback to deacti-
vate the function or to select when the vehi- cle should provide a visible response: during
Lock, Unlock or Both.
4. Select to receive an audible response when locking the vehicle by marking
Audible
Locking Feedback.
Folding door mirrors * confirmation
1. Tap
Settings in the center display's Top
view.
2. Tap
My CarMirrors and Convenience.
3. Select
Fold Mirror When Locked to acti-
vate or deactivate the function.
Related information
• Lock indication (p. 228)
Remote key
The remote key is used to lock and unlock doors and the tailgate. The remote key must be in thevehicle in order to start the engine.
Remote control key, on left, and button-less key ((Key Tag) *), on right.
The remote key is not physically used to start the ignition because the vehicle is standard-equippedwith keyless start (Passive Start). To start thevehicle, the key must be in the front section ofthe passenger compartment, e.g. in the driver'spocket or in a cup holder in the tunnel console.
Page 251 of 674

KEY, LOCKS AND ALARM
}}
* Option/accessory.249
Unlocking the tailgate from insidethe vehicle
The tailgate can be locked from the inside using a button on the dashboard.
1.
Press the button on the dashboard.
> The tailgate will unlock and can be opened from the outside by pressing the rubberized pressure plate on the handle.
2. With the optional power tailgate
* -
Press and hold the
button on the dash-
board.
> The tailgate will open.
Related information
• Locking and unlocking from inside the vehi- cle (p. 247)
• Opening and closing the power tailgate
*
(p. 251)
Activating and deactivating childsafety locks
Child safety locks help prevent children from opening the rear doors from inside the vehicle. There is an electric safety lock * and a manual
safety lock.
Activating and deactivating electric child safety locks *
The electric child safety lock can be activated and deactivated in any ignition mode higher than 0. The lock can be activated and deactivated up
to 2 minutes after the engine is turned off if no door has been opened.
Button for electric activation and deactivation.
1. Start the engine and select any ignition
mode higher than 0.
Page 259 of 674

KEY, LOCKS AND ALARM
}}
* Option/accessory.257
Activating and deactivating privatelocking
Private locking is activated using the function button in the center display and a PIN code.
NOTE
For the valet lock function to be activated the car must be in at least ignition mode I.
Entering security code before initial useThe first time the function is used, a security code must be selected. This code can then beused to deactivate private locking if the selectedPIN code has been lost or forgotten. The securitycode functions as a PUK (security) code for allPIN codes used for private locking. Save the security code in a safe place.To create a security code:
1. Tap the button for private locking in Function
view.
> A pop-up window will appear. 2. Enter your security code.
> The security code is saved. The privatelocking function is now ready for activa- tion.
If the system has been reset, the above proce-dure will need to be repeated.
Activating private locking1. Tap the button for private locking in Function view.
> A pop-up window will appear.
2. Enter the code you would like to use to unlock the tailgate and tap
Confirm.
> The tailgate will lock. A green indicator light will illuminate next to the button in Function view to confirm locked status.
Deactivating private locking1. Tap the button for private locking in Function view.
> A pop-up window will appear.
2. Enter the code used for locking and tap
Confirm.
> The tailgate will unlock. The green indica- tor light next to the button in Function view will go out to confirm unlocked sta-tus.
NOTE
If you have forgotten or lost your PIN code or if the PIN code has been entered incorrectlymore than three times, the security code canbe used to deactivate private locking.
NOTE
If private locking is activated and the vehicle is unlocked using Volvo On Call * or the Volvo
On Call * app, private locking will be deacti-
vated automatically.
Page 260 of 674

||
KEY, LOCKS AND ALARM
258
Related information
•Private Locking (p. 256)
Alarm
The alarm emits sound and light signals if any- one without a valid remote key attempts to breakinto the vehicle or interferes with the start batteryor alarm siren.
When armed, the alarm will be triggered if:
• the hood, tailgate or any door is opened.
• a battery cable is disconnected
• the alarm siren is disconnected.
Alarm signalsThe following occurs if the alarm is triggered:
• A siren will sound for 30 seconds or until the alarm is turned off.
• All turn signals will flash for 5 minutes oruntil the alarm is turned off.
If the reason the alarm was triggered is not recti- fied, the alarm cycle will repeat up to 10 times 20
.
Alarm indicator
A red indicator light on the dashboard shows the status of the alarm:
• Indicator off - the alarm is disarmed.
• Indicator flashes once every two seconds -the alarm is armed.
• The indicator flashes quickly after the alarmhas been disabled for up to 30 seconds or until the ignition is put in
I mode by turning
the start knob clockwise and then releasing - the alarm has been triggered.
20 Certain markets only.
Page 262 of 674

||
KEY, LOCKS AND ALARM
* Option/accessory.
260
Disarming the alarm without a functioning
remote key
The vehicle can be unlocked and disarmed even if the remote key is not functioning, e.g. if thebattery is discharged.
1. Open the driver's door using the detachable
key blade.
> This will trigger the alarm.
Location of the backup key reader in the cup holder.
2. Place the remote key on the key symbol inthe backup reader in the tunnel console's cup holder.
3. Turn the start knob clockwise and release. > The alarm will be disarmed.
Turning off a triggered alarm
–Press the unlock button on the remote key or put the ignition into mode I by turning the
start knob clockwise and then releasing it.
NOTE
• Remember that the alarm is armed when the vehicle is locked.
• The alarm will be triggered if any of thedoors is opened from the inside.
Automatically arming and disarming the alarm
Automatically arming the alarm helps prevent inadvertently leaving the vehicle without alarmprotection. If the vehicle is unlocked using the remote key (and the alarm is disarmed) but none of thedoors or tailgate are opened within two minutes,the alarm will be automatically rearmed. The vehi-cle will also re-lock. On some markets, the alarm will be automatically armed following a slight delay after the driver'sdoor has been opened and closed without beinglocked. To change this setting:1.
Tap
Settings in the center display's Top
view.
2. Tap
My CarLocking.
3. Select
Passive Arming Deactivation to
temporarily deactivate the function.
Related information
• Alarm (p. 258)
Foreign Component Detection
*
The Foreign Component Detection function detects if an unknown component has beenconnected to the vehicle.
Each LED headlight * is customized for the vehi-
cle. If an unrecognized headlight is used, the message
Unknown vehicle part. Service
required, unknown part found. will be dis-
played in the instrument panel. Volvo recom- mends contacting an authorized Volvo workshop.
Related information
• Volvo's service program (p. 588)
Page 398 of 674

HYBRID INFORMATION
396
General information about TwinEngine
Twin Engine vehicles are driven just like any other vehicle, but certain functions differ from avehicle powered exclusively by gasoline. Theelectric motor powers the vehicle primarily at lowspeeds; the gasoline engine is used at higherspeeds or during more active driving.
The instrument panel displays Twin Engine-spe- cific information - charging information, selecteddrive mode, distance to discharged battery andhybrid battery charge level. Different drive modes can be selected while driv- ing, e.g. electric power only or, if more power isneeded, a combination of electric and gasolinepower. The vehicle calculates the optimal combi-nation of driveability, driving experience, environ-mental impact and fuel economy for the selecteddrive mode. In order to function optimally, the hybrid battery (and its electrical drive systems) and the gasolineengine (and its drive systems) must be at thecorrect operating temperature. Battery capacitycan be considerably reduced if the battery is toocold or too hot. Preconditioning prepares thevehicle's drive systems and passenger compart-ment before driving to help reduce both wear andenergy consumption. It also helps increase thehybrid battery's range. The hybrid battery, which powers the electric motor, is recharged using the charging cable. Itcan also be recharged during light braking and through engine braking in gear position
B. The
combustion engine can also help recharge thehybrid battery.
Important
No electrical current
Keep in mind that if there is no electrical current to the vehicle, i.e. the ignition is switched off orthe start battery is discharged, certain functionssuch as brakes, power steering, etc. will not work.
WARNING
If the vehicle does not have electrical current and both the electric motor and the gasolineengine are switched off, the brakes cannot beused to stop the vehicle.
Towing not permitted
Never tow a Twin Engine vehicle behind another vehicle, as this could damage the electric motor.
Exterior engine noise
WARNING
Keep in mind that the vehicle does not emit any engine noise when using the electricmotor and may therefore be difficult to detectfor children, pedestrians, cyclists or animals.This is especially true at low speeds, e.g. inparking lots.
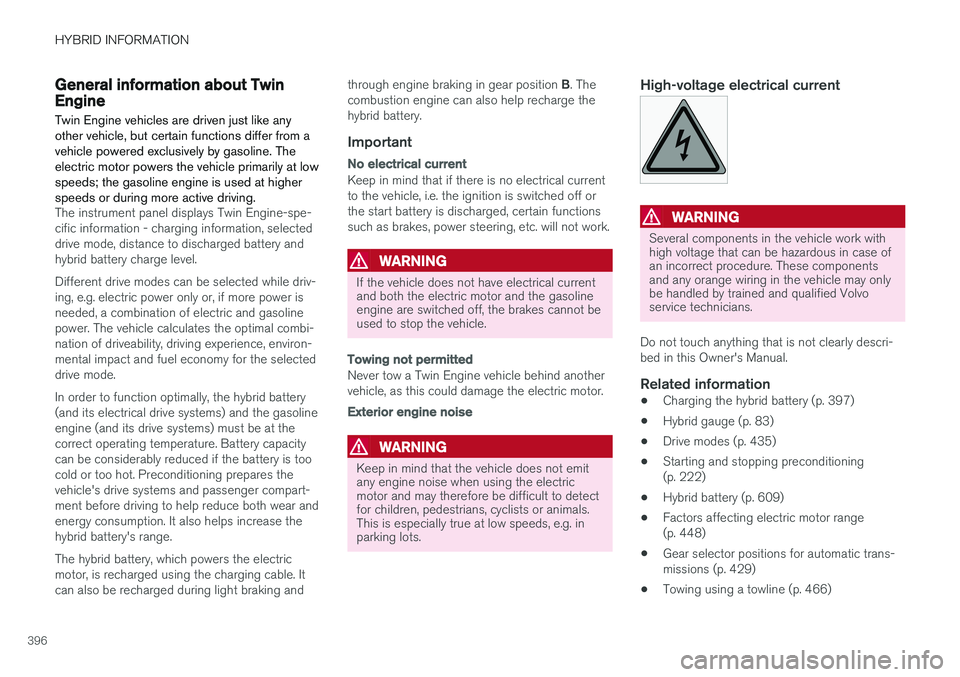
High-voltage electrical current
WARNING
Several components in the vehicle work with high voltage that can be hazardous in case ofan incorrect procedure. These componentsand any orange wiring in the vehicle may onlybe handled by trained and qualified Volvoservice technicians.
Do not touch anything that is not clearly descri- bed in this Owner's Manual.
Related information
• Charging the hybrid battery (p. 397)
• Hybrid gauge (p. 83)
• Drive modes (p. 435)
• Starting and stopping preconditioning(p. 222)
• Hybrid battery (p. 609)
• Factors affecting electric motor range(p. 448)
• Gear selector positions for automatic trans-missions (p. 429)
• Towing using a towline (p. 466)
Page 405 of 674

HYBRID INFORMATION
}}
403
•Disconnect the charger from the wall out- let before cleaning it.
• Never connect the charging cable to anextension cord or a multiple plug socket.
Also, refer to the manufacturer's instructions for using the charging cable and its compo-nents.
CAUTION
Make sure that the 120/240 V outlet (AC, alternating current) has a power capacity suf-ficient for charging electric vehicles. If you areuncertain of the capacity, have the outletchecked by a licensed electrician.
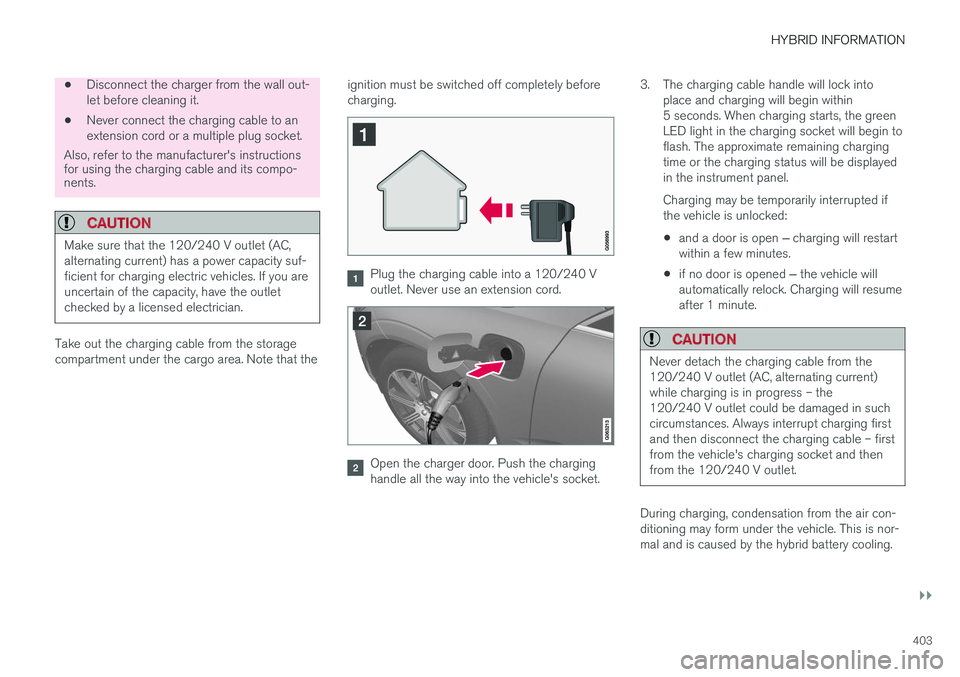
Take out the charging cable from the storage compartment under the cargo area. Note that the ignition must be switched off completely beforecharging.
Plug the charging cable into a 120/240 V outlet. Never use an extension cord.
Open the charger door. Push the charging handle all the way into the vehicle's socket.3. The charging cable handle will lock into
place and charging will begin within5 seconds. When charging starts, the greenLED light in the charging socket will begin toflash. The approximate remaining chargingtime or the charging status will be displayedin the instrument panel. Charging may be temporarily interrupted if the vehicle is unlocked:
• and a door is open
‒ charging will restart
within a few minutes.
• if no door is opened
‒ the vehicle will
automatically relock. Charging will resumeafter 1 minute.
CAUTION
Never detach the charging cable from the 120/240 V outlet (AC, alternating current)while charging is in progress – the120/240 V outlet could be damaged in suchcircumstances. Always interrupt charging firstand then disconnect the charging cable – firstfrom the vehicle's charging socket and thenfrom the 120/240 V outlet.
During charging, condensation from the air con- ditioning may form under the vehicle. This is nor-mal and is caused by the hybrid battery cooling.
Page 409 of 674

HYBRID INFORMATION
407
NOTE
If the instrument panel is not used, it will go dark after a period of time. To reactivate thedisplay: •depress the brake pedal,
• open one of the doors, or
• put the ignition in mode
I by turning the
START knob clockwise and then releas-
ing.
Related information
• Charging the hybrid battery (p. 397)
• Twin Engine symbols and messages in the instrument panel (p. 409)
• Charging status in the vehicle's chargingsocket (p. 404)
• Charging status in the charging cable'scharging module (p. 405)
• Stopping hybrid battery charging (p. 408)