2018 VOLVO XC60 T8 lock
[x] Cancel search: lockPage 393 of 674

DRIVER SUPPORT
}}
* Option/accessory.391
Park Assist Pilot * limitations
Park Assist Pilot PAP 126
may not be able to
detect all conditions in all situations and func- tionality may therefore be limited.WARNING
• The PAP function is supplementary driver support intended to facilitate driving andhelp make it safer – it cannot handle allsituations in all traffic, weather and roadconditions.
• Pay particular attention to people andanimals near the vehicle.
• Bear in mind that the front end of thevehicle may swing out towards oncomingtraffic during the parking maneuver.
• Objects situated higher than the detec-tion area of the sensors are not includedwhen the parking maneuver is calculated,which could cause PAP to swing into theparking space too early. Such parkingspaces should be avoided for this reason.
• PAP is not a substitute for the driver'sattention and judgment. The driver isalways responsible for ensuring the vehi-cle is driven in a safe manner, at theappropriate speed, with an appropriatedistance to other vehicles, and in accord-ance with current traffic rules and regula-tions.
The driver should be aware of the following limi-tations for Park Assist Pilot:
The parking sequence is cancelledA parking sequence will be cancelled if:
• the driver moves the steering wheel
• the vehicle's speed exceeds 7 km/h (4 mph)
• the driver taps
Cancel in the center display
• when the anti-lock brakes or the Electronic stability control are engaged - e.g. when awheel loses grip on a slippery road
• when the power steering works at reduced power - e.g. during cooling due to overheat- ing (see section "Speed-dependent steeringforce").
A message in the center display will explain whythe parking sequence was cancelled.
CAUTION
Under certain circumstances, PAP may not be able to find parking spaces – one reason maybe that the sensors are disrupted by externalsound sources that emit the same ultrasonicfrequencies that the system works with. Examples of such sources include horns, wet tires on asphalt, pneumatic brakes, exhaustnoise from motorcycles, etc.
126 Park Assist Pilot
Page 396 of 674

DRIVER SUPPORT
* Option/accessory.
394
Park Assist Pilot * messages
Messages for Park Assist Pilot PAP 130
may be
displayed in the instrument panel and/or the center display.
Some examples of symbols and messages are shown in the table below.
MessageMeaning
Park Assist System Sensors blocked, cleaning neededOne or more of the sensors are blocked. Check and clean/remove the obstacle as soon as possible.
Park Assist System Unavailable Service requiredThe system is not functioning as intended. Contact a workshop ‒ an authorized Volvo workshop is recommended.
A text message can be erased by briefly pressing the
button in the center of the right-side
steering wheel keypad. If the message persists: Contact a workshop ‒ an
authorized Volvo workshop is recommended.
Related information
• Park Assist Pilot
* (p. 386)
130
Park Assist Pilot
Page 403 of 674

HYBRID INFORMATION
}}
401
WARNING
•The charging cable's residual current breaker helps protect the vehicle's charg-ing system but cannot ensure that an cur-rent overload will never occur.
• Never use visibly worn or damaged elec-trical sockets. Doing so could lead to firesor serious injury.
• Never connect the charging cable to anextension cord.
• Maintenance or replacement of the hybridbattery may only be performed by atrained and qualified Volvo service techni-cian.
Related information
• Charge cable (p. 399)
• Charging status in the charging cable'scharging module (p. 405)
Charging cable temperaturemonitoring
To help ensure the vehicle's hybrid battery is reli- ably charged each time it is connected, chargingis stopped if the temperature in the chargingcable becomes too high and reaches a criticallimit.
CAUTION
If charging is often inadvertently interrupted, have the charging cable and the vehicle'scharging system inspected by a trained andqualified Volvo service technician.
Related information
• Charge cable (p. 399)
Opening and closing the chargingsocket cover
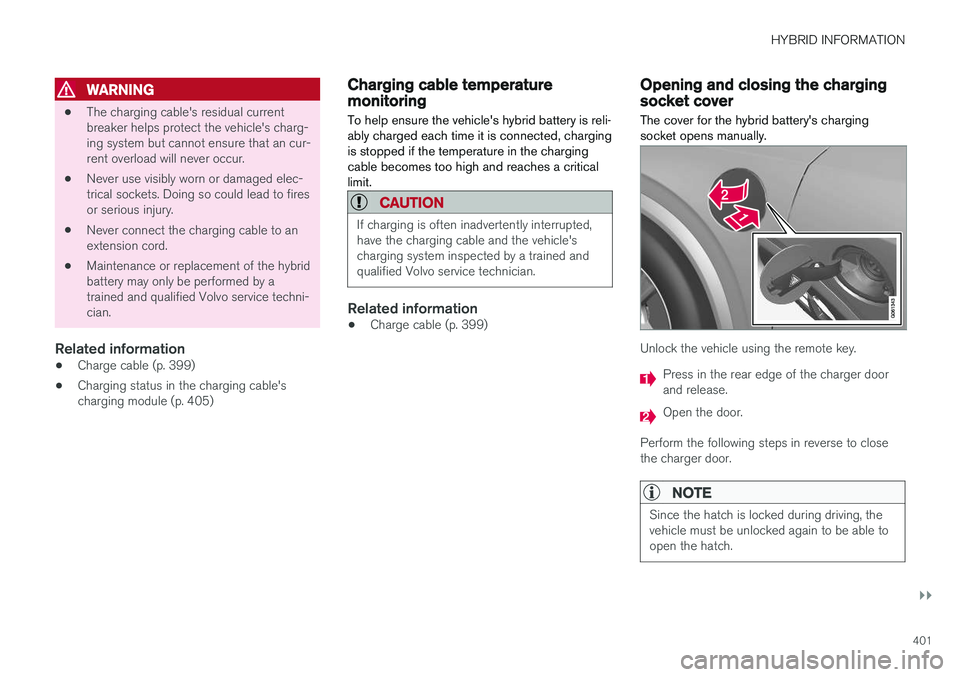
The cover for the hybrid battery's charging socket opens manually.
Unlock the vehicle using the remote key.
Press in the rear edge of the charger door and release.
Open the door.
Perform the following steps in reverse to close the charger door.
NOTE
Since the hatch is locked during driving, the vehicle must be unlocked again to be able toopen the hatch.
Page 405 of 674

HYBRID INFORMATION
}}
403
•Disconnect the charger from the wall out- let before cleaning it.
• Never connect the charging cable to anextension cord or a multiple plug socket.
Also, refer to the manufacturer's instructions for using the charging cable and its compo-nents.
CAUTION
Make sure that the 120/240 V outlet (AC, alternating current) has a power capacity suf-ficient for charging electric vehicles. If you areuncertain of the capacity, have the outletchecked by a licensed electrician.
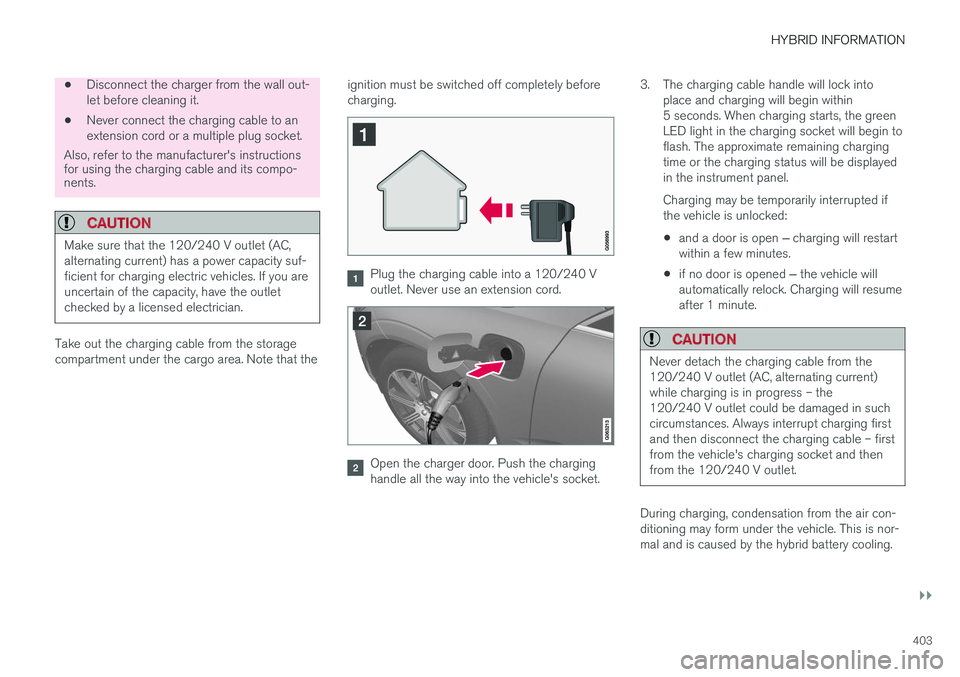
Take out the charging cable from the storage compartment under the cargo area. Note that the ignition must be switched off completely beforecharging.
Plug the charging cable into a 120/240 V outlet. Never use an extension cord.
Open the charger door. Push the charging handle all the way into the vehicle's socket.3. The charging cable handle will lock into
place and charging will begin within5 seconds. When charging starts, the greenLED light in the charging socket will begin toflash. The approximate remaining chargingtime or the charging status will be displayedin the instrument panel. Charging may be temporarily interrupted if the vehicle is unlocked:
• and a door is open
‒ charging will restart
within a few minutes.
• if no door is opened
‒ the vehicle will
automatically relock. Charging will resumeafter 1 minute.
CAUTION
Never detach the charging cable from the 120/240 V outlet (AC, alternating current)while charging is in progress – the120/240 V outlet could be damaged in suchcircumstances. Always interrupt charging firstand then disconnect the charging cable – firstfrom the vehicle's charging socket and thenfrom the 120/240 V outlet.
During charging, condensation from the air con- ditioning may form under the vehicle. This is nor-mal and is caused by the hybrid battery cooling.
Page 406 of 674

||
HYBRID INFORMATION
404
Related information
•Charging the hybrid battery (p. 397)
• Opening and closing the charging socket cover (p. 401)
• Charging status in the vehicle's chargingsocket (p. 404)
• Charging status in the instrument panel(p. 406)
• Charging status in the charging cable'scharging module (p. 405)
• Stopping hybrid battery charging (p. 408)
Charging status in the vehicle'scharging socket
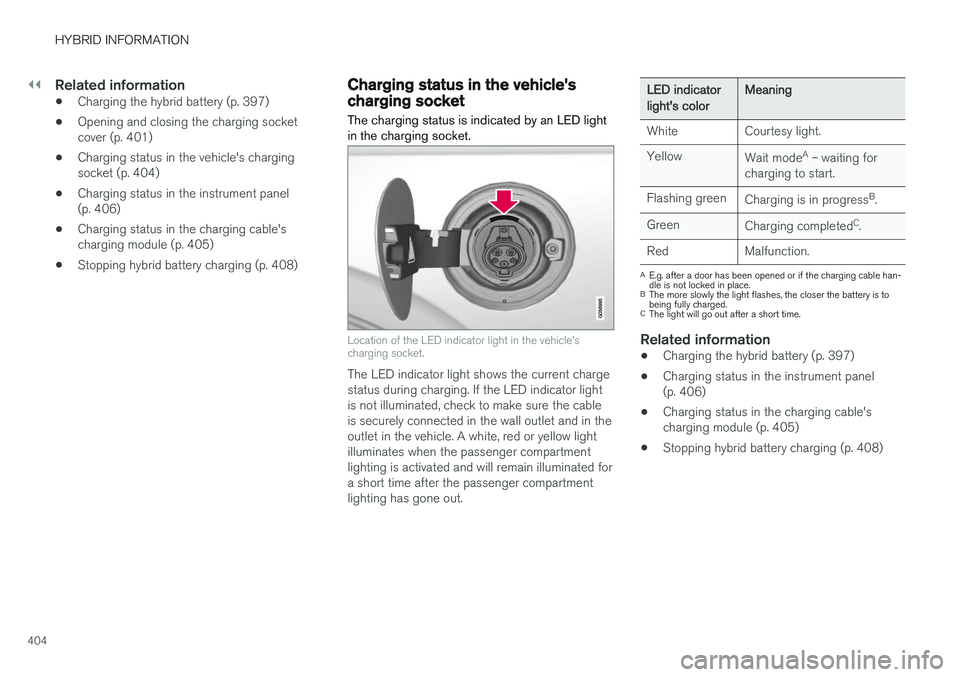
The charging status is indicated by an LED light in the charging socket.
Location of the LED indicator light in the vehicle's charging socket.
The LED indicator light shows the current charge status during charging. If the LED indicator lightis not illuminated, check to make sure the cableis securely connected in the wall outlet and in theoutlet in the vehicle. A white, red or yellow lightilluminates when the passenger compartmentlighting is activated and will remain illuminated fora short time after the passenger compartmentlighting has gone out.
LED indicatorlight's colorMeaning
White Courtesy light. Yellow Wait modeA
– waiting for
charging to start.
Flashing green Charging is in progress B
.
Green Charging completed C
.
Red Malfunction.
A E.g. after a door has been opened or if the charging cable han- dle is not locked in place.
B The more slowly the light flashes, the closer the battery is tobeing fully charged.
C The light will go out after a short time.
Related information
• Charging the hybrid battery (p. 397)
• Charging status in the instrument panel (p. 406)
• Charging status in the charging cable'scharging module (p. 405)
• Stopping hybrid battery charging (p. 408)
Page 409 of 674

HYBRID INFORMATION
407
NOTE
If the instrument panel is not used, it will go dark after a period of time. To reactivate thedisplay: •depress the brake pedal,
• open one of the doors, or
• put the ignition in mode
I by turning the
START knob clockwise and then releas-
ing.
Related information
• Charging the hybrid battery (p. 397)
• Twin Engine symbols and messages in the instrument panel (p. 409)
• Charging status in the vehicle's chargingsocket (p. 404)
• Charging status in the charging cable'scharging module (p. 405)
• Stopping hybrid battery charging (p. 408)
Page 410 of 674

HYBRID INFORMATION
* Option/accessory.
408
Stopping hybrid battery charging
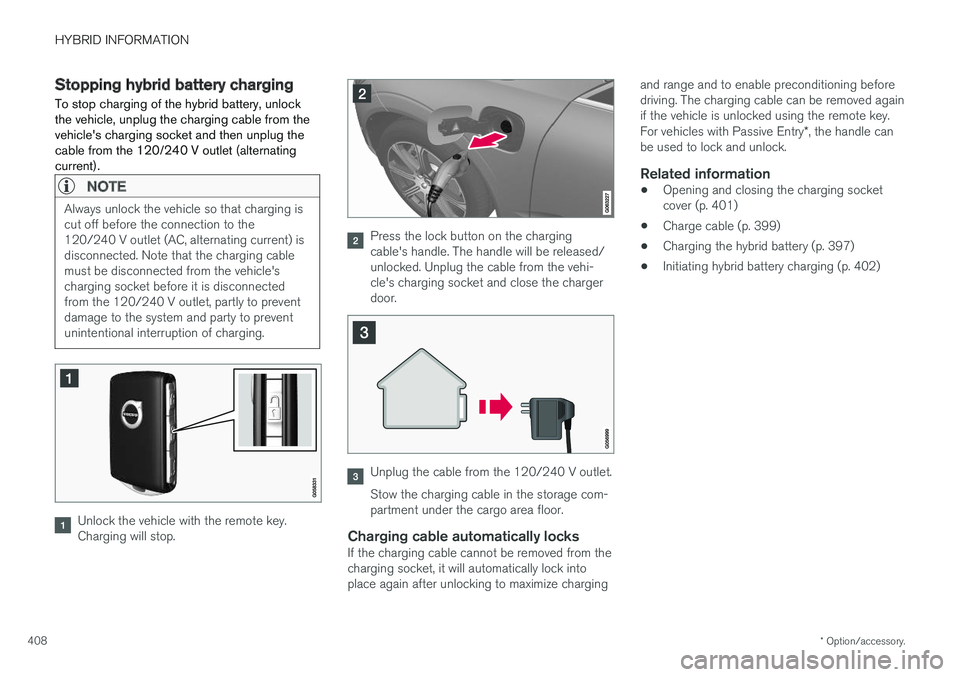
To stop charging of the hybrid battery, unlock the vehicle, unplug the charging cable from thevehicle's charging socket and then unplug thecable from the 120/240 V outlet (alternatingcurrent).
NOTE
Always unlock the vehicle so that charging is cut off before the connection to the120/240 V outlet (AC, alternating current) isdisconnected. Note that the charging cablemust be disconnected from the vehicle'scharging socket before it is disconnectedfrom the 120/240 V outlet, partly to preventdamage to the system and party to preventunintentional interruption of charging.
Unlock the vehicle with the remote key. Charging will stop.
Press the lock button on the charging cable's handle. The handle will be released/unlocked. Unplug the cable from the vehi-cle's charging socket and close the chargerdoor.
Unplug the cable from the 120/240 V outlet. Stow the charging cable in the storage com- partment under the cargo area floor.
Charging cable automatically locksIf the charging cable cannot be removed from thecharging socket, it will automatically lock intoplace again after unlocking to maximize charging and range and to enable preconditioning beforedriving. The charging cable can be removed againif the vehicle is unlocked using the remote key. For vehicles with Passive Entry
*, the handle can
be used to lock and unlock.
Related information
• Opening and closing the charging socket cover (p. 401)
• Charge cable (p. 399)
• Charging the hybrid battery (p. 397)
• Initiating hybrid battery charging (p. 402)
Page 416 of 674

STARTING AND DRIVING
* Option/accessory.
414
Starting the vehicle
The vehicle can be started using the start knob in the tunnel console when the remote key is inthe passenger compartment.
Start knob in the tunnel console.
WARNING
Before starting:
• Buckle your seat belt.
• Adjust the seat, steering wheel and mir- rors.
• Make sure you can fully depress thebrake pedal. The remote key is not physically used to start theignition because the vehicle is equipped with thekeyless Passive Start system. To start the vehicle:
1. The remote key must be inside the vehicle.
For vehicles with Passive Start, the key must be in the front section of the passengercompartment. With the optional keyless lock- ing/unlocking function *, the key can be any-
where in the vehicle.
2. Press and hold down the brake pedal 1
as far
as possible.
3. Turn the start knob clockwise and release. The control will automatically return to the original position.
WARNING
• Never use more than one inlay mat at a time on the driver's floor. If any other typeof floor mat is used, remove the originalmat from the driver's seat floor beforedriving. All types of mats must be securelyanchored in the attachment points in thefloor. Make sure the floor mat does notimpede the movement of the brake pedalor accelerator pedal in any way, as thiscould be a serious safety hazard.
• Volvo's floor mats are specially manufac-tured for your vehicle. They must be prop-erly secured in the attachment points inthe floor to help ensure they cannot slideand become trapped under the pedals.
The starter motor will crank until the enginestarts or until its overheating protection is trig-gered. During normal start conditions, the vehicle's elec- tric motor will be prioritized and the gasolineengine will remain off. This means that once thestart knob is turned clockwise, the electric motorhas been "started" and the vehicle is ready to bedriven. The warning and information symbols inthe instrument panel will go out and the selectedtheme will be displayed to indicate that the elec-tric motor is activated.
1 If the vehicle is moving, it is only necessary to turn the start knob clockwise to start the engine.