2018 VOLVO V90 CROSS COUNTRY lock
[x] Cancel search: lockPage 543 of 662
WHEELS AND TIRES
}}
* Option/accessory.541
1. Turn on the vehicle's hazard warning flashers
if a wheel change must be performed in an area with traffic.
2. Apply the parking brake and put the gear selector in P.
For vehicles with
Leveling Control* : If the
vehicle is equipped with pneumatic suspen- sion, this must be switched off before the vehicle is lifted with the jack *.
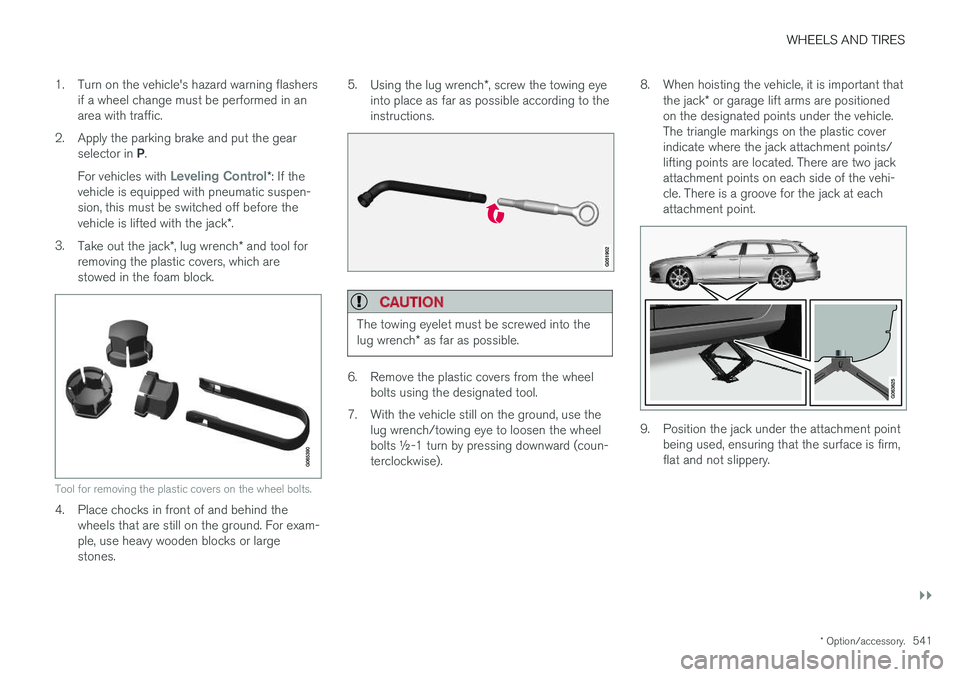
3. Take out the jack *, lug wrench * and tool for
removing the plastic covers, which are stowed in the foam block.
Tool for removing the plastic covers on the wheel bolts.
4. Place chocks in front of and behind the wheels that are still on the ground. For exam- ple, use heavy wooden blocks or largestones. 5.
Using the lug wrench *, screw the towing eye
into place as far as possible according to theinstructions.
CAUTION
The towing eyelet must be screwed into the lug wrench * as far as possible.
6. Remove the plastic covers from the wheel
bolts using the designated tool.
7. With the vehicle still on the ground, use the lug wrench/towing eye to loosen the wheel bolts ½-1 turn by pressing downward (coun-terclockwise). 8. When hoisting the vehicle, it is important that
the jack * or garage lift arms are positioned
on the designated points under the vehicle.The triangle markings on the plastic coverindicate where the jack attachment points/lifting points are located. There are two jackattachment points on each side of the vehi-cle. There is a groove for the jack at eachattachment point.
9. Position the jack under the attachment point being used, ensuring that the surface is firm, flat and not slippery.
Page 544 of 662
||
WHEELS AND TIRES
* Option/accessory.
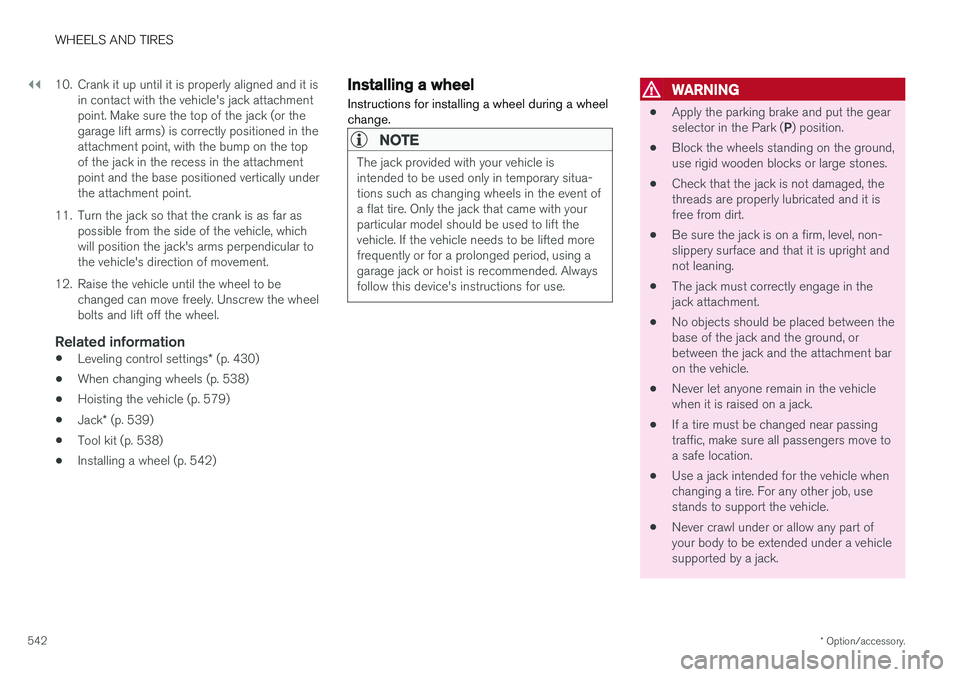
542 10. Crank it up until it is properly aligned and it is
in contact with the vehicle's jack attachment point. Make sure the top of the jack (or thegarage lift arms) is correctly positioned in theattachment point, with the bump on the topof the jack in the recess in the attachmentpoint and the base positioned vertically underthe attachment point.
11. Turn the jack so that the crank is as far as possible from the side of the vehicle, whichwill position the jack's arms perpendicular tothe vehicle's direction of movement.
12. Raise the vehicle until the wheel to be changed can move freely. Unscrew the wheelbolts and lift off the wheel.
Related information
• Leveling control settings
* (p. 430)
• When changing wheels (p. 538)
• Hoisting the vehicle (p. 579)
• Jack
* (p. 539)
• Tool kit (p. 538)
• Installing a wheel (p. 542)
Installing a wheel
Instructions for installing a wheel during a wheel change.
NOTE
The jack provided with your vehicle is intended to be used only in temporary situa-tions such as changing wheels in the event ofa flat tire. Only the jack that came with yourparticular model should be used to lift thevehicle. If the vehicle needs to be lifted morefrequently or for a prolonged period, using agarage jack or hoist is recommended. Alwaysfollow this device's instructions for use.
WARNING
• Apply the parking brake and put the gear selector in the Park (
P) position.
• Block the wheels standing on the ground, use rigid wooden blocks or large stones.
• Check that the jack is not damaged, thethreads are properly lubricated and it isfree from dirt.
• Be sure the jack is on a firm, level, non-slippery surface and that it is upright andnot leaning.
• The jack must correctly engage in thejack attachment.
• No objects should be placed between thebase of the jack and the ground, orbetween the jack and the attachment baron the vehicle.
• Never let anyone remain in the vehiclewhen it is raised on a jack.
• If a tire must be changed near passingtraffic, make sure all passengers move toa safe location.
• Use a jack intended for the vehicle whenchanging a tire. For any other job, usestands to support the vehicle.
• Never crawl under or allow any part ofyour body to be extended under a vehiclesupported by a jack.
Page 546 of 662
||
WHEELS AND TIRES
544
WARNING
•The vehicle must never be driven with more than one "Temporary spare" tiremounted.
• Driving with a spare wheel may alter thedriving characteristics of the vehicle.Replace the spare wheel with a normalwheel as soon as possible.
• The spare wheel is smaller than the nor-mal wheel, which affects the vehicle'sground clearance. Watch for high curbsand do not wash the vehicle in an auto-matic car wash when a spare wheel ismounted.
• Follow the manufacturer's recommendedtire inflation pressure for the spare wheel.
• On all-wheel drive vehicles, the drive onthe rear axle can be disconnected.
• If the spare wheel is mounted on thefront axle, snow chains must not be used.
• The spare wheel must not be repaired.
CAUTION
The vehicle must not be driven with wheels of different dimensions or with a spare tire otherthan the one that came with the vehicle. Theuse of different size wheels can seriouslydamage your vehicle's transmission.
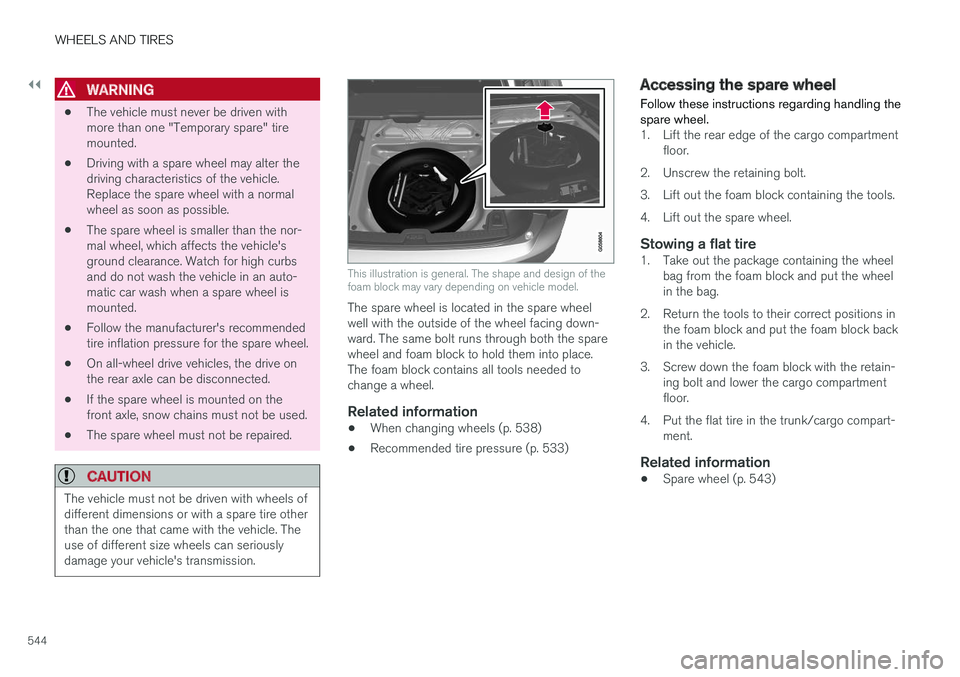
This illustration is general. The shape and design of the foam block may vary depending on vehicle model.
The spare wheel is located in the spare wheel well with the outside of the wheel facing down-ward. The same bolt runs through both the sparewheel and foam block to hold them into place.The foam block contains all tools needed tochange a wheel.
Related information
•When changing wheels (p. 538)
• Recommended tire pressure (p. 533)
Accessing the spare wheel
Follow these instructions regarding handling the spare wheel.
1. Lift the rear edge of the cargo compartment floor.
2. Unscrew the retaining bolt.
3. Lift out the foam block containing the tools.
4. Lift out the spare wheel.
Stowing a flat tire1. Take out the package containing the wheel bag from the foam block and put the wheel in the bag.
2. Return the tools to their correct positions in the foam block and put the foam block backin the vehicle.
3. Screw down the foam block with the retain- ing bolt and lower the cargo compartmentfloor.
4. Put the flat tire in the trunk/cargo compart- ment.
Related information
• Spare wheel (p. 543)
Page 548 of 662
||
WHEELS AND TIRES
546
CAUTION
Snow chains can be used on the vehicle, with the following restrictions:• Volvo recommends not using snowchains on wheel dimensions larger than18 inches.
• Always follow the manufacturer's installa-tion instructions carefully. Install chainsas tightly as possible and retighten peri-odically.
• Only put snow chains on the front wheels(also applies to all-wheel drive vehicles).
• If accessory, aftermarket or "custom"tires and wheels with different dimen-sions than the original tires and wheelsare used, snow chains in some casesmay NOT be used. Sufficient distancebetween the chains and brakes, suspen-sion and body components must bemaintained.
• Check local regulations regarding the useof snow chains before installing.
• Never exceed the snow chain manufac-turer's specified maximum speed limit.Under no circumstances should youexceed 50 km/h (30 mph).
• Avoid bumps, holes or sharp turns whendriving with snow chains.
• Avoid driving on surfaces without snow as this wears out both the snow chains andthe tires.
• The handling of the vehicle can beadversely affected when driving withchains. Avoid fast or sharp turns as wellas locked wheel braking.
• Some types of strap-on chains affectbrake components and therefore mustNOT be used.
Consult a Volvo retailer for more information about snow chains.
Related information
•
Winter driving (p. 435)
Tire sealing system12
The temporary tire sealing system can be used to seal a puncture in a tire or to check andadjust the pressure in the tire. Models equipped with a spare wheel 13
do not
have the tire sealing system.
The tire sealing system consists of a compressor and a bottle containing sealing compound. Thesealing functions as a temporary repair.
NOTE
The sealing compound effectively seals tires with punctures in the tread but may not beable to fully seal tires with punctures in thesidewall. Do not use the tire sealing systemon tires with large tears, cracks or similardamage.
NOTE
The compressor is intended for temporary tire sealing and is approved by Volvo.
LocationThe tire sealing system is located in a foam block under the floor of the cargo compartment.
Page 560 of 662
LOADING, STORAGE AND PASSENGER COMPARTMENT
* Option/accessory.
558
Using the electrical outlets
The 12 V outlet can be used for devices intended for this such as MP3 players, coolersand cellular phones. The high-voltage outlet * can be used for devices
intended for this, such as chargers, laptops, etc.
The ignition must be in at least mode I for the
outlets to supply current. The outlets will then be active as long as there is sufficient charge in thestart battery. If the engine is turned off and the vehicle is locked, the outlets will be deactivated. If theengine is turned off and the vehicle remainsunlocked, the sockets will remain active for up to7 minutes.
NOTE
Bear in mind that using the electrical outlets when the engine is off could cause the starterbattery to have too low of a charge level,which could limit other functionality. Accessories connected to the electrical out- lets can be activated even when the vehicleelectrical system is off or if preconditioning isused. For this reason, disconnect plugs whenthey are not in use to prevent the starter bat-tery from becoming discharged.
WARNING
• Do not use accessories with large or heavy plugs – they could damage the out-let or come loose while you are driving.
• Do not use accessories that could causedisruptions to e.g. the vehicle's radioreceiver or electrical system.
• Position the accessory so that there is norisk of it injuring the driver or passengersin the event of heavy braking or a colli-sion.
• Pay attention to connected accessoriesas they can generate heat that could burnpassengers or the interior.
Using 12 V outlets1. Remove the stopper (tunnel console) or fold
down the cover (trunk/cargo compartment)over the socket and plug in the device.
2. Unplug the device and put the stopper back in (tunnel console) or fold up the cover(trunk/cargo compartment) when the socketis not in use or left unattended.
CAUTION
The maximum power is 120 W (10 A) per outlet.
Using high-voltage outletsThe ignition must be in at least mode I for outlets
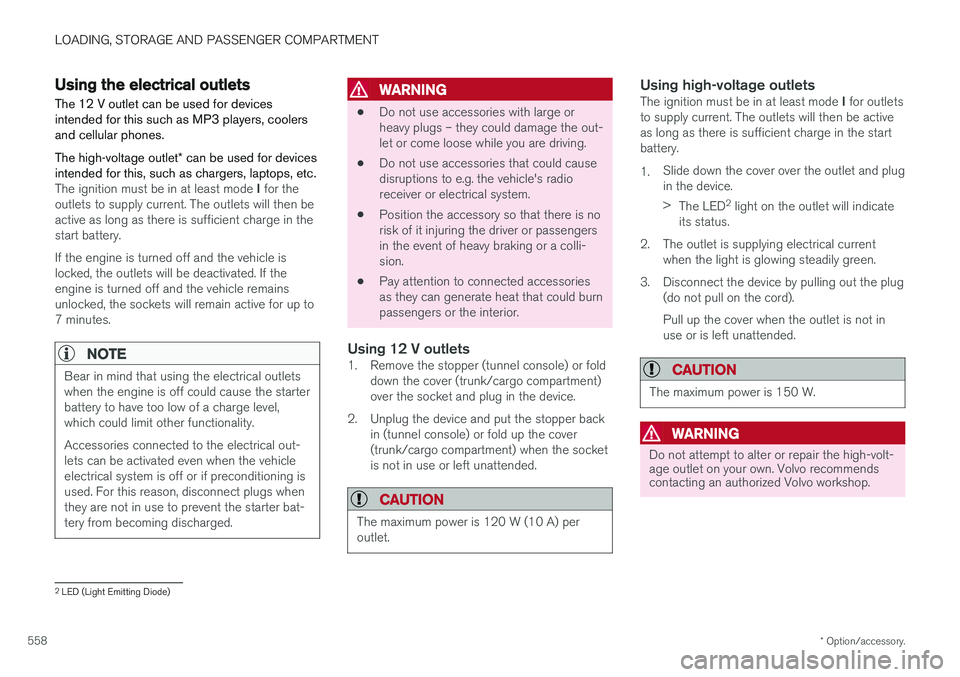
to supply current. The outlets will then be active as long as there is sufficient charge in the startbattery. 1. Slide down the cover over the outlet and plug in the device. >
The LED 2
light on the outlet will indicate
its status.
2. The outlet is supplying electrical current when the light is glowing steadily green.
3. Disconnect the device by pulling out the plug (do not pull on the cord). Pull up the cover when the outlet is not in use or is left unattended.
CAUTION
The maximum power is 150 W.
WARNING
Do not attempt to alter or repair the high-volt- age outlet on your own. Volvo recommendscontacting an authorized Volvo workshop.
2LED (Light Emitting Diode)
Page 561 of 662
LOADING, STORAGE AND PASSENGER COMPARTMENT
}}
* Option/accessory.559
WARNING
•Only use accessories that are not dam- aged or malfunctioning. The accessoriesmust be designed for 120 V and 60 Hz,with plugs intended for the outlet. Theaccessories must be CE marked, ULmarked or have an equivalent safetymarking.
• New let outlets, plugs or accessoriescome into contact with water or anotherfluid. Do not touch or use the outlet if itappears damaged or has been in contactwith water or another fluid.
• Do not connect power strips, adapters orextension cords to the outlet has thiscould cause the outlet's safety functionsto malfunction.
• The outlet is equipped with a pet guard.Make sure that no one picks at or dam-ages the outlet in such a way that theguard is disabled. Children should not beleft unsupervised in the vehicle when theoutlet is active.
Failure to follow the above could lead to severe or fatal electrical shocks.
Related information
• Electrical outlets (p. 556)
• Passenger compartment interior (p. 554)
Using the glove compartment
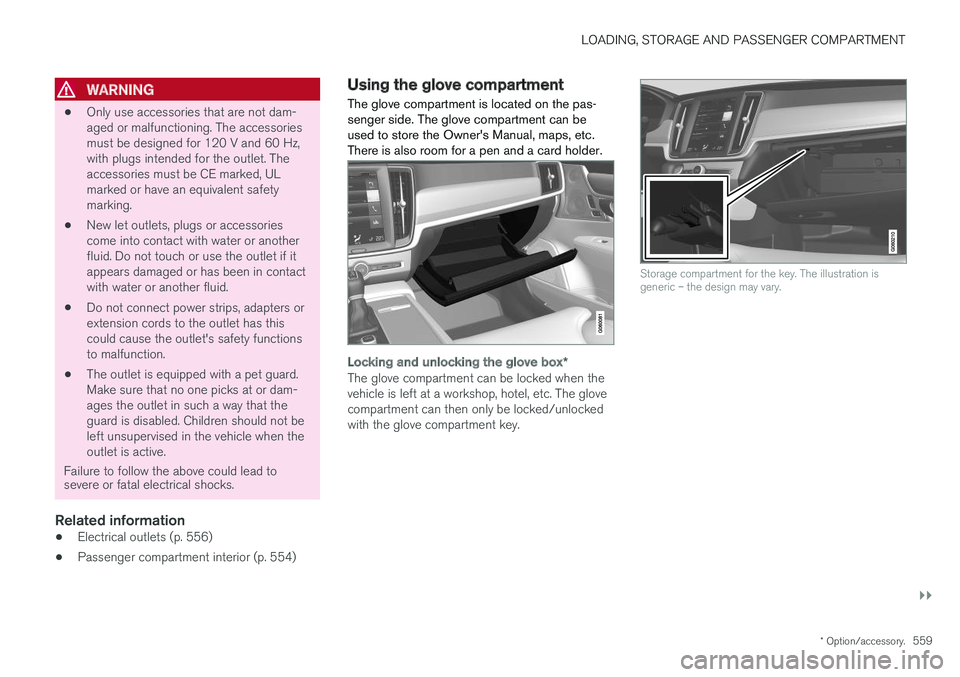
The glove compartment is located on the pas- senger side. The glove compartment can beused to store the Owner's Manual, maps, etc.There is also room for a pen and a card holder.
Locking and unlocking the glove box *
The glove compartment can be locked when the vehicle is left at a workshop, hotel, etc. The glovecompartment can then only be locked/unlockedwith the glove compartment key.
Storage compartment for the key. The illustration is generic – the design may vary.
Page 562 of 662
||
LOADING, STORAGE AND PASSENGER COMPARTMENT
* Option/accessory.
560
The illustration is generic – the design may vary.
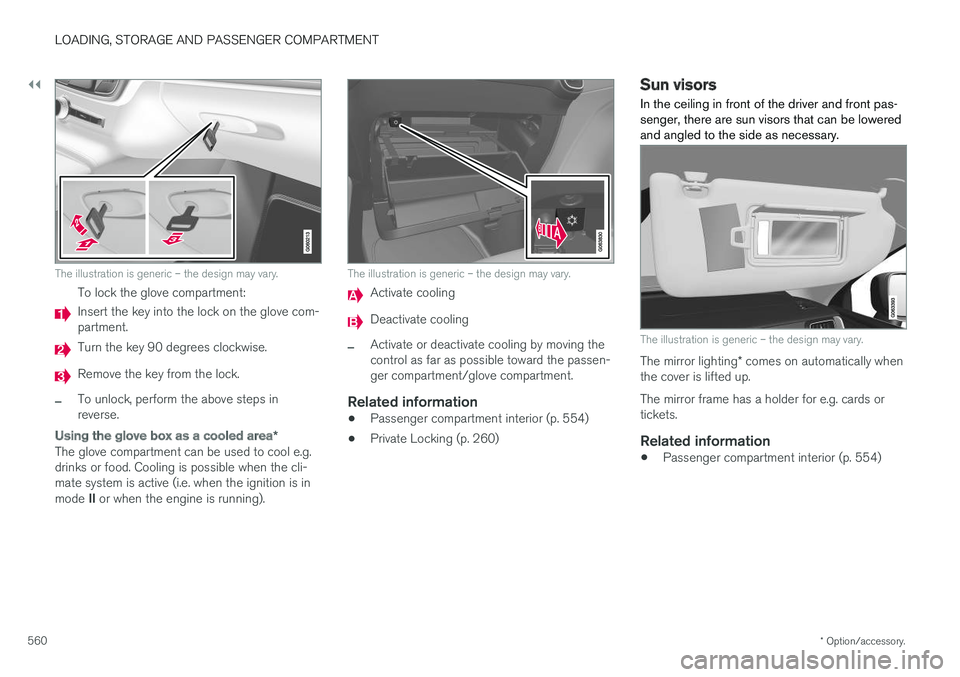
To lock the glove compartment:
Insert the key into the lock on the glove com- partment.
Turn the key 90 degrees clockwise.
Remove the key from the lock.
–To unlock, perform the above steps in reverse.
Using the glove box as a cooled area *
The glove compartment can be used to cool e.g. drinks or food. Cooling is possible when the cli-mate system is active (i.e. when the ignition is in mode II or when the engine is running).
The illustration is generic – the design may vary.
Activate cooling
Deactivate cooling
–Activate or deactivate cooling by moving the control as far as possible toward the passen-ger compartment/glove compartment.
Related information
• Passenger compartment interior (p. 554)
• Private Locking (p. 260)
Sun visors In the ceiling in front of the driver and front pas- senger, there are sun visors that can be loweredand angled to the side as necessary.
The illustration is generic – the design may vary.
The mirror lighting
* comes on automatically when
the cover is lifted up. The mirror frame has a holder for e.g. cards or tickets.
Related information
• Passenger compartment interior (p. 554)
Page 566 of 662
LOADING, STORAGE AND PASSENGER COMPARTMENT
* Option/accessory.
564
Rear seat ski hatch
The hatch in the rear seat backrest can be opened to transport long, narrow objects suchas skis.
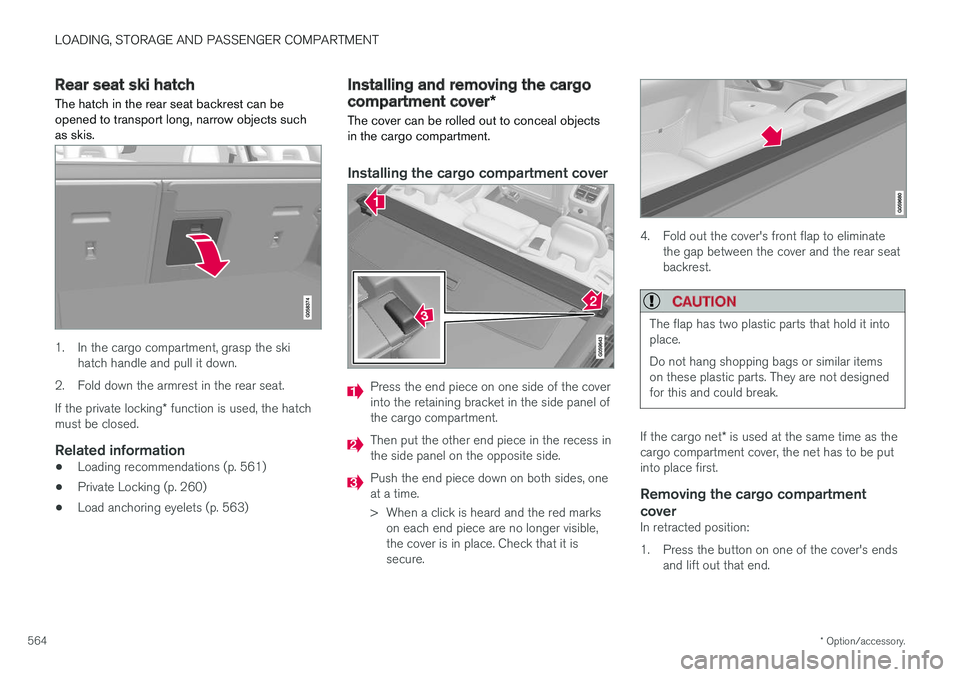
1. In the cargo compartment, grasp the ski hatch handle and pull it down.
2. Fold down the armrest in the rear seat. If the private locking * function is used, the hatch
must be closed.
Related information
• Loading recommendations (p. 561)
• Private Locking (p. 260)
• Load anchoring eyelets (p. 563)
Installing and removing the cargo
compartment cover
*
The cover can be rolled out to conceal objects in the cargo compartment.
Installing the cargo compartment cover
Press the end piece on one side of the cover into the retaining bracket in the side panel ofthe cargo compartment.
Then put the other end piece in the recess in the side panel on the opposite side.
Push the end piece down on both sides, one at a time.
> When a click is heard and the red marks on each end piece are no longer visible, the cover is in place. Check that it issecure.
4. Fold out the cover's front flap to eliminate the gap between the cover and the rear seat backrest.
CAUTION
The flap has two plastic parts that hold it into place. Do not hang shopping bags or similar items on these plastic parts. They are not designedfor this and could break.
If the cargo net * is used at the same time as the
cargo compartment cover, the net has to be put into place first.
Removing the cargo compartment
cover
In retracted position:
1. Press the button on one of the cover's ends and lift out that end.