2018 VOLVO V90 CROSS COUNTRY lock
[x] Cancel search: lockPage 409 of 662
STARTING AND DRIVING
}}
407
Braking on salted roads When driving on salted roads, a layer of salt may form on the brake discs and brake pads.
This could increase stopping distance. Maintain an extra large safety distance to the vehicleahead. Make sure to also:
• Apply the brakes from time to time to helpremove salt. Make sure braking does notpose a risk to any other road users.
• Gently apply the brakes when you have fin-ished driving and before driving again.
Related information
• Brakes (p. 405)
• Braking on wet roads (p. 406)
Maintenance of the brake system
Regularly check the brake system components for wear.
To keep the vehicle as safe and reliable as possi- ble, follow the Volvo service schedule specified inthe Warranty and Maintenance Records Informa-tion booklet. New and replaced brake pads andbrake discs do not provide optimal braking effectuntil they are "broken in" by driving a few hun-dred kilometers (miles). Compensate for thereduced braking effect by applying greater pres-sure to the brake pedal. Volvo recommends onlyusing brake pads approved for your Volvo.
CAUTION
The brake system's components should be regularly checked for wear. Contact a workshop for advice on how to do this or let a workshop perform the inspection- an authorized Volvo workshop is recom-mended.
Related information
• Brakes (p. 405)
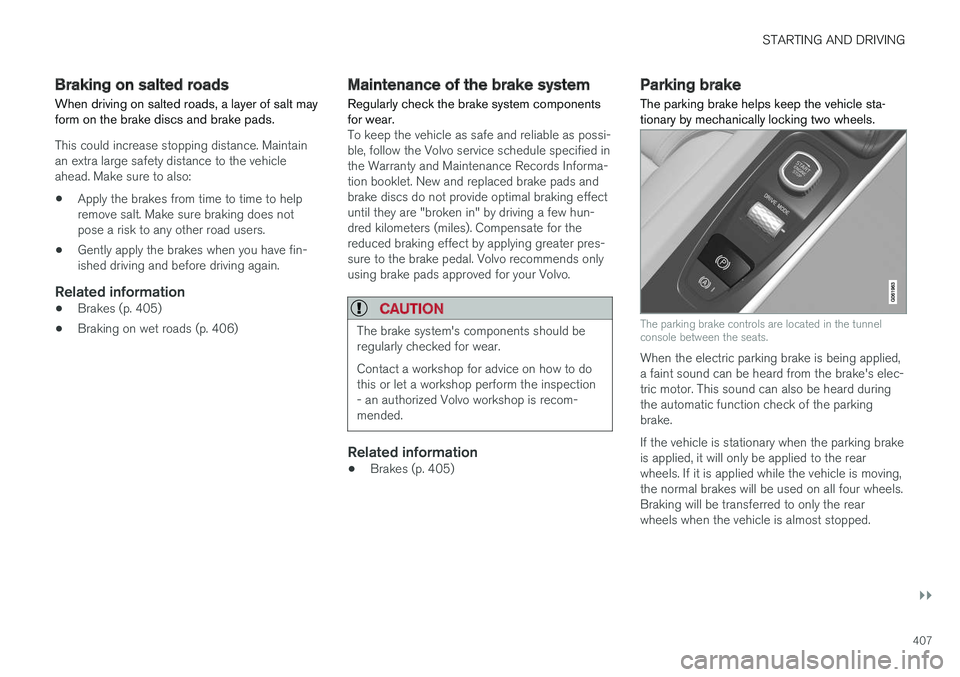
Parking brake The parking brake helps keep the vehicle sta- tionary by mechanically locking two wheels.
The parking brake controls are located in the tunnel console between the seats.
When the electric parking brake is being applied, a faint sound can be heard from the brake's elec-tric motor. This sound can also be heard duringthe automatic function check of the parkingbrake. If the vehicle is stationary when the parking brake is applied, it will only be applied to the rearwheels. If it is applied while the vehicle is moving,the normal brakes will be used on all four wheels.Braking will be transferred to only the rearwheels when the vehicle is almost stopped.
Page 416 of 662
||
STARTING AND DRIVING
* Option/accessory.
414
SymbolMeaning
Information and messages related to the transmission. Follow the rec-ommendations provided.
Hot or overheated transmission. Follow the recommendations provi-ded.
Reduced performance/Acceler-
ation performance reduced
In the event of a temporary fault in the driveline, the vehicle may gointo a "limp home" mode withreduced power output to help avoiddamage to the driveline.
Related information
• Gear selector positions for automatic trans- missions (p. 414)
• Gear indicator
* (p. 418)
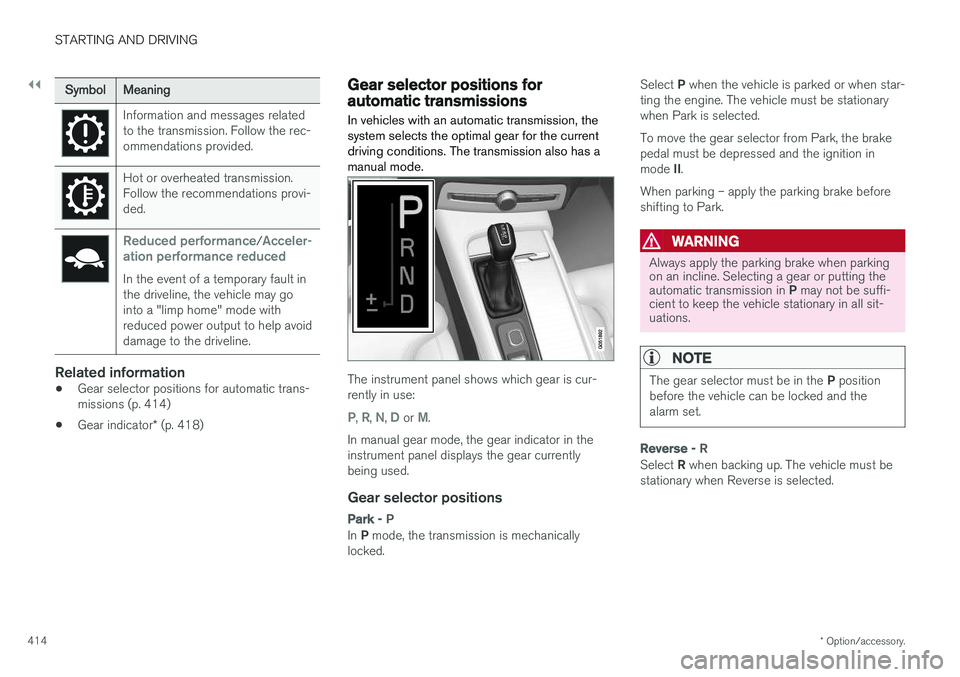
Gear selector positions forautomatic transmissions In vehicles with an automatic transmission, the system selects the optimal gear for the currentdriving conditions. The transmission also has amanual mode.
The instrument panel shows which gear is cur- rently in use:
P, R, N, D or M.
In manual gear mode, the gear indicator in the instrument panel displays the gear currentlybeing used.
Gear selector positions
Park - P
In P mode, the transmission is mechanically
locked. Select
P when the vehicle is parked or when star-
ting the engine. The vehicle must be stationary when Park is selected. To move the gear selector from Park, the brake pedal must be depressed and the ignition in mode II.
When parking – apply the parking brake before shifting to Park.
WARNING
Always apply the parking brake when parking on an incline. Selecting a gear or putting the automatic transmission in P may not be suffi-
cient to keep the vehicle stationary in all sit- uations.
NOTE
The gear selector must be in the P position
before the vehicle can be locked and the alarm set.
Reverse - R
Select R when backing up. The vehicle must be
stationary when Reverse is selected.
Page 417 of 662
STARTING AND DRIVING
}}
* Option/accessory.415
Neutral - N
No gear is selected and the engine can be started. Apply the parking brake if the vehicle is stationary with the gear selector in N.
To move the gear selector from Neutral to another gear, the brake pedal must be depressed and the ignition in mode II.
D drive mode
D is the normal driving gear position. The trans-
mission shifts up or down automatically depend- ing on acceleration and speed. The vehicle mustbe stationary when the gear selector is moved from R to D.
Manual shifting mode - M
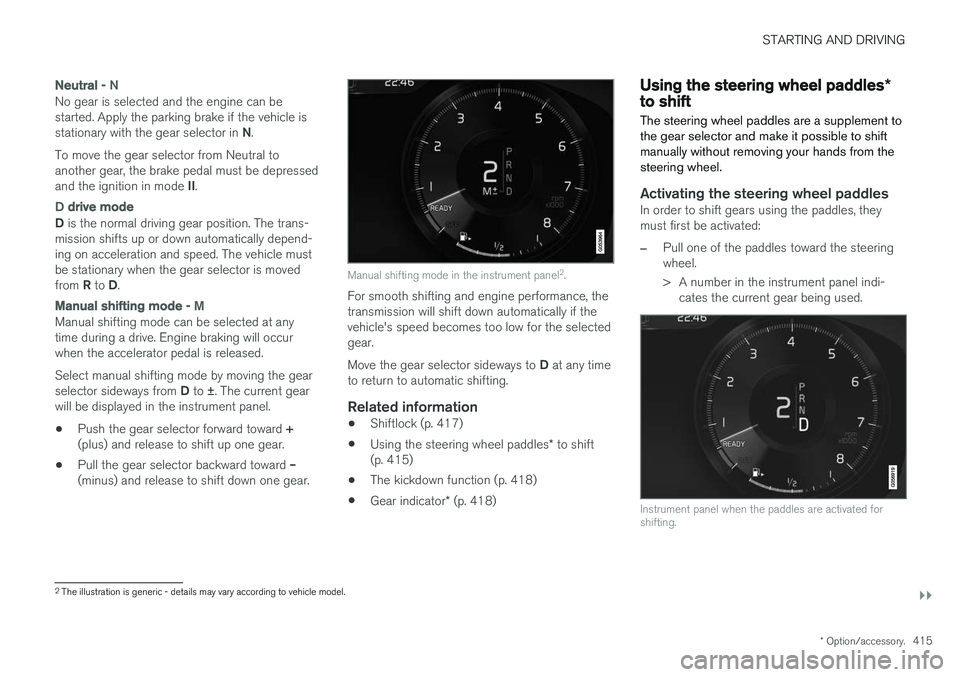
Manual shifting mode can be selected at any time during a drive. Engine braking will occurwhen the accelerator pedal is released. Select manual shifting mode by moving the gear selector sideways from D to ±
. The current gear
will be displayed in the instrument panel.
• Push the gear selector forward toward
+
(plus) and release to shift up one gear.
• Pull the gear selector backward toward
–
(minus) and release to shift down one gear.
Manual shifting mode in the instrument panel 2
.
For smooth shifting and engine performance, the transmission will shift down automatically if thevehicle's speed becomes too low for the selectedgear. Move the gear selector sideways to D at any time
to return to automatic shifting.
Related information
• Shiftlock (p. 417)
• Using the steering wheel paddles
* to shift
(p. 415)
• The kickdown function (p. 418)
• Gear indicator
* (p. 418)
Using the steering wheel paddles *to shift
The steering wheel paddles are a supplement to the gear selector and make it possible to shiftmanually without removing your hands from thesteering wheel.
Activating the steering wheel paddlesIn order to shift gears using the paddles, they must first be activated:
–Pull one of the paddles toward the steering wheel.
> A number in the instrument panel indi- cates the current gear being used.
Instrument panel when the paddles are activated for shifting.
2The illustration is generic - details may vary according to vehicle model.
Page 419 of 662
STARTING AND DRIVING
}}
417
Shiftlock The automatic transmission's shiftlock function helps prevent inadvertently moving the gearselector between different positions.
There are two types of shiftlocks: mechanical and automatic.
Mechanical shiftlock
The gear selector can be moved back and forth between N and D. The other positions have a
shiftlock that is operated using the lock button on the gear selector. Press and hold the shiftlock button and move the gear selector forward or backward between P, R ,
N and D.
Automatic shiftlockThe automatic shiftlock has a separate safety system.
From Park - P
To move the gear selector from the P position,
the brake pedal must be depressed and the igni- tion in mode II.
From Neutral - N
If the gear selector is in N and the vehicle has
been stationary for at least 3 seconds (with or without the engine running), the gear selector willbe locked in that position. To move the gear selector from N to another
gear, the brake pedal must be depressed and the ignition in mode II.
Related information
• Gear selector positions for automatic trans- missions (p. 414)
• Deactivating the automatic shiftlock (p. 417)
Deactivating the automatic shiftlock
The automatic shiftlock can still be disengaged even when there is no electrical current to thevehicle.
Deactivating the automatic shiftlock
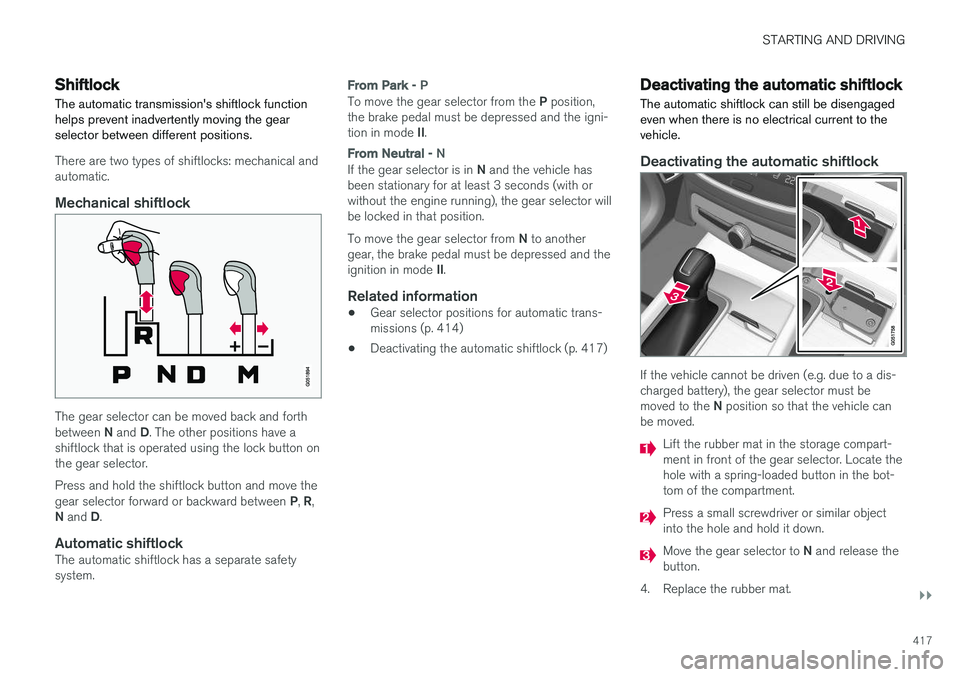
If the vehicle cannot be driven (e.g. due to a dis- charged battery), the gear selector must be moved to the N position so that the vehicle can
be moved.
Lift the rubber mat in the storage compart- ment in front of the gear selector. Locate thehole with a spring-loaded button in the bot-tom of the compartment.
Press a small screwdriver or similar object into the hole and hold it down.
Move the gear selector to N and release the
button.
4. Replace the rubber mat.
Page 420 of 662
||
STARTING AND DRIVING
* Option/accessory.
418
Related information
• Shiftlock (p. 417)
• Gear selector positions for automatic trans- missions (p. 414)
The kickdown function
Kickdown 3
is used when maximum acceleration
is needed, e.g. when passing.
When the accelerator pedal is depressed all the way to the floor (past the normal full acceleratorposition), the transmission will automaticallyengage kickdown, i.e. immediately shift down to alower gear. If the accelerator pedal is released from the kick- down position, the transmission will automaticallyshift up again.
Safety function
The transmission control module is equipped with a downshift protection feature to help prevent theengine from overheating. In some conditions, the transmission will prevent downshifting/kickdown if this would lead to suchhigh engine speed (rpm) that the engine couldbe damaged. If the driver still attempts downshift-ing or kickdown at a high rpm, nothing will hap-pen and the original gear will remain selected. With kickdown, the vehicle can downshift one or more steps at a time depending on the enginespeed. The vehicle upshifts when the engine rea-ches its maximum rpm to prevent engine dam-age.
Related information
• Gear selector positions for automatic trans- missions (p. 414)
Gear indicator
*
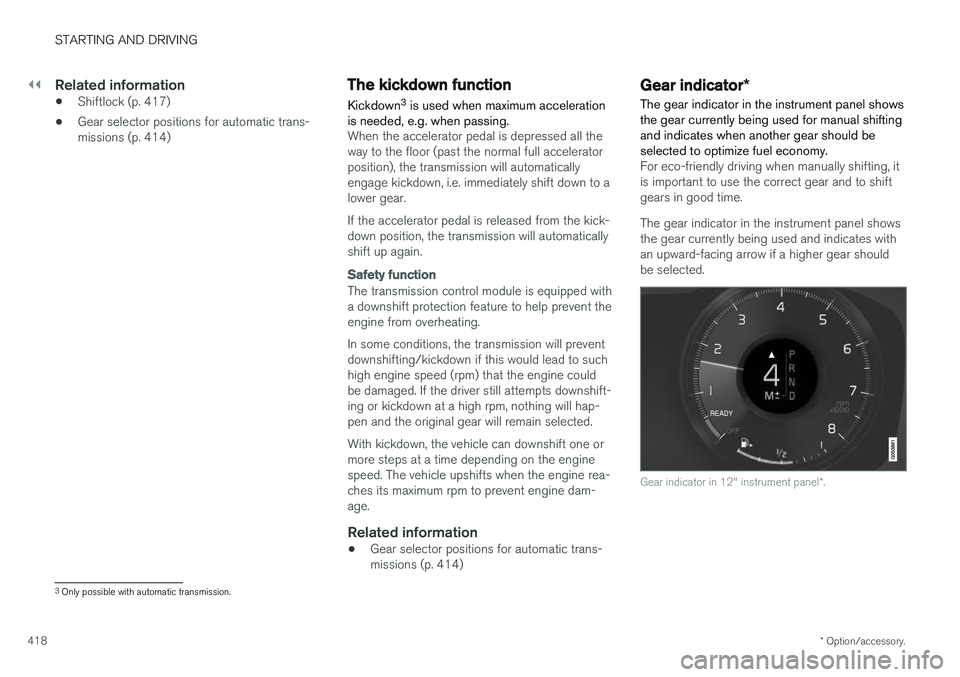
The gear indicator in the instrument panel shows the gear currently being used for manual shiftingand indicates when another gear should beselected to optimize fuel economy.
For eco-friendly driving when manually shifting, it is important to use the correct gear and to shiftgears in good time. The gear indicator in the instrument panel shows the gear currently being used and indicates withan upward-facing arrow if a higher gear shouldbe selected.
Gear indicator in 12" instrument panel *.
3
Only possible with automatic transmission.
Page 438 of 662
||
STARTING AND DRIVING
436
CAUTION
•Engine damage could occur if water enters the air cleaner.
• If water enters the transmission, the lubri-cating ability of the oils is reduced andthe service life of these systems is short-ened.
• Damage to any component, engine,transmission, turbocharger, differential orits internal components caused by flood-ing, vapor lock or insufficient oil is notcovered under warranty.
• If the engine stalls while the vehicle is inwater, do not attempt to restart it. Havethe vehicle towed out of the water to aworkshop. An authorized Volvo workshopis recommended. Risk of engine failure.
Related information
• Recovery (p. 452)
• Low Speed Control (p. 430)
Opening/closing the fuel filler door The vehicle must be unlocked before the fuel filler door can be opened 7
.
An arrow next to the fuel pump symbol in the instrument panelindicates the side of the vehicleon which the fuel filler door islocated.
1. Open the fuel filler door by pressing lightly
on its rear edge.
2. After refueling, press the fuel filler door lightly to close it.
Related information
• Refueling (p. 436)
Refueling
The fuel tank is equipped with a fuel filling sys- tem without a cover.
Refueling the vehicle at a service station
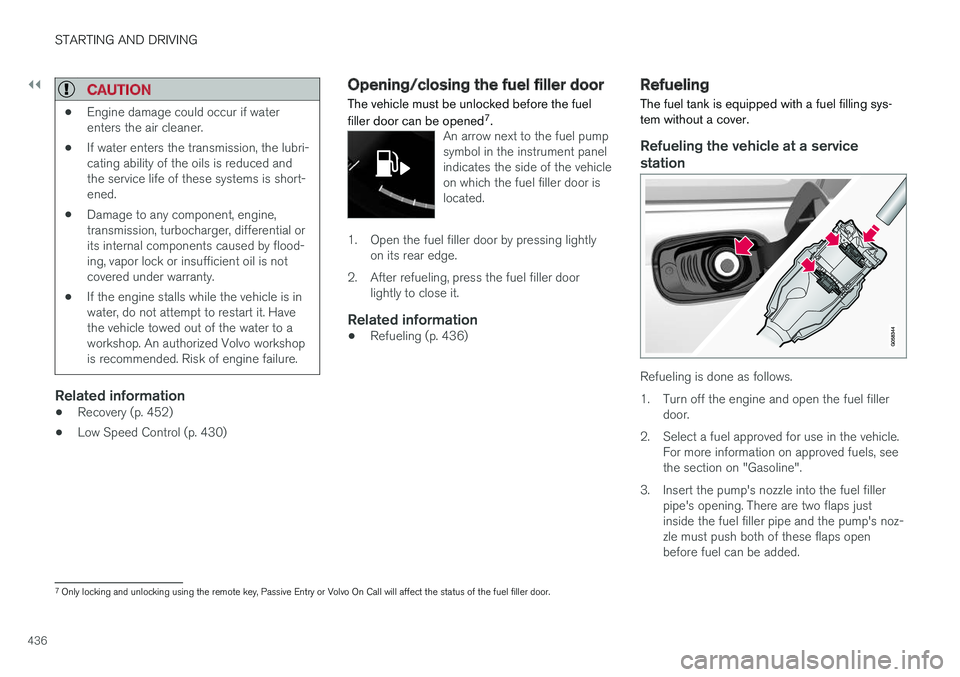
Refueling is done as follows.
1. Turn off the engine and open the fuel filler door.
2. Select a fuel approved for use in the vehicle. For more information on approved fuels, see the section on "Gasoline".
3. Insert the pump's nozzle into the fuel filler pipe's opening. There are two flaps justinside the fuel filler pipe and the pump's noz-zle must push both of these flaps openbefore fuel can be added.
7Only locking and unlocking using the remote key, Passive Entry or Volvo On Call will affect the status of the fuel filler door.
Page 439 of 662

STARTING AND DRIVING
}}
437
4. Avoid overfilling the tank. Do not press the
handle on the filler nozzle again after it has initially stopped pumping.
> The fuel tank is now filled.
NOTE
An over-full tank may overflow in hot weather.
CAUTION
Avoid spilling gasoline during refueling. In addition to causing damage to the environ-ment, gasolines containing alcohol can causedamage to painted surfaces, which may notbe covered under the New Vehicle LimitedWarranty.
Refueling from a fuel containerWhen filling from a fuel container, use the funnel provided in a foam block under the floor hatch inthe cargo compartment.
1. Open the fuel filler door.
2. Insert the funnel into the fuel filler pipe'sopening. There are two flaps just inside the fuel filler pipe and the tube section of thefunnel must push both of these flaps openbefore fuel can be added.
Related information
• Opening/closing the fuel filler door (p. 436)
Fuel Volvo recommends the use of detergent gaso- line to control engine deposits.
Deposit control gasoline (gasoline with detergent additives)
Detergent gasoline is effective in keeping injec- tors and intake valves clean. Consistent use ofdeposit control gasolines will help ensure gooddriveability and fuel economy. If you are not surewhether the gasoline contains deposit controladditives, check with the service station operator.
NOTE
Volvo recommends not using external fuel injector cleaning systems, e.g. do not adddetergent additives to gasoline before or afterrefueling.
Unleaded fuelAll Volvo vehicles have a three-way catalytic con- verter and must only use unleaded gasoline. USand Canadian regulations require that pumpsdelivering unleaded gasoline are labeled"UNLEADED". Only the nozzles of these pumpswill fit in your vehicle's fuel filler inlet. It is unlaw-ful to dispense leaded fuel into a vehicle labeled"unleaded gasoline only". Leaded gasoline dam-ages the three-way catalytic converter and theheated oxygen sensor system. Repeated use ofleaded gasoline will lessen the effectiveness of the emission control system and could result inloss of emission warranty coverage. State andlocal vehicle inspection programs will makedetection of misfueling easier, possibly resultingin emission test failure for misfueled vehicles.
NOTE
Some U.S. and Canadian gasolines contain an octane enhancing additive called methyl-cyclopentadienyl manganese tricarbonyl(MMT). If such fuels are used, your EmissionControl System performance may be affected,and the Check Engine Light (malfunctionindicator light) located on your instrumentpanel may light. If this occurs, please returnyour vehicle to a trained and qualified Volvoservice technician for service.
Gasoline containing alcohol and ethers, "Oxygenated fuels"
Some fuel suppliers sell gasoline containing "oxygenates" which are usually alcohols orethers. In some areas, state or local laws requirethat the service pump be marked indicating useof alcohols or ethers. However, there are areas inwhich the pumps are unmarked. If you are notsure whether there is alcohol or ethers in thegasoline you buy, check with the service stationoperator. To meet seasonal air quality standards,some areas require the use of "oxygenated" fuel.
Page 446 of 662
||
STARTING AND DRIVING
444
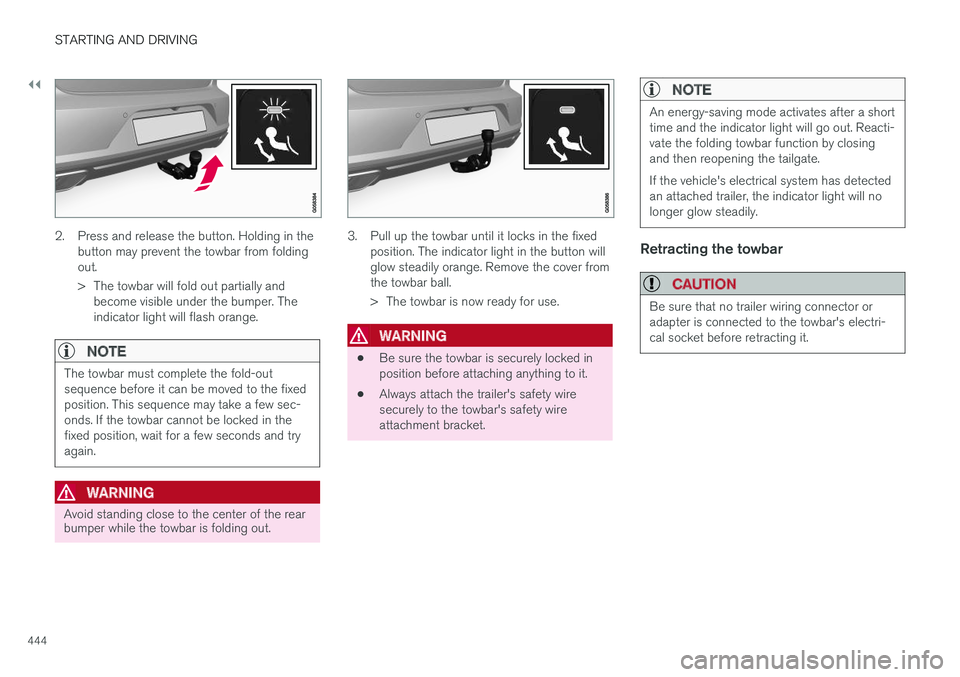
2. Press and release the button. Holding in thebutton may prevent the towbar from folding out.
> The towbar will fold out partially andbecome visible under the bumper. The indicator light will flash orange.
NOTE
The towbar must complete the fold-out sequence before it can be moved to the fixedposition. This sequence may take a few sec-onds. If the towbar cannot be locked in thefixed position, wait for a few seconds and tryagain.
WARNING
Avoid standing close to the center of the rear bumper while the towbar is folding out.
3. Pull up the towbar until it locks in the fixed position. The indicator light in the button will glow steadily orange. Remove the cover fromthe towbar ball.
> The towbar is now ready for use.
WARNING
• Be sure the towbar is securely locked in position before attaching anything to it.
• Always attach the trailer's safety wiresecurely to the towbar's safety wireattachment bracket.
NOTE
An energy-saving mode activates after a short time and the indicator light will go out. Reacti-vate the folding towbar function by closingand then reopening the tailgate. If the vehicle's electrical system has detected an attached trailer, the indicator light will nolonger glow steadily.
Retracting the towbar
CAUTION
Be sure that no trailer wiring connector or adapter is connected to the towbar's electri-cal socket before retracting it.