2018 VOLVO V60 CROSS COUNTRY light
[x] Cancel search: lightPage 158 of 404
||
LOCKS AND ALARM
* Option/accessory.
156
Unlock – Press the Unlock button on the
remote once to unlock the driver's door. After a short pause, press the Unlock button a second time within 10 seconds to unlock theother doors and the tailgate. This function can be changed so that all doors unlock at the same time by pressing My Car and
going to
SettingsCar settingsLock
settings
Change doors unlock setting. For
a description of the menu system, see My Car – introduction (p. 79).
Approach lighting – As you approach the
vehicle, press the button on the remote key to light the interior lighting, parking lights, license plate lighting and the lights in the door mirrors *.
These lights will switch off automatically after 30, 60 or 90 seconds. For a description of the menusystem, see My Car – introduction (p. 79).
Unlock tailgate – Press the button twice
within several seconds to disarm the alarm sys- tem (the alarm indicator light on the dashboardwill go out), and unlock only the tailgate.
NOTE
As an added safety precaution, the parking lights will come on automatically for a shortperiod when the tailgate has been opened.
After closing, the tailgate will not automatically relock. Press Lock to relock it and rearm thealarm. For information on opening the tailgate from the passenger compartment, see Locking/unlocking– tailgate (p. 168)
Panic alarm – This button can be used to
attract attention during emergency situations. To activate the panic alarm, press and hold this button for at least 3 seconds or press it twicewithin 3 seconds. The turn signals and horn willbe activated. The panic alarm will stop automati-cally after 2 minutes and 45 seconds. To deactivate, wait approximately 5 seconds and press the button again. The Panic alarm button will not unlock the vehi- cle.
Related information
• Locking/unlocking – from inside (p. 166)
• Locking/unlocking – from the outside(p. 165)
• Locking/unlocking confirmation (p. 154)
Remote key – range The remote key has a range of approximately 60 ft. (20 m) from the vehicle.
NOTE
Buildings or other obstacles may interfere with the function of the remote key. The vehi-cle can also be locked or unlocked with thekey blade, see Alarm-related functions(p. 172).
If the remote key is removed from the vehicle while the engine is running or if the ignition is in mode
I or II and all of the doors are closed, a
message will appear in the instrument panel dis- play and there will be an audible signal. When the remote key is returned to the vehicle, the message will be erased and the audible sig-nal will stop after one of the following has beendone:
• The remote key is inserted in the ignition slot
• The vehicle's speed exceeds 20 mph(30 km/h)
• The
OK button on the left steering wheel
lever is pressed
Related information
• Remote key – functions (p. 155)
Page 169 of 404
LOCKS AND ALARM
167
Unlocking
The vehicle can be unlocked from inside the vehi- cle in two ways:• By pressing the unlock button
.
• The
front doors can be unlocked and
opened by pulling the door handle once. The rear doors can be unlocked by pulling the
door handle once and opened by pulling the handle again.
Locking
• Press the lock button after the front
doors have been closed.
• Press the lock button
: all of the doors
that are closed will lock.
• Each door can be locked individually with the lock button on the respective doors. The doormust be closed first.
Indicator light in the lock buttons
There are two versions of the central locking sys- tem that affect the indicator light in the driver'sdoor central locking button. If
only the driver's door has a central locking but-
ton:
• If the light is on, this indicates that all of the doors are locked.
If there are central locking buttons in both front
doors and electric lock buttons in the rear sidedoors: •
If a light is on in one of the buttons, thismeans that only that door is locked. Whenthe lights are on in all of the buttons, all ofthe doors are locked.
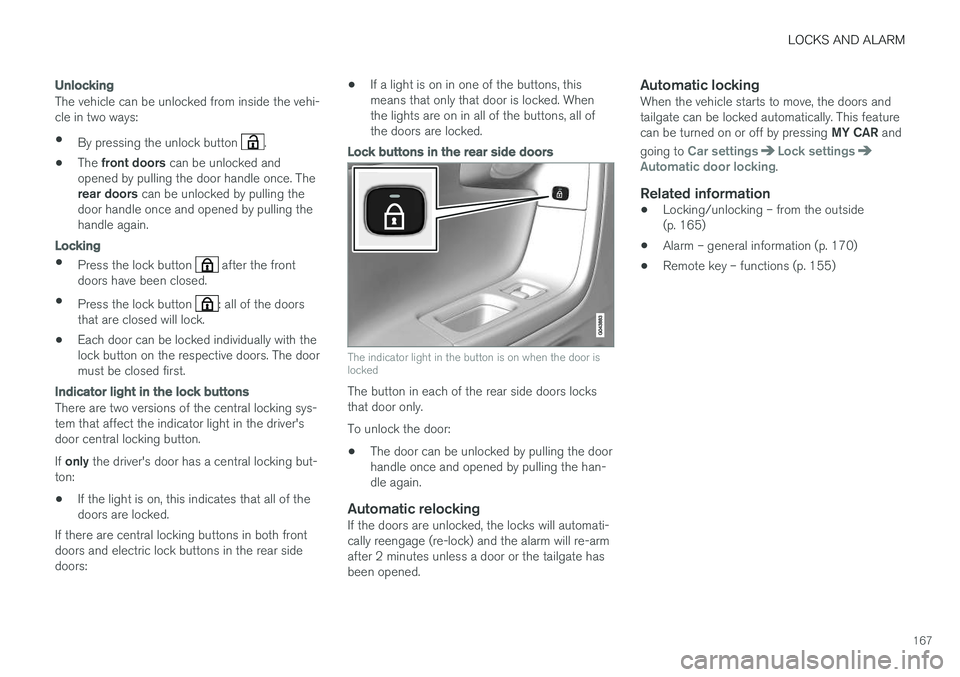
Lock buttons in the rear side doors
The indicator light in the button is on when the door is locked
The button in each of the rear side doors locks that door only. To unlock the door:
• The door can be unlocked by pulling the door handle once and opened by pulling the han-dle again.
Automatic relockingIf the doors are unlocked, the locks will automati-cally reengage (re-lock) and the alarm will re-armafter 2 minutes unless a door or the tailgate hasbeen opened.
Automatic lockingWhen the vehicle starts to move, the doors andtailgate can be locked automatically. This feature can be turned on or off by pressing
MY CAR and
going to
Car settingsLock settingsAutomatic door locking.
Related information
• Locking/unlocking – from the outside (p. 165)
• Alarm – general information (p. 170)
• Remote key – functions (p. 155)
Page 170 of 404
LOCKS AND ALARM
168
Locking/unlocking – glove compartment
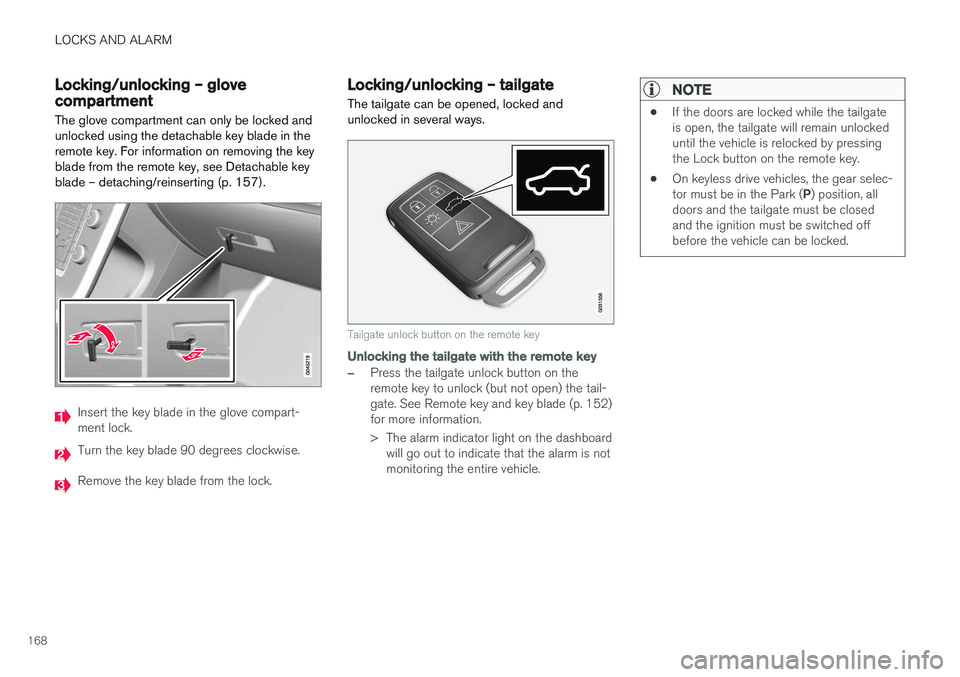
The glove compartment can only be locked and unlocked using the detachable key blade in theremote key. For information on removing the keyblade from the remote key, see Detachable keyblade – detaching/reinserting (p. 157).
Insert the key blade in the glove compart- ment lock.
Turn the key blade 90 degrees clockwise.
Remove the key blade from the lock.
Locking/unlocking – tailgate The tailgate can be opened, locked and unlocked in several ways.
Tailgate unlock button on the remote key
Unlocking the tailgate with the remote key
–Press the tailgate unlock button on the remote key to unlock (but not open) the tail-gate. See Remote key and key blade (p. 152)for more information.
> The alarm indicator light on the dashboard will go out to indicate that the alarm is not monitoring the entire vehicle.
NOTE
• If the doors are locked while the tailgate is open, the tailgate will remain unlockeduntil the vehicle is relocked by pressingthe Lock button on the remote key.
• On keyless drive vehicles, the gear selec- tor must be in the Park (
P) position, all
doors and the tailgate must be closed and the ignition must be switched offbefore the vehicle can be locked.
Page 171 of 404
LOCKS AND ALARM
169
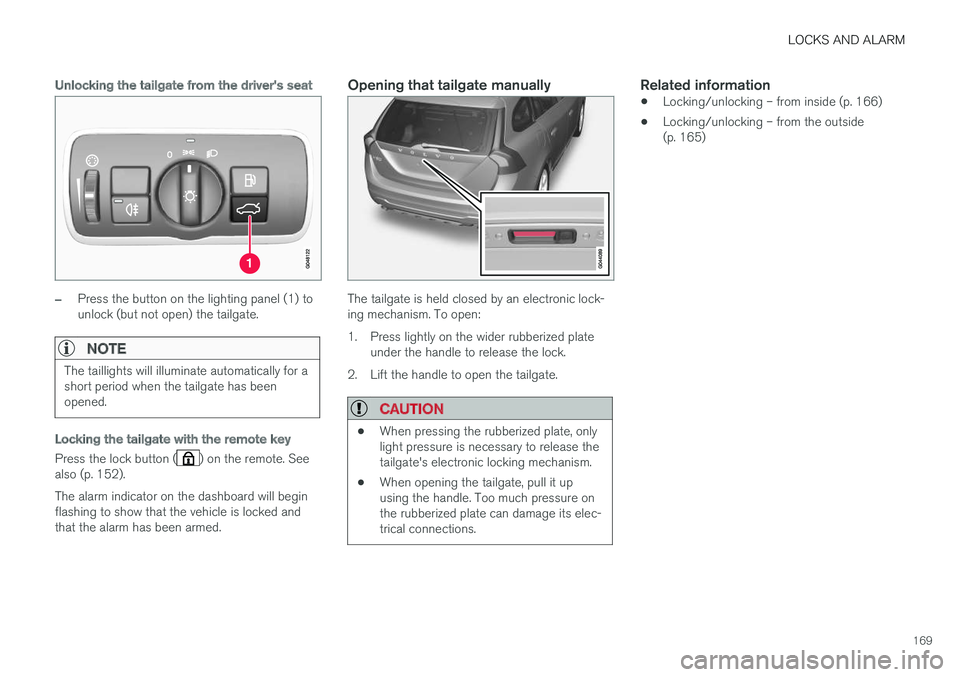
Unlocking the tailgate from the driver's seat
–Press the button on the lighting panel (1) to unlock (but not open) the tailgate.
NOTE
The taillights will illuminate automatically for a short period when the tailgate has beenopened.
Locking the tailgate with the remote key
Press the lock button () on the remote. See
also (p. 152). The alarm indicator on the dashboard will begin flashing to show that the vehicle is locked andthat the alarm has been armed.
Opening that tailgate manually
The tailgate is held closed by an electronic lock- ing mechanism. To open:
1. Press lightly on the wider rubberized plate under the handle to release the lock.
2. Lift the handle to open the tailgate.
CAUTION
• When pressing the rubberized plate, only light pressure is necessary to release thetailgate's electronic locking mechanism.
• When opening the tailgate, pull it upusing the handle. Too much pressure onthe rubberized plate can damage its elec-trical connections.
Related information
• Locking/unlocking – from inside (p. 166)
• Locking/unlocking – from the outside (p. 165)
Page 172 of 404
LOCKS AND ALARM
170
Alarm – general information
The alarm system provides a warning if an attempt is made to break into the vehicle. The alarm is automatically armed (p. 171) whenever the vehicle is locked with the remotekey. When armed, the alarm continuously monitors a number of points on the vehicle. The followingconditions will trigger the alarm:
• The hood is forced open.
• The tailgate is forced open.
• A door is forced open.
• The ignition slot is tampered with.
• An attempt is made to start the vehicle with a non-approved key (a key not coded to thecar's ignition).
• The battery is disconnected (while the alarmis armed).
• The siren is disconnected when the alarm isdisarmed.
A message will appear in the information displayif a fault should occur in the alarm system. Con-tact a trained and qualified Volvo service techni-cian.
NOTE
Do not attempt to repair any of the compo- nents in the alarm system yourself. This couldaffect the insurance policy on the vehicle.
Related information
• Alarm – turning off (p. 172)
• Alarm signal (p. 171)
• Alarm indicator (p. 170)
Alarm indicator
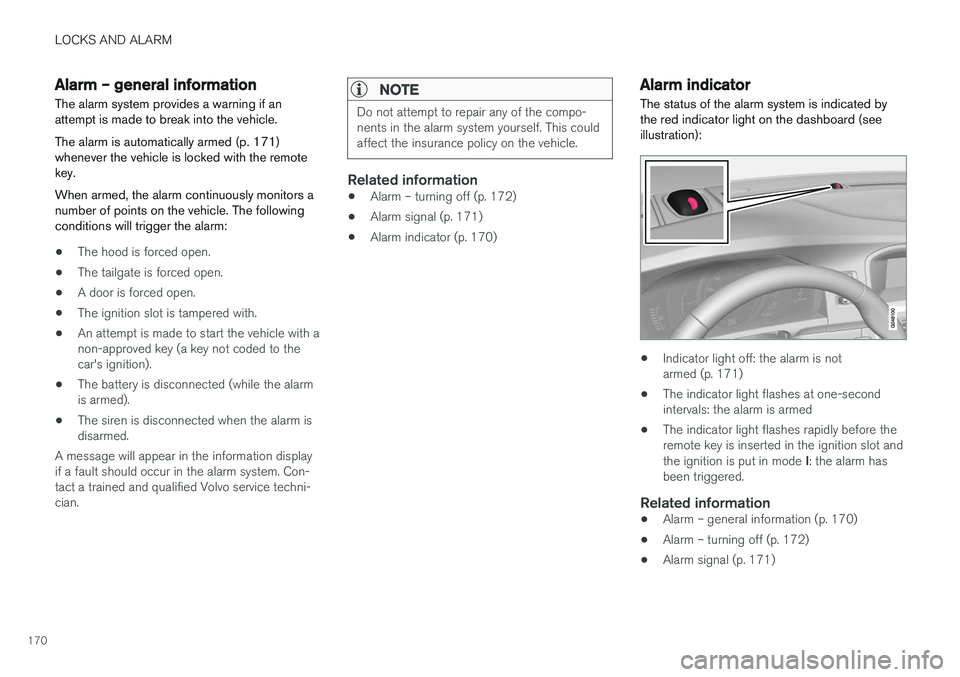
The status of the alarm system is indicated by the red indicator light on the dashboard (seeillustration):
• Indicator light off: the alarm is not armed (p. 171)
• The indicator light flashes at one-secondintervals: the alarm is armed
• The indicator light flashes rapidly before theremote key is inserted in the ignition slot and the ignition is put in mode
I: the alarm has
been triggered.
Related information
• Alarm – general information (p. 170)
• Alarm – turning off (p. 172)
• Alarm signal (p. 171)
Page 176 of 404
DRIVER SUPPORT
174
Stability system – introduction The Electronic Stability Control (ESC) system consists of a number of functions designed tohelp reduce wheel spin, counteract skidding andto generally help improve directional stability.
A pulsating sound will be audible when the system is actively operating and isnormal. Acceleration will also beslightly slower than normal.
WARNING
•The stability system (ESC) is intended to help improve driving safety but cannotdeal with all situations, or traffic, road andweather conditions. Speed and drivingstyle should always be adapted to thecurrent driving situation.
• ESC supplements, but can never replace,the driver's judgment and responsibilitywhen operating the vehicle. The driver isalways responsible for operating the vehi-cle in a safe manner in accordance withapplicable traffic regulations.
ESC consists of the following functions:
• Traction control
• Spin control
• Active Yaw Control
• Engine Drag Control •
Corner Traction Control
Traction Control (TC)
This function is designed to help reduce wheel spin at low speeds by transferring power from adrive wheel that begins to lose traction to thewheel on the opposite side of the vehicle (on thesame axle).
Spin Control (SC)
The SC function is designed to help prevent the drive wheels from spinning while the vehicle isaccelerating.
Active Yaw Control (AYC)
This function helps maintain directional stability, for example when cornering, by braking one ormore of the wheels if the vehicle shows a ten-dency to skid or slide laterally.
Corner Traction Control (CTC)
CTC compensates for understeering and helps provide additional stability when acceleratingthrough a curve by preventing the inside wheelfrom spinning. This is particularly useful whenaccelerating on a curving highway on-ramp. CTC is most effective if the stability system's Sport
mode is selected. See the section about
Sport mode.
Engine Drag Control (EDC)
EDC helps keep the engine running if the wheels show a tendency to lock, e.g., when shifting downin the Geartronic manual shifting mode or whileusing the engine's braking function on a slipperysurface. If the engine were to stop, power steer- ing would not function, making the vehicle moredifficult to steer.
Trailer Stability Assist (TSA)
The TSA helps stabilize a vehicle that is towing a trailer when the vehicle and trailer have begun tosway. See Trailer Stability Assist (TSA) (p. 294)for more information. This system is automatically deactivated if the driver selects
Sport mode.
Related information
•Stability system – operation (p. 175)
• Stability system – symbols and messages (p. 176)
• Trailer Stability Assist (TSA) (p. 294)
Page 180 of 404
DRIVER SUPPORT
* Option/accessory.
178
Adjustable steering force *
Steering force increases with the speed of the vehicle to give the driver enhanced sense ofcontrol and stability. At low speed the vehicle iseasy to steer in order to facilitate parking, etc.
Adjustable steering force *Steering force can be changed under MY CAR
Car settingsSteering wheel force.
Select Low, Medium or High. For a description
of the menu system, My Car – introduction (p. 79).
NOTE
This steering force level menu function can- not be accessed when the vehicle is inmotion.
NOTE
In certain situations, the power steering may become too warm and will have to be tempo-rarily cooled down. While this is happening,the power steering effect will be reducedslightly and somewhat more effort may berequired to turn the steering wheel. If this occurs, a message will be displayed in the instrument panel.
Road Sign Information (RSI) * –
introduction
RSI is a feature that helps the driver see road signs with the posted speed limit.
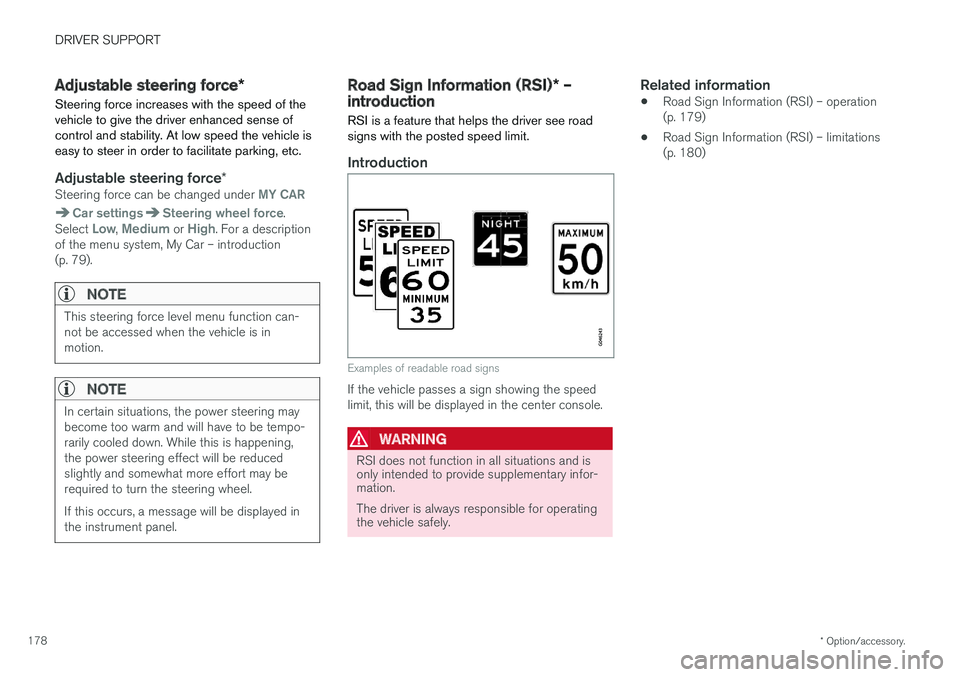
Introduction
Examples of readable road signs
If the vehicle passes a sign showing the speed limit, this will be displayed in the center console.
WARNING
RSI does not function in all situations and is only intended to provide supplementary infor-mation. The driver is always responsible for operating the vehicle safely.
Related information
• Road Sign Information (RSI) – operation (p. 179)
• Road Sign Information (RSI) – limitations(p. 180)
Page 187 of 404
DRIVER SUPPORT
}}
185
•
Adaptive Cruise Control – setting speed (p. 187)
• Radar sensor (p. 193)
• Adaptive Cruise Control (ACC) – QueueAssist (p. 191)
• Adaptive Cruise Control – passing anothervehicle (p. 190)
• Adaptive Cruise Control – limitations(p. 193)
• Adaptive Cruise Control – function (p. 185)
• Adaptive Cruise Control – engaging (p. 187)
• Adaptive Cruise Control – deactivating(p. 189)
Adaptive Cruise Control – function
Function
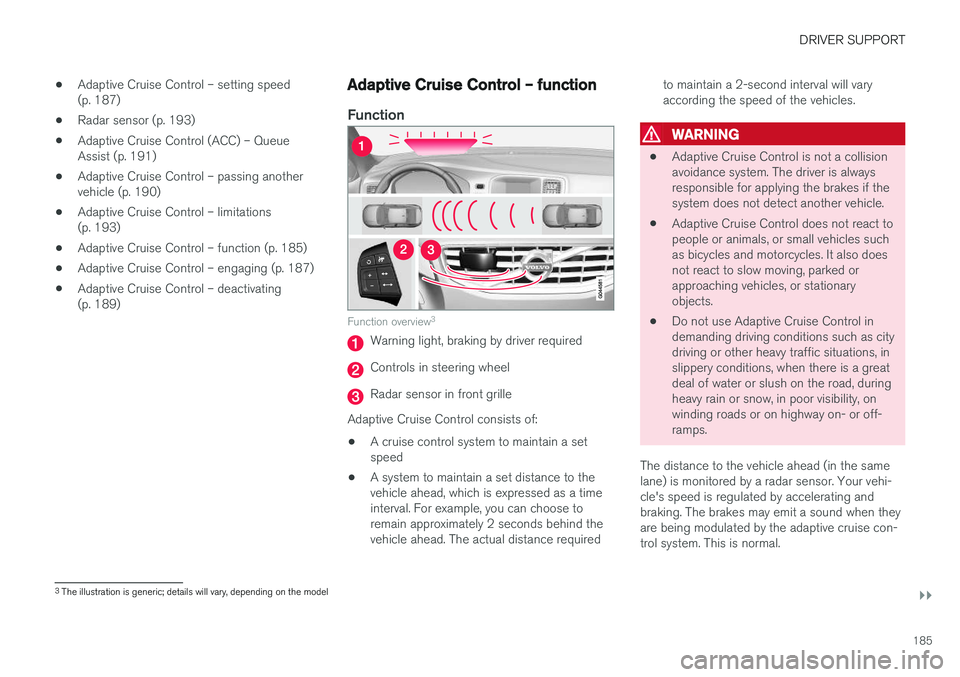
Function overview 3
Warning light, braking by driver required
Controls in steering wheel
Radar sensor in front grille
Adaptive Cruise Control consists of:
• A cruise control system to maintain a set speed
• A system to maintain a set distance to thevehicle ahead, which is expressed as a timeinterval. For example, you can choose toremain approximately 2 seconds behind thevehicle ahead. The actual distance required to maintain a 2-second interval will varyaccording the speed of the vehicles.
WARNING
•
Adaptive Cruise Control is not a collision avoidance system. The driver is alwaysresponsible for applying the brakes if thesystem does not detect another vehicle.
• Adaptive Cruise Control does not react topeople or animals, or small vehicles suchas bicycles and motorcycles. It also doesnot react to slow moving, parked orapproaching vehicles, or stationaryobjects.
• Do not use Adaptive Cruise Control indemanding driving conditions such as citydriving or other heavy traffic situations, inslippery conditions, when there is a greatdeal of water or slush on the road, duringheavy rain or snow, in poor visibility, onwinding roads or on highway on- or off-ramps.
The distance to the vehicle ahead (in the samelane) is monitored by a radar sensor. Your vehi-cle's speed is regulated by accelerating andbraking. The brakes may emit a sound when theyare being modulated by the adaptive cruise con-trol system. This is normal.
3 The illustration is generic; details will vary, depending on the model