2018 VOLVO V60 CROSS COUNTRY light
[x] Cancel search: lightPage 137 of 404
CLIMATE
}}
* Option/accessory.135
Air conditioning
The air conditioning function cools and dehu- midifies the air in the passenger compartment.
When the indicator light in the button is on, the air condition-ing is controlled automatically.This cools/heats and dehu-midifies the incoming air. Whenthe indicator light in the buttonis off, the air conditioning is
disengaged. Other functions are still controlledautomatically. When maximum defroster (p. 135)is selected, the air conditioning system is set formaximum blower speed and dehumidifies thecabin as quickly as possible.
Related information
• Climate – general information (p. 128)
• Automatic climate control (p. 134)
Max. defroster and electrically heated windshield
*
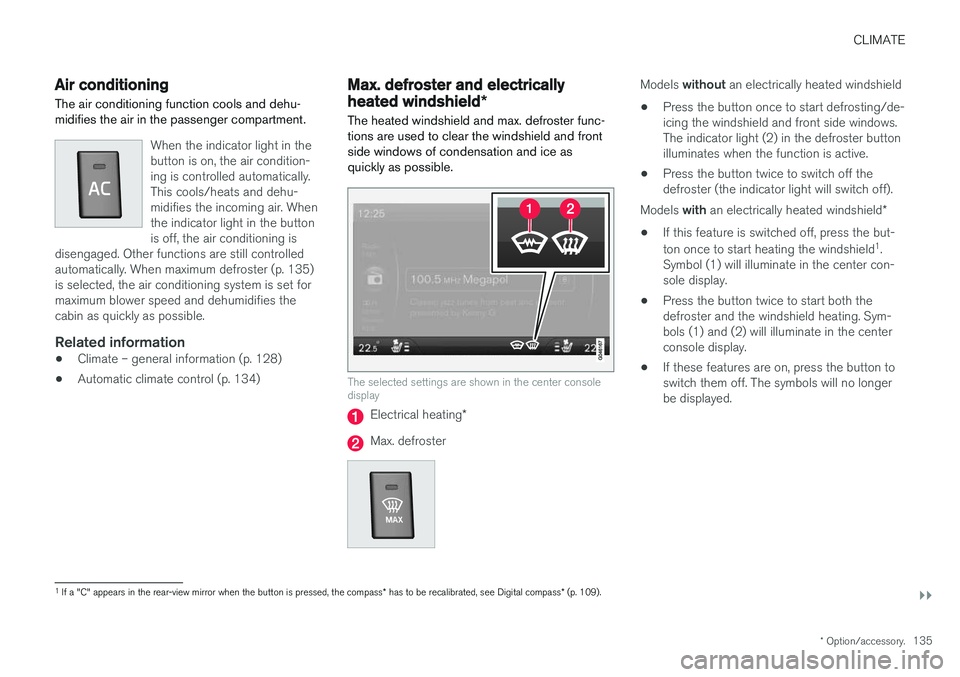
The heated windshield and max. defroster func- tions are used to clear the windshield and frontside windows of condensation and ice asquickly as possible.
The selected settings are shown in the center console display
Electrical heating *
Max. defroster
Models without an electrically heated windshield
• Press the button once to start defrosting/de- icing the windshield and front side windows.The indicator light (2) in the defroster buttonilluminates when the function is active.
• Press the button twice to switch off thedefroster (the indicator light will switch off).
Models with an electrically heated windshield *
• If this feature is switched off, press the but- ton once to start heating the windshield 1
.
Symbol (1) will illuminate in the center con- sole display.
• Press the button twice to start both thedefroster and the windshield heating. Sym-bols (1) and (2) will illuminate in the centerconsole display.
• If these features are on, press the button toswitch them off. The symbols will no longerbe displayed.
1
If a "C" appears in the rear-view mirror when the button is pressed, the compass * has to be recalibrated, see Digital compass * (p. 109).
Page 138 of 404
||
CLIMATE
* Option/accessory.
136
NOTE
• Triangular areas at the far sides of the windshield are not heated electrically andwill take slightly longer to defrost/de-ice.
• The heated windshield may affect theperformance/range of e.g., transpondersused to automatically pay highway tolls orother communication equipment.
The following occurs when the defroster/wind- shield heating functions have been activated:
• Blower speed increases automatically andthe air conditioning (p. 135) will switch on (ifnot already on and if the passenger compart-ment blower is not turned off) to dehumidifythe air in the passenger compartment. Airconditioning can be switched off by pressing the
AC button.
• Recirculation (p. 137) will not function while defrost is engaged.
The climate system will return to its previous set-tings when the defroster/windshield heatingfunction is switched off. See also Heated windshield *, rear window and
door mirror defrosters (p. 108) for additional information.
Related information
• Climate – general information (p. 128)
• Automatic climate control (p. 134)
Air distribution – function
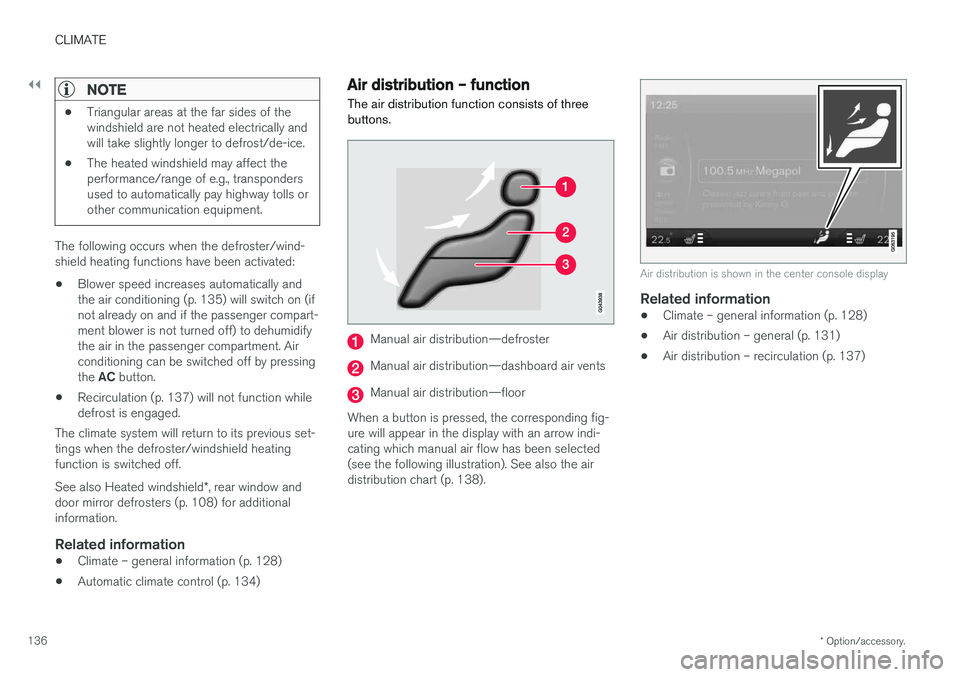
The air distribution function consists of three buttons.
Manual air distribution—defroster
Manual air distribution—dashboard air vents
Manual air distribution—floor
When a button is pressed, the corresponding fig- ure will appear in the display with an arrow indi-cating which manual air flow has been selected(see the following illustration). See also the airdistribution chart (p. 138).
Air distribution is shown in the center console display
Related information
• Climate – general information (p. 128)
• Air distribution – general (p. 131)
• Air distribution – recirculation (p. 137)
Page 139 of 404
CLIMATE
137
Air distribution – recirculation Recirculation can be used to shut out exhaust fumes, smoke, etc., from the passenger com-partment.
The air in the passenger com- partment is then recirculated,i.e., no air from outside the caris taken into the car when thisfunction is activated. The indi-cator light in the button will illu-minate when recirculation is
selected. If the air in the car recirculates for too long, there is a risk of condensation forming on the insidesof the windows, especially in winter.
TimerThe timer function minimizes the risk of fogging, or stale air when the recirculation function isselected by automatically switching off the func-tion after a certain length of time, depending onthe ambient temperature. Activate/deactivate the function under
Climate settingsRecirculation timer. See My Car – introduction
(p. 79) for a description of the menu system.
NOTE
When Defroster is selected, recirculation is always deactivated.
Related information
• Climate – general information (p. 128)
• Air distribution – general (p. 131)
• Air distribution – function (p. 136)
• Air distribution – table (p. 138)
Page 146 of 404
LOADING AND STORAGE
* Option/accessory.
144
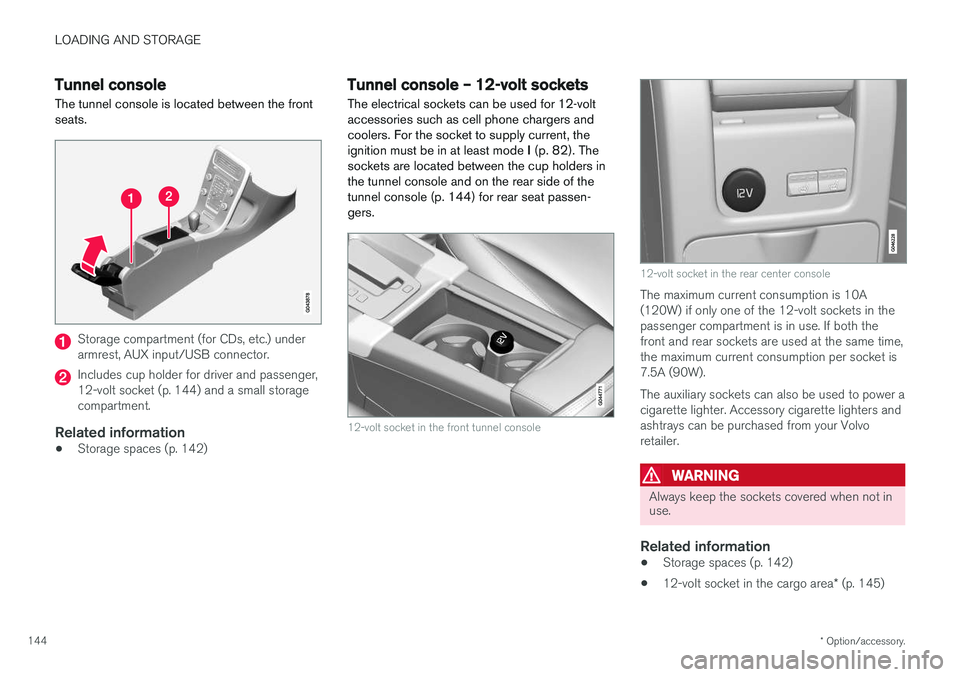
Tunnel console The tunnel console is located between the front seats.
Storage compartment (for CDs, etc.) under armrest, AUX input/USB connector.
Includes cup holder for driver and passenger, 12-volt socket (p. 144) and a small storagecompartment.
Related information
• Storage spaces (p. 142)
Tunnel console – 12-volt sockets
The electrical sockets can be used for 12-volt accessories such as cell phone chargers andcoolers. For the socket to supply current, theignition must be in at least mode I (p. 82). The
sockets are located between the cup holders inthe tunnel console and on the rear side of the
tunnel console (p. 144) for rear seat passen-gers.
12-volt socket in the front tunnel console
12-volt socket in the rear center console
The maximum current consumption is 10A (120W) if only one of the 12-volt sockets in thepassenger compartment is in use. If both thefront and rear sockets are used at the same time,the maximum current consumption per socket is7.5A (90W). The auxiliary sockets can also be used to power a cigarette lighter. Accessory cigarette lighters andashtrays can be purchased from your Volvoretailer.
WARNING
Always keep the sockets covered when not in use.
Related information
• Storage spaces (p. 142)
• 12-volt socket in the cargo area
* (p. 145)
Page 147 of 404
LOADING AND STORAGE
* Option/accessory.145
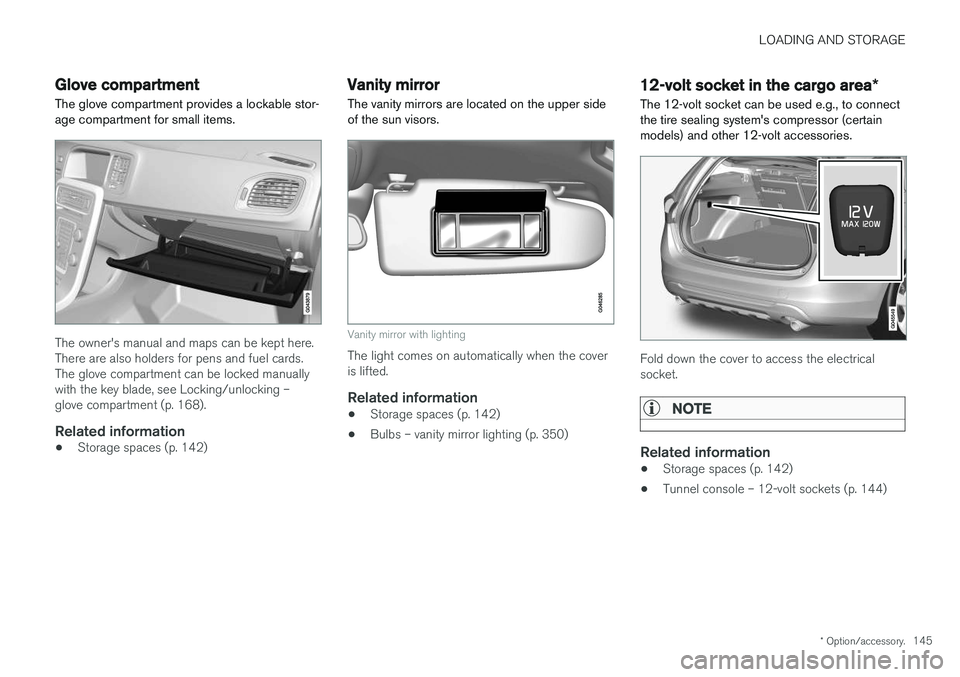
Glove compartment
The glove compartment provides a lockable stor- age compartment for small items.
The owner's manual and maps can be kept here. There are also holders for pens and fuel cards.The glove compartment can be locked manuallywith the key blade, see Locking/unlocking –glove compartment (p. 168).
Related information
• Storage spaces (p. 142)
Vanity mirror
The vanity mirrors are located on the upper side of the sun visors.
Vanity mirror with lighting
The light comes on automatically when the cover is lifted.
Related information
• Storage spaces (p. 142)
• Bulbs – vanity mirror lighting (p. 350)
12-volt socket in the cargo area
*
The 12-volt socket can be used e.g., to connect the tire sealing system's compressor (certainmodels) and other 12-volt accessories.
Fold down the cover to access the electrical socket.
NOTE
Related information
• Storage spaces (p. 142)
• Tunnel console – 12-volt sockets (p. 144)
Page 152 of 404
||
LOADING AND STORAGE
1503. Press both sides of the cover until they click
into place
. The red mark will no longer be
visible.
4. Check that both ends of the cover are securely locked in place.
Removing the cover1. Press one of the end pieces of the coverinward.
2. Pull the cover carefully upward and outward. The other end will release automatically from its retaining bracket.
Folding down the cargo area cover's rear flap
The cargo area cover's rear flap points horizon- tally when the cover is retracted (rolled up). Tofold it down:
–Pull the flap slightly rearward past its sup- ports and fold it down.
NOTE
On models equipped with this cover, it should be removed before a child seat is attached tothe child restraint anchors.
Related information
• Loading – general (p. 146)
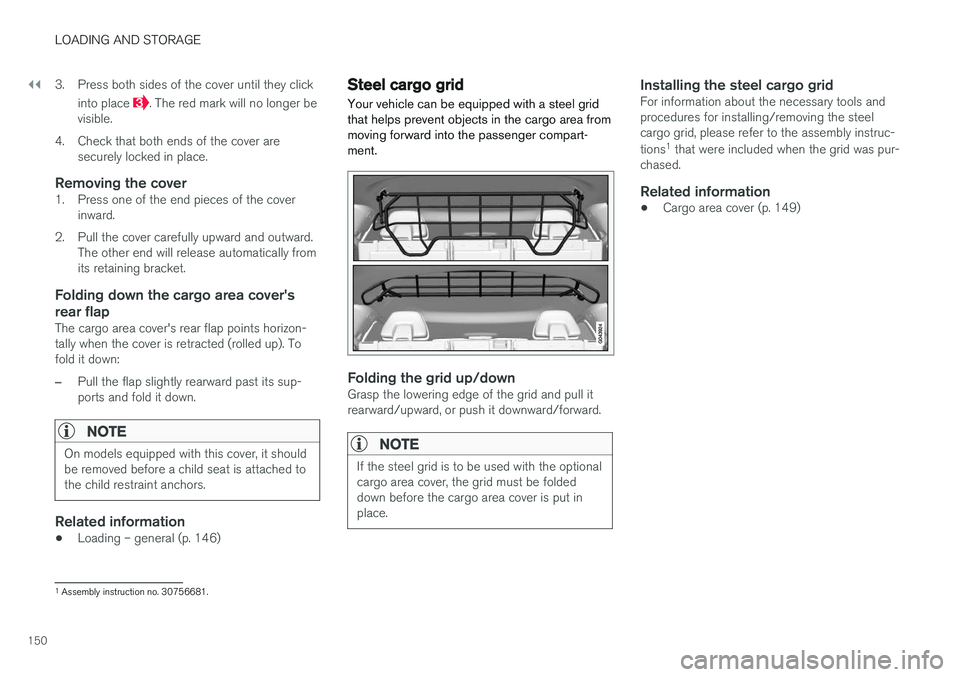
Steel cargo grid
Your vehicle can be equipped with a steel grid that helps prevent objects in the cargo area frommoving forward into the passenger compart-ment.
Folding the grid up/downGrasp the lowering edge of the grid and pull it rearward/upward, or push it downward/forward.
NOTE
If the steel grid is to be used with the optional cargo area cover, the grid must be foldeddown before the cargo area cover is put inplace.
Installing the steel cargo gridFor information about the necessary tools and procedures for installing/removing the steelcargo grid, please refer to the assembly instruc- tions 1
that were included when the grid was pur-
chased.
Related information
• Cargo area cover (p. 149)
1
Assembly instruction no. 30756681.
Page 156 of 404

LOCKS AND ALARM
* Option/accessory.
154
Locking/unlocking confirmation Settings can be made in the menu system for audible and visual confirmation when the vehiclehas been locked or unlocked. With these func-tions activated, the following will occur when thevehicle is locked/unlocked:
Locking confirmation
• The turn signals flash once, an audible signal sounds and the door mirrors will fold
* in.
Confirmation will only be given when all doors and the tailgate are properly closed and locked.
NOTE
If you do not receive confirmation when lock- ing the vehicle, check whether a door or thetailgate is ajar, or if this feature has beenturned off in the menu.
Unlocking confirmation
• The turn signals will flash twice and the door mirrors will fold
* out.
Making a setting
Different alternatives for locking/unlocking con- firmation can be selected in the menus by press- ing MY CAR on the center console control panel.
• To activate visual confirmation: go to
SettingsCar settingsLight settingsand select Door lock confirmation light
and/or Unlock confirmation light by
pressing OK/MENU .
• To activate audible confirmation: go to
SettingsCar settingsLock settingsand select Audible confirmation by press-
ing OK/MENU .
For a description of the menu system, see My Car – introduction (p. 79).
Lock indicator
Lock/alarm indicator light
A flashing indicator light at the base of the wind- shield verifies that the vehicle is locked.
Related information
• Locking/unlocking – from the outside(p. 165)
• Locking/unlocking – from inside (p. 166)
• Locking/unlocking – tailgate (p. 168)
Immobilizer (start inhibitor)
The immobilizer is a start inhibitor that helps pre- vent unauthorized persons from starting theengine. Each of the keys supplied with your vehicle con- tains a coded transponder. The code in the keyis transmitted to an antenna in the ignition slotwhere it is compared to the code stored in thestart inhibitor module. The vehicle will start onlywith a properly coded key. If you misplace a key,take the other keys to a trained and qualifiedVolvo service technician for reprogramming asan anti-theft measure. The following messages(which may appear in the instrument panel dis-play) are related to the immobilizer:
Page 157 of 404

LOCKS AND ALARM
}}
* Option/accessory.155
MessageMeaning
Insert car keyRemote key not recognized dur- ing start. Try to start the vehicleagain.
Car key not foundVehicles with keyless drive *
only. Remote key not recog- nized during start. Try to startthe vehicle again. If the problem continues, insert the remote key into the ignitionslot and try to start the vehicleagain.
Immobil- izer Trystart againRemote key fault during start. Contact an authorized Volvoworkshop.
CAUTION
Never use force when inserting the remote key in the ignition slot. The vehicle cannot bestarted if the transponder is damaged.
USA–FCC ID: LTQWFS 125VO This device complies with part 15 of the FCC rules. Operation is subject to the following condi-tion: (1) This device may not cause harmful inter-ference, and (2) this device must accept anyinterference received, including interference thatmay cause undesired operation. Canada–IC: 3659A-WFS125VO Operation is subject to the following conditions: (1) this device may not cause interference, and(2) this device must accept any interference,including interference that may cause undesiredoperation of the device. For information on starting the vehicle, see Star- ting the engine (p. 258).
Remote key – functions
The remote key is used e.g., to unlock the doors and start the engine.
Remote key
Lock
Unlock
Approach lighting
Tailgate unlock
Panic alarm
Buttons on the remote
Lock – Press the Lock button on the remote
once to lock all doors and the tailgate. The turn signals will flash once to confirm locking.