2018 VOLKSWAGEN T-ROC ECO mode
[x] Cancel search: ECO modePage 157 of 502

button in the air conditioning block to switch the auxiliary heater on and off when the
ignition is switched off
Touch the function button in the Infotainment system air conditioning settings to access the
Auxiliary heater menu Auxiliary heater and ventilation
The auxiliary heater provides additional heating when the ignition is switched on.
Blower
Turn the middle rotary control.
When Climatronic is in automatic mode, no blower speed is displayed in the rotary control.
Air recirculation mode
Press the button.
Air distribution
air distribution to the upper body via the vents in the dash panel.
air distribution to footwell.
air distribution to the upper body and the footwell.
air distribution to the windscreen and the footwell.
air distribution to the windscreen.
| Defrost function
Manual air conditioning system: turn the right rotary knob to position Fig. 91
Climatronic: press the button Fig. 92
Manual air conditioning system: in the defrost function, the air recirculation mode switches off
and the air conditioning compressor for the cooling system switches on in order to dehumidify the
air. When the defrost function is switched on, it is not possible to switch the air recirculation mode
on or the air conditioning compressor off1).
Rear window heating
Press to switch the rear window heating on or off while the engine is running.
The rear window heating will switch off after 10 minutes at the latest.
Recommended settings for manual air conditioning system
Switch off air recirculation mode.
Set blower to setting or .
Page 172 of 502

file Driving profile selection and 4MOTION Active Control
Avoid driving at full throttle
Never drive the vehicle at its top speed. The drag coefficient increases at excessively high speeds.
This in turn increases the force needed to move the vehicle.
Reduce idling
Pull away immediately with low engine speeds. If you are stopped for a long period, do not allow the
engine to idle but switch it off, e.g. when in a traffic jam or at a railway crossing.
In vehicles with an activated start/stop system, the engine can switch off automatically when the
vehicle is stopping and when the vehicle is stationary Start/stop system
Refuel moderately
A full fuel tank increases the weight of the vehicle. A fuel tank that is half or two thirds of the way
full is sufficient for journeys in urban traffic in particular.
Avoid short journeys
A cold engine has very high fuel consumption. The optimum operating temperature is reached only
after driving a few kilometres. The fuel consumption is above average at very low ambient
temperatures, e.g. in winter Fig. 97
Carry out regular maintenance
Regular maintenance is an essential prerequisite for economical driving and increases the service life
of the vehicle.
Observe the tyre pressures
Low tyre pressures does not just mean greater wear, but also increase the rolling resistance of the
tyres and thus the fuel consumption. Use optimised rolling resistance tyres.
Adjust the tyre pressure according to the load. Observe the information on the tyre pressure sticker
Useful information about wheels and tyres
Tyre Pressure Loss Indicator or Tyre Pressure Monitoring System Tyre monitoring system
Use low viscosity engine oils
Fully synthetic engine oils with a low viscosity decrease frictional resistance in the engine and are
distributed better and more quickly, especially during cold starts.
Do not drive with unnecessary loads in the vehicle
You can reduce fuel consumption by clearing out the luggage compartment before setting off, for
example by removing empty drink crates or unused child seats.
To keep the vehicle's air resistance as low as possible, remove any add-on parts and equipment such
as ski racks, bicycle racks and roof carriers once you have finished using them.
Save electrical energy
Page 176 of 502

WARNING
New brake pads will not have the optimal braking effect when first fitted.
New brake pads cannot generate the full braking effect during the first 300 km and must first be run
in. A reduced braking effect can be increased by applying more pressure to the brake pedal.
In order to reduce the risk of accidents, serious injuries and the loss of control over the vehicle, you
must drive particularly carefully when driving with new brake pads.
Never drive too close to other vehicles during the run-in time for the new brake pads and never
create a driving situation that will place a heavy load on the brakes.
WARNING
Overheated brakes reduce the braking effect and considerably increase the braking distance.
When driving downhill, the brakes are placed under particular strain and become hot very quickly.
Before driving down a long, steep gradient, reduce speed and change to a lower gear (with manual
gearboxes or in Tiptronic mode with the automatic gearbox). This will make use of the engine
braking effect and relieve the load on the brakes.
Non-standard or damaged front spoilers could restrict the airflow to the brakes and cause them to
overheat.
WARNING
Wet brakes or brakes coated with ice or road salt react more slowly and require longer braking
distances.
Carefully apply the brakes to test them.
Always dry brakes and clean off any coating of ice and salt with a few cautious applications of the
brake when visibility, weather, road and traffic conditions permit.
WARNING
Driving without the brake servo can considerably increase the braking distance and thus cause
accidents and serious injuries.
Never switch the engine or ignition off while the vehicle is in motion.
If the brake servo does not function or the vehicle is being towed, the brake pedal will have to be
depressed more forcefully as the braking distance will be increased due to the lack of assistance for
the brake system.
Page 190 of 502

Fig. 102 In the upper part of the centre console: button for the start/stop system.
The start/stop system automatically switches the engine off when the vehicle is coming to a stop
and when stationary. When required, the engine restarts automatically.
Switching on the start/stop system
The function is automatically activated every time the ignition is switched on. The instrument cluster
display will show information about the current status.
Further information on start/stop mode can be accessed in the Infotainment system using the
button or function button and the Vehicle, Selection, Vehicle status function buttons. This
information also applies to coasting.
Always switch off the start/stop system manually when driving through water.
Indicator lamps
If the indicator lamp lights up, the start/stop system is available and automatic engine stop is
active.
If the indicator lamp lights up, the start/stop system is not available or the start/stop system has
started the engine automatically Conditions for an automatic restart
The display on the instrument cluster may show the status of the start/stop system.
In addition, start/stop information on the current status of the start/stop system can be displayed as
required in Infotainment systems with a navigation function. Touch the i in the start/stop
information to obtain further information on the status.
Vehicles with a manual gearbox
Disengage the gear and release the clutch pedal when the vehicle is coming to a stop, or when it is
stationary. The engine is stopped.
Depress the clutch pedal to restart the engine.
Important preconditions for automatic engine switch-off
The driver is wearing their seat belt.
The driver door is closed.
Page 200 of 502

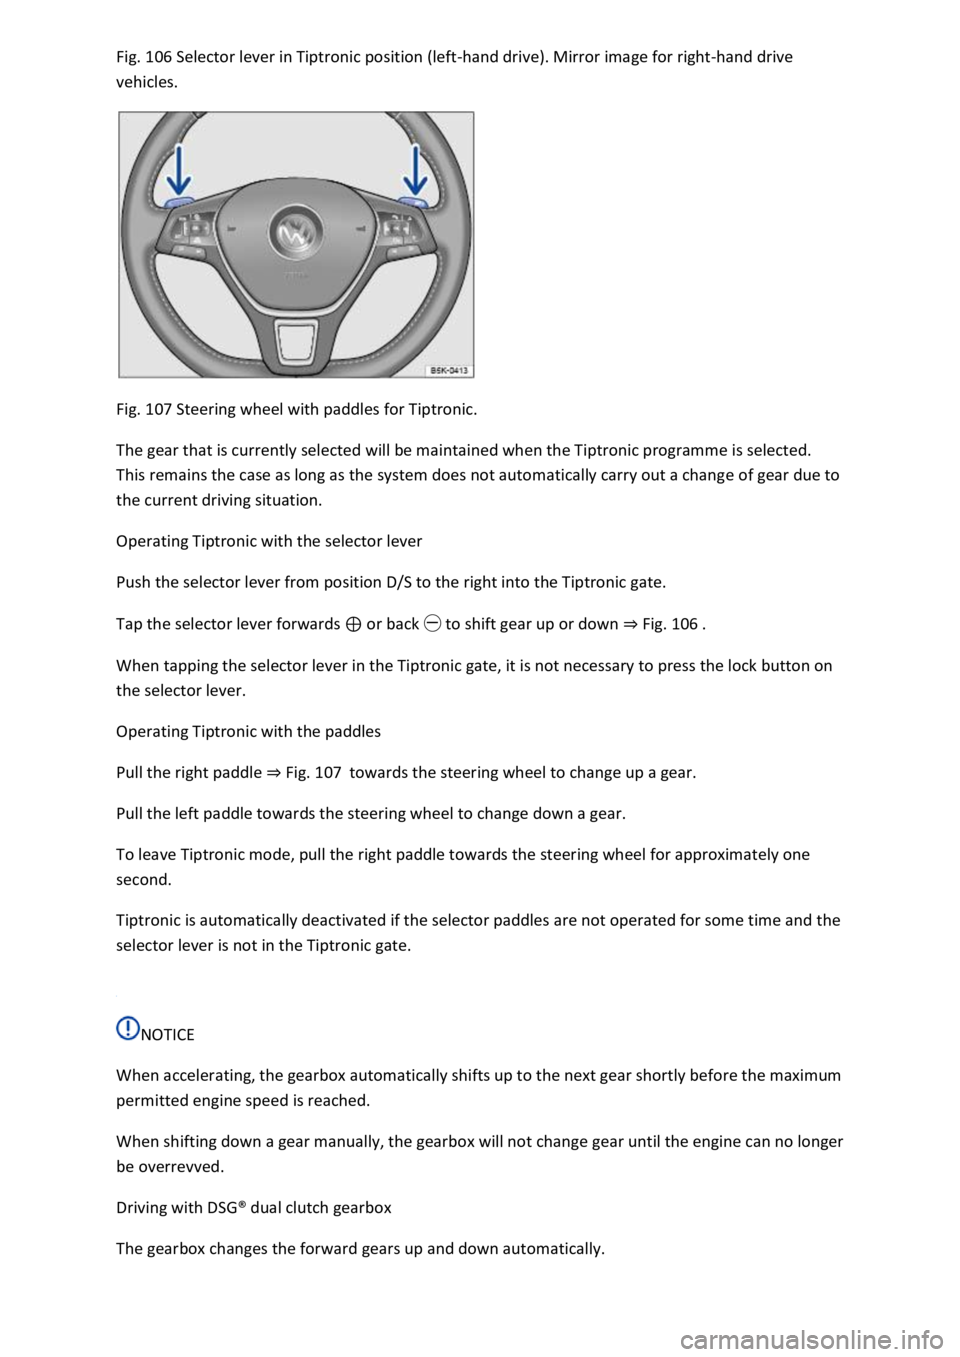
106 Selector lever in Tiptronic position (left-hand drive). Mirror image for right-hand drive
vehicles.
Fig. 107 Steering wheel with paddles for Tiptronic.
The gear that is currently selected will be maintained when the Tiptronic programme is selected.
This remains the case as long as the system does not automatically carry out a change of gear due to
the current driving situation.
Operating Tiptronic with the selector lever
Push the selector lever from position D/S to the right into the Tiptronic gate.
Tap the selector lever forwards or back to shift gear up or down Fig. 106
When tapping the selector lever in the Tiptronic gate, it is not necessary to press the lock button on
the selector lever.
Operating Tiptronic with the paddles
Pull the right paddle Fig. 107towards the steering wheel to change up a gear.
Pull the left paddle towards the steering wheel to change down a gear.
To leave Tiptronic mode, pull the right paddle towards the steering wheel for approximately one
second.
Tiptronic is automatically deactivated if the selector paddles are not operated for some time and the
selector lever is not in the Tiptronic gate.
NOTICE
When accelerating, the gearbox automatically shifts up to the next gear shortly before the maximum
permitted engine speed is reached.
When shifting down a gear manually, the gearbox will not change gear until the engine can no longer
be overrevved.
Driving with DSG
Page 272 of 502

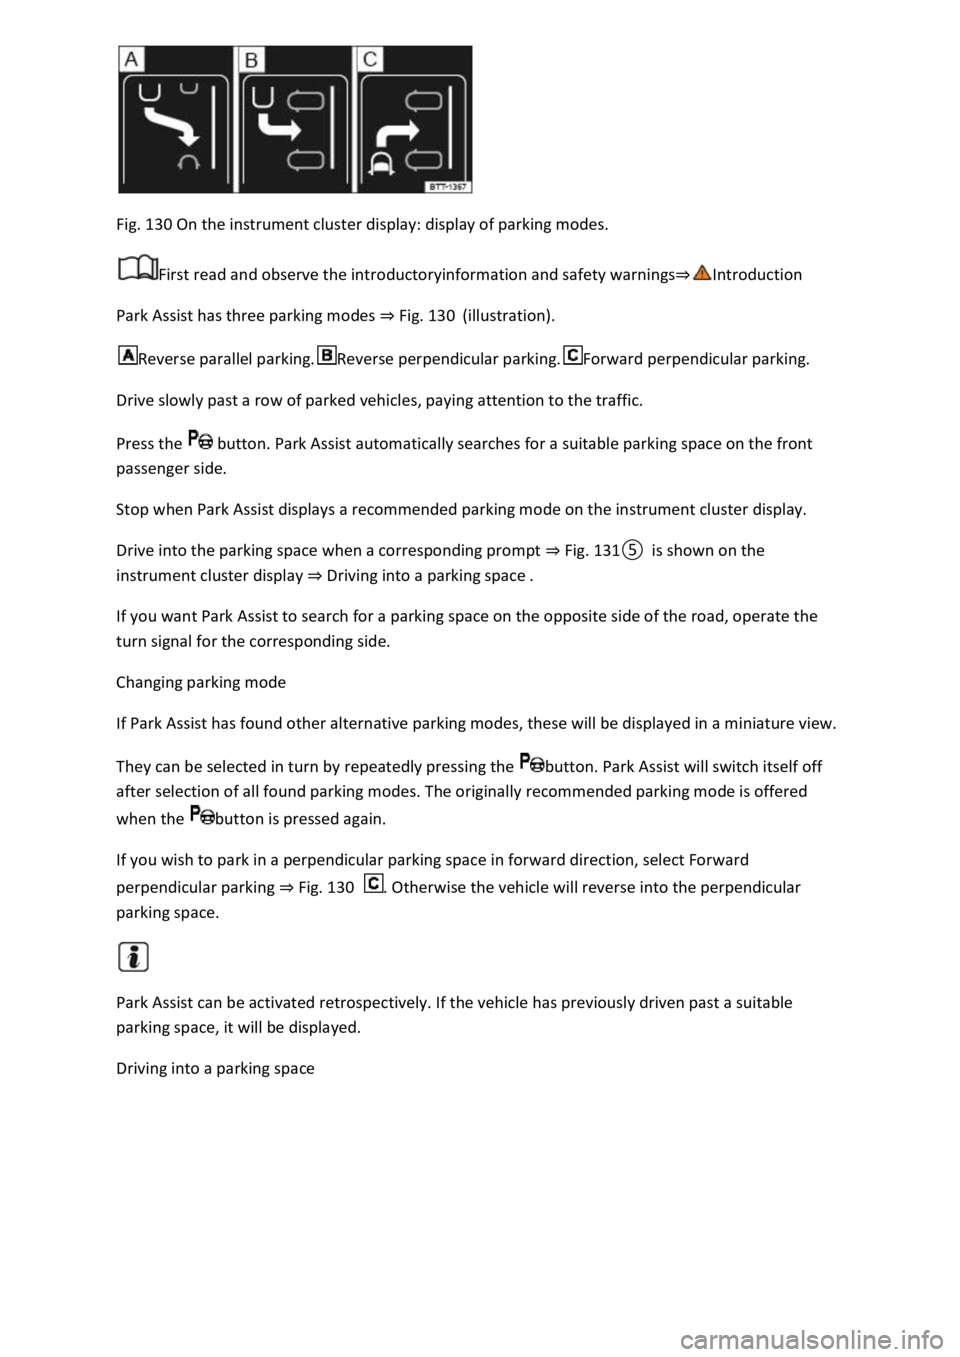
Fig. 130 On the instrument cluster display: display of parking modes.
First read and observe the introductoryinformation and safety warnings
Park Assist has three parking modes Fig. 130(illustration).
Reverse parallel parking.Reverse perpendicular parking.Forward perpendicular parking.
Drive slowly past a row of parked vehicles, paying attention to the traffic.
Press the button. Park Assist automatically searches for a suitable parking space on the front
passenger side.
Stop when Park Assist displays a recommended parking mode on the instrument cluster display.
Drive into the parking space when a corresponding prompt Fig.
Driving into a parking space
If you want Park Assist to search for a parking space on the opposite side of the road, operate the
turn signal for the corresponding side.
Changing parking mode
If Park Assist has found other alternative parking modes, these will be displayed in a miniature view.
They can be selected in turn by repeatedly pressing the button. Park Assist will switch itself off
after selection of all found parking modes. The originally recommended parking mode is offered
when the button is pressed again.
If you wish to park in a perpendicular parking space in forward direction, select Forward
perpendicular parking Fig. 130. Otherwise the vehicle will reverse into the perpendicular
parking space.
Park Assist can be activated retrospectively. If the vehicle has previously driven past a suitable
parking space, it will be displayed.
Driving into a parking space
Page 284 of 502

ge compartment is locked when the key
slot is vertical.
To open: pull the opening lever.
To close: push the stowage compartment upwards.
WARNING
If the stowage compartment on the front passenger side is left open, this can increase the risk of
serious injury in the event of an accident or during sudden braking or driving manoeuvres.
Always keep the stowage compartment closed while the vehicle is in motion.
NOTICE
In some vehicle models, the stowage compartment on the front passenger side contains apertures.
Small items could fall through the apertures and become trapped behind the trim. This could cause
unusual noises and damage to the vehicle.
Stow small objects only in the stowage areas that are intended for such items.
Stowage compartment in the front centre armrest
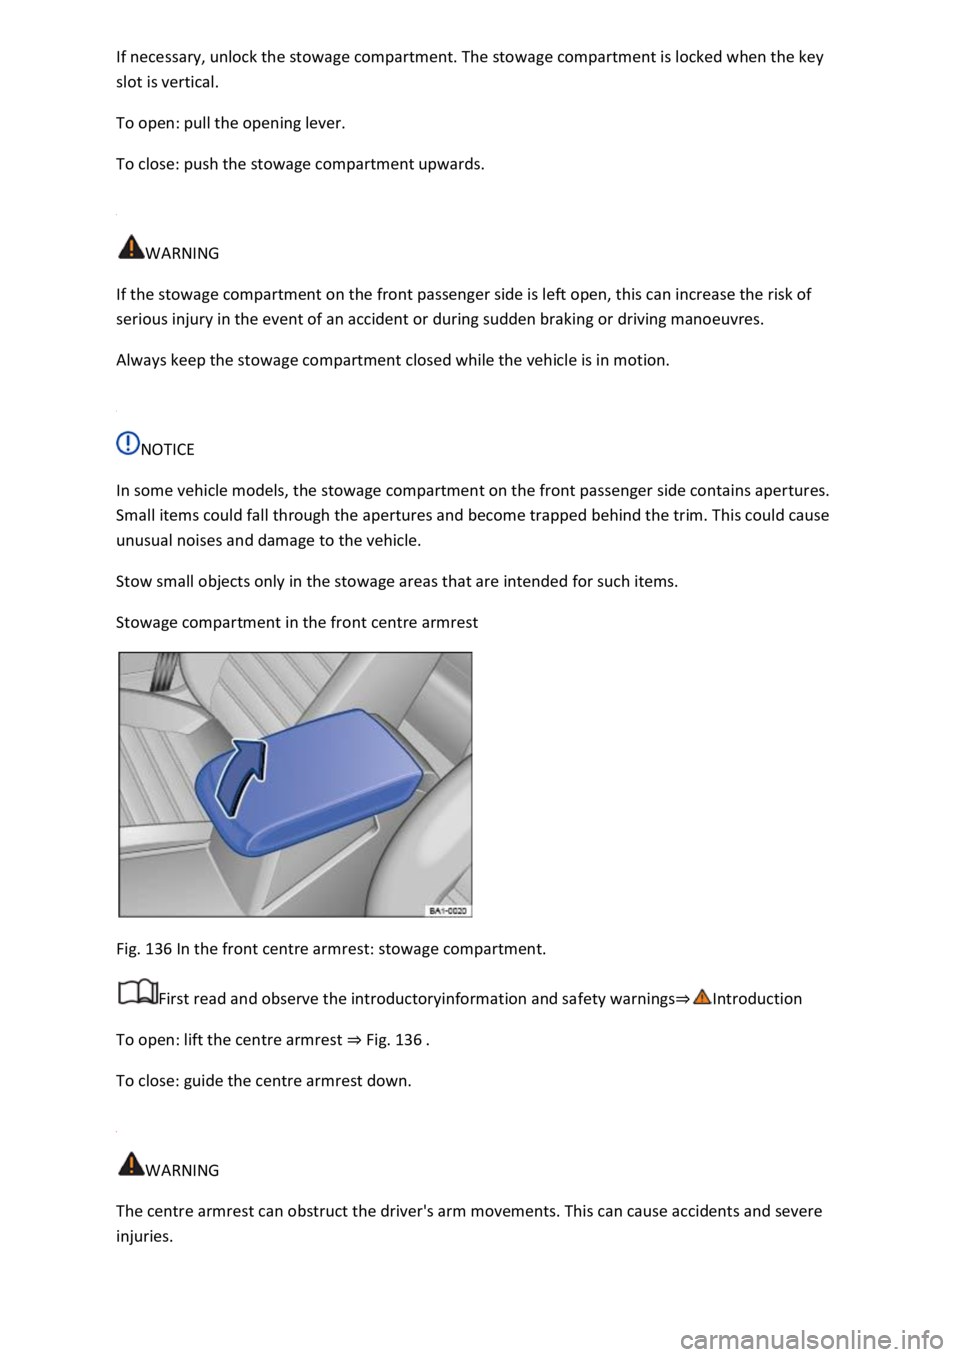
Fig. 136 In the front centre armrest: stowage compartment.
First read and observe the introductoryinformation and safety warnings
To open: lift the centre armrest Fig. 136
To close: guide the centre armrest down.
WARNING
The centre armrest can obstruct the driver's arm movements. This can cause accidents and severe
injuries.
Page 304 of 502

-through hatch is folded forwards or backwards carelessly or in an
uncontrolled way.
Never fold the load-through hatch forwards or backwards while the vehicle is in motion.
Ensure that the seat belt is not trapped or damaged when folding back the load-through hatch.
Always keep hands, fingers, feet and other body parts away from the swivel area when folding the
load-through hatch forwards and backwards.
The load-through hatch has not been secured properly if the red marking can still be seen on the
locking indicator. Always ensure that the red marking is never visible when the load-through hatch is
in the upright position.
Passengers (children in particular) must not use this seat if the load-through hatch is folded forward
or is not engaged securely into place.
Roof carrier
Introduction
This chapter contains information on the followingsubjects:
Securing roof carriers
Loading roof carriers
Notes on use
Depending on the model, the vehicle may be designed for fitting a roof carrier.
Roof carriers can be used to transport bulky items on the roof of the vehicle.
If you are unsure whether a roof carrier can be fitted on your vehicle, please contact a specialist
workshop. Volkswagen recommends using a Volkswagen dealership for this purpose.
Only roof carriers that have been approved by Volkswagen for the vehicle must be used.
If the vehicle is not approved for use with a roof carrier, do not use or retrofit a roof carrier.
WARNING
When transporting heavy or bulky objects on the roof carrier, the vehicle's handling will change due
to a shift in the centre of gravity and an increased susceptibility to crosswinds.
Always secure loads properly using suitable and undamaged lashing, retaining or securing straps.
Loads that are large, heavy, bulky, long or flat will have a negative effect on the vehicle
aerodynamics, centre of gravity and overall handling.
Avoid abrupt and sudden driving and braking manoeuvres.
Always adapt your speed and driving style to suit visibility, weather, road and traffic conditions.