Page 428 of 672
4286-1. Using the air conditioning system
NOTICE
■To prevent damage to the seat heaters/seat ventilators
Do not put heavy objects that have an uneven surface on the sea t and do
not stick sharp objects (needles, nails, etc.) into the seat.
■ To prevent battery discharge
Turn the seat heaters/seat ventilators off when the engine is n ot running.
Page 431 of 672
4316-2. Using the interior lights
6
Interior features
Ty p e B
On/off
“OFF”
The cargo lamp can be individually
turned on or off.
“DOOR”
The cargo lamp comes on when a
door is opened. They turn off when
the doors are closed.
“ON”
The cargo lamp cannot be individually turned off.
■Illuminated entry system
The lights automatically turn on/off according to the engine sw itch position,
whether the doors are locked/unlocked, and whether the doors are opened/
closed.
■ To prevent battery discharge
If the following lights remain on when the door is not fully closed and the main
switch is in the “DOOR” position, the lights will go off automatically after 20
minutes:
●Personal lights
● Interior lights
● Cargo lamp
■ Customization that can be configured at Toyota dealer
Settings (e.g. the time elapsed before lights turn off) can be changed.
(Customizable features: P. 624)
Cargo lamp main switch
1
2
3
Page 451 of 672
4516-4. Using the other interior features
6
Interior features
The clock is displayed on the
screen.
■Setting the clock
Vehicles with Entune Audio (Multimedia system types: P. 322)
P. 3 3 1
Vehicles with Entune Audio P lus or Entune Premium Audio
(Multimedia system types: P. 322)
Refer to the “NAVIGATION AND MULTIMEDIA SYSTEM
OWNER’S MANUAL”.
■ The clock is displayed when
The engine switch is in the “ACC” or “ON” position.
■ When disconnecting and reco nnecting battery terminals
The clock data will be reset.
Clock
Page 456 of 672

4566-4. Using the other interior features
Garage door opener
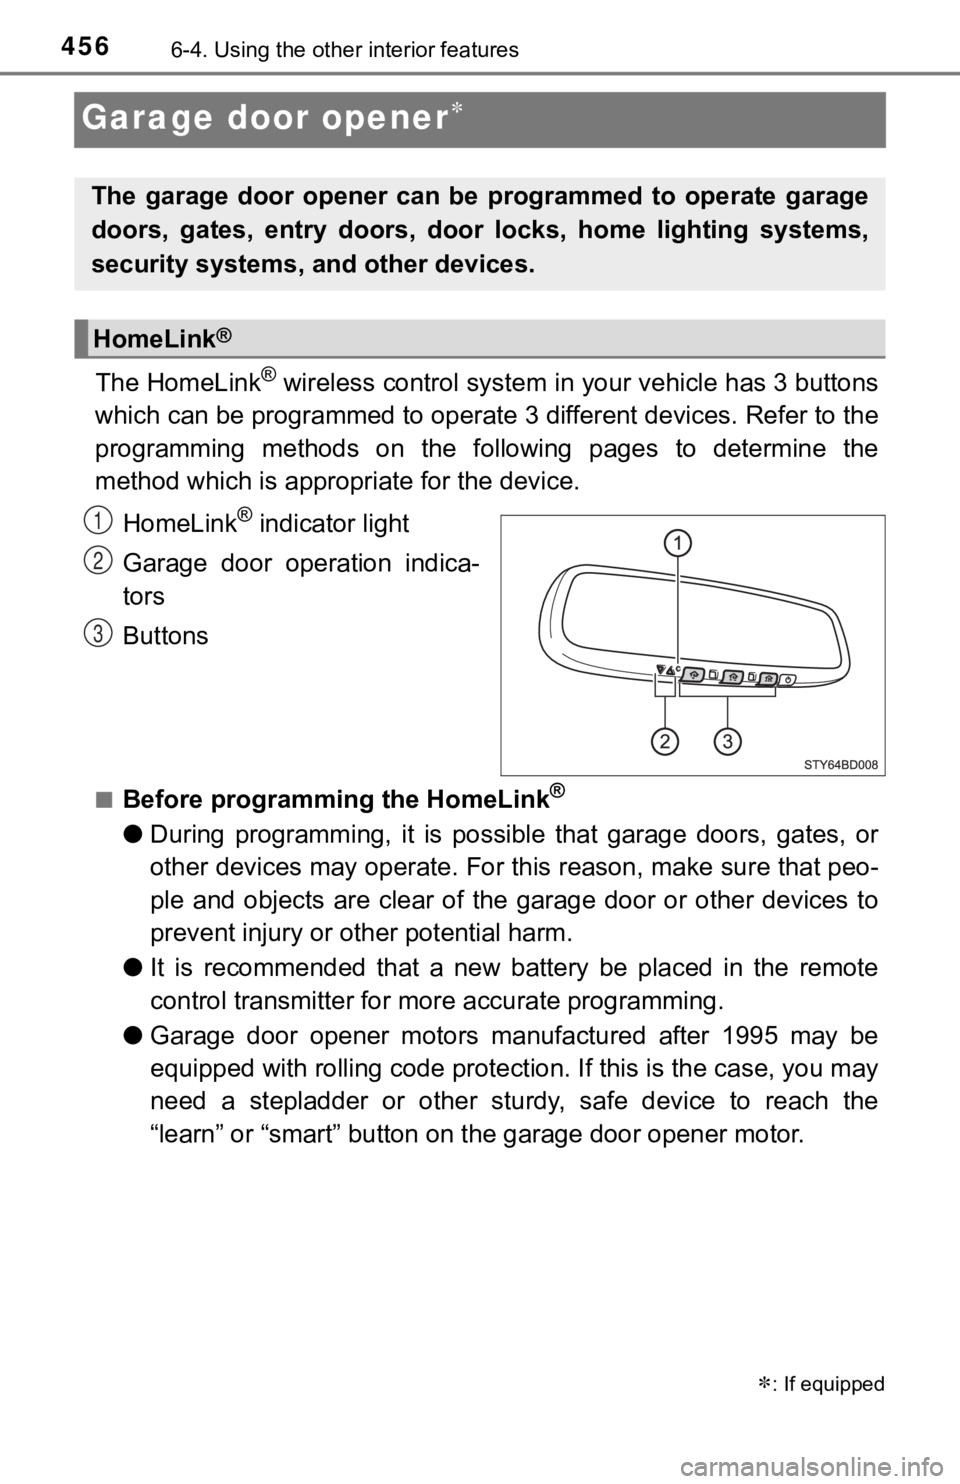
The HomeLink® wireless control system in your vehicle has 3 buttons
which can be programmed to operate 3 different devices. Refer to the
programming methods on the following pages to determine the
method which is approp riate for the device.
HomeLink
® indicator light
Garage door operation indica-
tors
Buttons
■Before programming the HomeLink®
● During programming, it is possible that garage doors, gates, or
other devices may operate. For this reason, make sure that peo-
ple and objects are clear of the garage door or other devices t o
prevent injury or other potential harm.
● It is recommended that a new battery be placed in the remote
control transmitter for mo re accurate programming.
● Garage door opener motors manufactured after 1995 may be
equipped with rolling code pro tection. If this is the case, you may
need a stepladder or other sturdy, safe device to reach the
“learn” or “smart” button on the garage door opener motor.
: If equipped
The garage door opener can be programmed to operate garage
doors, gates, entry doors, door locks, home lighting systems,
security systems, and other devices.
HomeLink®
1
2
3
Page 462 of 672
4626-4. Using the other interior features
Press and hold the 2 outside but-
tons for 10 seconds until the
HomeLink
® indicator light
changes from continuously lit
orange to rapidly flashing green.
If you sell your vehicle, be sure to
erase the programs stored in the
HomeLink
® memory.
■ Codes stored in the HomeLink® memory
● The registered codes are not erased even if the battery cable i s discon-
nected.
● If learning failed when registering a different code to a HomeL ink
® button
that already has a code registered to it, the already registere d code will not
be erased.
■ Before programming
●Install a new battery in the transmitter.
● The battery side of the transmitter must be pointed away from the Home-
Link
®.
Erasing the entire HomeLink® memory (all three codes)
Page 467 of 672

4676-4. Using the other interior features
6
Interior features
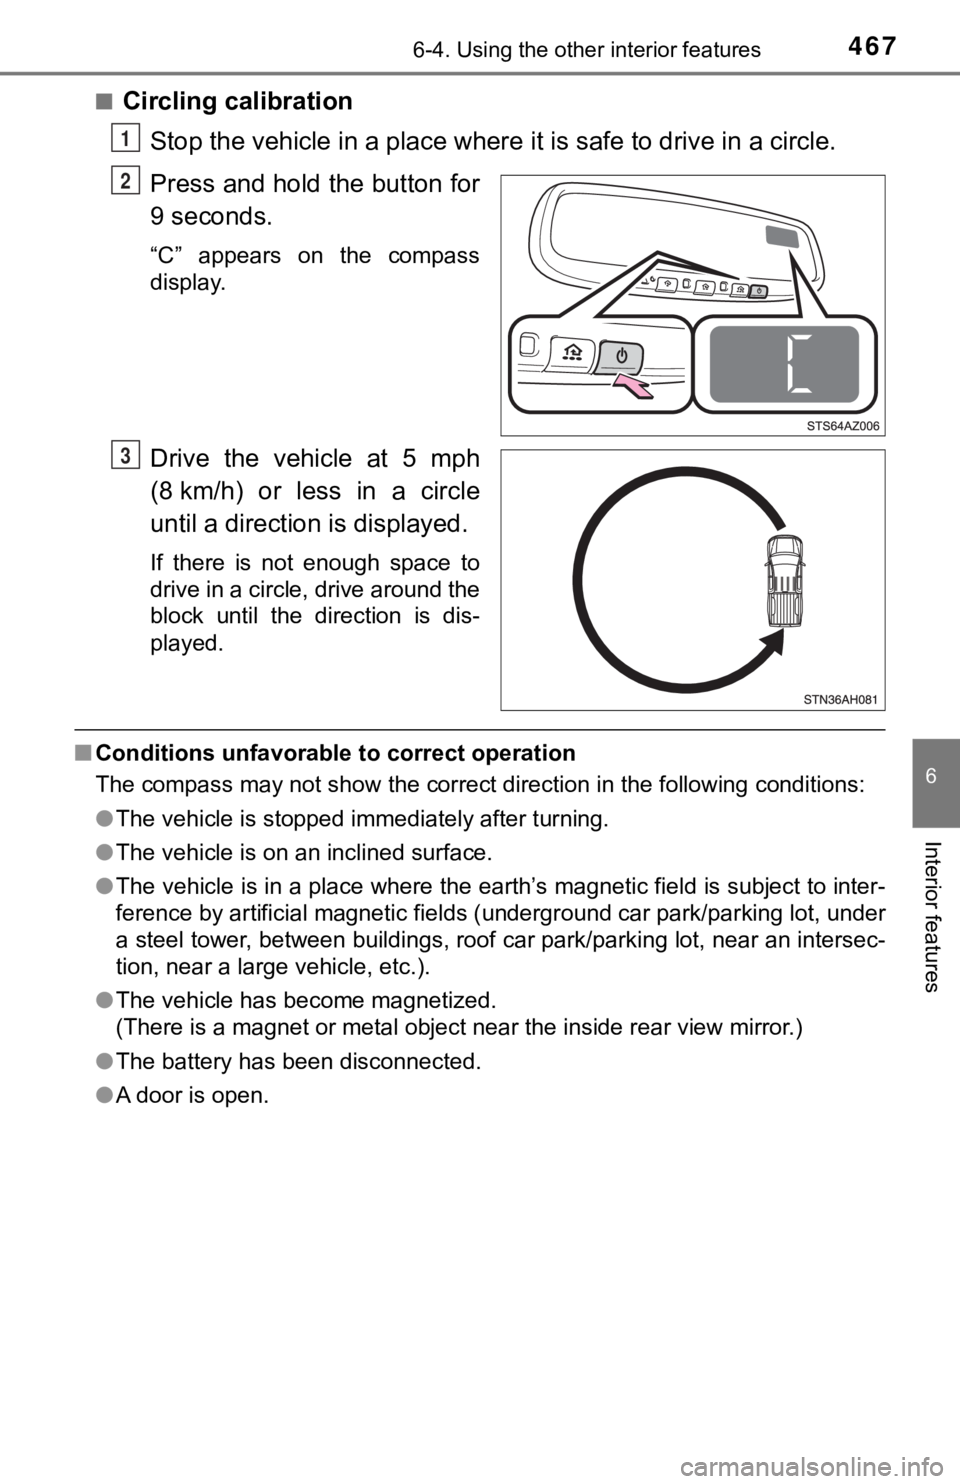
■Circling calibrationStop the vehicle in a place where it is safe to drive in a circle.
Press and hold the button for
9 seconds.
“C” appears on the compass
display.
Drive the vehicle at 5 mph
(8 km/h) or less in a circle
until a direction is displayed.
If there is not enough space to
drive in a circle, drive around the
block until the direction is dis-
played.
■ Conditions unfavorable to correct operation
The compass may not show the correct direction in the following conditions:
● The vehicle is stopped immediately after turning.
● The vehicle is on an inclined surface.
● The vehicle is in a place where the earth’s magnetic field is subject to inter-
ference by artificial magnetic fields (underground car park/par king lot, under
a steel tower, between buildings, roof car park/parking lot, near an intersec-
tion, near a large vehicle, etc.).
● The vehicle has become magnetized.
(There is a magnet or metal object near the inside rear view mi rror.)
● The battery has been disconnected.
● A door is open.
1
2
3
Page 469 of 672
469
7Maintenance and care
7-1. Maintenance and careCleaning and protecting the vehicle exterior .......... 470
Cleaning and protecting the vehicle interior ........... 473
7-2. Maintenance Maintenance requirements ................... 476
General maintenance ........ 478
Emission inspection and maintenance (I/M)
programs ......................... 481 7-3. Do-it-yourself maintenance
Do-it-yourself service precautions ..................... 482
Hood ................................. 484
Engine compartment ......... 485
Tires .................................. 495
Tire inflation pressure ....... 507
Wheels .............................. 510
Air conditioning filter.......... 513
Wireless remote control battery ............................. 516
Checking and replacing fuses ............................... 518
Light bulbs......................... 521
Page 477 of 672

4777-2. Maintenance
7
Maintenance and care
■Resetting the message indicating ma intenance is required (U.S.A. only)
After the required maintenance is performed according to the ma intenance
schedule, please reset the message.
To reset the message, follow the procedure described below:
Press “<” or “>” of meter control switches and select on the m ulti-infor-
mation display.
Press “
” or “” of meter control switches and select “Vehicle Settings”, and
then press .
Press “
” or “” of meter control switches and select “Maintenance Reset”,
and then press .
Select the “YES” and press .
■ Allow inspection and repairs to b e performed by a Toyota dealer
● Toyota technicians are well-trained specialists and are kept up to date with
the latest service information. They are well informed about th e operations
of all systems on your vehicle.
● Keep a copy of the repair order. It proves that the maintenance that has
been performed is under warranty coverage. If any problem should arise
while your vehicle is under warranty, your Toyota dealer will p romptly take
care of it.
WARNING
■ If your vehicle is no t properly maintained
Improper maintenance could result in serious damage to the vehi cle and
possible death or serious injury.
■ Handling of the battery
● Engine exhaust, some of its constituents, and a wide variety of automobile
components contain or emit chemicals known to the State of California to
cause cancer and birth defects and other reproductive harm. Wor k in a
well ventilated area.
● Oils, fuels and fluids contained in vehicles as well as waste p roduced by
component wear contain or emit chemicals known to the State of Califor-
nia to cause cancer and birth defects or other reproductive har m. Avoid
exposure and wash any affected area immediately.
● Battery posts, terminals and related accessories contain lead a nd lead
compounds which are known to cause brain damage. Wash your hand s
after handling. ( P. 492)
1
2
3
4