2018 TOYOTA PROACE ECU
[x] Cancel search: ECUPage 186 of 516

186
"ISOFIX" mountings
The incorrect installation of a child seat in a vehicle compromises the child's protection in the event of an accident.
For information on the possibilities for installing ISOFIX child seats in your vehicle, refer to the locations table.
Observe strictly the fitting instructions provided with the child seat.
Your vehicle has been approved to the latest ISOFIX regulation.If fitted on your vehicle, the regulation ISOFIX mountings are located by labels.The mountings comprise three rings for each seat:- Two front rings A, located between the vehicle seat backrest and cushion, indicated by an "ISOFIX" marking,- If fitted to your vehicle, a rear ring B, located behind the vehicle's seat, called the Top Tether, for securing the upper strap, indicated by a "Top Tether" marking.The Top Tether is used to secure the upper strap of child seats that have one. In the event of a front impact, this system limits the for ward tipping of the child seat.
This ISOFIX mounting system provides fast, reliable and safe fitting of the child seat in your vehicle.The ISOFIX child seats are fitted with two latches which are secured on the two front rings A.Some also have an upper strap which is attached to the rear ring B.To secure the child seat to the Top Tether:- remove and stow the head restraint before installing a child seat on this seat (refit it once the child seat has been removed),- pass the child seat upper strap over the top of the seat backrest, between the apertures for the head restraint rods,
- fix the hook on the end of the upper strap to the rear ring B,- tighten the upper strap.
Safety
Page 187 of 516
187
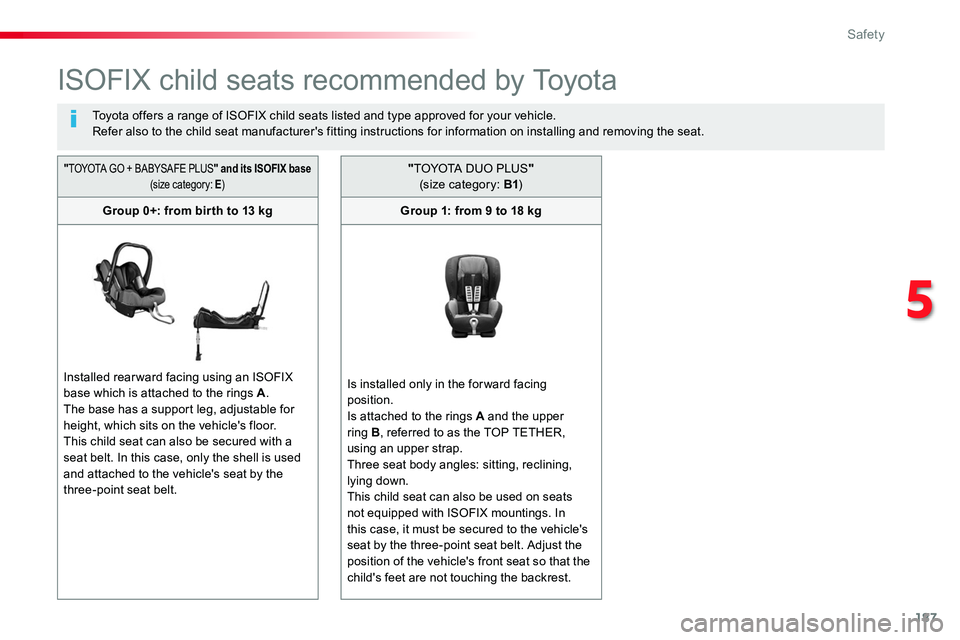
ISOFIX child seats recommended by Toyota
Toyota offers a range of ISOFIX child seats listed and type approved for your vehicle.Refer also to the child seat manufacturer's fitting instructions for information on installing and removing the seat.
"TOYOTA GO + BABYSAFE PLUS" and its ISOFIX base (size category: E)
Group 0+: from bir th to 13 kg
Installed rearward facing using an ISOFIX base which is attached to the rings A.The base has a support leg, adjustable for height, which sits on the vehicle's floor.This child seat can also be secured with a seat belt. In this case, only the shell is used and attached to the vehicle's seat by the three-point seat belt.
"TOYOTA DUO PLUS" (size category: B1)
Group 1: from 9 to 18 kg
Is installed only in the for ward facing position.Is attached to the rings A and the upper
ring B, referred to as the TOP TETHER, using an upper strap.Three seat body angles: sitting, reclining, lying down.This child seat can also be used on seats not equipped with ISOFIX mountings. In this case, it must be secured to the vehicle's seat by the three-point seat belt. Adjust the position of the vehicle's front seat so that the child's feet are not touching the backrest.
5
Safety
Page 189 of 516

189
Weight of the child / indicative age
Less than 10 kg(group 0) Up to approx. 6 months
Less than 10 kg(group 0)Less than 13 kg (group 0+) Up to approx. 1 year
From 9 to 18 kg (group 1) From 1 to 3 years approx.
Type of ISOFIX child seatCotrearward facingrearward facingforward facing
ISOFIX size categor yFGCDECDABB1
Row 2 with individual seats in row 1
Left-hand outer seat-*
Centre seatNot ISOFIX
Right-hand outer seat-*
IUF Seat suitable for the installation of an Isofix Universal seat, For ward facing secured using the upper strap.IL Seat suitable for the installation of an Isofix semi-universaL seat either:- rear ward facing fitted with an upper strap or a support leg,- for ward facing fitted with a support leg,- a cot fitted with an upper strap or a support leg.* Submitted for type approval.
For more information on the ISOFIX mountings and the upper strap, refer to the corresponding section.
Refit the head restraint when the child seat is removed.
X Seat not suitable for the installation of an ISOFIX child seat or cot of the weight group indicated.
5
Safety
Page 192 of 516
192
IUF Seat suitable for the installation of an Isofix Universal seat, For ward facing secured using the upper strap.IL Seat suitable for the installation of an Isofix semi-universaL seat either:- rear ward facing fitted with an upper strap or a support leg,- for ward facing fitted with a support leg,- a cot fitted with an upper strap or a support leg.
X Seat not suitable for the installation of an ISOFIX child seat or cot of the weight group indicated.
Refit the head restraint when the child seat is removed.
For more information on the ISOFIX mountings and in particular the upper strap, refer to the corresponding section.
Safety
Page 193 of 516
193
Child seatsInstalling a booster
cushion
Recommendations
The legislation on carrying a child on the front passenger seat is specific to each country. Refer to the legislation in force in the country in which you are driving.Deactivate the passenger front airbag when a rear ward facing child seat is installed on the front passenger seat. Otherwise, the child would risk being seriously injured or killed if the airbag were deployed.
For optimum installation of the forward facing child seat, ensure that the back of the child seat is as close as possible to the backrest of the vehicle's seat, or in contact if possible.The head restraint must be removed before installing a child seat with a backrest on the passenger seat.Ensure that the head restraint is stowed or attached securely so that it is not thrown around the vehicle in the event of sharp braking.Refit the head restraint as soon as the child seat is removed.
The incorrect installation of a child seat in a vehicle compromises the child's protection in the event of an accident.Check that there is no seat belt or seat belt buckle under the child seat as this could destabilise it.Remember to fasten the seat belts or the child seat harnesses keeping the slack in relation to the child's body to a minimum, even for short journeys.For the installation of a child seat using a seat belt, ensure that this is well tensioned on the child seat and that it is holding the child seat firmly against the seat of your vehicle. If your front passenger seat is adjustable, move it for ward if necessary.At the rear seats, always leave sufficient space between the front seat and:- a rear ward facing child seat,- the feet of a child seated in a for ward facing child seat.For this, move the front seat for ward and if necessary straighten its backrest.
Children at the front
The chest part of the seat belt must be positioned on the child's shoulder without touching the neck.Ensure that the lap part of the seat belt passes correctly over the child's thighs.Toyota recommends the use of a booster seat which has a back, fitted with a seat belt guide at shoulder level.
As a safety precaution, do not leave:- one or more children alone and unsupervised in a vehicle,- a child or an animal in a vehicle which is exposed to the sun, with the windows closed,- the keys within reach of children inside the vehicle.To prevent accidental opening of the doors, use the child lock.Take care not to open the rear windows by more than one third.To protect young children from the rays of the sun, fit side blinds on the rear windows.
5
Safety
Page 197 of 516

197
To assure the durability of your vehicle and your safety, remember that certain precautions, described hereafter, should be taken when driving your vehicle:
Load the vehicle correctly
With a load carried, the vehicle must remain within the maximum authorised weight, the Gross Vehicle Weight.To avoid upsetting the balance of the vehicle, the load should be centred and the heaviest part placed on the floor in front of the rear wheels.
Manoeuve cautiously, at
low speed
The dimensions of your vehicle differ from those of a light vehicle, in width, in height, as well as in length, and some obstacles will be more difficult to notice.Manoeuvre slowly.Before turning, check that there are no obstacles at mid-height along the sides.Before reversing, check that there are no obstacles, particularly at high level behind the vehicle.Be aware of the external dimensions, if ladders are fitted.
It is inadvisable to place heavy loads on a roof rack.Loading the roof rack also requires you not to exceed the maximum load on the roof rack anchorages. Observe the maximum authorised weight, available from Toyota dealers.Loads must be securely lashed down.Cargo that is not properly secured inside the vehicle can adversely affect the handling of the vehicle and create the risk of accident.If your vehicle is fitted with a drop-side back, the height and width of the load must remain within the overall dimensions of the vehicle.
Drive the vehicle in a
prudent and efficient way
Take corners gently.Anticipate the need to brake as the stopping distance is increased, particularly on wet or icy roads.Be aware of the effect of side winds on the vehicle.Effective eco-driving saves fuel; accelerate progressively, anticipate the need to slow down and adapt your speed to suit the situation.Indicate changes of direction well in advance
so that you are seen by other road users.
Take care
The tyres must be inflated to at least the pressures indicated on the label, even over-inflated by 0.2 to 0.3 bar for long journeys.After ensuring that no obstacle might prevent closing, guide the movement of the door at the right speed until it closes.
6
Driving
Page 231 of 516
231
MEM
On sharp acceleration, as when descending a steep hill, the speed limiter will not be able to prevent the vehicle from exceeding the programmed speed.The limiter is temporarily deactivated and the displayed programmed speed flashes.An audible signal accompanies the flashing of the programmed speed when exceeding the speed is not due to an action by the driver.
Flashing of the dashes indicates a fault with the speed limiter.Have it checked by an authorized Toyota dealer or repairer, or another duly qualified and equipped professional.
Operating faultTemporarily exceeding the
programmed speed
Switching off
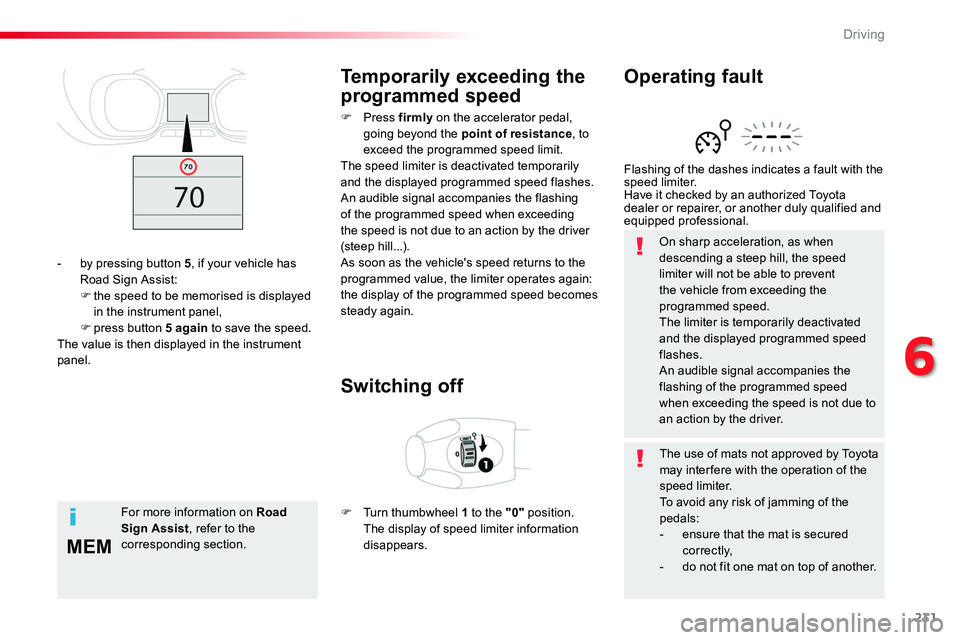
F Press firmly on the accelerator pedal, going beyond the point of resistance, to exceed the programmed speed limit.The speed limiter is deactivated temporarily and the displayed programmed speed flashes.An audible signal accompanies the flashing of the programmed speed when exceeding the speed is not due to an action by the driver (steep hill...).As soon as the vehicle's speed returns to the programmed value, the limiter operates again: the display of the programmed speed becomes steady again.
F Turn thumbwheel 1 to the "0" position. The display of speed limiter information
disappears.
- by pressing button 5, if your vehicle has Road Sign Assist:F the speed to be memorised is displayed in the instrument panel,F press button 5 again to save the speed.The value is then displayed in the instrument panel.
For more information on Road Sign Assist, refer to the corresponding section.
The use of mats not approved by Toyota may inter fere with the operation of the speed limiter.To avoid any risk of jamming of the pedals:- ensure that the mat is secured c o r r e c t l y,- do not fit one mat on top of another.
6
Driving
Page 235 of 516
235
Exceeding the programmed
speed
If the programmed speed is exceeded, the displayed speed flashes.Once the vehicle returns to the programmed speed, the display becomes steady again.
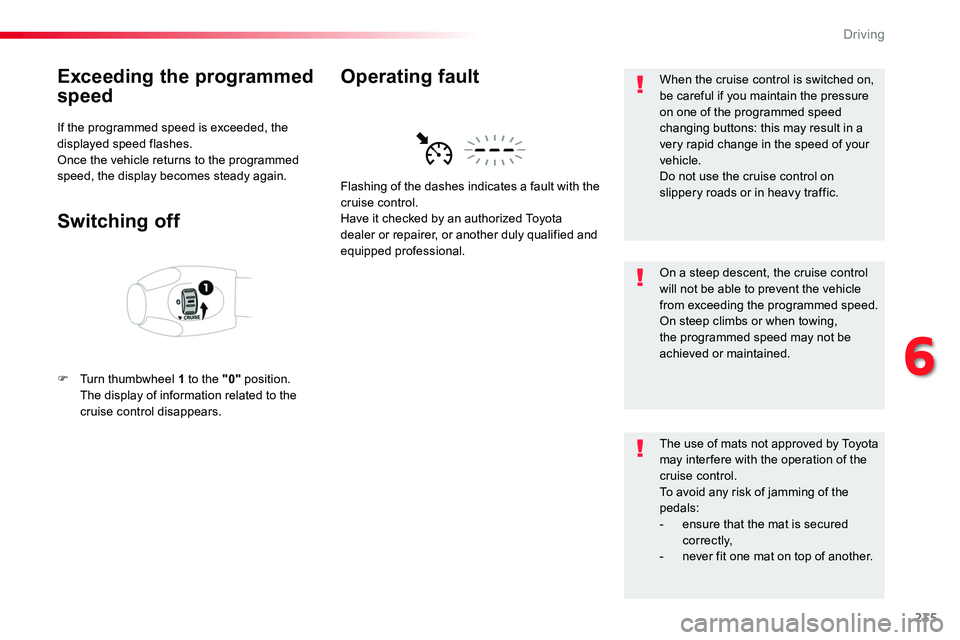
Switching off
F Turn thumbwheel 1 to the "0" position. The display of information related to the cruise control disappears.
Flashing of the dashes indicates a fault with the cruise control.Have it checked by an authorized Toyota
dealer or repairer, or another duly qualified and equipped professional.
Operating faultWhen the cruise control is switched on, be careful if you maintain the pressure on one of the programmed speed changing buttons: this may result in a very rapid change in the speed of your vehicle.Do not use the cruise control on slippery roads or in heavy traffic.
On a steep descent, the cruise control will not be able to prevent the vehicle from exceeding the programmed speed.On steep climbs or when towing, the programmed speed may not be achieved or maintained.
The use of mats not approved by Toyota may inter fere with the operation of the cruise control.To avoid any risk of jamming of the pedals:- ensure that the mat is secured c o r r e c t l y,- never fit one mat on top of another.
6
Driving