Page 65 of 292

65
3. OTHER SETTINGS
BASIC FUNCTION
2
MIRAI_Navi_USA_OM62029U_17CY
3. VEHICLE SETTINGS
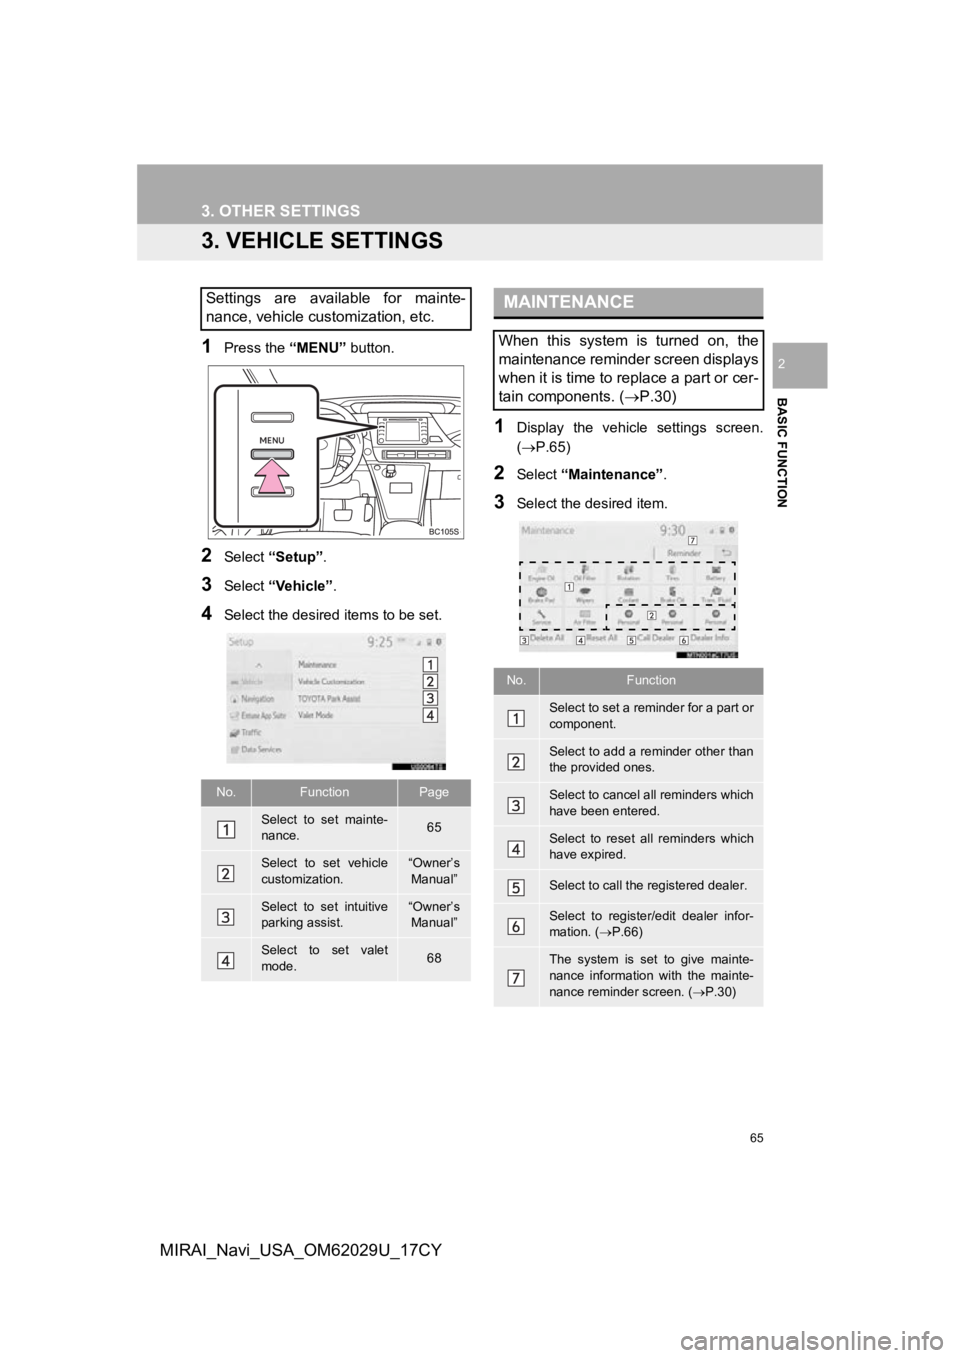
1Press the “MENU” button.
2Select “Setup” .
3Select “Vehicle”.
4Select the desired items to be set.
1Display the vehicle settings screen.
(P.65)
2Select “Maintenance” .
3Select the desired item.
Settings are available for mainte-
nance, vehicle customization, etc.
No.FunctionPage
Select to set mainte-
nance.65
Select to set vehicle
customization.“Owner’s
Manual”
Select to set intuitive
parking assist.“Owner’s Manual”
Select to set valet
mode.68
MAINTENANCE
When this system is turned on, the
maintenance reminder screen displays
when it is time to replace a part or cer-
tain components. ( P.30)
No.Function
Select to set a reminder for a part or
component.
Select to add a reminder other than
the provided ones.
Select to cancel all reminders which
have been entered.
Select to reset all reminders which
have expired.
Select to call the registered dealer.
Select to register/edit dealer infor-
mation. (P.66)
The system is set to give mainte-
nance information with the mainte-
nance reminder screen. ( P.30)
Page 66 of 292

66
3. OTHER SETTINGS
MIRAI_Navi_USA_OM62029U_17CY
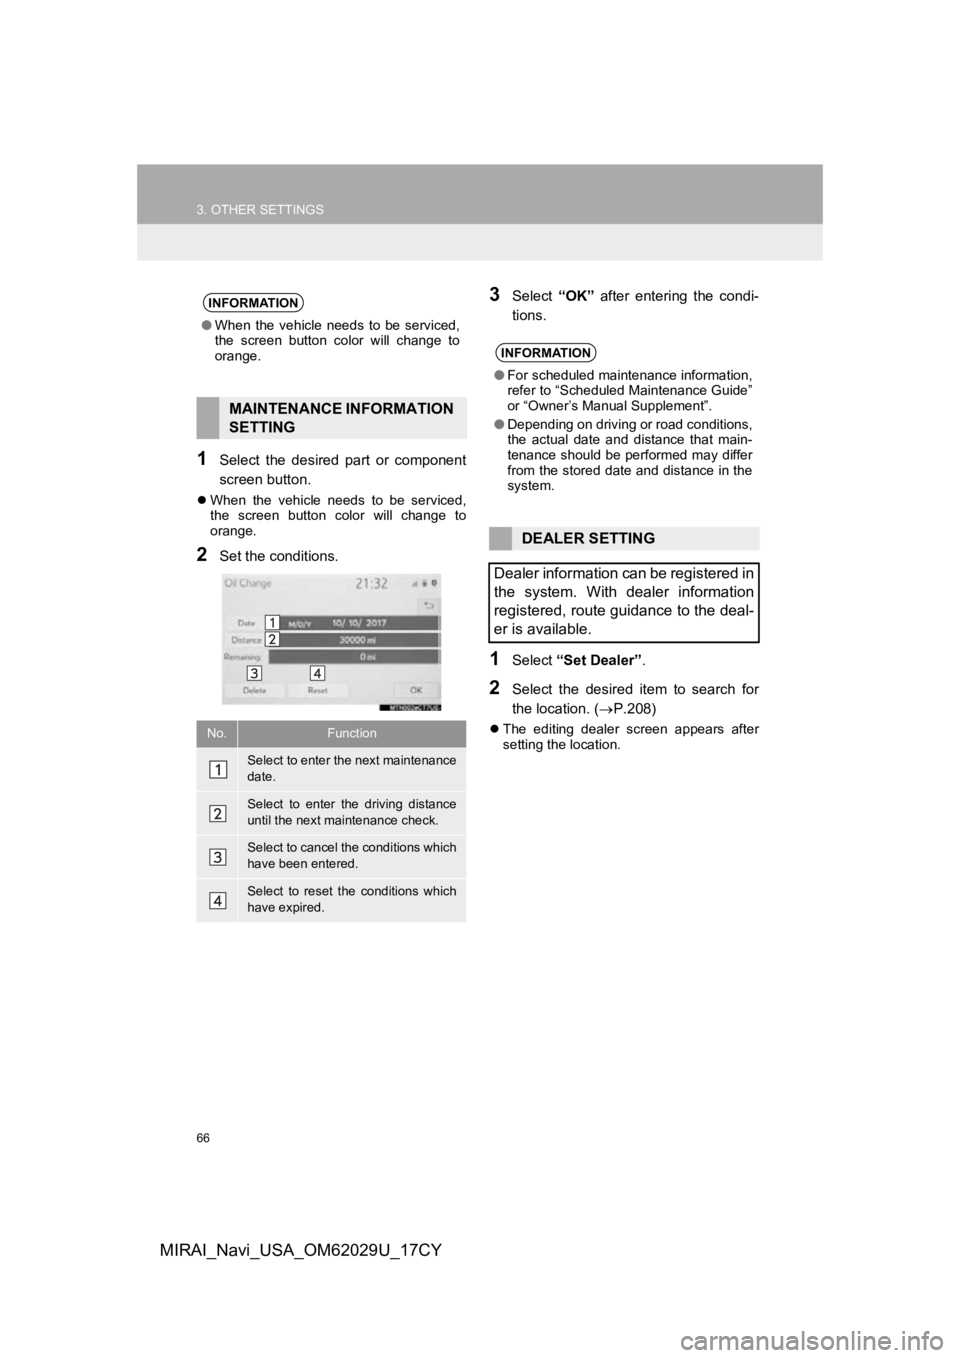
1Select the desired part or component
screen button.
When the vehicle needs to be serviced,
the screen button color will change to
orange.
2Set the conditions.
3Select “OK” after entering the condi-
tions.
1Select “Set Dealer” .
2Select the desired item to search for
the location. ( P.208)
The editing dealer screen appears after
setting the location.
INFORMATION
●When the vehicle needs to be serviced,
the screen button color will change to
orange.
MAINTENANCE INFORMATION
SETTING
No.Function
Select to enter the next maintenance
date.
Select to enter the driving distance
until the next maintenance check.
Select to cancel the conditions which
have been entered.
Select to reset the conditions which
have expired.
INFORMATION
●For scheduled maintenance information,
refer to “Scheduled Maintenance Guide”
or “Owner’s Manual Supplement”.
● Depending on driving or road conditions,
the actual date and distance that main-
tenance should be performed may differ
from the stored date and distance in the
system.
DEALER SETTING
Dealer information can be registered in
the system. With dealer information
registered, route guidance to the deal-
er is available.
Page 67 of 292
67
3. OTHER SETTINGS
BASIC FUNCTION
2
MIRAI_Navi_USA_OM62029U_17CY
3Select the desired items to be edited.
■EDITING DEALER OR CONTACT
NAME
1Select “Dealer” or “Contact” .
2Enter the name and select “OK”.
■EDITING THE LOCATION
1Select “Location” .
2Scroll the map to the desired point
(P.198) and select “Enter”.
■EDITING PHONE NUMBER
1Select “Phone #” .
2Enter the phone number and select
“OK”.No.FunctionPage
Select to enter the name of
a dealer.67
Select to enter the name of
a dealer member.67
Select to set the location.67
Select to enter the phone
number.67
Select to delete the dealer
information displayed on
the screen.
Select to set the displayed
dealer as a destination.219
Page 68 of 292

68
3. OTHER SETTINGS
MIRAI_Navi_USA_OM62029U_17CY
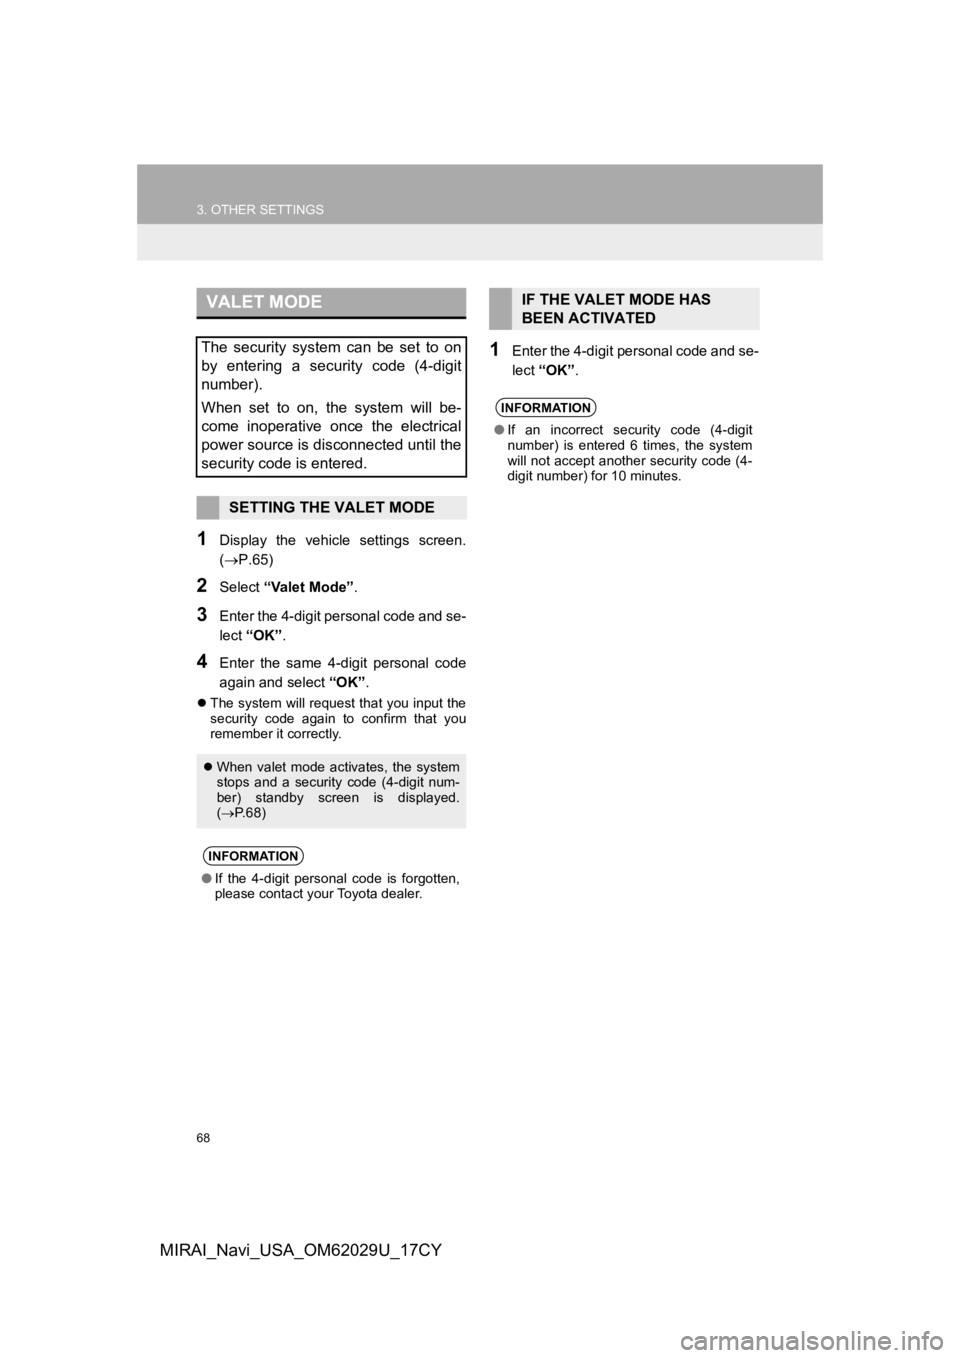
1Display the vehicle settings screen.
(P.65)
2Select “Valet Mode” .
3Enter the 4-digit personal code and se-
lect “OK” .
4Enter the same 4-d igit personal code
again and select “OK”.
The system will request that you input the
security code again to confirm that you
remember it correctly.
1Enter the 4-digit personal code and se-
lect “OK” .
VALET MODE
The security system can be set to on
by entering a security code (4-digit
number).
When set to on, the system will be-
come inoperative once the electrical
power source is disconnected until the
security code is entered.
SETTING THE VALET MODE
When valet mode activates, the system
stops and a security code (4-digit num-
ber) standby screen is displayed.
( P. 6 8 )
INFORMATION
●If the 4-digit personal code is forgotten,
please contact your Toyota dealer.
IF THE VALET MODE HAS
BEEN ACTIVATED
INFORMATION
●If an incorrect security code (4-digit
number) is entered 6 times, the system
will not accept another security code (4-
digit number) for 10 minutes.
Page 69 of 292
69
3. OTHER SETTINGS
BASIC FUNCTION
2
MIRAI_Navi_USA_OM62029U_17CY
Page 70 of 292
70
MIRAI_Navi_USA_OM62029U_17CY
1. QUICK REFERENCE .................... 72
2. SOME BASICS .............................. 74
TURNING THE SYSTEM ON AND OFF...................................................... 74
SELECTING AN AUDIO SOURCE ........ 74
DISC SLOT ............................................ 75
USB/AUX PORT..................................... 76
SOUND SETTINGS ............................... 76
AUDIO SCREEN ADJUSTMENT ........... 78
VOICE COMMAND SYSTEM ................ 79
1BASIC OPERATION
3
AUDIO/VISUAL SYSTEM
Page 71 of 292

3
71
1
2
3
4
5
6
7
8
9
MIRAI_Navi_USA_OM62029U_17CY
1. AM/FM/SiriusXM (SXM) RADIO .... 80
OVERVIEW ........................................... 80
PRESETTING A STATION .................... 82
CACHING A RADIO PROGRAM ........... 82
SELECTING A STATION FROM THE LIST ............................................ 84
RADIO OPTIONS .................................. 85
RADIO BROADCAST DATA SYSTEM ............................................. 85
USING HD Radio™ TECHNOLOGY ..... 86
AVAILABLE HD Radio™ TECHNOLOGY ................................... 86
HD Radio™ TROUBLESHOOTING GUIDE ................................................. 87
HOW TO SUBSCRIBE TO SiriusXM Satellite Radio ..................................... 88
DISPLAYING THE RADIO ID ................ 90
IF THE SATELLITE RADIO TUNER MALFUNCTIONS ................................ 91
2. INTERNET RADIO ..... .................... 92
LISTENING TO INTERNET RADIO ...... 92
1. CD .................................................. 93
OVERVIEW ........................................... 93
2. USB MEMORY ............................... 96
OVERVIEW ........................................... 96
3. iPod ................................................ 99
OVERVIEW ........................................... 99
4. Bluetooth® AUDIO...................... 102
OVERVIEW.......................................... 102
REGISTERING/CONNECTING A
Bluetooth
® DEVICE ........................... 106
5. AUX ............................................. 107
OVERVIEW.......................................... 107
1. STEERING SWITCHES............... 109
1. AUDIO SETTINGS ...................... 111
AUDIO SETTINGS SCREEN............... 111
1. OPERATING INFORMATION ..... 113
RADIO.................................................. 113
CD PLAYER AND DISC ...................... 114
iPod ...................................................... 116
HIGH-RESOLUTION SOUND SOURCE ........................................... 118
FILE INFORMATION ........................... 118
TERMS ................................................ 121
ERROR MESSAGES ........................... 123
2RADIO OPERATION
3MEDIA OPERATION
4AUDIO/VISUAL REMOTE
CONTROLS
5SETUP
6TIPS FOR OPERATING
THE AUDIO/VISUAL SYSTEM
AUDIO/VISUAL SYSTEM
Page 72 of 292
72
MIRAI_Navi_USA_OM62029U_17CY
1. BASIC OPERATION
1. QUICK REFERENCE
The audio control screen can be reached by the following methods:
From the “AUDIO” button
Press the “AUDIO” button.
From the “MENU” button
Press the “MENU” button, then select “Audio” .