2018 TESLA MODEL X lights
[x] Cancel search: lightsPage 64 of 213

High Beam HeadlightsPush the left-hand steering column lever away
from you. To cancel, pull the lever toward you.
The high beam headlights can automatically
switch to low beam when there is light
detected in front of Model X (for example,
from an oncoming vehicle). To turn this feature
on, touch Controls > Auto High Beam .
Note: Your chosen setting is retained until you
manually change it. It can also be saved in
your driver
profile.
In situations where high beams are turned offbecause AUTO HIGH BEAM is turned on and
light is detected in front of Model X, you can temporarily turn on high beams by pulling thelever all the way toward you.
The following indicator lights are visible on the
instrument panel when high beams are turned
on:
High beam headlights are on.
Illuminates when high beams are on but the Auto High Beam setting is
turned
off or if the Auto High Beam
setting is turned on but is
termporarily unavaible.
High beams are currently turned on,
and Auto High Beam is ready to turn
off the high beams if light is
detected in front of Model X.
High beams are temporarily turnedoff because Auto High Beam is on
and is detecting light in front of
Model X. When light is no longer
detected, the high beams will
automatically turn back on.
To flash the headlight high beams, pull the
lever fully toward you and release.
Warning: Auto High Beam is an aid only
and is subject to limitations. It is the
driver
Page 65 of 213

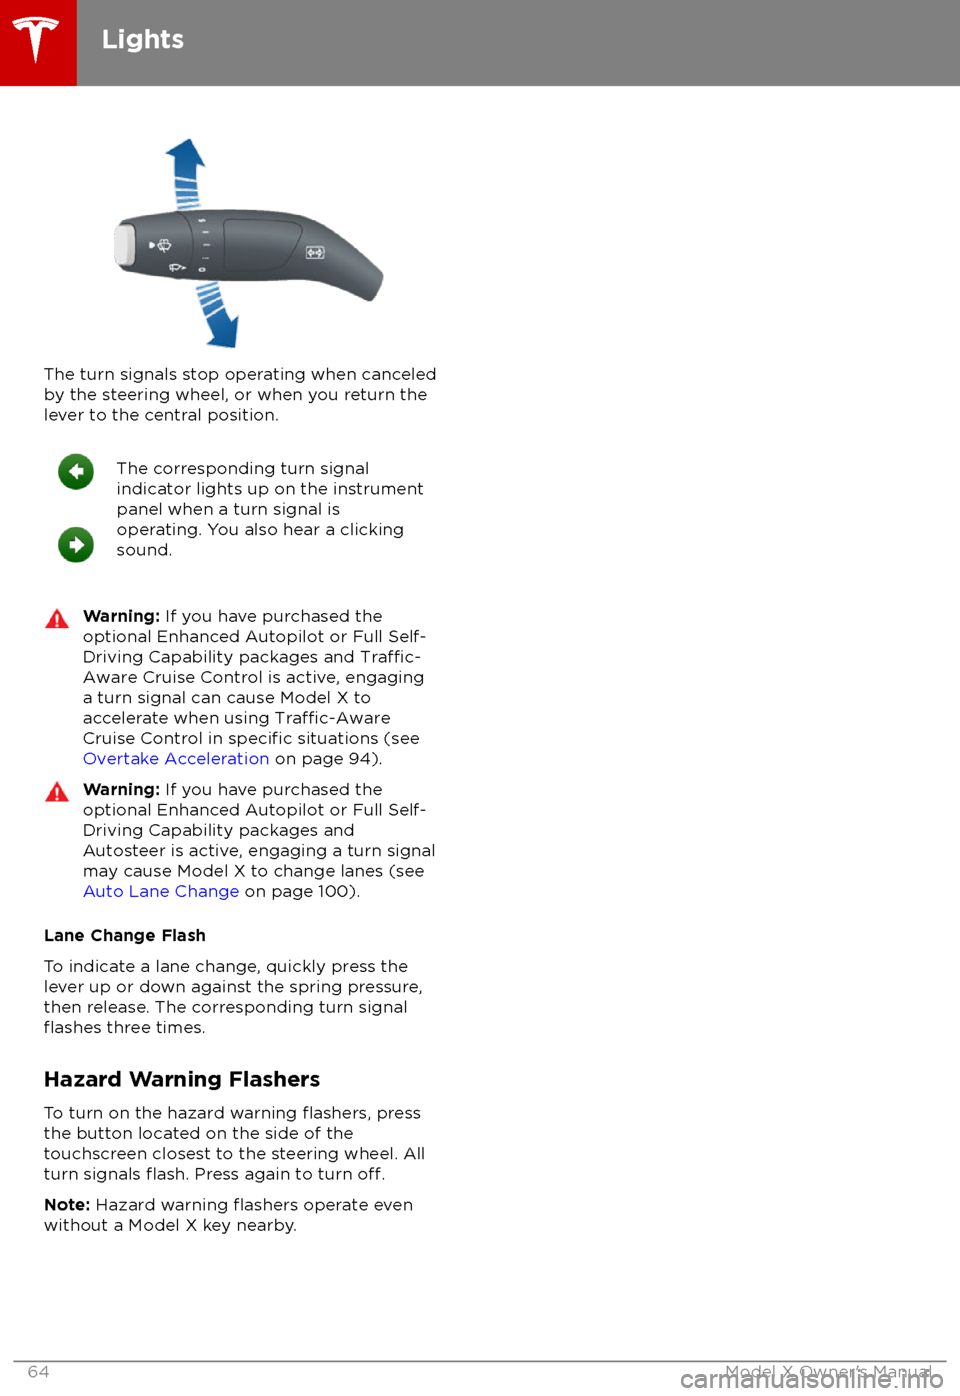
The turn signals stop operating when canceledby the steering wheel, or when you return the
lever to the central position.
The corresponding turn signal
indicator lights up on the instrument
panel when a turn signal is
operating. You also hear a clicking
sound.Warning: If you have purchased the
optional Enhanced Autopilot or Full Self-
Driving Capability packages and
Traffic-
Aware Cruise Control is active, engaging
a turn signal can cause Model X to
accelerate when using
Traffic-AwareCruise Control in specific situations (see
Overtake Acceleration on page 94).
Warning: If you have purchased the
optional Enhanced Autopilot or Full Self-
Driving Capability packages and
Autosteer is active, engaging a turn signal
may cause Model X to change lanes (see
Auto Lane Change on page 100).
Lane Change Flash
To indicate a lane change, quickly press the
lever up or down against the spring pressure,
then release. The corresponding turn signal
flashes three times.
Hazard Warning Flashers
To turn on the hazard warning
flashers, press
the button located on the side of the
touchscreen closest to the steering wheel. All
turn signals
flash. Press again to turn off.
Note: Hazard warning flashers operate even
without a Model X key nearby.
Lights
64Model X Owner
Page 67 of 213

Braking SystemsWarning: Properly functioning braking
systems are critical to ensure safety. If you experience a problem with the brake
pedal, brake caliper, or any component of
a Model X braking system, contact Tesla
immediately.
Model X has an anti-lock braking system
(ABS) that prevents the wheels from locking
when you apply maximum brake pressure. This
improves steering control during heavy
braking in most road conditions.
During emergency braking conditions, the
ABS constantly monitors the speed of each
wheel and varies the brake pressure according
to the grip available.
The alteration of brake pressure can be felt as
a pulsing sensation through the brake pedal.
This demonstrates that the ABS is operating
and is not a cause for concern. Keep
firm and
steady pressure on the brake pedal while
experiencing the pulsing.
The ABS indicator flashes briefly on
the instrument panel when you firststart Model X. If this indicator lights
up at any other time, an ABS fault
has occurred and the ABS is not
operating. Contact Tesla. The braking
system remains fully operational and
is not
affected by an ABS failure.
However, braking distances may
increase.
If the instrument panel displays this
indicator at any time other than
displaying
briefly when you first start
Model X, a brake system fault is
detected or the brake
fluid level is
low. Contact Tesla immediately.
Emergency Braking
In an emergency, fully press the brake pedal and maintain
firm pressure, even on low
traction surfaces. The ABS varies the braking
pressure to each wheel according to the
amount of traction available. This prevents
wheels from locking and ensures that you stop
as safely as possible.
Warning: Do not pump the brake pedal.
Doing so interrupts operation of the ABS
and can increase braking distance.Warning: Always maintain a safe distance
from the vehicle in front of you and beaware of hazardous driving conditions.
While the ABS can improve stopping
distance, it cannot overcome the laws of physics. It also does not prevent the
danger of hydroplaning (where a layer of
water prevents direct contact between the tires and the road).
Automatic Emergency Braking automatically
applies full braking in situations where a
collision is considered imminent (see Automatic Emergency Braking on page 109).
Warning: Automatic Emergency Braking
is not designed to prevent a collision. At best, it can minimize the impact of a
frontal collision by attempting to reduce
your driving speed. Depending on Automatic Emergency Braking to avoid a
collision can result in serious injury or death.
Brake Wear
Model X brake pads are equipped with wear indicators. A wear indicator is a thin metal
strip attached to the brake pad that squeals as
it rubs against the rotor when the pad wears
down. This squealing sound indicates that the
brake pads have reached the end of their service life and require replacement. To
replace the brake pads, contact Tesla Service.
Brakes must be periodically inspected visually by removing the tire and wheel. For detailed
specifications and service limits for rotors and
brake pads, see Brakes on page 184.
Warning:
Neglecting to replace worn
brake pads damages the braking system
and can result in a braking hazard.
Regenerative Braking
Whenever Model X is moving and your foot is
off the accelerator, regenerative braking slows
down Model X and feeds any surplus energy
back to the Battery.
By anticipating your stops and reducing or
removing pressure from the accelerator pedal
to slow down, you can take advantage of regenerative braking to increase driving range.
Of course, this is no substitute for regular
braking when needed for safety.
Note: If regenerative braking is aggressively
slowing Model X (such as when your foot is
completely
off the accelerator pedal at
highway speeds), the brake lights turn on to
alert others that you are slowing down.
Brakes
66Model X Owner
Page 81 of 213

The towing package allows you to tow a trailer
with your Model X. It also allows you to carry skis, snowboards, bicycles, etc. by attaching
an accessory carrier to the hitch.
Carrying Accessories
The Model X towing package has a 50 mm ball
coupling that can support an accessory
carrier.
The ball coupling is designed to support vertical loads of up to 54 kg. When carryingbicycles or other items on the Model X hitch,always check to ensure that the maximum
weight is not exceeded. When calculatingweight, remember to include the weight of the
accessory carrier. For example, assuming the
carrier weighs 14 kg, the weight threshold is
sufficient for carrying two bicycles weighing
approximately 20 kg each, or four bicycles
weighing approximately 10 kg each.
Caution: The Model X hitch is designed to
support up to 54 kg. Exceeding this
maximum weight can cause
significantdamage.
Caution: Do not attempt to install a
carrier on a Model X that is not equipped
with the towing package. Doing so can
cause
significant damage.
To install and use an accessory carrier, the tow
hitch must be connected (see Connecting the
Tow Hitch on page 85). Then follow the
instructions provided with your accessory
carrier. Observe all regulations and legal requirements in your state/region that apply
to carrying accessories.
The Model X towing package includes the wiring necessary for using an accessory carrier
equipped with lights (see Electrical
Connections on page 87). The package also
includes Trailer Mode software (see Trailer
Mode on page 83).
When you connect an accessory
carrier
Page 126 of 213

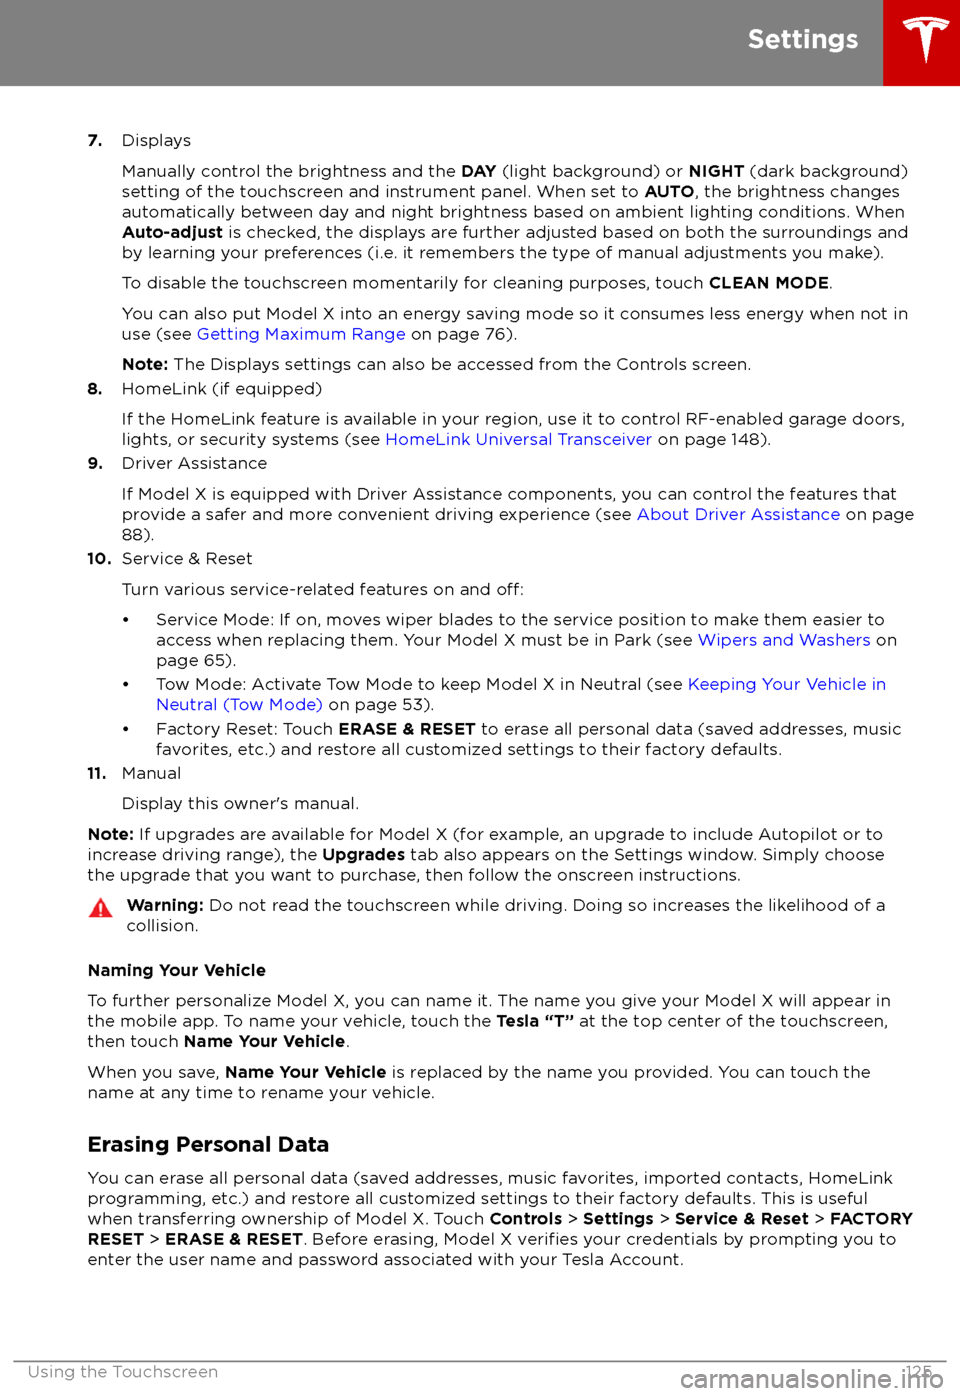
7.Displays
Manually control the brightness and the DAY (light background) or NIGHT (dark background)
setting of the touchscreen and instrument panel. When set to AUTO, the brightness changes
automatically between day and night brightness based on ambient lighting conditions. When
Auto-adjust is checked, the displays are further adjusted based on both the surroundings and
by learning your preferences (i.e. it remembers the type of manual adjustments you make).
To disable the touchscreen momentarily for cleaning purposes, touch CLEAN MODE.
You can also put Model X into an energy saving mode so it consumes less energy when not in
use (see Getting Maximum Range on page 76).
Note: The Displays settings can also be accessed from the Controls screen.
8. HomeLink (if equipped)
If the HomeLink feature is available in your region, use it to control RF-enabled garage doors, lights, or security systems (see HomeLink Universal Transceiver on page 148).
9. Driver Assistance
If Model X is equipped with Driver Assistance components, you can control the features that
provide a safer and more convenient driving experience (see About Driver Assistance on page
88).
10. Service & Reset
Turn various service-related features on and
off:
Page 148 of 213

About the Security SystemIf Model X does not detect a key nearby and a
locked door or trunk is opened, an alarm sounds and the headlights and turn signals
flash. To deactivate the alarm, press any
button on the key.
To manually enable or disable the alarm
system, touch Controls > Settings > Safety &
Security > Alarm . When set to ON, Model X
activates its alarm one minute after you exit,
the doors lock, and a recognized key is no
longer detected.
If your Model X is equipped with the optional security package, it includes a battery-backed
siren that sounds in situations where a locked door or trunk is opened and Model X does not
detect a key nearby. If the Tilt/Intrusion
setting is on, the siren also sounds if Model X
detects motion inside the cabin or if the vehicle is moved or tilted (for example, with a
tow truck or jack). To temporarily turn the Tilt/
Intrusion detection system
off, touch
Controls > Settings > Safety & Security > Tilt/
Intrusion > OFF . The Tilt/Intrusion setting is
enabled every time Model X is unlocked.
Note: If you plan to leave something that
moves, such as a dog, inside your locked
Model X, remember to turn
off Tilt/Intrusion .
Motion detected inside Model X activates the
siren.
Note: The Alarm must be on to enable Tilt/
Intrusion .
Security Settings
Using the Touchscreen147
Page 150 of 213

Troubleshooting HomeLinkWhen programming a HomeLink device, the
touchscreen walks you through a two-part
programming process:
1. Model X records the signal from the
remote. The touchscreen instructs you to
stand in front of the vehicle, point the
remote at the front bumper and press and
hold the button until the headlights
flash.When the headlights flash, Model X has
learned the remote and you can touch
Continue on the touchscreen. If the
headlights do not
flash, refer to the
following guidelines.
2. The device
Page 207 of 213

AABS (Anti-lock Braking System) 66
absolute speed limit 112
Acceleration (dual-motor) 119
Acceleration settings 73
access panel, removing 173accessoriesplugging into power socket 137
accessory carrier 80
adaptive headlights 63
air circulation 127
air conditioning 126
air distribution 127
air
filter 131
air suspension 133
air vents 131
airbag, front passenger, disabling 42
airbags 40
alarm 147
all-season tires 166
always connected, setting 76
anti-lock braking (ABS) 66
audioplaying files 134
steering wheel buttons 47
volume control 134
Auto High Beam 63
Auto Lane Change 100
auto-raising suspension 132
automatic emergency braking 109
Autopark 102
Autopilot components 88
Autosteer 97
average range 76
B
backup camera 78
battery (12V)complete discharge 155specifications 185Battery (high voltage)care of 155
coolant 173
specifications 185
temperature limits 155
battery (key), replacing 5
bicycle carrier 80
blind spot warning 106
Bluetoothdevices, playing audio files from 137
general information 139
phone, pairing and using 139
body repairs 176
body touch up 171
brake
fluid replacement 162
brakesbrakes (continued)automatic in emergencies 109fluid level 173
overview of 66
specifications 184
brightness of displays 122
C
Cabin Overheat Protection setting 122
cabin temperature control 126
Calendar app 146
camera (rear view) 78
cameras (autopilot) 88
car cover 171
car status, displaying 47, 48
car washes 169
cargo area 14
cargo volume 182
carpets, cleaning 170
CE
certifications 200
CHAdeMO 154
chains 167
change of ownership 125
charge port 157
charge port light 158
chargingcharge settings 158
components and equipment 153
instructions 157
public charging stations 154
scheduling 158
status of 160
charging locations, finding 142
child protectiondisabling liftgate and rear door handles
10
disabling rear window switches 12child seatsdisabling front passenger airbag 42
installing and using 30
Chill acceleration 73
cleaning 169
climate controls 126
Climate Timer 130
Cold Weather controls 119
collision avoidance assist 108
console12V power socket 137
cup holders 18
USB ports 137
consumption chart 76
contact informationroadside assistance 192coolantBattery, checking level of 173
Battery, replacement interval 162
copyrights 197
Index
206Model X Owner