2018 SUBARU WRX wheel
[x] Cancel search: wheelPage 450 of 578
(467,1)
北米Model "A1700BE-B" EDITED: 2017/ 10/ 11
some tires can only be partially sealed or
not sealed at all, and this condition may
cause a loss of tire pressure. A loss of tire
pressure can affect vehicle handling,
leading to the loss of vehicle control.
After sealing the flat tire temporarily,
change the tires with new ones as soon
as possible. We recommend that you have
the sealed tire changed by your nearest
SUBARU dealer. You may reuse the wheel
if the attached sealant is wiped off, but the
valve of the wheel must be replaced with a
new one. If you reuse the wheel without
replacing the valve, air may leak from the
valve.
For tire replacement, refer to“Tire replace-
ment”F11-36.!Safety precautions when sealing flat
tire
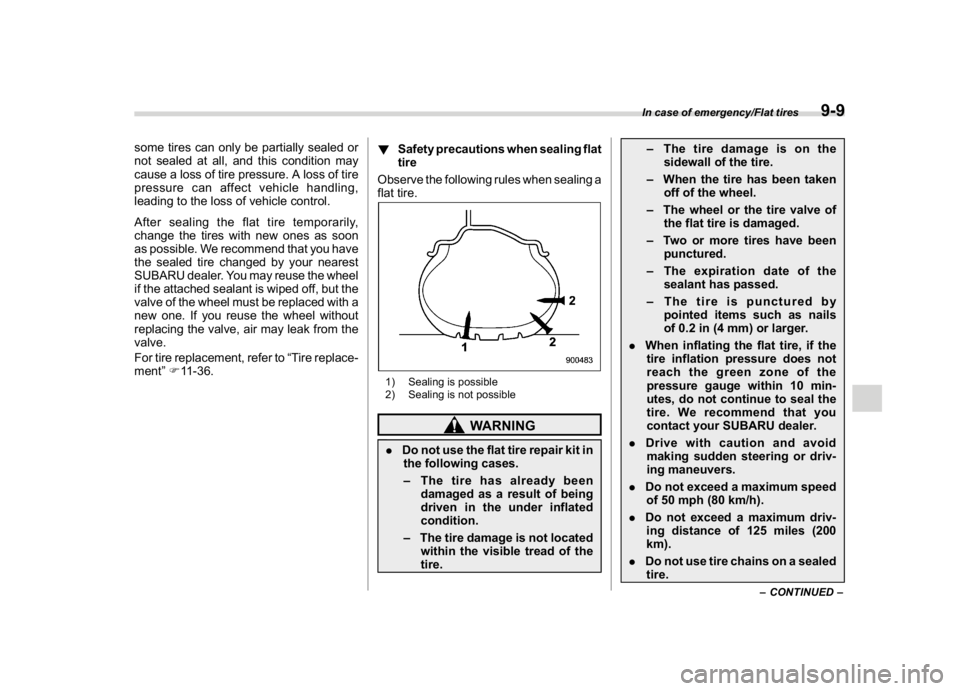
Observe the following rules when sealing a
flat tire.
1) Sealing is possible
2) Sealing is not possible
WARNING
.Do not use the flat tire repair kit in
the following cases.
–The tire has already been
damaged as a result of being
driven in the under inflated
condition.
–The tire damage is not located
within the visible tread of the
tire.–The tire damage is on the
sidewall of the tire.
–When the tire has been taken
off of the wheel.
–The wheel or the tire valve of
the flat tire is damaged.
–Two or more tires have been
punctured.
–The expiration date of the
sealant has passed.
–The tire is punctured by
pointed items such as nails
of 0.2 in (4 mm) or larger.
.When inflating the flat tire, if the
tire inflation pressure does not
reach the green zone of the
pressure gauge within 10 min-
utes, do not continue to seal the
tire. We recommend that you
contact your SUBARU dealer.
.Drive with caution and avoid
making sudden steering or driv-
ing maneuvers.
.Do not exceed a maximum speed
of 50 mph (80 km/h).
.Do not exceed a maximum driv-
ing distance of 125 miles (200
km).
.Do not use tire chains on a sealed
tire.
–CONTINUED–
In case of emergency/Flat tires
9-9
9
Page 455 of 578
(472,1)
北米Model "A1700BE-B" EDITED: 2017/ 10/ 11
compressor into the accessory power
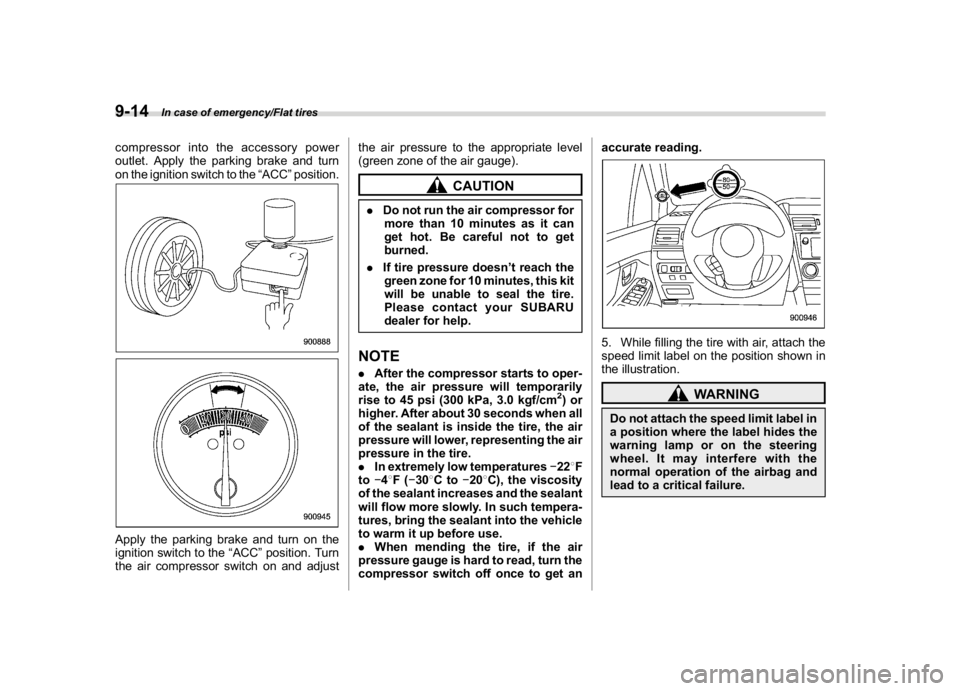
outlet. Apply the parking brake and turn
on the ignition switch to the“ACC”position.Apply the parking brake and turn on the
ignition switch to the“ACC”position. Turn
the air compressor switch on and adjustthe air pressure to the appropriate level
(green zone of the air gauge).
CAUTION
.Do not run the air compressor for
more than 10 minutes as it can
get hot. Be careful not to get
burned.
.If tire pressure doesn’t reach the
green zone for 10 minutes, this kit
will be unable to seal the tire.
Please contact your SUBARU
dealer for help.NOTE.After the compressor starts to oper-
ate, the air pressure will temporarily
rise to 45 psi (300 kPa, 3.0 kgf/cm
2)or
higher. After about 30 seconds when all
of the sealant is inside the tire, the air
pressure will lower, representing the air
pressure in the tire.
.In extremely low temperatures�228F
to�48F(�308Cto�208C), the viscosity
of the sealant increases and the sealant
will flow more slowly. In such tempera-
tures, bring the sealant into the vehicle
to warm it up before use.
.When mending the tire, if the air
pressure gauge is hard to read, turn the
compressor switch off once to get anaccurate reading.
5. While filling the tire with air, attach the
speed limit label on the position shown in
the illustration.
WARNING
Do not attach the speed limit label in
a position where the label hides the
warning lamp or on the steering
wheel. It may interfere with the
normal operation of the airbag and
lead to a critical failure.
In case of emergency/Flat tires
9-14
Page 458 of 578

(475,1)
北米Model "A1700BE-B" EDITED: 2017/ 10/ 11
&Tire pressure monitoring
system (TPMS) (U.S.-spec.
models)Low tire pressure warning lightThe tire pressure monitoring system pro-
vides the driver with the warning message
indicated by sending a signal from a
sensor that is installed in each wheel when
tire pressure is severely low.
The tire pressure monitoring system will
activate only when the vehicle is driven.
Also, this system may not react immedi-
ately to a sudden drop in tire pressure (for
example, a blow-out caused by running
over a sharp object).
WARNING
.If the low tire pressure warning
light illuminates while driving,
never brake suddenly. Instead,
perform the following procedure.
(1) Keep driving straight ahead
while gradually reducing
speed.
(2) Slowly pull off the road to a
safe place. Otherwise an acci-
dent involving serious vehicle
damage and serious personal
injury could occur.
(3) Check the pressure for all four
tires and adjust the pressure
to the COLD tire pressure
shown on the vehicle placard
on the door pillar on the
driver’s side.
If this light still illuminates while
driving after adjusting the tire
pressure, a tire may have signifi-
cant damage and a fast leak that
causes the tire to lose air rapidly.
If you have a flat tire, refer to“Flat
tires”F9-5.
.When a spare tire is mounted or a
wheel rim is replaced without the
original pressure sensor/trans-
mitter being transferred, the lowtire pressure warning light will
illuminate steadily after blinking
for approximately one minute.
This indicates the TPMS is unable
to monitor all four road wheels.
Contact your SUBARU dealer as
soon as possible for tire and
sensor replacement and/or sys-
tem resetting.
.When a tire is repaired with liquid
sealant, the tire pressure warning
valve and transmitter may not
operate properly. If a liquid sea-
lant is used, contact your nearest
SUBARU dealer or other qualified
service shop as soon as possi-
ble. Make sure to replace the tire
pressure warning valve and
transmitter when replacing the
tire. You may reuse the wheel if
there is no damage to it and if the
sealant residue is properly
cleaned off.
If the light illuminates steadily
after blinking for approximately
one minute, promptly contact a
SUBARU dealer to have the sys-
tem inspected.
In case of emergency/Flat tires
9-17
9
Page 462 of 578
(479,1)
北米Model "A1700BE-B" EDITED: 2017/ 10/ 11
TowingIf towing is necessary, it is best done by
your SUBARU dealer or a commercial
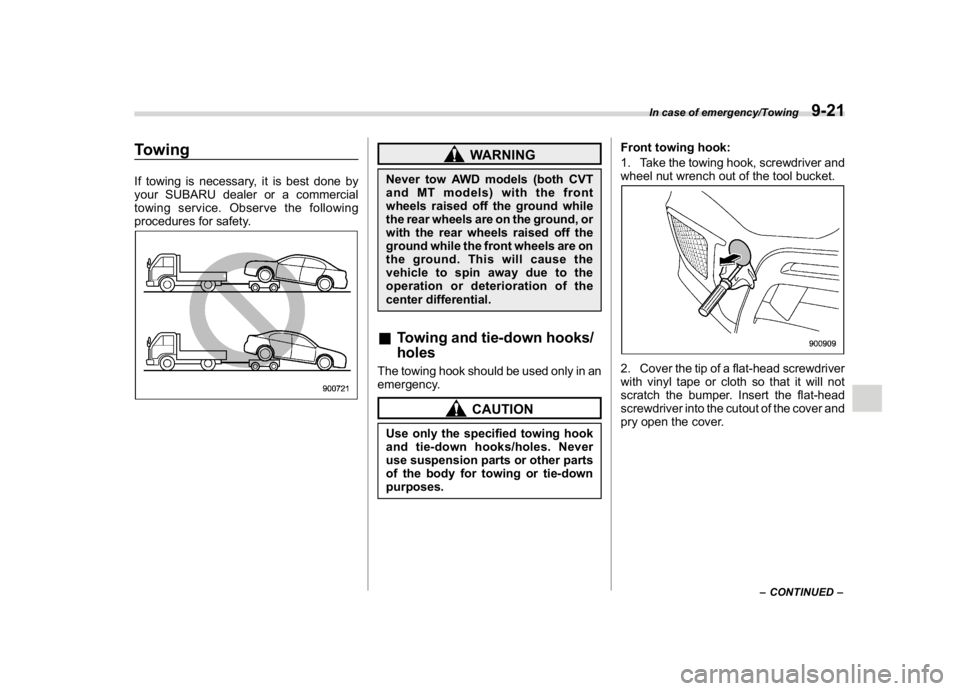
towing service. Observe the following
procedures for safety.
WARNING
Never tow AWD models (both CVT
andMTmodels)withthefront
wheels raised off the ground while
the rear wheels are on the ground, or
with the rear wheels raised off the
ground while the front wheels are on
the ground. This will cause the
vehicle to spin away due to the
operation or deterioration of the
center differential.&Towing and tie-down hooks/
holesThe towing hook should be used only in an
emergency.
CAUTION
Use only the specified towing hook
and tie-down hooks/holes. Never
use suspension parts or other parts
of the body for towing or tie-down
purposes.Front towing hook:
1. Take the towing hook, screwdriver and
wheel nut wrench out of the tool bucket.
2. Cover the tip of a flat-head screwdriver
with vinyl tape or cloth so that it will not
scratch the bumper. Insert the flat-head
screwdriver into the cutout of the cover and
pry open the cover.
–CONTINUED–
In case of emergency/Towing
9-21
9
Page 463 of 578
(480,1)
北米Model "A1700BE-B" EDITED: 2017/ 10/ 11
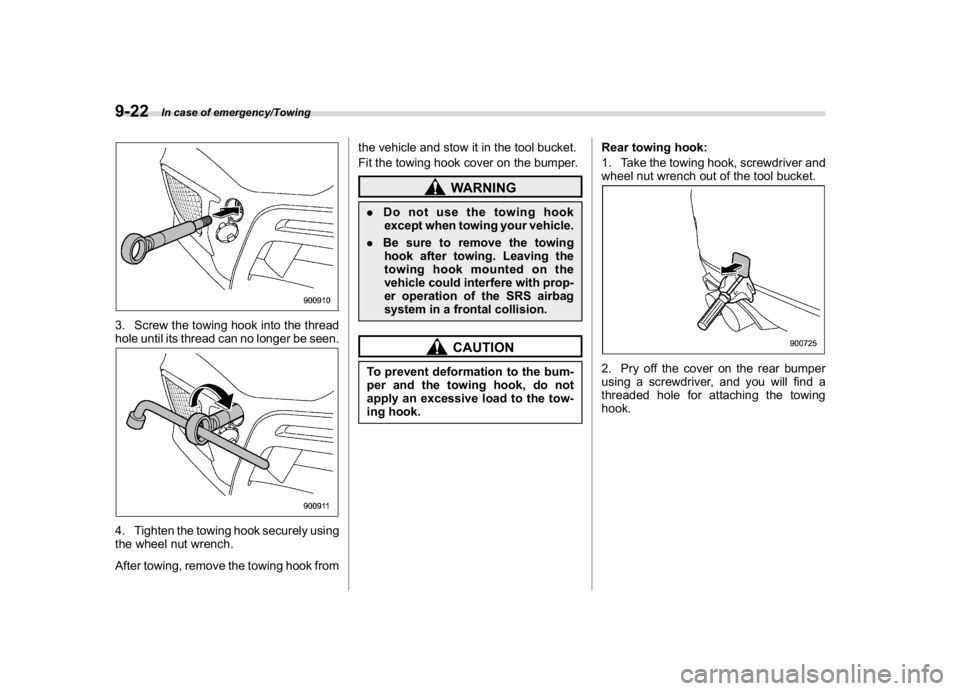
3. Screw the towing hook into the thread
hole until its thread can no longer be seen.4. Tighten the towing hook securely using
the wheel nut wrench.
After towing, remove the towing hook fromthe vehicle and stow it in the tool bucket.
Fit the towing hook cover on the bumper.
WARNING
.Do not use the towing hook
except when towing your vehicle.
.Be sure to remove the towing
hook after towing. Leaving the
towing hook mounted on the
vehicle could interfere with prop-
er operation of the SRS airbag
system in a frontal collision.
CAUTION
To prevent deformation to the bum-
per and the towing hook, do not
apply an excessive load to the tow-
ing hook.Rear towing hook:
1. Take the towing hook, screwdriver and
wheel nut wrench out of the tool bucket.
2. Pry off the cover on the rear bumper
using a screwdriver, and you will find a
threaded hole for attaching the towing
hook.
In case of emergency/Towing
9-22
Page 464 of 578
(481,1)
北米Model "A1700BE-B" EDITED: 2017/ 10/ 11
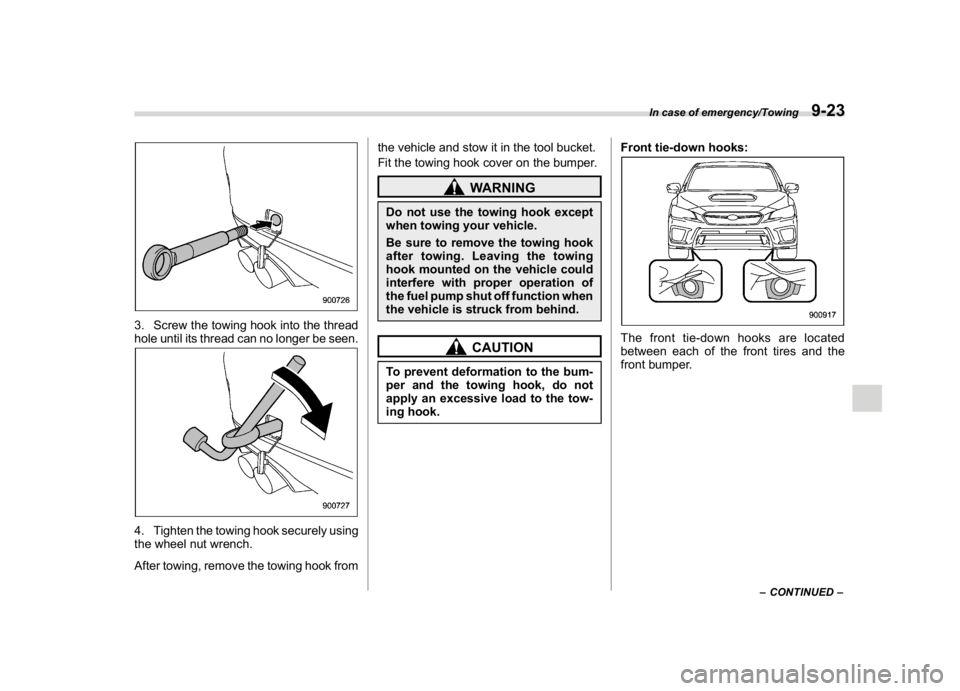
3. Screw the towing hook into the thread
hole until its thread can no longer be seen.4. Tighten the towing hook securely using
the wheel nut wrench.
After towing, remove the towing hook fromthe vehicle and stow it in the tool bucket.
Fit the towing hook cover on the bumper.
WARNING
Do not use the towing hook except
when towing your vehicle.
Be sure to remove the towing hook
after towing. Leaving the towing
hook mounted on the vehicle could
interfere with proper operation of
the fuel pump shut off function when
the vehicle is struck from behind.
CAUTION
To prevent deformation to the bum-
per and the towing hook, do not
apply an excessive load to the tow-
ing hook.Front tie-down hooks:
The front tie-down hooks are located
between each of the front tires and the
front bumper.
–CONTINUED–
In case of emergency/Towing
9-23
9
Page 466 of 578
(483,1)
北米Model "A1700BE-B" EDITED: 2017/ 10/ 11
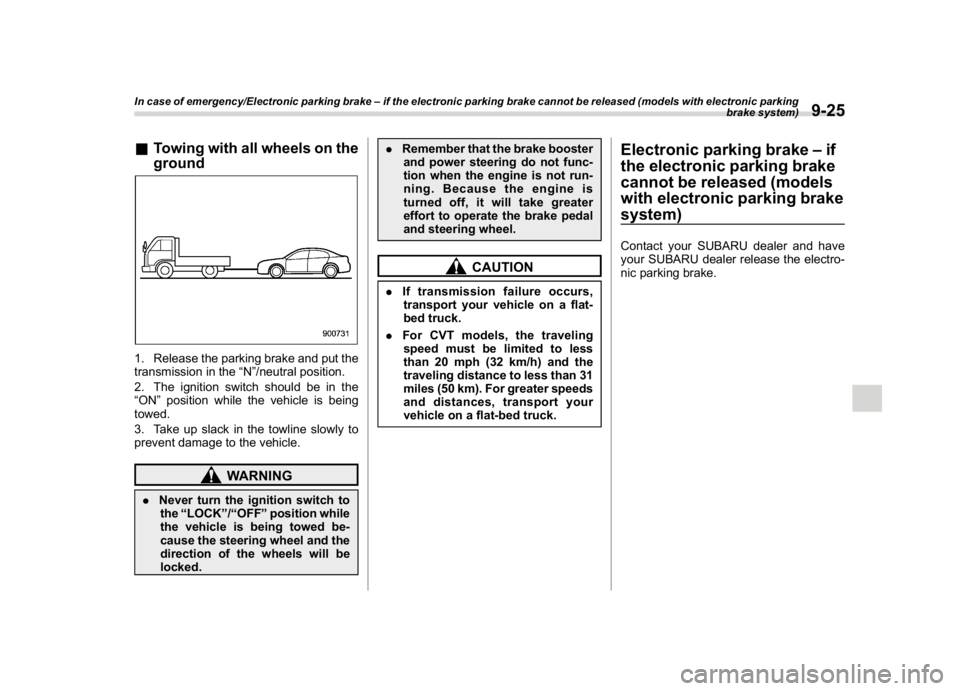
&Towing with all wheels on the
ground1. Release the parking brake and put the
transmission in the“N”/neutral position.
2. The ignition switch should be in the
“ON”position while the vehicle is being
towed.
3. Take up slack in the towline slowly to
prevent damage to the vehicle.
WARNING
.Never turn the ignition switch to
the“LOCK”/“OFF”position while
the vehicle is being towed be-
cause the steering wheel and the
direction of the wheels will be
locked..Remember that the brake booster
and power steering do not func-
tion when the engine is not run-
ning. Because the engine is
turned off, it will take greater
effort to operate the brake pedal
and steering wheel.
CAUTION
.If transmission failure occurs,
transport your vehicle on a flat-
bed truck.
.For CVT models, the traveling
speed must be limited to less
than 20 mph (32 km/h) and the
traveling distance to less than 31
miles (50 km). For greater speeds
and distances, transport your
vehicle on a flat-bed truck.
Electronic parking brake–if
the electronic parking brake
cannot be released (models
with electronic parking brake
system)Contact your SUBARU dealer and have
your SUBARU dealer release the electro-
nic parking brake.
In case of emergency/Electronic parking brake–if the electronic parking brake cannot be released (models with electronic parking
brake system)
9-25
9
Page 470 of 578
(489,1)
北米Model "A1700BE-B" EDITED: 2017/ 10/ 11
Exterior care..........................................................10-2
Washing...............................................................10-2
Waxing and polishing............................................10-4
Cleaning alloy wheels...........................................10-4
Corrosion protection............................................10-5
Most common causes of corrosion.......................10-5
To help prevent corrosion.....................................10-5
Cleaning the interior.............................................10-6
Seat fabric............................................................10-6Leather seat materials..........................................10-6
Synthetic leather upholstery.................................10-6
Climate control panel, audio panel, instrument
panel, console panel, and switches....................10-7
Monitor.................................................................10-7
Steering wheel with ultra-suede covering
(if equipped).......................................................10-7
Regular cleaning...................................................10-7
Liquid dirt.............................................................10-8
Dirt from hands....................................................10-8
Appearance care
10