2018 SUBARU CROSSTREK headlights
[x] Cancel search: headlightsPage 213 of 474

(218,1)
北米Model "A1320BE-C" EDITED: 2017/ 10/ 10
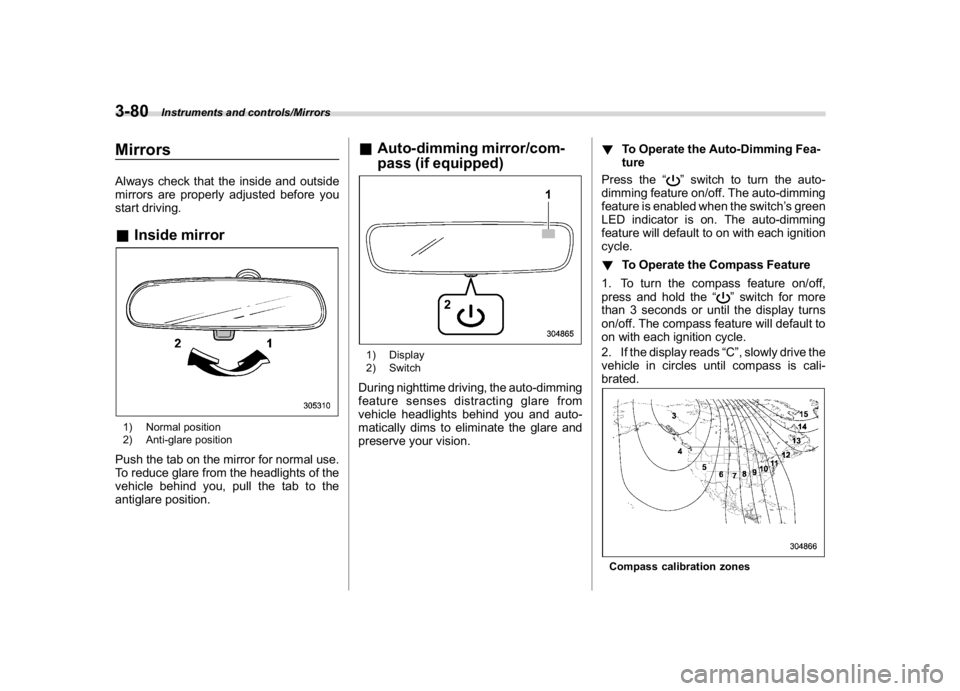
MirrorsAlways check that the inside and outside
mirrors are properly adjusted before you
start driving.&Inside mirror1) Normal position
2) Anti-glare positionPush the tab on the mirror for normal use.
To reduce glare from the headlights of the
vehicle behind you, pull the tab to the
antiglare position.
&Auto-dimming mirror/com-
pass (if equipped)1) Display
2) SwitchDuring nighttime driving, the auto-dimming
feature senses distracting glare from
vehicle headlights behind you and auto-
matically dims to eliminate the glare and
preserve your vision.!To Operate the Auto-Dimming Fea-
ture
Press the“
”switch to turn the auto-
dimming feature on/off. The auto-dimming
feature is enabled when the switch’s green
LED indicator is on. The auto-dimming
feature will default to on with each ignition
cycle.
!To Operate the Compass Feature
1. To turn the compass feature on/off,
press and hold the“
”switch for more
than 3 seconds or until the display turns
on/off. The compass feature will default to
on with each ignition cycle.
2. If the display reads“C”, slowly drive the
vehicle in circles until compass is cali-
brated.
Compass calibration zones
Instruments and controls/Mirrors
3-80
Page 214 of 474

(219,1)
北米Model "A1320BE-C" EDITED: 2017/ 10/ 10
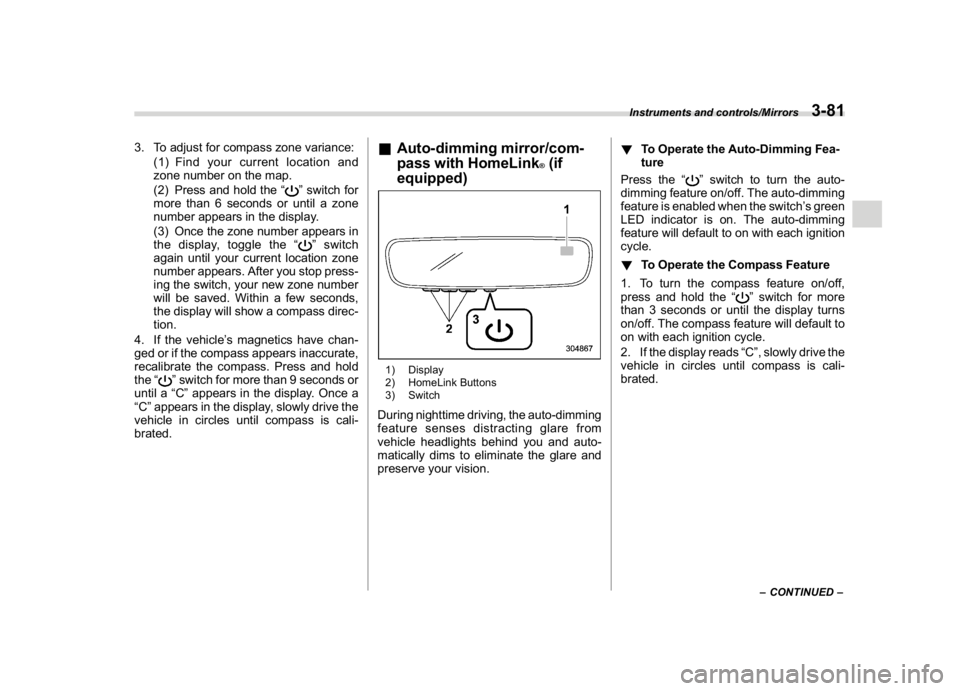
3. To adjust for compass zone variance:
(1) Find your current location and
zone number on the map.
(2) Press and hold the“
”switch for
more than 6 seconds or until a zone
number appears in the display.
(3) Once the zone number appears in
the display, toggle the“”switch
again until your current location zone
number appears. After you stop press-
ing the switch, your new zone number
will be saved. Within a few seconds,
the display will show a compass direc-
tion.
4. If the vehicle’s magnetics have chan-
ged or if the compass appears inaccurate,
recalibrate the compass. Press and hold
the“
”switch for more than 9 seconds or
until a“C”appears in the display. Once a
“C”appears in the display, slowly drive the
vehicle in circles until compass is cali-
brated.
&Auto-dimming mirror/com-
pass with HomeLink
®(if
equipped)
1) Display
2) HomeLink Buttons
3) SwitchDuring nighttime driving, the auto-dimming
feature senses distracting glare from
vehicle headlights behind you and auto-
matically dims to eliminate the glare and
preserve your vision.!To Operate the Auto-Dimming Fea-
ture
Press the“
”switch to turn the auto-
dimming feature on/off. The auto-dimming
feature is enabled when the switch’s green
LED indicator is on. The auto-dimming
feature will default to on with each ignition
cycle.
!To Operate the Compass Feature
1. To turn the compass feature on/off,
press and hold the“
”switch for more
than 3 seconds or until the display turns
on/off. The compass feature will default to
on with each ignition cycle.
2. If the display reads“C”, slowly drive the
vehicle in circles until compass is cali-
brated.–CONTINUED–
Instruments and controls/Mirrors
3-81
3
Page 266 of 474

(275,1)
北米Model "A1320BE-C" EDITED: 2017/ 10/ 10
Starting and stopping the en-
gine (models without push-
button start system)
CAUTION
Do not operate the starter motor
continuously for more than 10 sec-
onds. If the engine fails to start after
operating the starter for 5 to 10
seconds, wait for 10 seconds or
more before trying again.NOTEIt may be difficult to start the engine
when the battery has been discon-
nected and reconnected (for mainte-
nance or other purposes). This diffi-
culty is caused by the electronically
controlled throttle’s self-diagnosis
function. To overcome it, keep the
ignition switch in the“ON”position
for approximately 10 seconds before
starting the engine.
&Starting engine!General precautions when starting
engine
WARNING
.Never start the engine from out-
side the vehicle (except when
using the remote engine start
system). It may result in an acci-
dent.
.Do not leave the engine running
in locations with poor ventilation,
such as a garage and indoors.
The exhaust gas may enter the
vehicle or indoors, and it may
result in carbon monoxide poi-
soning.
.Do not start the engine near dry
foliage, paper, or other flammable
substances. The exhaust pipe
and exhaust emissions can cre-
ate a fire hazard at high tempera-
tures.
CAUTION
.If the engine is stopped during
driving, the catalyst may over-
heat and burn..When starting the engine, be sure
to sit in the driver’s seat (except
when using the remote engine
start system).
NOTE.Avoid rapid racing and rapid accel-
eration immediately after the engine
has started.
.For a short time after the engine has
started, the engine speed is kept high.
When the warm-up is completed, the
engine speed lowers automatically.
.On rare occasions, it may be difficult
to start the engine depending on the
fuel and the usage condition (repeated
driving of a distance in which the
engine has not warmed up sufficiently).
In such a case, it is recommended that
you change to a different brand of fuel.
.On rare occasions, transient knock-
ing may be heard from the engine when
the accelerator is operated rapidly such
as a rapid start-up and a rapid accel-
eration. This is not a malfunction.
.The engine starts more easily when
the headlights, air conditioner and rear
window defogger are turned off.
.Do not shift the select lever (CVT
models) or shift lever (MT models)
while the starter is cranking.
–CONTINUED–
Starting and operating/Starting and stopping the engine (models without push-button start system)
7-9
7
Page 313 of 474

(322,1)
北米Model "A1320BE-C" EDITED: 2017/ 10/ 10
with a low body height such as
sports cars or a trailer with no
cargo)
–Vehicles that are not approaching
your vehicle even though they are in
the detection area (either on a
neighboring lane to the rear or be-
side your vehicle when reversing)
(The system determines the pre-
sence of approaching vehicles
based on data detected by the radar
sensors.)
–Vehicles traveling at significantly
different speeds
–Vehicles driving in parallel at al-
most the same speed as your vehi-
cle for a prolonged time
–Oncoming vehicles
–Vehicles in a lane beyond the
neighboring lane
–Vehicles travelling at a signifi-
cantly lower speed that you are
trying to overtake
.On a road with extremely narrow
lanes, the system may detect vehicles
driving in a lane next to the neighboring
lane.
.When the 8-inch audio/navigation
system is performing a software up-
date, the RCTA warning icons may not
be displayed on the audio/navigation
screen until the update is complete.
&BSD/RCTA approach indica-
tor light/warning buzzerWhen the BSD/RCTA is active, the BSD/
RCTA approach indicator light will operate
to alert the driver when there are vehicles
in the neighboring lanes. When reversing
the vehicle, the BSD/RCTA approach
indicator light and warning buzzer will
operate to alert the driver that a vehicle is
approaching from the left or right side.
!BSD/RCTA approach indicator lightBSD/RCTA approach indicator lightIt is mounted in each side of the outside
mirrors.
The indicator light will illuminate when a
vehicle approaching from behind is de-
tected.
The indicator light will flash to warn thedriver of dangers under the following
conditions.
.While the indicator light illuminates, if
you operate the turn signal lever toward
the side in which this light turned on.
.When reversing the vehicle while the
system detects a vehicle approaching
from either side.
!BSD/RCTA approach indicator
light dimming function
When the headlights are turned on, the
brightness of the BSD/RCTA approach
indicator light will be reduced.
NOTE.You may have difficulty recognizing
the BSD/RCTA approach indicator light
under the following conditions.
–When affected by direct sunlight
–When affected by the headlight
beams from the vehicles behind
.While the illumination brightness
control dial is in the fully upward
position, even if the headlights are
turned on, the brightness of the BSD/
RCTA approach indicator light will not
be reduced. For details about the
illumination brightness control dial,
refer to“Illumination brightness con-
trol”F3-12.
Starting and operating/BSD/RCTA
7-56
Page 383 of 474

(396,1)
北米Model "A1320BE-C" EDITED: 2017/ 10/ 10
Rotational direction of tires................................. 11-25
Tire rotation........................................................ 11-25
Tire replacement................................................. 11-26
Wheel replacement............................................. 11-27
Alloy wheels........................................................ 11-27
Windshield washer fluid..................................... 11-28
Adding the windshield washer fluid..................... 11-28
Windshield washer fluid...................................... 11-28
Replacement of wiper blades............................ 11-29
Windshield wiper blade assembly........................ 11-29
Window wiper blade rubber................................. 11-30
Rear window wiper blade assembly..................... 11-31
Rear window wiper blade rubber......................... 11-32
Battery................................................................. 11-33
Fuses................................................................... 11-34
Installation of accessories................................. 11-35Replacing bulbs...................................................11-36
Headlights (models with LED headlights)............ 11-36
Headlights (models with halogen headlights) ...... 11-36
Front turn signal light......................................... 11-38
Parking light....................................................... 11-38
Front fog light (if equipped)................................ 11-38
Rear combination lights...................................... 11-38
Backup light....................................................... 11-40
License plate light.............................................. 11-40
Map light............................................................ 11-41
Vanity mirror light (if equipped)........................... 11-41
Dome light and cargo area light.......................... 11-41
Other bulbs........................................................ 11-42
Replacing key battery.........................................11-42
Safety precautions.............................................. 11-42
Replacing battery of access key fob................... 11-43
Replacing transmitter battery.............................. 11-44
Maintenance and service
Page 417 of 474

(430,1)
北米Model "A1320BE-C" EDITED: 2017/ 10/ 10
Replacing bulbs
WARNING
Bulbs may become very hot while
illuminated. Before replacing bulbs,
turn off the lights and wait until the
bulbs cool down. Otherwise, there is
a risk of sustaining a burn injury.
CAUTION
Replace any bulb only with a new
bulb of the specified wattage. Using
a bulb of different wattage could
result in a fire. For the specified
wattage of each bulb, refer to“Bulb
chart”F12-14.NOTEFor models with type B combination
meter, if SRH is malfunctioning, the
SRH OFF indicator appears on the
combination meter when the ignition
switch is in the“ON”position. It
indicates that SRH has been deacti-
vated. Contact a SUBARU dealer for an
inspection.
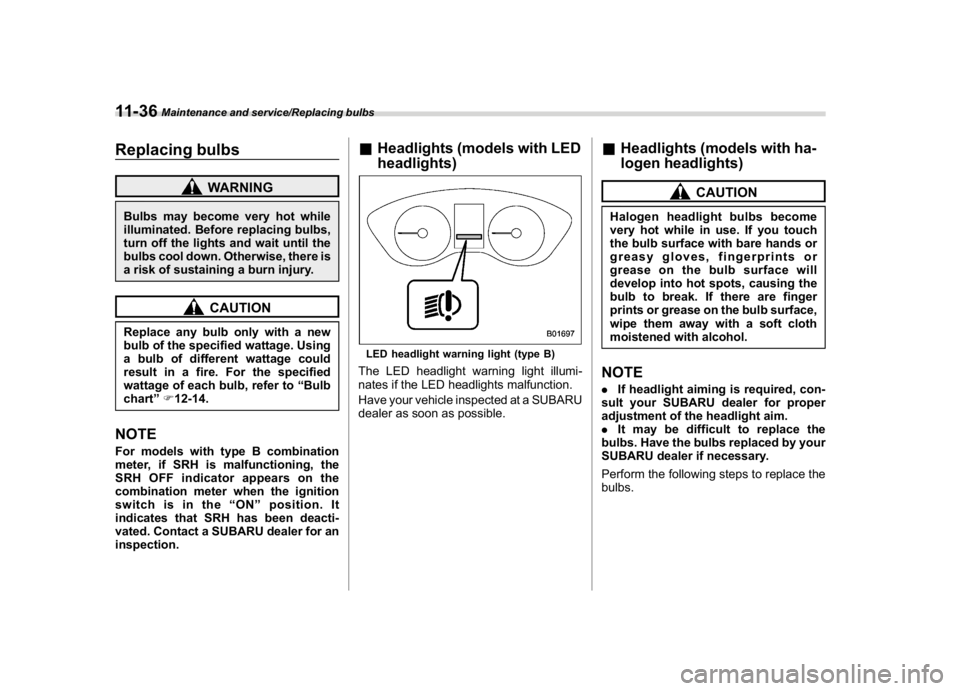
&Headlights (models with LED
headlights)LED headlight warning light (type B)The LED headlight warning light illumi-
nates if the LED headlights malfunction.
Have your vehicle inspected at a SUBARU
dealer as soon as possible.
&Headlights (models with ha-
logen headlights)
CAUTION
Halogen headlight bulbs become
very hot while in use. If you touch
the bulb surface with bare hands or
greasy gloves, fingerprints or
grease on the bulb surface will
develop into hot spots, causing the
bulb to break. If there are finger
prints or grease on the bulb surface,
wipe them away with a soft cloth
moistened with alcohol.NOTE.If headlight aiming is required, con-
sult your SUBARU dealer for proper
adjustment of the headlight aim.
.It may be difficult to replace the
bulbs. Have the bulbs replaced by your
SUBARU dealer if necessary.
Perform the following steps to replace the
bulbs.
Maintenance and service/Replacing bulbs
11-36