2018 Seat Ateca buttons
[x] Cancel search: buttonsPage 57 of 348
The essentials
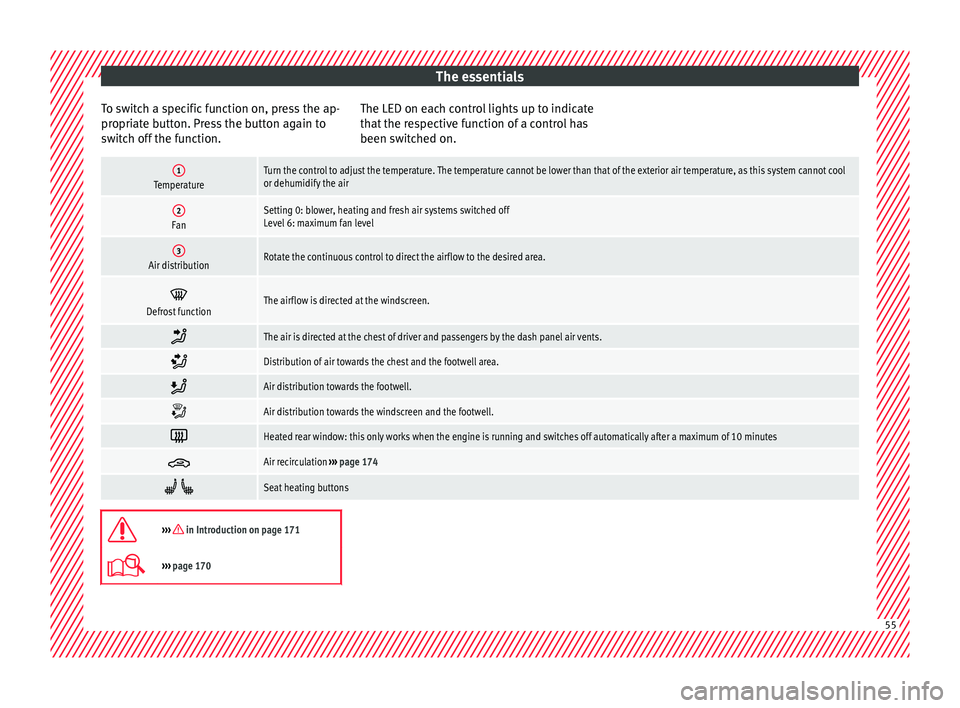
To switch a specific function on, press the ap-
pr opri
at
e button. Press the button again to
switch off the function. The LED on each control lights up to indicate
that the r
espective function of a control has
been switched on.
1TemperatureTurn the control to adjust the temperature. The temperature cannot be lower than that of the exterior air temperature, as this system cannot cool
or dehumidify the air
2FanSetting 0: blower, heating and fresh air systems switched off
Level 6: maximum fan level
3Air distributionRotate the continuous control to direct the airflow to the desired area.
Defrost functionThe airflow is directed at the windscreen.
The air is directed at the chest of driver and passengers by the dash panel air vents.
Distribution of air towards the chest and the footwell area.
Air distribution towards the footwell.
Air distribution towards the windscreen and the footwell.
Heated rear window: this only works when the engine is running and switches off automatically after a maximum of 10 minutes
Air recirculation
››› page 174
Seat heating buttons
››› in Introduction on page 171
›››
page 170 55
Page 122 of 348
Operation
Introduction to the Easy
C onnect
sy
stem*
System settings (CAR)* CAR menu Read the additional information carefully
›› ›
page 33
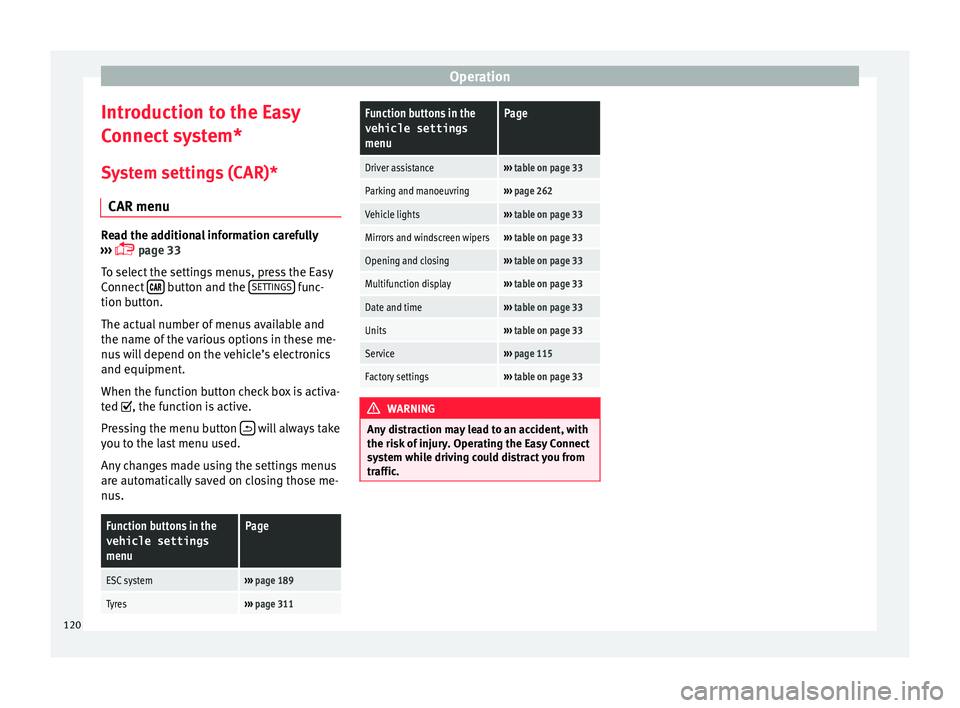
To select the settings menus, press the Easy
Connect button and the
S
ET
TINGS func-
tion b utt
on.
The act
ual number of menus available and
the name of the various options in these me-
nus will depend on the vehicle’s electronics
and equipment.
When the function button check box is activa-
ted , the function is active.
Pressing the menu button will always take
y ou t
o the l
ast menu used.
Any changes made using the settings menus
are automatically saved on closing those me-
nus.
Function buttons in the vehicle settings
menuPage
ESC system››› page 189
Tyres››› page 311
Function buttons in the
vehicle settings
menuPage
Driver assistance››› table on page 33
Parking and manoeuvring››› page 262
Vehicle lights››› table on page 33
Mirrors and windscreen wipers››› table on page 33
Opening and closing››› table on page 33
Multifunction display››› table on page 33
Date and time››› table on page 33
Units››› table on page 33
Service››› page 115
Factory settings››› table on page 33 WARNING
Any distraction may lead to an accident, with
the risk of
injury. Operating the Easy Connect
system while driving could distract you from
traffic. 120
Page 129 of 348

Opening and closing
The vehicle keys or new spare keys can be
o bt
ained fr
om a SEAT Official Service, a spe-
cialised workshop or an approved key service
qualified to create this kind of key.
New keys or spare keys must be synchron-
ised before use ››› page 134. CAUTION
All of the vehicle keys contain electronic com-
ponents. Pr ot
ect them from damage, impacts
and humidity. Note
● Only u
se the key button when you require
the corresponding function. Pushing the but-
ton unnecessarily could accidentally unlock
the vehicle or trigger the alarm. It is also pos-
sible even when you are outside the radius of
action.
● Key operation can be greatly influenced by
overl
apping radio signals close to the vehicle
working in the same range of frequencies, for
example, radio transmitters or mobile tele-
phones.
● Obstacles between the remote control and
the vehic
le, bad weather conditions and dis-
charged batteries can considerably reduce
the range of the remote control.
● If the buttons of the vehicle key are press-
ed ›››
Fig. 128 or ››› Fig. 129 or one of the cen-
tral locking buttons ››› page 128 is pressed
repeatedly in short succession, the central
locking briefly disconnects as protection against overloading. The vehicle is then un-
lock
ed. L
ock it if necessary. Unlocking/Locking by remote control
Read the additional information carefully
›› ›
page 15
The vehicle will be locked again automatical-
ly if you do not open one of the doors or the
rear lid within 30 seconds after unlocking the
car. This function prevents the vehicle from
remaining unlocked if the unlocking button is
pressed by mistake. This does not apply if
you press the button for at least one sec-
ond.
In vehicles with a security central locking
feature (selective unlocking of side doors)
››› page 127, when the button is pressed
once, only the driver door and the fuel tank
flap are unlocked. When the button is press-
ed a second time, all the vehicle doors are unlocked. WARNING
Observe the safety warnings ›››
in Descrip-
tion on pag e 125
. Note
● Do not u se the r
emote control key until the
vehicle is visible. ●
Other fu nction
s of the remote control key
››› page 140, Convenience opening and clos-
ing. Selective unlocking system
The selective unlocking system allows you to
only
u
nlock the driver door and the fuel tank
flap. All other doors and the rear lid remain
locked.
Unlocking the driver door and tank flap
– Press ( once) the b utt
on on the remote
control key or turn the key once in the
opening direction.
Unlocking all the doors, the rear lid and the
tank flap simultaneously. – Within 5 seconds, press ( twice) the
but-
ton on the remote control key, or turn the
key twice within 5 seconds in the opening
direction.
The anti-theft security system* and the anti-
theft alarm* are immediately disabled if you
unlock only the driver door, without unlock-
ing the other doors.
In vehicles with Easy Connect*, you can pro-
gramme the security central locking system
directly ››› page 128.
127
Technical data
Advice
Operation
Emergencies
Safety
Page 133 of 348

Opening and closing
Rear lid with sensor-controlled open-
in g/c
lo
sing (Easy Open)
If there is a valid vehicle key in the proximity
››› Fig. 131 of the rear lid, it is possible to
unlock and open or close it moving one foot
in the area of the sensors ››› Fig. 131 loca-
ted under the rear bumper.
● Switch the ignition off.
● Stand in front of the rear bumper, in the
middle.
● W
ith a brisk movement, bring your foot and
lower l
eg as close as you can to the bumper.
The lower part of the leg needs to be close to
the upper sensor area and your foot to the
lower sensor area ››› Fig. 131 1 .
● Quickly remove your foot and lower leg
fr om the sen
sor ar
eas ››› Fig. 131 2 . The
r e
ar lid w
ill be automatically opened.
● If the rear lid fails to open, repeat the pro-
cedure af
ter a few seconds.
The third brake light flashes once to show the
boot has opened with the Easy Open func-
tion.
The rear lid can be closed with another foot
movement similar to the opening one (provi-
ded a valid vehicle key is in the proximity of
the rear lid).
When closed, the rear lid automatically locks
if the vehicle has been locked beforehand
and there is no valid key inside. While the rear lid is in motion (either opening
or clos
ing), it can be stopped with another
foot movement similar to the opening one
(provided a valid vehicle key is in the proxim-
ity of the rear lid).
The Easy Open feature is not available or only
has limited availability in the following situa-
tions (examples):
● If the rear bumper is very dirty.
● If the rear bumper is wet with salt water,
e.g. aft
er having driven on gritted roads.
● If the electrical unlocking tow hitch is not
cov
ered.
● If the vehicle has been equipped at a later
time with a to
w bracket.
In the event of heavy rain, the Easy Open fea-
ture may take a little longer to open the boot
or may deactivate automatically, to avoid the
boot opening by accident, e.g. because of
the running water.
The Easy Open function can be connected
and disconnected permanently in the info-
tainment system by pressing the button
and the S
ET
TINGS and the
Openin
g and c
lo
sing function buttons
››
›
page 33.
What happens when locking the vehicle with
a second key
If there is a vehicle key inside the vehicle and
it is locked from the outside with a second
vehicle key, the key inside the vehicle is blocked for engine ignition
›››
page 181. In
order to enable engine ignition, the button
on the key inside the vehicle needs to be
pressed.
Automatically disabling sensors
If the vehicle is not locked or unlocked for a
long period of time, the proximity sensors on
the passenger doors are automatically disa-
bled.
If one of the sensor surfaces on the door han-
dles is often activated in an unusual manner
with the vehicle locked (e.g. by the branches
of a bush rubbing against it), all proximity
sensors are disabled for a certain period of
time.
Sensors will again be enabled:
● After a time.
● OR: if the vehicle is unlocked with the
butt
on on the key.
● OR: if the boot is opened.
● OR: if
the vehicle is unlocked manually with
the key
.
Keyless Access temporary disconnection
function*
You can deactivate the vehicle's Keyless Ac-
cess unlocking for a locking and unlocking
cycle. »
131
Technical data
Advice
Operation
Emergencies
Safety
Page 139 of 348

Opening and closing
Rear lid (luggage compart-
ment) R el
at
ed video Fig. 136
Handsfree Rear lid with electric opening and
c
lo s
ing* Fig. 137
Rear lid open: button to close the
r e
ar lid immedi
ately. Fig. 138
Centre console: button to open and
clo se r
ear lid. Opening the rear lid
● Unlock the vehicle ››
›
page 125 and briefly
press the handle of the rear lid. On vehicles
with Keyless Access you can directly press
the handle of the rear lid. The rear lid is un-
locked if an authorised key is recognised in
the proximity of the vehicle.
● OR: press the button on the centre console
for at
least one second ›››
Fig. 138. The but-
ton also works when the ignition is switched
off.
● OR: Press and hold the butt
on on the
vehicle key for approx. 1 second. If the vehi-
cle is locked, only the rear lid is unlocked
(the doors remain locked).
● OR: on vehicles with Keyless Access and
sensor
-controlled opening you can open the
rear lid by moving one foot in the area of the
sensors located below the rear bumper (Easy Open). The rear lid will be automatically
opened.
Clos
ing the rear lid
● Briefly press the button on the r
ear lid
››› Fig. 137 ››› .
● OR: pr ess the
b
utton located on the
centre console until the rear lid is closed
››› Fig. 138.
● OR: on vehicles with Keyless Access, press
and hol
d the vehicle key button until the
rear lid is closed or move one foot in the area
of the sensors located below the rear bumper
(Easy Open) ››› page 129. The vehicle key
must not be further than approx. 1.5 m from
the luggage compartment and should not be
in the vehicle.
● OR: manually move the rear lid in the direc-
tion of c
losing until it closes automatically.
● The rear lid goes down automatically to the
final po
sition and also closes automatically
››› .
Int erruptin
g openin
g or closing
After beginning to open or close the rear lid,
the action can be halted by pressing one of
the buttons.
Continue opening or closing the rear lid by
hand. To do this, some force will have to be
used. »
137
Technical data
Advice
Operation
Emergencies
Safety
Page 140 of 348
Operation
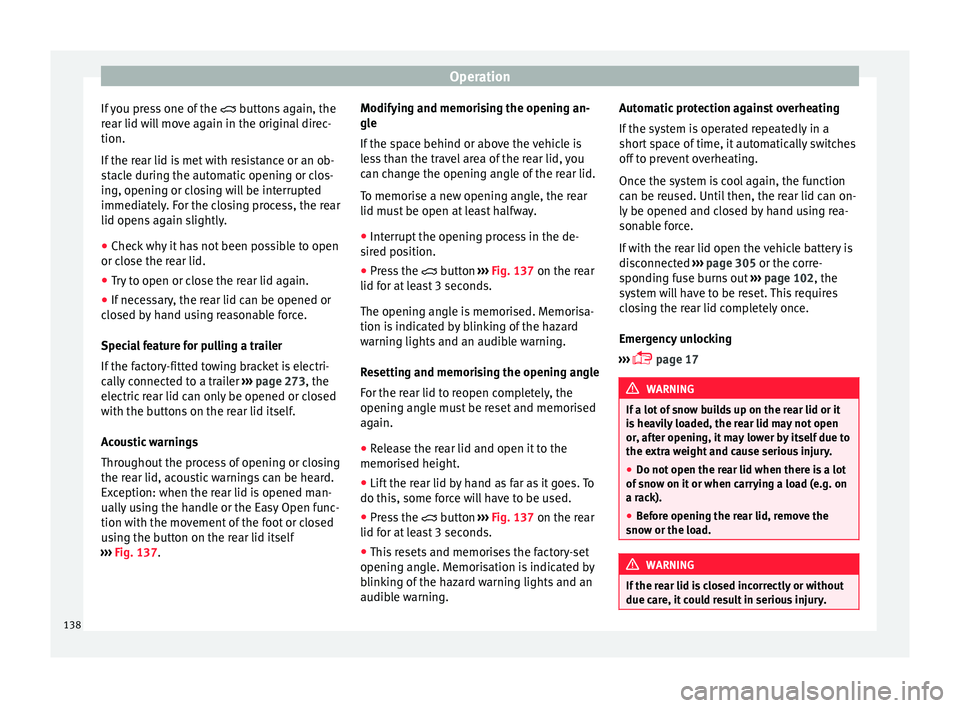
If you press one of the butt
on s again, the
rear lid will move again in the original direc-
tion.
If the rear lid is met with resistance or an ob-
stacle during the automatic opening or clos-
ing, opening or closing will be interrupted
immediately. For the closing process, the rear
lid opens again slightly.
● Check why it has not been possible to open
or close the r
ear lid.
● Try to open or close the rear lid again.
● If necessary, the rear lid can be opened or
closed b
y hand using reasonable force.
Special feature for pulling a trailer
If the factory-fitted towing bracket is electri-
cally connected to a trailer ››› page 273, the
electric rear lid can only be opened or closed
with the buttons on the rear lid itself.
Acoustic warnings
Throughout the process of opening or closing
the rear lid, acoustic warnings can be heard.
Exception: when the rear lid is opened man-
ually using the handle or the Easy Open func-
tion with the movement of the foot or closed
using the button on the rear lid itself
››› Fig. 137. Modifying and memorising the opening an-
gle
If the s
pace behind or above the vehicle is
less than the travel area of the rear lid, you
can change the opening angle of the rear lid.
To memorise a new opening angle, the rear
lid must be open at least halfway.
● Interrupt the opening process in the de-
sired po
sition.
● Press the button ›
›› Fig. 137 on the rear
lid for at least 3 seconds.
The opening angle is memorised. Memorisa-
tion is indicated by blinking of the hazard
warning lights and an audible warning.
Resetting and memorising the opening angle
For the rear lid to reopen completely, the
opening angle must be reset and memorised
again.
● Release the rear lid and open it to the
memorised height.
● Lif
t the rear lid by hand as far as it goes. To
do this, some for
ce will have to be used.
● Press the button ›
›› Fig. 137 on the rear
lid for at least 3 seconds.
● This resets and memorises the factory-set
opening angl
e. Memorisation is indicated by
blinking of the hazard warning lights and an
audible warning. Automatic protection against overheating
If the sys
tem is operated repeatedly in a
short space of time, it automatically switches
off to prevent overheating.
Once the system is cool again, the function
can be reused. Until then, the rear lid can on-
ly be opened and closed by hand using rea-
sonable force.
If with the rear lid open the vehicle battery is
disconnected ››› page 305 or the corre-
sponding fuse burns out ››› page 102, the
system will have to be reset. This requires
closing the rear lid completely once.
Emergency unlocking
››› page 17 WARNING
If a lot of snow builds up on the rear lid or it
is he
avily loaded, the rear lid may not open
or, after opening, it may lower by itself due to
the extra weight and cause serious injury.
● Do not open the rear lid when there is a lot
of sno
w on it or when carrying a load (e.g. on
a rack).
● Before opening the rear lid, remove the
snow or the lo
ad. WARNING
If the rear lid is closed incorrectly or without
due car e, it
could result in serious injury.138
Page 142 of 348
Operation
Safety switch *
The s af
ety
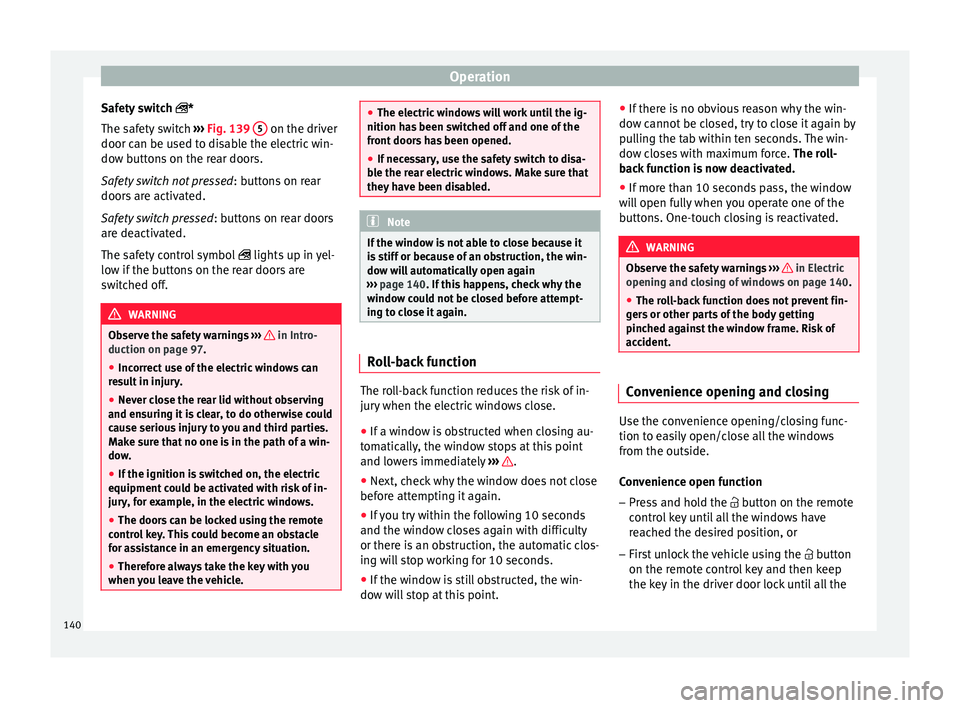
switch ››› Fig. 139 5 on the driver
door c an be u
sed t
o disable the electric win-
dow buttons on the rear doors.
Safety switch not pressed : buttons on rear
doors are activated.
Safety switch pressed : buttons on rear doors
are deactivated.
The safety control symbol lights up in yel-
low if the buttons on the rear doors are
switched off. WARNING
Observe the safety warnings ›››
in Intro-
duction on pag e 97
.
● Incorrect use of the electric windows can
res
ult in injury.
● Never close the rear lid without observing
and ensurin
g it is clear, to do otherwise could
cause serious injury to you and third parties.
Make sure that no one is in the path of a win-
dow.
● If the ignition is switched on, the electric
equipment cou
ld be activated with risk of in-
jury, for example, in the electric windows.
● The doors can be locked using the remote
contro
l key. This could become an obstacle
for assistance in an emergency situation.
● Therefore always take the key with you
when you l
eave the vehicle. ●
The electric w
indows will work until the ig-
nition has been switched off and one of the
front doors has been opened.
● If necessary, use the safety switch to disa-
ble the r
ear electric windows. Make sure that
they have been disabled. Note
If the window is not able to close because it
i s s
tiff or because of an obstruction, the win-
dow will automatically open again
››› page 140. If this happens, check why the
window could not be closed before attempt-
ing to close it again. Roll-back function
The roll-back function reduces the risk of in-
jur
y
when the el
ectric windows close.
● If a window is obstructed when closing au-
tomatic
ally, the window stops at this point
and lowers immediately ››› .
● Next, check why the window does not close
bef or
e att
empting it again.
● If you try within the following 10 seconds
and the window c
loses again with difficulty
or there is an obstruction, the automatic clos-
ing will stop working for 10 seconds.
● If the window is still obstructed, the win-
dow wi
ll stop at this point. ●
If there i
s no obvious reason why the win-
dow cannot be closed, try to close it again by
pulling the tab within ten seconds. The win-
dow closes with maximum force. The roll-
back function is now deactivated.
● If more than 10 seconds pass, the window
wil
l open fully when you operate one of the
buttons. One-touch closing is reactivated. WARNING
Observe the safety warnings ›››
in Electric
opening and c lo
sing of windows on page 140.
● The roll-back function does not prevent fin-
gers
or other parts of the body getting
pinched against the window frame. Risk of
accident. Convenience opening and closing
Use the convenience opening/closing func-
tion t
o e
a
sily open/close all the windows
from the outside.
Convenience open function
– Press and hold the button on the r
emote
control key until all the windows have
reached the desired position, or
– First unlock the vehicle using the button
on the r
emote control key and then keep
the key in the driver door lock until all the
140
Page 143 of 348
Opening and closing
windows have reached the required posi-
tion.
C on
v
enience close function
– Press and hold the button on the r
emote
control key until all the windows are closed
››› , or
– Lock the driver's door with the key and hold
the k ey
in the
itat>lock position un-
til all the windows are closed
Programming convenience opening in the
Easy Connect*
– Select: button > SETTINGS
fu
nction
b
utton > Opening and closing > Open-
ing the window by holding down
button or > Front window on/off .WARNING
● Never c lo
se the windows without due care
or proper control. There is a risk of suffering
injury.
● For safety reasons, you should only use the
remote c
ontrol open and close functions with-
in about 2 metres of the vehicle. To avoid in-
juries, always keep an eye on the windows
when pressing the button to close them. The
windows stop moving as soon as the button
is released. One-touch opening and closing
One-touch opening and closing means you
do not h
av
e to hold down the button.
Buttons ››› Fig. 139 1 ,
2 ,
3 and
4 have
two po s
itions for opening windows and two
for closing them. This makes it easier to open
and close windows to the desired position.
One-touch closing
– Pull up the window button briefly up to the
second pos
ition. The window closes fully.
One-touch opening
– Push down the window button briefly up to
the second po s
ition. The window opens
fully.
Resetting one-touch opening and closing
The automatic open and close function will
not work if the battery has been temporarily
disconnected. The function can be restored
as follows:
– Close the window as far as it will go by lift-
ing and hol
ding the electric window switch.
– Release the switch and then lift it again for
1 second. Thi
s will re-enable the automatic
function.
If you push (or pull) a button to the first
stage, the window will open (or close) until
you release the button. If you push or lift the button briefly to the second stage, the win-
dow wi
ll open (one-touch opening) or close
(one-touch closing) automatically. If you op-
erate the button while the window is opening
or closing, it stops at this position.
Sunroof*
Introduction The sunroof consists of two glass parts. The
re
ar p
art is fixed and cannot be opened. It al-
so has a sun blind. WARNING
If the sunroof is used negligently or without
pa y
ing due attention, it can cause serious in-
jury.
● Open or close the sunroof and the sun blind
only when no one i
s in their path of move-
ment.
● Never leave any key inside the vehicle
when exitin
g.
● Never leave a child or any other person who
may
need help in the vehicle, especially if
they have access to the vehicle key. If using
they key unattended, they could lock the ve-
hicle, start the engine, switch on the ignition
and activate the sunroof.
● After switching off, it is still possible to
open or close the s
unroof during a short » 141
Technical data
Advice
Operation
Emergencies
Safety