Page 177 of 316

Driving
●
Bef or
e attempting to push-start or tow a ve-
hicle in order to start it, you should first try to
start it using the battery of another vehicle.
Please observe and follow the notes on the
››› page 71, How to jump start. For the sake of the environment
Do not warm-up the engine by running the
en gine w ith the
vehicle stationary. You
should drive off as soon as you start the en-
gine. This helps the engine reach operating
temperature faster and reduces emissions. Immobiliser “SAFE”*
1)The electronic immobiliser prevents unau-
thori
sed per
son
s from driving the vehicle.
Inside the key there is a chip that deactivates
the electronic immobiliser automatically
when the key is inserted into the ignition.
The electronic immobiliser will be activated
again automatically as soon as you pull the
key out of the ignition lock.
The engine can only be started using a genu-
ine SEAT key with its correct code.
If the following message* is shown on the in-
strument panel display: SAFE, the vehicle
cannot be started. The engine can, however, be started if the
appropri
ate coded SEAT genuine key is used. Note
A perfect operation of the vehicle is ensured
if g enuine
SEAT keys are used. Switching off the engine
–
Stop the vehicle.
– Turn the ignition key to position ›
› ›
Fig. 175
1 .
Af t
er sw
itching the engine off, the radiator
fan may run on for up to 10 minutes. It is also
possible that the fan turns itself on once
more if the coolant temperature increases
due to the heat accumulated in the engine
compartment or due to its prolonged expo-
sure to solar radiation. WARNING
● Never sw it
ch the engine off until the vehi-
cle is completely stationary.
● The brake servo works only when the en-
gine is ru
nning. With the engine switched off,
more strength is needed to brake. As normal
brake operation cannot be performed, risk of
accidents and serious injury may exist. ●
The st eerin
g lock can be immediately
blocked once the key is removed from the ig-
nition. The vehicle cannot be steered. Risk of
accident.
● Power-assisted steering does not work
when the engine is
off, and more strength is
needed to turn the wheel.
● If the key is removed from the ignition lock
the steerin
g lock could be engaged and vehi-
cle steering would not work. CAUTION
● When the en gine ha
s been running under a
heavy load for a long period, heat can accu-
mulate in the engine compartment and cause
engine damage. For this reason, idle the en-
gine for approximately 2 minutes before
switching it off.
● If the vehicle is stopped and the Start-Stop
syst
em* switches off the engine, the ignition
remains switched on. Make sure that the igni-
tion is switched off before leaving the vehi-
cle, otherwise the battery could discharge. 1)
Available depending on the market
175
Technical data
Advice
Operation
Emergencies
Safety
Page 178 of 316

Operation
Starter button* Fig. 176
In the lower part of the centre con-
so l
e: s
tarter button. Fig. 177
On the right of the steering column:
emer gency
start. The vehicle engine can be started with a
s
t
ar
ter button (Press & Drive). To do so, there
must be a valid key inside the vehicle in the
area of the front or rear seats. Opening the driver's door
when exitin
g the
vehicle activates the electronic lock on the
steering column if the ignition is disabled.
Switching the ignition on/off manually
Briefly push the starter button without touch-
ing the brake or clutch pedal ››› .
F or
v
ehicles with both manual and automatic
transmission, the starter button text START ENGINE STOP flashes like a heartbeat
when the sy s
t
em is preset for switching the
ignition on and off.
Automatic ignition switch-off
If the driver leaves the vehicle, taking the ve-
hicle key with them but leaving the ignition
on, the ignition is not switched off automati-
cally. The ignition is switched off automati-
cally by pressing the lock button on the re-
mote control or manually by pressing the
sensor surface on the door lever ››› Fig. 143
Emergency starting function
If no valid key is detected inside the vehicle,
an emergency start-up will be required. The
relevant message will appear in the dash
panel display. This may happen when, for ex-
ample, the battery of the vehicle key button
is very low or flat:
● Immediately after pushing the starter but-
ton, k eep the
vehicle key next to the right trim of the steering column
›››
Fig. 177, as
close as possible to the Kessy logo.
● The ignition connects and the engine starts
automatic
ally.
Emergency disconnection
If the engine does not switch off after briefly
pressing the starter button, an emergency
disconnect will be required:
● Press the starter button twice within 3 sec-
onds or pr
ess it once for more than 1 sec-
ond ››› .
● The engine turns off automatically.
En gine r
e
start feature
If no valid key is detected inside the vehicle
after the engine stops, you will only have 5
seconds to restart it. A warning will display
on the dash panel screen.
After this interval, it will not be possible to
start the engine without a valid key inside
the vehicle.
Automatic deactivation of the ignition on ve-
hicles with the Start-Stop system
The ignition is switched off automatically
when the vehicle is stopped and the auto-
matic engine shutdown is active, if:
● The driver's seat belt is not fastened,
● the driver does not step on any pedal,
176
Page 179 of 316

Driving
● the driv er door i
s
opened.
After automatically turning off the ignition, if
the dipped beam is on, the side light re-
mains on for approx. 30 minutes (if the bat-
tery is sufficiently charged). If the driver locks
the vehicle or manually turns off the light, the
side light goes out. WARNING
Any accidental movement of the vehicle could
re s
ult in serious injury.
● When switching on the ignition, do not
pre
ss the brake or clutch pedal, otherwise
the engine could start immediately. WARNING
If vehicle keys are used negligently or with-
out due c ar
e, this may cause accidents and
serious injury.
● Never leave any key inside the vehicle
when exitin
g. Otherwise, a child or unauthor-
ised person could lock the vehicle, start the
engine or connect the ignition and, in this
way, operate electronic equipment (e.g. the
windows). Note
● Bef or
e leaving the vehicle, always discon-
nect the ignition manually and, if appropri-
ate, take into account the instructions on the
screen of the dash panel. ●
If the v
ehicle is stationary for a long time
with the ignition on, the vehicle battery
might be discharged and it might not be pos-
sible to start the engine.
● In diesel vehicles, there may be a delay in
the engine st
arting if it requires preheating.
● If during the STOP phase you press the
STAR
T ENGINE STOP button, the ignition is
swit c
hed off and the button flashes.
● If the indication “Start-Stop system deacti-
vated:
Start the engine manually” is dis-
played on the dash panel display, the START ENGINE STOP button will blink.
Starting the engine
3 V
alid for vehicles: with starter button
StepStarting the engine with the starter
button ››› page 176.
1.Press and hold the brake pedal until step 5 is
performed.
1a.In vehicles with a manual gearbox: press
and hold the clutch down until the engine
starts.
2.Put the gearbox lever in neutral or the selec-
tor lever in position P or N.
StepStarting the engine with the starter
button ››› page 176.
3.
Briefly press the starter button ››› Fig. 176
without pressing the accelerator. For the en-
gine to start there must be a valid key in the
vehicle.
After starting the engine, the light of the START ENGINE STOP
button changes to a fixed
light indicating that the engine has started.
4.
If the engine does not start, stop and wait for
approx. 1 minute before trying again. If nec-
essary, perform an emergency start
››› page 176.
5.Disconnect the hand brake when you are
about to start driving ››› page 180. WARNING
Never leave the vehicle with the engine run-
ning, e s
pecially if a gear or gear range is en-
gaged. The vehicle could then suddenly move
or something strange could happen that
would cause damage, fire or serious injury. WARNING
Cold start sprays could explode or cause a
sud den inc
rease in the engine speed.
● Never use sprays to cold start the engine. CAUTION
● The st ar
ter motor or the engine may be
damaged if you try to start the engine while » 177
Technical data
Advice
Operation
Emergencies
Safety
Page 180 of 316

Operation
driving or if you restart it immediately after
swit
c
hing it off.
● If the engine is cold, avoid high engine
speeds, p
ushing the engine too hard and rap-
id acceleration.
● Do not start the engine by pushing the ve-
hicle or t
owing it. Unburnt fuel could enter
the catalytic converter and damage it. Note
● Do not wait
until the engine warms up with
the vehicle stationary; if you have good visi-
bility through the windows, start driving im-
mediately. This helps the engine reach oper-
ating temperature faster and reduces emis-
sions.
● Electrical components with a high power
cons
umption are switched off temporarily
when the engine starts.
● When starting with a cold engine, noise
level
s may briefly increase. This is quite nor-
mal, and no cause for concern.
● When the outside temperature is below
+5°C (+41°F), if the en
gine is diesel, some
smoke may appear under the vehicle when
the fuel-operated auxiliary heater is on. Stopping the engine
3 Valid for vehicles: with starter button
StepSwitch off the engine with the starter
button
››› page 176.
1.Stop the vehicle completely ››› .
2.Press and hold the brake pedal until the step
4 is performed.
3.If you are driving an automatic vehicle, place
the selector lever in position P.
4.Apply the handbrake ››› page 180.
5.
Briefly press the start-up button ››› Fig. 176.
The START ENGINE STOP button blinks again. If
the engine fails to switch off, perform an
emergency disconnect ››› page 176.
6.If the vehicle is equipped with a manual
gearbox, put it into 1st or reverse. WARNING
Never switch off the engine while the vehicle
is mo
ving. This could cause loss of control of
the vehicle, accidents and serious injury.
● The airbags and belt tensioners do not
work when the ignition i
s switched off.
● The brake servo does not work with the en-
gine off. Ther
efore, you need to press the
break pedal harder to brake the vehicle.
● Power steering does not work when the en-
gine is not
running. You need more strength
to steer when the engine is switched off. ●
If the ignition i s
switched off, the steering
column could be locked, making it impossible
to control the vehicle. CAUTION
If the engine is made to work hard for a long
time, it ma
y overheat after being switched
off. To prevent damage to the engine before
switching it off, leave it idle for approx. 2 mi-
nutes in neutral. Note
After switching off the engine, the cooling fan
ma y
continue to operate in the engine com-
partment for a few more minutes, even with
the ignition off. The radiator fan is automati-
cally switched off. “My Beat” Function
For vehicles with a convenience key there is
the “M
y
B
eat” function. This feature provides
an additional indication of the vehicle igni-
tion system.
When accessing the vehicle, e.g. by opening
the doors with the remote control, the START ENGINE STOP button flashes, calling at-
t ention t
o the r
elevant starter system button.
Upon switching the ignition on/off, the light
of the START ENGINE STOP button flashes. With
the en gine sw
it
ched off, after a few seconds,
178
Page 181 of 316

Driving
the S
T
OP ENGINE START button stops flashing
and g oe
s
out.
With the engine running, the START ENGINE STOP button light stays on, indi-
c atin
g th
at the engine is running. The time
that lapses between the moment the user
starts the engine with the START ENGINE STOPbutton and the lighting changes from flash-
in
g t
o fi
xed will depend on specific engine
size characteristics. Upon switching the igni-
tion off with the START ENGINE STOP button, it
s t
ar
ts flashing again.
In vehicles with the Start-Stop system , the
“My Beat” function also offers additional in-
formation:
● When the engine stops during the Stop
phase, the light
of the START ENGINE STOP but-
t on s
t
ays on, since, even though the engine
is off, the Start-Stop system is active.
● When the engine cannot be stated again
with the St
art-Stop system, ››› page 202, and
needs to be started manually, the START ENGINE STOP button flashes to indicate
thi s
f
act.
Braking and parking Brakin
g capacity and braking distance The efficiency of the brakes depends directly
on the br
ak
e p
ad wear. This wear depends to a great extent on the conditions under which
the vehic
le is operated and the way the vehi-
cle is driven. If you often drive in town, drive
short distances or have a sporty driving style,
we recommend that you have the thickness
of your brake pads checked by technical serv-
ices more frequently than recommended in
the Maintenance Programme.
If you drive with wet brakes, for example, af-
ter crossing areas of water, on days of heavy
rainfall or even after washing the car, the ef-
fect of the brakes is reduced as the brake
discs are wet or even frozen (in winter): in
this case, the brakes should be “dried” by
pressing the brake pedal several times. WARNING
Longer braking distances and faults in the
brak e sy
stem increase the risk of accidents.
● New brake pads must be run in and do not
have the c
orrect friction during the first
200 km (124 miles). This reduced braking ca-
pacity may be compensated for by pressing
on the brake pedal a little harder, which also
applies when the brake pads have to be
changed further on.
● If brakes are wet or frozen, or if you are
driving on r
oads which have been salted,
braking power may be lower than normal.
● On steep slopes, if brakes are excessively
used, they w
ill overheat. Before driving down
a long steep slope, it is advisable to reduce
speed and change down into a lower gear or range (depending on the type of transmis-
sion).
Thu
s, make use of engine braking and
relieve the brakes.
● Never let the brakes “drag” by applying
light pre
ssure. Continuous braking will cause
the brakes to overheat and the braking dis-
tance will increase. Apply and then release
the brakes alternately.
● Never let the vehicle run with the engine
switc
hed off. The braking distance is in-
creased considerably when the brake servo is
not active.
● If the brake fluid loses its viscosity and is
subj
ected to heavy use, vapour bubbles can
form in the brake system. This reduces the ef-
ficiency of the brakes.
● Non-standard or damaged front spoilers
coul
d restrict the airflow to the brakes and
cause them to overheat. Before purchasing
accessories please observe the relevant in-
structions ››› page 259, Technical modifica-
tions.
● If a brake system circuit fails, the braking
dist
ance will be increased considerably. Con-
tact a specialised workshop immediately and
avoid unnecessary journeys. Control lamp
Situations in which the warning lamp lights
up *
●
the brake fluid level is too low
› ›
›
page 280. »
179
Technical data
Advice
Operation
Emergencies
Safety
Page 182 of 316

Operation
● ther e i
s
a fault in the brake system.
This warning lamp can light up together with
the ABS system warning lamp. WARNING
● If the br ak
e warning lamp does not go out
or if it lights up when driving, the brake fluid
level in the reservoir is too low so there is a
risk of an accident ››› page 280, Brake fluid.
Stop the vehicle and do not drive on. Obtain
technical assistance.
● If the brake warning lamp lights up to-
gether w
ith the ABS lamp this could be
due to an ABS fault. This could cause the rear
wheels to lock quickly when you brake. This
could cause the rear to break away. Risk of
skidding. Stop the vehicle and seek technical
assistance. Handbrake
Fig. 178
Handbrake between the front seats. The handbrake should be applied firmly to
pr
ev
ent
the vehicle from accidentally rolling
away. Always apply the handbrake when you
leave your vehicle and when you park.
Applying the handbrake
– Pull the handbrake lever up firmly
›››
Fig. 178.
Releasing the handbrake
– Pull the lever up slightly and press the re-
lea
se knob in the direction of the arrow
››› Fig. 178 and guide the handbrake lever
down fully ››› .
A lw
a
ys pull the handbrake all the way up, so
there is less risk of driving off with it still en-
gaged ››› .
The h andbr
ak
e warning lamp lights up
when the handbrake is applied and the igni-
tion switched on. The warning lamp turns off
when the handbrake is released. WARNING
● Never u se the h
andbrake to stop the vehi-
cle when it is in motion. The braking distance
is considerably longer, because braking is
only applied to the rear wheels. Risk of acci-
dent!
● If the handbrake is only partially released,
this w
ill cause the rear brakes to overheat,
which can impair the function of the brake
system and could lead to an accident. This al- so causes premature wear on the rear brake
pa
d
s. CAUTION
Always apply the handbrake before you leave
the vehic
le. Put it in 1st gear as well. In vehi-
cles with an automatic gearbox, place the
gear lever in position P. Parking
The handbrake should always be firmly ap-
p
lied when the
v
ehicle is parked.
Always note the following points when park-
ing the vehicle: – Use the brake pedal to stop the vehicle.
– Apply the handbrake.
– Put it in 1st gear.
– Switch the engine off and remove the key
from the ignition. T
urn the steering wheel
slightly to engage the steering lock.
– Always take you keys with you when you
leav
e the vehicle ››› .
Ad dition
a
l notes on parking the vehicle on
gradients:
Turn the steering wheel so that the vehicle
rolls against the kerb if it started to roll.
180
Page 183 of 316

Driving
● If the
v
ehicle is parked facing downhill,
turn the front wheels so that they point to-
wards the kerb .
● If the vehicle is parked facing uphill
, turn
the front wheels so that they point away from
the kerb.
● Secure the vehicle as usual by applying the
handbrak
e firmly and putting it in 1st gear. WARNING
● Tak e me
asures to reduce the risk of injury
when you leave your vehicle unattended.
● Never park where the hot exhaust system
coul
d ignite inflammable materials, such as
dry grass, low bushes, spilt fuel etc.
● Never allow vehicle occupants to remain in
the vehic
le when it is locked. They would be
unable to open the vehicle from the inside,
and could become trapped in the vehicle in
an emergency. In the event of an emergency,
locked doors will delay assistance to vehicle
occupants.
● Never leave children alone in the vehicle.
They cou
ld set the vehicle in motion, for ex-
ample, by releasing the handbrake or the
gearbox lever.
● Depending on weather conditions, it may
become extr
emely hot or cold inside the vehi-
cle. This can be fatal. Braking and stability systems
El ectr
onic
Stability Control (ESC)* This Electronic Stability System reduces the
risk
of
skidding and improves the vehicle's
stability and ability to hold the road.
The Electronic Stability Control (ESC) contains
the electronic differential lock (EDL) and the
traction control system (ASR). The ESC works
together with the ABS. Both control lamps
will light up if the ESC or ABS systems are
faulty.
The ESC system is started automatically
when the engine is started.
The ESC system is always active and cannot
be switched off. With the Easy Connect sys-
tem it is only possible to deactivate the ASR
or else select Sport mode.
The ASR can be deactivated when wheel spin
is desirable ›››
page 182.
For example:
● When driving with snow chains.
● When driving in deep snow or on loose sur-
fac e
s.
● When the vehicle is stuck, to rock it back-
ward
s and forwards.
Press the button to switch the ASR back on
when you no longer need wheel spin. Electronic Stability Control (ESC)*
The ESC r
educes the risk of skidding by brak-
ing the wheels individually.
The system uses the steering wheel angle
and road speed to calculate the changes of
direction desired by the driver, and constant-
ly compares them with the actual behaviour
of the vehicle. When irregularities occur, for
example, if the vehicle begins to skid, the
ESC brakes the appropriate wheel automati-
cally.
The forces acting on the braked wheel bring
the vehicle back to a stable condition. If the
vehicle tends to oversteer (the rear end
slides out), the system will act on the front
wheel on the outside of the turn.
Control lamp
There are two control lamps for the electronic
stability control. The lamp provides infor-
mation concerning function and disconnec-
tion status.
Both control lamps light up together when
the ignition is switched on and should turn
off after approximately 2 seconds. This is the
time taken for the function check.
This programme includes the ABS, EDL and
ASR. It also includes emergency braking as-
sistance (BAS). »
181
Technical data
Advice
Operation
Emergencies
Safety
Page 184 of 316

Operation
The control lamp ha
s the following func-
tions:
● It flashes whilst driving when the ASR/ESC
is activ
ated.
● It will light up if there is a fault in the ESC.
● As the ESC operates in conjunction with the
ABS, the ESC light
will also come on if a fault
should occur in the ABS.
If the ESC control lamp lights up and stays
on after the engine is started, this may mean
that the control system has temporarily
switched off the ESC. In this case the ESC can
be reactivated by switching the ignition off
and then on again. If the control lamp goes
out, this means the system is fully functional.
The lamp provides information about the
disconnection status of the system:
● It stays lit when the ASR is disconnected or
if y
ou select ESC Sport mode, only by means
of Easy Connect. WARNING
● Do not f or
get that the electronic stability
control ESC cannot defy the laws of physics.
Bear this in mind, particularly on slippery
and wet roads and when towing a trailer.
● Always adapt your driving style to suit the
condition of the r
oads and the traffic situa-
tion. The greater safety provided by the ESC
should not encourage you to run any risks. CAUTION
● To en s
ure that the ESC works correctly, all
four wheels must be fitted with the same
tyres. Any differences in the rolling radius of
the tyres can cause the system to reduce en-
gine power when this is not desired.
● Any modifications made to the vehicle (for
examp
le, to the engine, brake system, run-
ning gear or to the combination of wheels
and tyres) may affect the operation of the
ABS, EDL, ESC and ASR. Traction control system (ASR)
The traction control system prevents the driv-
en wheel
s
fr
om spinning when the vehicle is
accelerating.
Description and operation of the traction
control system during acceleration (ASR)
The ASR system intervenes by reducing en-
gine power and preventing the driven wheels
from slipping during acceleration.
TCS helps the car to start moving, accelerate
and climb a gradient in slippery conditions
where this may otherwise be difficult or even
impossible.
The ASR automatically switches on when the
engine is started. If necessary, it could be
switched on or off using the Easy Connect
system*. When the ASR is off, the warning lamp lights
up . The ASR shoul
d normally be left on.
Only in exceptional cases can it be discon-
nected, i.e. when you want the wheels to
slide; this done through the Easy Connect
system, by means of the button and the
f u
nction b
utton SETTINGS> ESC system ,
for example:
● With compact temporary spare wheel.
● When using the snow chains.
● When driving in deep snow or on soft ter-
rain.
● When the v
ehicle is bogged-down, to free it
“by r
ocking it.”
The ASR should be switched on again as
soon as possible.
Control lamp
There are three control lamps for the traction
control system: (for vehicles equipped
with M-ABS), (for vehicles equipped with
ESC) and . Both control lamps light up to-
gether when the ignition is switched on and
should turn off after approximately 2 sec-
onds, which is the time taken for the function
check.
The or lamp has the following function:
● It flashes when the ASR is working if the ve-
hicl e i
s moving.
182
 1
1 2
2 3
3 4
4 5
5 6
6 7
7 8
8 9
9 10
10 11
11 12
12 13
13 14
14 15
15 16
16 17
17 18
18 19
19 20
20 21
21 22
22 23
23 24
24 25
25 26
26 27
27 28
28 29
29 30
30 31
31 32
32 33
33 34
34 35
35 36
36 37
37 38
38 39
39 40
40 41
41 42
42 43
43 44
44 45
45 46
46 47
47 48
48 49
49 50
50 51
51 52
52 53
53 54
54 55
55 56
56 57
57 58
58 59
59 60
60 61
61 62
62 63
63 64
64 65
65 66
66 67
67 68
68 69
69 70
70 71
71 72
72 73
73 74
74 75
75 76
76 77
77 78
78 79
79 80
80 81
81 82
82 83
83 84
84 85
85 86
86 87
87 88
88 89
89 90
90 91
91 92
92 93
93 94
94 95
95 96
96 97
97 98
98 99
99 100
100 101
101 102
102 103
103 104
104 105
105 106
106 107
107 108
108 109
109 110
110 111
111 112
112 113
113 114
114 115
115 116
116 117
117 118
118 119
119 120
120 121
121 122
122 123
123 124
124 125
125 126
126 127
127 128
128 129
129 130
130 131
131 132
132 133
133 134
134 135
135 136
136 137
137 138
138 139
139 140
140 141
141 142
142 143
143 144
144 145
145 146
146 147
147 148
148 149
149 150
150 151
151 152
152 153
153 154
154 155
155 156
156 157
157 158
158 159
159 160
160 161
161 162
162 163
163 164
164 165
165 166
166 167
167 168
168 169
169 170
170 171
171 172
172 173
173 174
174 175
175 176
176 177
177 178
178 179
179 180
180 181
181 182
182 183
183 184
184 185
185 186
186 187
187 188
188 189
189 190
190 191
191 192
192 193
193 194
194 195
195 196
196 197
197 198
198 199
199 200
200 201
201 202
202 203
203 204
204 205
205 206
206 207
207 208
208 209
209 210
210 211
211 212
212 213
213 214
214 215
215 216
216 217
217 218
218 219
219 220
220 221
221 222
222 223
223 224
224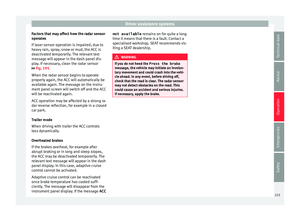 225
225 226
226 227
227 228
228 229
229 230
230 231
231 232
232 233
233 234
234 235
235 236
236 237
237 238
238 239
239 240
240 241
241 242
242 243
243 244
244 245
245 246
246 247
247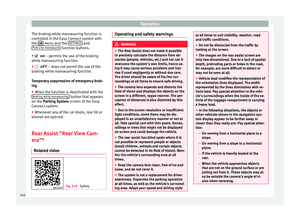 248
248 249
249 250
250 251
251 252
252 253
253 254
254 255
255 256
256 257
257 258
258 259
259 260
260 261
261 262
262 263
263 264
264 265
265 266
266 267
267 268
268 269
269 270
270 271
271 272
272 273
273 274
274 275
275 276
276 277
277 278
278 279
279 280
280 281
281 282
282 283
283 284
284 285
285 286
286 287
287 288
288 289
289 290
290 291
291 292
292 293
293 294
294 295
295 296
296 297
297 298
298 299
299 300
300 301
301 302
302 303
303 304
304 305
305 306
306 307
307 308
308 309
309 310
310 311
311 312
312 313
313 314
314 315
315