2018 RENAULT MASTER instrument panel
[x] Cancel search: instrument panelPage 159 of 290

2.43
FAST IDLE SPEED
Press control 1, and the function will be
activated after a few seconds.
Modifying fast idle speed
To increase or reduce the speed, con-
tact an approved dealer.
Switching off the function
The function is interrupted when:
– you depress the clutch pedal and/or accelerator pedal;
– the sequential gearbox is not in neu- tral;
– the vehicle speed is above 0 mph;
– the
® indicator light is lit up on
the instrument panel;
– the
© indicator light is lit up on
the instrument panel;
– the
Ô indicator light is lit up on
the instrument panel.
1
Special feature relating to the
Stop and Start function: activation
of the “Fast Idle Speed” function
stops the engine going into standby
(refer to the information on “Stop
and Start" in section 2).
Page 161 of 290

2.45
SEQUENTIAL GEARBOX (1/5)
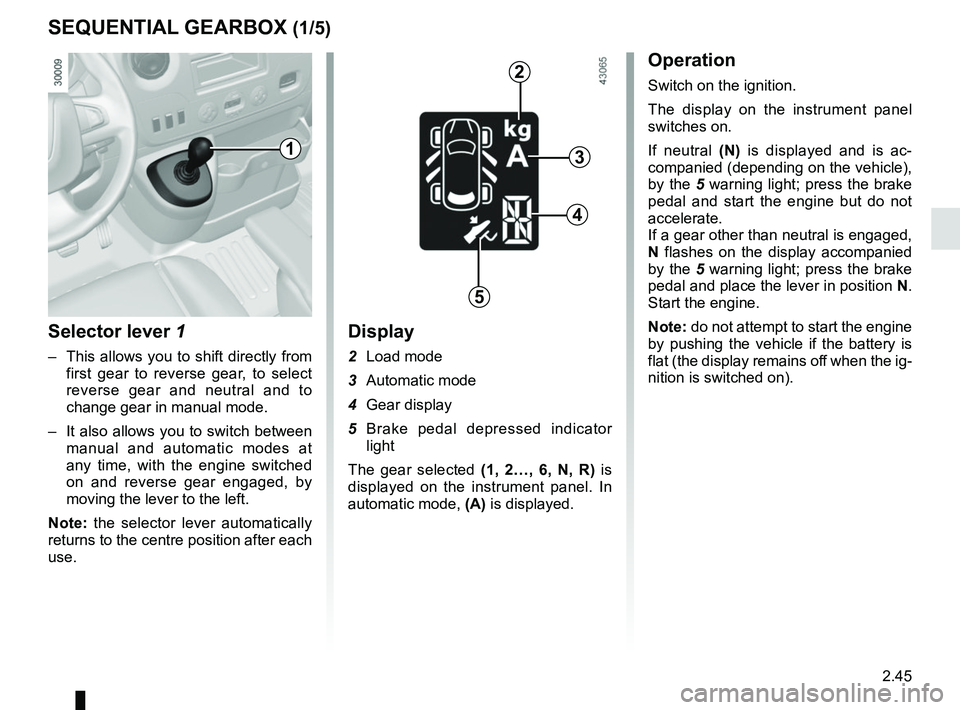
Selector lever 1
– This allows you to shift directly from first gear to reverse gear, to select
reverse gear and neutral and to
change gear in manual mode.
– It also allows you to switch between manual and automatic modes at
any time, with the engine switched
on and reverse gear engaged, by
moving the lever to the left.
Note: the selector lever automatically
returns to the centre position after each
use.
Display
2 Load mode
3 Automatic mode
4 Gear display
5 Brake pedal depressed indicator light
The gear selected (1, 2…, 6, N, R) is
displayed on the instrument panel. In
automatic mode, (A) is displayed.
Operation
Switch on the ignition.
The display on the instrument panel
switches on.
If neutral (N) is displayed and is ac-
companied (depending on the vehicle),
by the 5 warning light; press the brake
pedal and start the engine but do not
accelerate.
If a gear other than neutral is engaged,
N flashes on the display accompanied
by the 5 warning light; press the brake
pedal and place the lever in position N.
Start the engine.
Note: do not attempt to start the engine
by pushing the vehicle if the battery is
flat (the display remains off when the ig-
nition is switched on).
1
2
3
4
5
Page 164 of 290

2.48
SEQUENTIAL GEARBOX (4/5)
Operation in automatic mode
Automatic mode is selected by default
every time the ignition is switched on.
The letter A appears on the display.
The vehicle is controlled using the ac-
celerator and the brake. Gears will
change automatically at the correct
moment and at a suitable engine speed
because the automatic mode takes the
road surface and the chosen driving
style into consideration.
Gears may be shifted manually in this
mode. Pushing the lever forwards
or backwards shifts a gear upwards
(except if there is a risk of underrev-
ving) or downwards (except if there is a
risk of overrevving).
Note: automatic mode takes account
of:
– the position and speed of depression of the accelerator pedal to assess
driving style and select the optimum
gear;
– action on the brake pedal, to com- mence engine braking in preparation
for a downshift.
You can stop the vehicle at red lights,
with the gear engaged, by depressing
the brake pedal; there is no need to
change to neutral (N).
The vehicle will move off again:
– either slowly, if you release the brake without accelerating (e.g. when in a
traffic jam);
– or quickly, if you release the brake and accelerate.
Accelerating and overtaking
– Slowly depress the accelerator pedal to accelerate gradually;
The oil level in the automatic gear-
box system reservoir varies depend-
ing on use. Adding oil is strictly
forbidden (except by qualified ap-
proved network personnel).
– to obtain maximum vehicle per-
formance regardless of the mode
selected (automatic or manual),
quickly depress the accelerator
pedal beyond the kickdown point.
The speed with which you depress the
pedal will allow you to downshift ac-
cording to the vehicle’s capabilities.
Parking the vehicle
It is possible to park in gear (for exam-
ple, on a slope):
– with the ignition on, select a gear with your foot on the brake ;
– check that a gear other than N is dis- played on the instrument panel, then
remove the ignition key;
– apply the handbrake.
To disengage the gear, switch on the
ignition without starting the engine and
shift the selector lever to neutral with
the brake pedal depressed . Check
that N is displayed on the instrument
panel.
Page 200 of 290

4.4
ENGINE OIL LEVEL: general information (1/2)
If the level is at the minimum
The “TOP-UP OIL LEVEL” message
and warning light
© are displayed
on the instrument panel.
It is vital to top up the oil as soon as
possible.
The display only warns the
driver if the oil level is at the
minimum level. It does not
inform the driver that the oil
level has exceeded the maximum
level as this can only be measured
using a dipstick.
It is normal for an engine to use oil for
lubrication and cooling of moving parts
and it is normal to top up the level be-
tween oil changes.
However, contact an approved Dealer if
more than 0.5 litres is being consumed
every 600 miles (1,000 km) after the
running in period.
Oil change frequency: check the oil
level from time to time and certainly
before any long journey to avoid the
risk of damaging your engine.
Reading the oil level
The oil level should be read with the ve-
hicle on level ground, after the engine
has been switched off for some time.
The dipstick must be used to read
the exact oil level and make sure
that the maximum level has not been
exceeded (risk of engine damage).
Refer to the following pages.
The instrument panel display only
alerts the driver when the oil level is at
its minimum.
A
1
2
Minimum oil level display A
If the level is above the minimum
level
The “OIL LEVEL” message appears on
the display, accompanied by squares
indicating the level. These squares di-
sappear as the level drops and they are
replaced by dashes.
To switch to trip computer reading,
press button 1 or 2 again.
Page 207 of 290

4.11
TYRE PRESSURE (1/2)
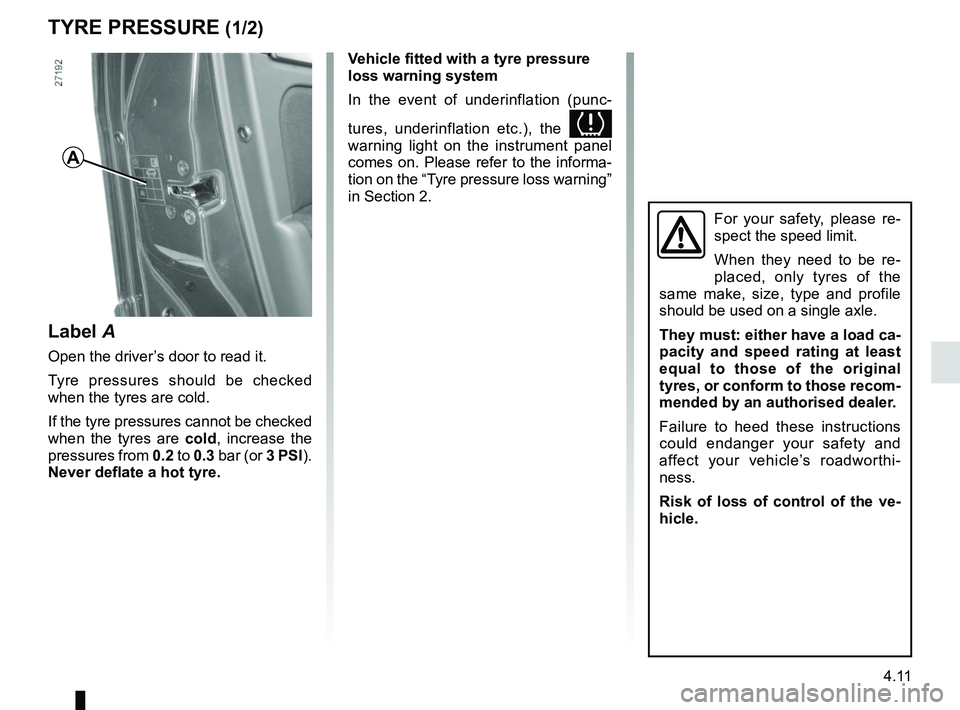
Label A
Open the driver’s door to read it.
Tyre pressures should be checked
when the tyres are cold.
If the tyre pressures cannot be checked
when the tyres are cold, increase the
pressures from 0.2 to 0.3 bar (or 3 PSI).
Never deflate a hot tyre.
A
Vehicle fitted with a tyre pressure
loss warning system
In the event of underinflation (punc-
tures, underinflation etc.), the
warning light on the instrument panel
comes on. Please refer to the informa-
tion on the “Tyre pressure loss warning”
in Section 2.
For your safety, please re-
spect the speed limit.
When they need to be re-
placed, only tyres of the
same make, size, type and profile
should be used on a single axle.
They must: either have a load ca-
pacity and speed rating at least
equal to those of the original
tyres, or conform to those recom-
mended by an authorised dealer.
Failure to heed these instructions
could endanger your safety and
affect your vehicle’s roadworthi-
ness.
Risk of loss of control of the ve-
hicle.
Page 209 of 290

4.13
When the ignition is off, some consu-
mers may also be switched off (dipped
beam headlights, radio, ventilation,
etc.). On the instrument panel, the mes-
sage “BATTERY MODE: ECONOMY”
appears when switched off. When the
level is extremely low, the message
“BATTERY LOW START ENGINE” is
displayed.
The charge status of the battery can
decrease, especially if you use your
vehicle:
– for short journeys;
– for driving in town;
– when the temperature drops;
– with the vehicle stopped and the engine off.
Replacing the battery
As this operation is complex, we advise
you to contact an approved Dealer.
BATTERY
123
456
This is located behind step A and does
not require maintenance. You should
not open it or add any fluid .
Depending on the vehicle, a system
continuously checks the battery charge
status.
Handle the battery with care as it contains sulphuric acid, which must n\
ot
come into contact with eyes or skin. If it does, wash the affected area with
plenty of cold water. If necessary, consult a doctor.
Ensure that naked flames, red hot objects and sparks do not come into
contact with the battery as there is a risk of explosion.
Label B
Observe the indications on the battery:
– 1 naked flames and smoking are for-
bidden;
– 2 eye protection required;
– 3 keep away from children;
– 4 explosive materials;
– 5 refer to the handbook;
– 6 corrosive materials.
The battery is a speci-
fic type, please ensure it
is replaced with the same
type. Consult an approved
dealer.
B
A
Page 213 of 290

4.17
Glass instrument panel(e.g. instrument panel, clock, exterior
temperature display, radio display, etc.)
Use a soft cloth (or cotton wool).
If this does not clean them properly,
use a soft cloth (or cotton wool) slightly
moistened with soapy water and then
wipe clean with another soft damp cloth
or cotton wool.
Finally, carefully dry off with a soft dry
cloth.
Do not use products containing alco-
hol and/or spray fluids on the area.
Seat belts
These must be kept clean.
Use products selected by our Technical
Department (Approved outlets) or
warm, soapy water and a sponge and
wipe with a dry cloth.
Detergents or dyes must not be used
under any circumstances.
INTERIOR TRIM MAINTENANCE (1/2)
Textiles (seats, door trim, etc)
Vacuum-clean the textiles regularly.
Liquid stain
Use soapy water.
Dab lightly (never rub) with a soft cloth,
rinse and remove the excess.
Solid or pasty stain
Carefully remove the excess solid or
pasty material immediately with a
spatula (working from the edges to the
centre to avoid spreading the stain).
Clean as for a liquid stain.
Special instructions for sweets or
chewing gum
Put an ice cube on the stain to solidify
it, then proceed as for a solid stain.
A well-maintained vehicle will last
longer. It is therefore recommended to
maintain the interior of the vehicle regu-
larly.
A stain should always be dealt with
swiftly.
Whatever type of stain is on the trim,
use
cold (or warm) soapy water with
natural soap.
Detergents (washing-up liquid, pow-
dered products, alcohol-based prod-
ucts) should not be used.
Use a soft cloth.
Rinse and soak up the excess.
For further recommendations for
maintaining the interior, and/or for
any unsatisfactory results, please
see an authorised dealer.
Page 233 of 290

5.19
TYRES (2/3)
Tyre pressures
Adhere to the tyre pressures (including
the emergency spare wheel). The tyre
pressures should be checked at least
once a month and additionally before
any long journey (refer to the label af-
fixed to the edge of the driver’s door).
Incorrect tyre pressures
lead to abnormal tyre wear
and unusually hot running.
These are factors which
may seriously affect safety and lead
to:
– poor road holding,
– risk of bursting or tread separa- tion.
The pressure depends on the load
and the speed of use. Adjust the
pressure according to the condi-
tions of use (refer to the label affixed
to the edge of the driver’s door).
Please be aware that a
poorly tightened or miss-
ing valve cap can make the
tyres less airtight and lead
to pressure loss.
Always use valve caps identical to
those fitted originally and tighten
them fully.
Pressures should be checked when the
tyres are cold; ignore higher pressures
which may be reached in hot weather
or following a fast journey.
If tyre pressures cannot be checked
when the tyres are cold, the normal
pressures must be increased by 0.2 to
0.3 bar (or 3 PSI).
Never deflate a hot tyre.
Dual wheel versions
To inflate the outer wheel, it is recom-
mended that the inflation tube is passed
between the two wheels. Vehicle fitted with a tyre pressure
loss warning system
If underinflated (puncture, low pres-
sure, etc.), the warning light
on
the instrument panel comes on, see
“Tyre pressure loss warning system” in
Section 2.
Changing wheels around
This practice is not recommended.
Emergency spare wheel
Refer to the information on the
“Emergency spare wheel” and
“Changing a wheel” in Section 5.