Page 4 of 416

2
.
.
Instrument panel 10
Warning and indicator lamps 1 3
Indicators
2
7
Lighting dimmer
3
4
Trip computer
3
5
Date and time adjustment
3
7
Key
39
Key, remote control
3
9
Keyless Entry and Starting
4
6
Locking/unlocking from inside
6
1
Front doors
6
3
Manual sliding side door(s)
6
4
Electric sliding side door(s)
6
6
Hands-free sliding side door(s)
7
4
Side-hinged rear doors
7
7
Tailgate
80
Alarm
81
Electric windows
8
3Steering wheel adjustment
8
5
Mirrors 85
Front seats
87
A
dditional adjustments
9
1
2-seat front bench seat
9
2
Moduwork
9
4
Fixed one-piece bench seat
9
9
Fixed rear seat and bench seat 1 02
Precautions for the seats and
bench seats 1 05
Fixed crew cab
1
06
Folding crew cab
1
07
Interior fittings
1
08
Loading area fittings
1
12
Seating area fittings
1
13
Heating
115
Manual air conditioning
1
15
Dual-zone automatic air conditioning
1
17
Recirculation of the interior air
1
20
Front demist – defrost
1
20
Door mirrors demist – defrost
1
21
Rear screen demist – defrost
1
22
Rear Heating – Air conditioning
1
24
Programmable Heating/Ventilation
1
25
Courtesy lamp(s)
1
28Lighting control stalk
1
30
Daytime running lamps
1
32
Automatic illumination of headlamps
1
32
Cornering lighting
1
34
Automatic headlamp dipping
1
35
Headlamp beam height
adjustment
137
Wiper control stalk
1
37
General safety recommendations
1
42
Hazard warning lamps
1
43
Emergency or assistance call
1
43
Hor n
14
5
Electronic stability control (ESC)
1
45
Grip control
1
48
Seat belts
1
50
Airbags
154
Child seats
1
57
Deactivating the passenger front airbag
1
59
ISOFIX mountings and child seats
1
66
Manual child lock
1
74
Electric child lock
1
74
Child lock on rear windows
1
75
Over view
Instruments
Access Ease of use and comfort
Safety
Lighting and visibility
Eco-driving
Instruments and controls 4
L abels 7
Eco-driving
8
Contents
Page 7 of 416

5
Steering mounted controls
1.External lighting/direction indicator
control stalk
2. Wiper/screenwash/trip computer control
stalk
3. Audio system adjustment controls
(depending on version).
4. Controls for Speed limiter/Cruise control/
Adaptive cruise control
5. Instrument panel display mode selection
wheel
6. Voice synthesis control (depending on
ve r s i o n).
Volume adjustment (depending on
ve r s i o n).
7. Audio system adjustment controls
(depending on version).
With touch screen
Depending on your vehicle's equipment,
the storage compartments may be open
or closed. This configuration is shown for
illustrative purposes.
1.
Open glove box.
2. 12 V accessory sockets (120 W).
Obser ve the maximum power rating to
avoid damaging your accessory.
3. USB port.
4. Auxiliary socket (JACK).
5. Cup or can holder.
6. Storage compartments.
7. Cooled glove box (if fitted).
Via a ventilation nozzle, if opened, engine
running and air conditioning on.
8. Upper glove box.
9. 230 V accessory socket (150 W, if fitted).
Obser ve the maximum power rating to
avoid damaging your accessory.
10. Horn.
.
Over view
Page 37 of 416
35
On the instrument panel
F Press this button.
With steering-mounted controls
F Press the thumbwheel on the steering wheel .
Trip computer
Data displays
To display the various on-board computer tabs
in succession:
F
P
ress this button, located on the end of the
wiper control stalk .
Information displayed about the current journey
(range, current fuel consumption, average fuel
consumption, etc.).
-
I
nstant information with:
•
range,
•
c
urrent fuel consumption,
•
S
top & Start time counter.
- t he trip 1 tab with:
• a verage speed,
•
a
verage fuel consumption,
•
d
istance travelled, for the first
trip.
Depending on your vehicle's equipment, a 2nd
trip is available. -
t
he trip 2 tab with:
•
a
verage speed,
•
a
verage fuel consumption,
•
d
istance travelled, for the
second trip.
Trips 1
and 2 are independent but their use is
identical.
For example, trip 1
can be used for daily figures
and trip 2
for monthly figures.
1
Instruments
Page 38 of 416
36
Reset trip
With LCD instrument panel
F When the trip is displayed, press the button on the end of the wiper control stalk for
more than two seconds.
F
O
r press this button for more than two
seconds.
With LCD text instrument panel
With LCD text or matrix
instrument panel
F When the trip is displayed, press the button on the end of the wiper control stalk for
more than two seconds. F
O
r, depending on equipment, press the
thumbwheel on the steering wheel for
more than two seconds.
A few definitions
Range
(miles or km)
The distance which can still be
travelled with the fuel remaining in
the tank (related to the average fuel
consumption over the last few miles
(kilometres) travelled).
This value may fluctuate if a change
of driving style or terrain results in a
significant change in the current fuel
consumption.
F
W
hen the desired trip is displayed, press
the reset button in the instrument panel for
more than two seconds.
Instruments
Page 87 of 416

85
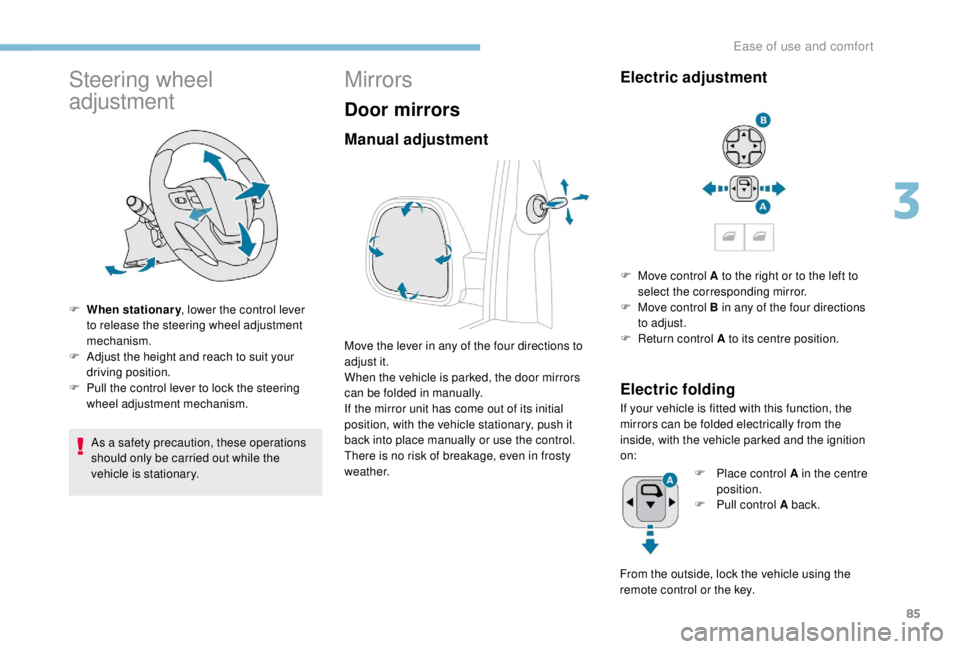
Steering wheel
adjustment
F When stationary, lower the control lever
to release the steering wheel adjustment
mechanism.
F
A
djust the height and reach to suit your
driving position.
F
P
ull the control lever to lock the steering
wheel adjustment mechanism.
As a safety precaution, these operations
should only be carried out while the
vehicle is stationary.
Mirrors
Door mirrors
Manual adjustment
Move the lever in any of the four directions to
adjust it.
When the vehicle is parked, the door mirrors
can be folded in manually.
If the mirror unit has come out of its initial
position, with the vehicle stationary, push it
back into place manually or use the control.
There is no risk of breakage, even in frosty
weather.
Electric adjustment
F Move control A to the right or to the left to select the corresponding mirror.
F
M
ove control B in any of the four directions
to adjust.
F
R
eturn control A to its centre position.
Electric folding
If your vehicle is fitted with this function, the
mirrors can be folded electrically from the
inside, with the vehicle parked and the ignition
on: F
P
lace control A in the centre
position.
F
P
ull control A back.
From the outside, lock the vehicle using the
remote control or the key.
3
Ease of use and comfort
Page 112 of 416
110
Front door pockets
Liquids carried in an open vessel (a cup
or mug) could be spilt, presenting a risk of
damage on contact with the controls in the
dashboard and centre console. Be careful.
Glove box, upper
This is located on the dashboard, behind the
steering wheel.
Press the control to open the lid (depending on
version) then guide it to its fully open position.
To close it, guide the cover then press the
centre gently.
Any liquid which could spill risks causing an
electrical short circuit and therefore a potential
fire.
When driving
, keep the storage
compartment closed. Otherwise there is a
risk of injury in the event of an accident or
sudden braking.
Depending on the country of
sale, with air conditioning, it
gives access to the ventilation
nozzle, delivering the same air-
conditioned air as the vents in
the passenger compartment.
Ease of use and comfort
Page 137 of 416

135
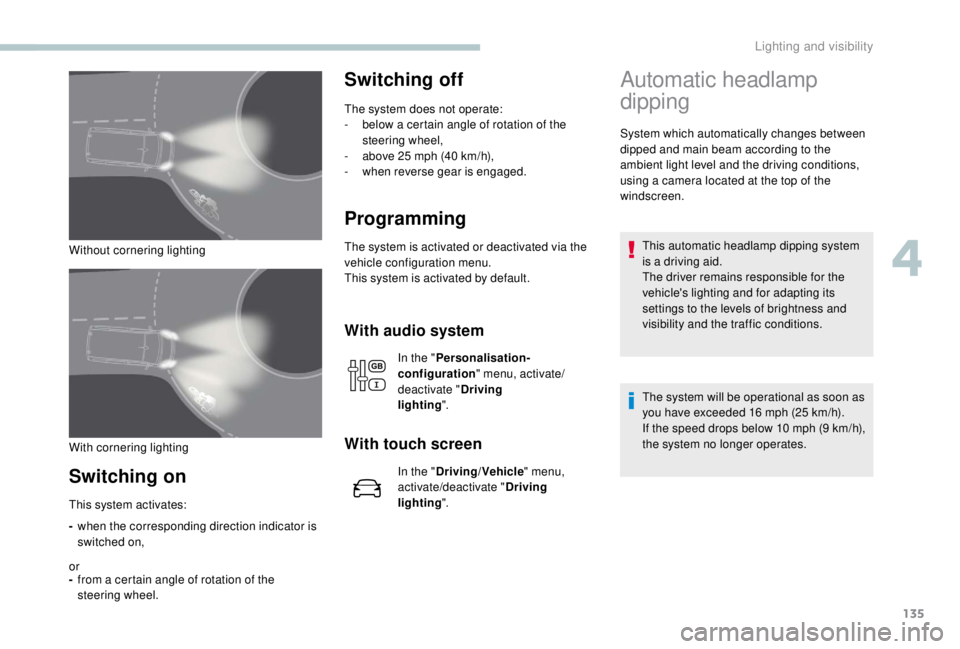
Without cornering lighting
Switching on
-when the corresponding direction indicator is
switched on,
or
- from a certain angle of rotation of the
steering wheel.
Switching off
The system does not operate:
-
b elow a certain angle of rotation of the
steering wheel,
-
a
bove 25 mph (40 km/h),
-
w
hen reverse gear is engaged.
Programming
The system is activated or deactivated via the
vehicle configuration menu.
This system is activated by default.
This system activates:
With audio system
In the " Personalisation-
configuration " menu, activate/
deactivate " Driving
lighting ".
With touch screen
In the "Driving/Vehicle " menu,
activate/deactivate " Driving
lighting ".
Automatic headlamp
dipping
System which automatically changes between
dipped and main beam according to the
ambient light level and the driving conditions,
using a camera located at the top of the
windscreen.
This automatic headlamp dipping system
is a driving aid.
The driver remains responsible for the
vehicle's lighting and for adapting its
settings to the levels of brightness and
visibility and the traffic conditions.
The system will be operational as soon as
you have exceeded 16
mph (25 km/h).
If the speed drops below 10
mph (9 km/h),
the system no longer operates.
With cornering lighting
4
Lighting and visibility
Page 147 of 416

145
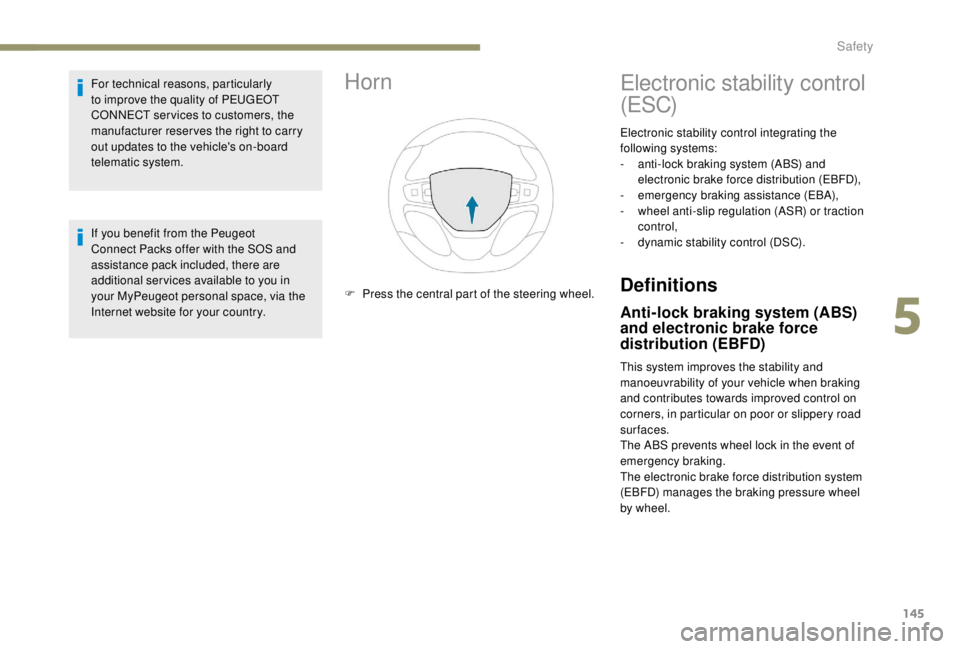
Horn
F Press the central part of the steering wheel.
Electronic stability control
(ESC)
Electronic stability control integrating the
following systems:
-
a
nti-lock braking system (ABS) and
electronic brake force distribution (EBFD),
-
em
ergency braking assistance (EBA),
-
w
heel anti-slip regulation (ASR) or traction
control,
-
d
ynamic stability control (DSC).
For technical reasons, particularly
to improve the quality of PEUGEOT
CONNECT ser vices to customers, the
manufacturer reser ves the right to carry
out updates to the vehicle's on-board
telematic system.
If you benefit from the Peugeot
Connect Packs offer with the SOS and
assistance pack included, there are
additional ser vices available to you in
your MyPeugeot personal space, via the
Internet website for your country.
Definitions
Anti-lock braking system (ABS)
and electronic brake force
distribution (EBFD)
This system improves the stability and
manoeuvrability of your vehicle when braking
and contributes towards improved control on
corners, in particular on poor or slippery road
surfaces.
The ABS prevents wheel lock in the event of
emergency braking.
The electronic brake force distribution system
(EBFD) manages the braking pressure wheel
by wheel.
5
Safety