2018 Peugeot 308 mirror
[x] Cancel search: mirrorPage 158 of 324

156
Active Blind Spot
Monitoring System
In addition to the fixed warning lamp in the door
mirror on the side in question, a correction of
trajectory will be felt if you cross a lane marking
with the direction indicators on, to help you
avoid a collision.
Conditions for operation
The following systems must be activated:
- B lind Spot Detection,
-
A
ctive Lane Keeping Assistance.
The speed of the vehicle must be between 40
and 87
mph (65 and 140 km/h) inclusive.
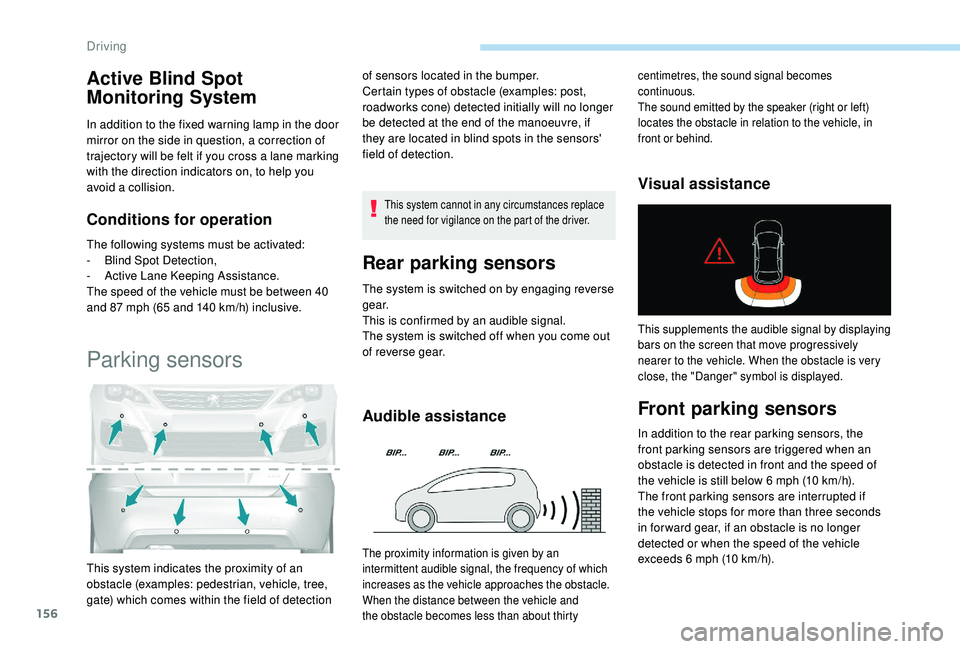
Parking sensors
This system cannot in any circumstances replace
the need for vigilance on the part of the driver.
Rear parking sensors
The system is switched on by engaging reverse
g e a r.
This is confirmed by an audible signal.
The system is switched off when you come out
of reverse gear.
Audible assistance Visual assistance
This system indicates the proximity of an
obstacle (examples: pedestrian, vehicle, tree,
gate) which comes within the field of detection of sensors located in the bumper.
Certain types of obstacle (examples: post,
roadworks cone) detected initially will no longer
be detected at the end of the manoeuvre, if
they are located in blind spots in the sensors'
field of detection.The proximity information is given by an
intermittent audible signal, the frequency of which
increases as the vehicle approaches the obstacle.
When the distance between the vehicle and
the obstacle becomes less than about thirty centimetres, the sound signal becomes
continuous.
The sound emitted by the speaker (right or left)
locates the obstacle in relation to the vehicle, in
front or behind.
Front parking sensors
In addition to the rear parking sensors, the
front parking sensors are triggered when an
obstacle is detected in front and the speed of
the vehicle is still below 6
mph (10 km/h).
The front parking sensors are interrupted if
the vehicle stops for more than three seconds
in for ward gear, if an obstacle is no longer
detected or when the speed of the vehicle
exceeds 6
mph (10 km/h).
This supplements the audible signal by displaying
bars on the screen that move progressively
nearer to the vehicle. When the obstacle is very
close, the "Danger" symbol is displayed.
Driving
Page 160 of 324

158
Reversing camera
The reversing camera cannot, in any
circumstances, replace the need for
vigilance on the part of the driver.They are represented as lines marked
"on the ground" and do not indicate the
position of tall obstacles (for example:
other vehicles, etc.) relative to the vehicle.
Some distortion of the image is normal.
It is normal to have a part of the number
plate showing in the bottom of the screen.
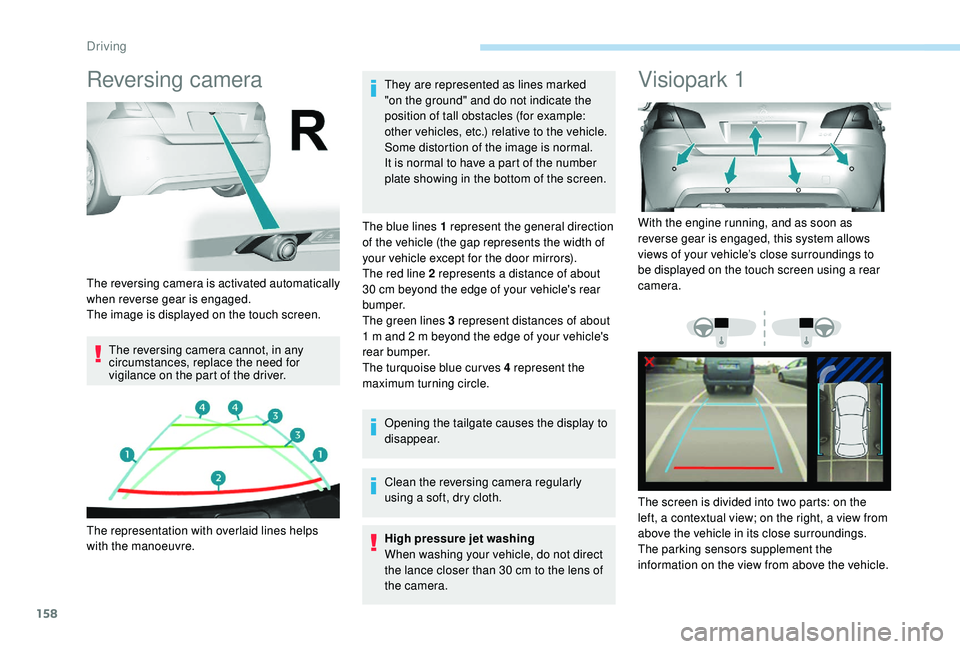
The blue lines 1 represent the general direction
of the vehicle (the gap represents the width of
your vehicle except for the door mirrors).
The red line 2 represents a distance of about
30 cm beyond the edge of your vehicle's rear
b u m p e r.
The green lines 3 represent distances of about
1 m and 2 m beyond the edge of your vehicle's
rear bumper.
The turquoise blue curves 4 represent the
maximum turning circle.
Opening the tailgate causes the display to
disappear.
Clean the reversing camera regularly
using a soft, dry cloth.
High pressure jet washing
When washing your vehicle, do not direct
the lance closer than 30
cm to the lens of
the camera.
Visiopark 1
The reversing camera is activated automatically
when reverse gear is engaged.
The image is displayed on the touch screen.
The representation with overlaid lines helps
with the manoeuvre. With the engine running, and as soon as
reverse gear is engaged, this system allows
views of your vehicle’s close surroundings to
be displayed on the touch screen using a rear
camera.
The screen is divided into two parts: on the
left, a contextual view; on the right, a view from
above the vehicle in its close surroundings.
The parking sensors supplement the
information on the view from above the vehicle.
Driving
Page 161 of 324

159
Different contextual views can be displayed in
the left-hand part:
-
s
tandard view,
-
1
80° view,
-
z
oom view.
The blue lines 1 represent the width of your
vehicle, with the mirrors unfolded; their
direction changes depending on the position of
the steering wheel.
The red line 2 represents a distance of 30
cm
from the bumper; the two blue lines 3 and 4
represent 1
m and 2 m, respectively.
AUTO mode is activated by default.
In this mode, the system chooses the best view
to display (standard or zoom) according to the
information from the parking sensors.
You can change the type of view at any time
during a manoeuvre.
The state of the system is not kept in memory
when the ignition is switched off.Principle of operation
Using the rear camera, the vehicle's
surroundings are recorded during manoeuvres
at low speed.
An image from above your vehicle in its close
surroundings is created in real time, as the
vehicle manoeuvre progresses.
This representation facilitates the alignment of
your vehicle when parking and allows obstacles
close to the vehicle to be seen.
This image is automatically deleted if the
vehicle remains stationary for too long.
This system is a visual aid that cannot in
any circumstances replace the need for
vigilance on the part of the driver. The images provided by the camera may
be distorted by the relief.
In the presence of areas in shade, or in
conditions of bright sunlight or inadequate
lighting, the image may be darkened and
with lower contrast.
Activation
Activation is automatic on engaging reverse at
a speed lower than 6
mph (10 km/h).
You can choose the display mode at any time
by pressing on this area.
When the sub-menu is displayed, select one of
the four views: "Standard view".
"180° view".
6
Driving
Page 162 of 324

160
The function will be deactivated:
- I f a trailer is attached or a bicycle
carrier is fitted on a towbar (vehicle
fitted with a towbar installed in line with
the manufacturer's recommendations).
-
A
bove about 6 mph (10 km/h).
-
O
n opening the tailgate.
-
W
hen shifting out of reverse (the image
remains displayed for 7
seconds).
-
B
y pressing the red cross in the top
left-hand corner of the touch screen.
Check the cleanliness of the camera lens
regularly.
Clean the reversing camera regularly
using a soft, dry cloth.
AUTO mode
Standard view Zoom view"Zoom view".
"AUTO m o de".
This mode is activated by default.
Using sensors in the rear bumper, the
automatic view changes from a rear view
(standard) to a view from above (zoom), as an
obstacle is approached at the level of the red
line (less than 30
cm) during a manoeuvre.The blue lines 1 represent the width of your
vehicle, with the mirrors unfolded; the direction
changes depending on the position of the
steering wheel.
The red line 2 represents a distance of 30
cm
from the rear bumper; the two blue lines 3 and
4 represent 1
m and 2 m, respectively.
This view is available with AUTO mode or in the
view selection menu.
The area behind the vehicle is displayed on the
screen. The camera records the vehicle's surroundings
during the manoeuvre in order to create a
view from above the rear of the vehicle in its
near surroundings, allowing the vehicle to be
manoeuvred around obstacles nearby.
This view is available with AUTO mode or in the
view selection menu.
Driving
Page 163 of 324

161
Obstacles may appear further away than
they actually are in reality.
It is important to check the sides of the
vehicle during the manoeuvre, using the
mirrors.
The rear parking sensors also provide
information on the vehicle's surroundings.
180° viewRecommendations on care
In bad or wintry weather, ensure that the
sensors and camera are not covered with mud,
ice or snow.
Check the cleanliness of the camera lens
regularly.
If necessary, clean the camera with a soft, dry
cloth.
When washing your vehicle at high pressure,
direct the lance at least 30
cm away from the
camera and parking sensors.
The 180° view facilitates reversing out of a
parking bay, making it possible to see the
approach of vehicles, pedestrians and cyclists.
This view is not recommended for carrying out
a complete manoeuvre. It consists of 3 areas: left A
, centre B and
right C .
This view is available only from the view
selection menu.
Park Assist
This system provides active assistance with
parking: it detects a parking space then
operates the steering system to park in this
space.
With a manual gearbox , the driver manages
the accelerator, brakes, gears and clutch.
With an automatic gearbox (EAT6/EAT8) , the
driver manages the accelerator, brakes and
gears. During phases of entry into and exit from a
parking space, the system provides visual
and audible information to the driver in order
to make the manoeuvres safe. It may be
necessary to move for wards and backwards
more than once.
The driver can take control at any time by
gripping the steering wheel.
This manoeuvring assistance system
cannot, in any circumstances, replace the
need for vigilance on the part of the driver.
The driver must remain in control of their
vehicle ensuring that the space remains
clear throughout the manoeuvre.
In some circumstances, the sensors may
not detect small obstacles located in their
blind spots.
The Park Assist system cannot work with
the engine off.
6
Driving
Page 210 of 324

208
Direction indicators (halogen model)
Quicker flashing of the direction indicator
lamp (left or right) indicates the failure of
one of the bulbs on the corresponding
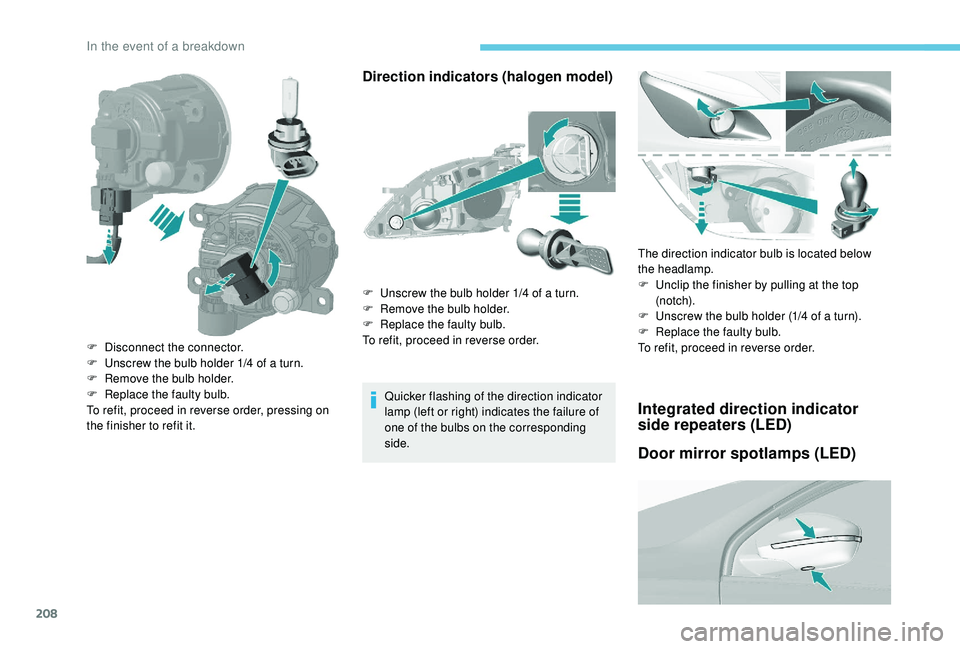
side.The direction indicator bulb is located below
the headlamp.
F
U
nclip the finisher by pulling at the top
(n otc h).
F
U
nscrew the bulb holder (1/4 of a turn).
F
R
eplace the faulty bulb.
To refit, proceed in reverse order.Integrated direction indicator
side repeaters (LED)
Door mirror spotlamps (LED)
F Disconnect the connector.
F U nscrew the bulb holder 1/4 of a turn.
F
R
emove the bulb holder.
F
R
eplace the faulty bulb.
To refit, proceed in reverse order, pressing on
the finisher to refit it. F
U
nscrew the bulb holder 1/4 of a turn.
F
R
emove the bulb holder.
F
R
eplace the faulty bulb.
To refit, proceed in reverse order.
In the event of a breakdown
Page 215 of 324

213
Table of fuses
FuseNo. Rating
(A) Functions
F9 5Alarm, emergency and assistance calls
F13 5Reversing camera and parking sensors
F15 1512
V accessory socket.
F16 15Cigarette lighter.
F17 15Audio system.
F18 20Touch screen, CD player, audio and navigation system.
F19 5Rain, sunshine sensor.
F20 5Airbags.
F21 5Instrument panel.
F22/F24 30Internal/external locks, front and rear.
F23 5Glove box lamp, vanity mirror, front and rear courtesy lamps.
F25/F27 15Front/rear screenwash pump.
F26 15Horn.
F30 15Rear wiper.
8
In the event of a breakdown
Page 256 of 324

4
21,518,5
or Decrease volume.
or Media
(short press): change the
multimedia source.
Telephone (short press): start
telephone call.
Call in progress (short press):
access telephone menu.
Telephone (long press): reject an
incoming call, end call; when no call
is in progress, access telephone
menu.
or Radio
(rotate): previous/next preset.
Media (rotate): previous/next track,
move in a list.
Short press : confirm a selection; if
nothing selected, access to presets.
Radio : display the list of stations.
Media : display the list of tracks.
Radio (press and hold): update the
list of stations received.
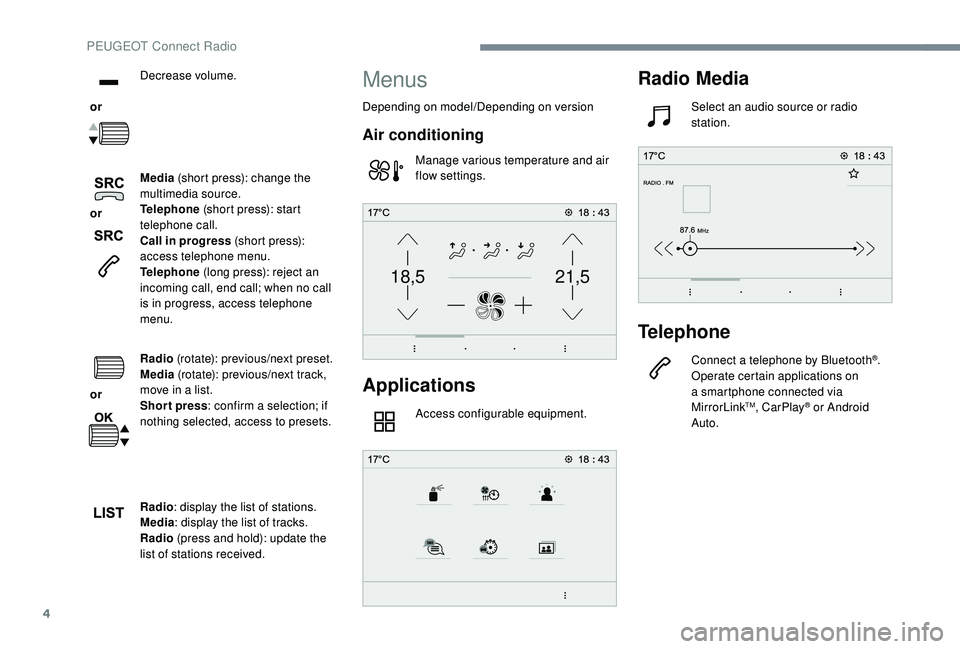
Menus
Depending on model/Depending on version
Air conditioning
Manage various temperature and air
flow settings.
Applications
Access configurable equipment.
Radio Media
Select an audio source or radio
station.
Telephone
Connect a telephone by Bluetooth®.
Operate certain applications on
a smartphone connected via
MirrorLink
TM, CarPlay® or Android
Auto.
PEUGEOT Connect Radio