2018 Peugeot 308 battery
[x] Cancel search: batteryPage 116 of 324

114
Manual parking brake
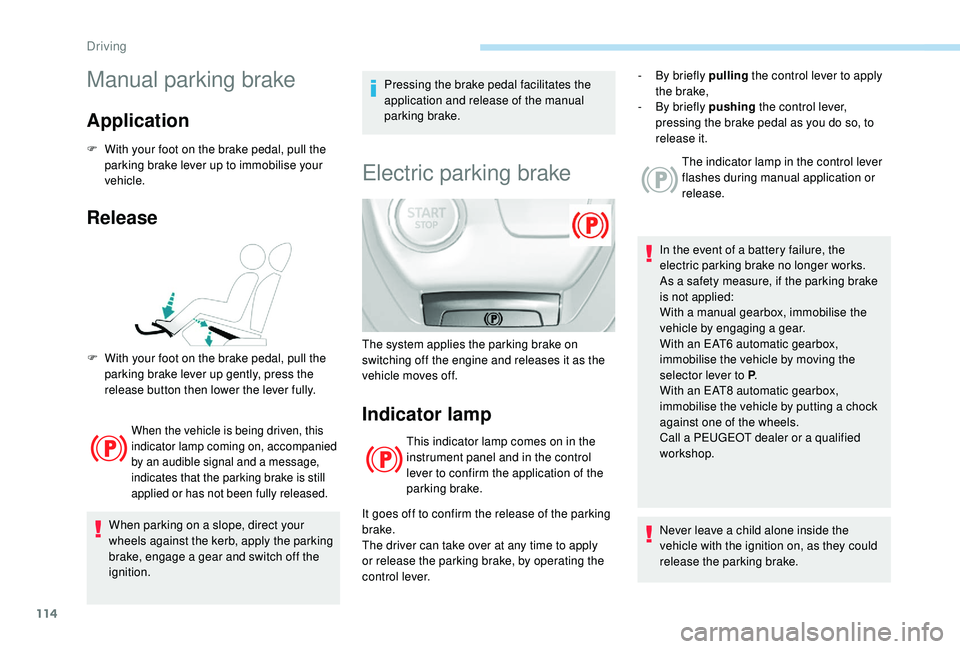
Application
F With your foot on the brake pedal, pull the parking brake lever up to immobilise your
vehicle.
Release
When the vehicle is being driven, this
indicator lamp coming on, accompanied
by an audible signal and a message,
indicates that the parking brake is still
applied or has not been fully released.
When parking on a slope, direct your
wheels against the kerb, apply the parking
brake, engage a gear and switch off the
ignition. Pressing the brake pedal facilitates the
application and release of the manual
parking brake.
Electric parking brake
Indicator lamp
This indicator lamp comes on in the
instrument panel and in the control
lever to confirm the application of the
parking brake.
It goes off to confirm the release of the parking
brake.
The driver can take over at any time to apply
or release the parking brake, by operating the
control lever. The indicator lamp in the control lever
flashes during manual application or
release.
In the event of a battery failure, the
electric parking brake no longer works.
As a safety measure, if the parking brake
is not applied:
With a manual gearbox, immobilise the
vehicle by engaging a gear.
With an EAT6 automatic gearbox,
immobilise the vehicle by moving the
selector lever to P .
With an EAT8 automatic gearbox,
immobilise the vehicle by putting a chock
against one of the wheels.
Call a PEUGEOT dealer or a qualified
workshop.
Never leave a child alone inside the
vehicle with the ignition on, as they could
release the parking brake.
F
W
ith your foot on the brake pedal, pull the
parking brake lever up gently, press the
release button then lower the lever fully. The system applies the parking brake on
switching off the engine and releases it as the
vehicle moves off. -
B
y briefly pulling
the control lever to apply
the brake,
-
B
y briefly pushing
the control lever,
pressing the brake pedal as you do so, to
release it.
Driving
Page 124 of 324

122
If the selector is not in position P, when the
driver's door is opened or approximately
45
seconds after the ignition is switched
off, an audible signal sounds and a
message appears.
F
R
eturn the gear selector to position
P ; the audible signal stops and the
message disappears.
Operating fault
When the ignition is on, a message
appears in the instrument panel screen
to indicate a gearbox fault.
In this case, the gearbox switches to back-up
mode and is locked in 3
rd gear. You may feel a
substantial jolt when changing from P to R and
from N to R. This will not cause any damage to
the gearbox.
Do not exceed 62
mph (100 km/h), local speed
restrictions permitting.
Have it checked by a PEUGEOT dealer or a
qualified workshop. There is a risk of damage to the gearbox:
-
i
f you press the accelerator and brake
pedals at the same time,
-
i
f you force the selector from position P
to another position when the battery is
flat.
EAT8 automatic gearbox
Eight-speed automatic gearbox with push
selector. It also offers a manual mode with
steering mounted paddle gear changes.
Gearbox selector positions
P. Park.
For parking the vehicle: the front wheels
are blocked.
R. Reverse.
N. Neutral.
For moving the vehicle with the ignition off:
in certain car wash stations, if towing the
vehicle, etc.
D. Automatic mode.
The gearbox manages gear changes
according to the style of driving, the road
profile and the vehicle load.
M. Manual mode.
The driver changes gear using the steering
mounted control paddles.
Push selector
In both cases, apply the parking brake to
immobilise the vehicle, unless it is programmed
to automatic mode.
Driving
Page 126 of 324

124
With the engine running and the brakes
released, if R, D or M is selected, the
vehicle moves off, even without pressing
the accelerator pedal.
Never leave children unsuper vised in the
vehicle when the engine is running.
Never press the accelerator and brake
pedals at the same time – Risk of damage
to the gearbox!
In the event of a battery failure, you
must place the chock supplied with the
vehicle tools against one of the wheels to
immobilise the vehicle.
General information
To unlock the gearbox:
- f rom mode P :
F
f
ully depress the brake pedal,
F
press the Unlock button,
F
s
elect another mode while continuing to
press the brake pedal and the Unlock
button.
-
f
rom the neutral position N , at a speed
below 3
mph (5 km/h):
F
f
ully depress the brake pedal,
F
s
elect another mode while continuing to
press the brake pedal. To select reverse:
F
s
low down until you come to a stop,
F
w
ith your foot on the brake pedal, press the
Unlock button,
F
s
elect mode R while continuing to press the
brake pedal and the Unlock button.
To select manual mode:
F
w
hile having mode D selected in advance,
F
p
ress button M
; the indicator lamp in the
button comes on.
To quit manual mode:
F
p
ush for wards once to go back to D
.
or
F
p
ress button M
; the indicator lamp in the
button goes off.
To switch off the ignition, the vehicle must
be stationary.
Changing to free-wheel
To put the vehicle in free-wheeling mode with
the engine switched off:
F
w
ith the vehicle stationary and the engine
running, select N ,
F
s
witch off the engine,
F
w
ithin five seconds, switch the ignition on
again,
F
w
ith the foot on the brake pedal, push the
selector for ward or back once to confirm N
and manually release the electric parking
brake,
F
s
witch off the ignition.If you open the driver's door when mode N
is engaged, an audible signal will sound. It
will stop when you close the driver's door
again.
Special aspects of automatic
mode
If you exceed the time limit of five seconds,
the gearbox engages mode P
; you should then
restart the procedure.
The gearbox selects the gear that offers
optimum per formance, taking account of the
exterior temperature, the profile of the road, the
load on the vehicle and the style of driving.
For maximum acceleration without touching the
selector, push the accelerator to the floor (kick-
down). The gearbox shifts down automatically
or holds the gear selected until the maximum
engine speed is reached.
The steering mounted controls allow the driver
to temporarily select a gear, if the vehicle
speed and engine speed permit.
Special aspects of manual mode
The change from one gear to another takes
place only if the vehicle speed and engine
speed permit.
Driving
Page 130 of 324

128
Stop & Start
The Stop & Start system puts the engine
t emporarily into standby – STOP mode – during
stops in traffic (red lights, traffic jams, etc.). The
engine restarts automatically – START mode –
as soon as you want to move off.
The restart takes place instantly, quickly and
silently.
Per fect for urban use, the Stop & Start system
reduces fuel consumption and exhaust
emissions as well as the noise level when
stationary.
Operation
Going into engine STOP mode
This indicator lamp comes on in the
instrument panel and the engine goes
into standby automatically: -
W
ith a manual gearbox
, at speeds below
2 mph (3 km/h) (with BlueHDi 130 S&S
engine) or with the vehicle stationary (other
engines), when you place the gear selector
in neutral and release the clutch pedal.
- With an automatic gearbox , vehicle
stationary, when you press the brake pedal
or place the gear selector lever in position N .
Stop & Star t time counter
(minutes/seconds or hours/
minutes)
A time counter calculates the time spent in STOP
mode during a journey.
It resets to zero every time the ignition is switched on.
For your comfort, during parking
manoeuvres, STOP mode is not available
for a few seconds after coming out of
reverse gear.
The Stop & Start system does not modify
the vehicle's functions, such as, for
example, braking, power steering, etc.
A slight delay between the vehicle
stopping and the engine cutting out may
be noticed.
Never refuel with the engine in STOP
mode; you must switch off the ignition.
Special cases: STOP mode not
available
STOP mode does not activate, mainly when:
-
t he vehicle is on a steep slope (rising or
falling),
-
t
he driver's door is open,
-
t
he driver's seat belt is not fastened,
-
t
he vehicle has not exceeded 6 mph
(10
km/h) since the last engine start by the
driver,
-
t
he electric parking brake is applied or being
applied,
-
t
he engine is needed to maintain a
comfortable temperature in the passenger
compartment,
-
d
emisting is active,
-
s
ome temporary conditions (battery charge,
engine temperature, braking assistance,
exterior temperature, etc.) make this
necessary to ensure control of a system.
In this case, this indicator lamp flashes
for a few seconds then goes off.
This operation is perfectly normal.
Going into engine START mode
This indicator lamp goes off and the
engine restarts automatically:
The system adapts its gear shift
recommendation according to the driving
conditions (slope, load, etc.) and the
driver’s requirements (power, acceleration,
b r a k i n g , e t c .) .
The system never suggests:
-
e
ngaging first gear,
-
enga
ging reverse gear.
Driving
Page 131 of 324

129
- With a manual gearbox, when you fully
depress the clutch pedal.
-
W
ith an automatic gearbox :
•
g
ear selector in position D or M , when
you release the brake pedal,
•
o
r gear selector in position N and brake
pedal released, when you place the gear
selector in position D or M ,
•
o
r when you engage reverse.
Special cases: START mode
activated automatically
START mode is activated automatically if:
- you open the driver's door,
-
y
ou unfasten the driver's seat belt,
-
t
he speed of the vehicle exceeds 2 mph
(3
km/h),
-
t
he electric parking brake is being
applied,
-
s
ome temporary conditions (battery
charge, engine temperature, braking
assistance, air conditioning setting,
etc.) require the engine to be running to
control the system or the vehicle.
In this case, this indicator lamp flashes
for a few seconds, then goes off.
This operation is perfectly normal.
Deactivation/Reactivation
In certain cases, such as the need to maintain
a comfortable temperature in the passenger
compartment, it may be useful to deactivate the
Stop & Start system.
The system can be deactivated at any time, once
the ignition is switched on.
If the engine is in STOP mode, it restarts
immediately.
The Stop & Start system is reactivated
automatically every time the ignition is switched on.
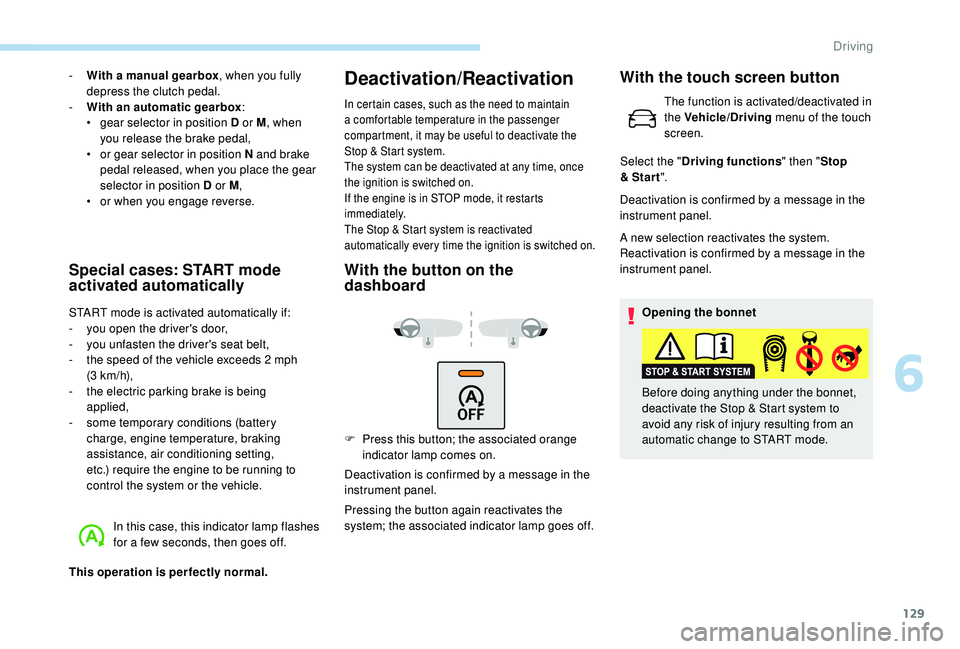
With the button on the
dashboard
F Press this button; the associated orange indicator lamp comes on.
Deactivation is confirmed by a message in the
instrument panel.
Pressing the button again reactivates the
system; the associated indicator lamp goes off. Deactivation is confirmed by a message in the
instrument panel.
A new selection reactivates the system.
Reactivation is confirmed by a message in the
instrument panel.
Opening the bonnet
Before doing anything under the bonnet,
deactivate the Stop & Start system to
avoid any risk of injury resulting from an
automatic change to START mode.
With the touch screen button
The function is activated/deactivated in
the Vehicle/Driving menu of the touch
screen.
Select the " Driving functions " then "Stop
& Star t ".
6
Driving
Page 132 of 324

130
Driving on flooded roads
Operating fault
System malfunction is signalled by the display
of a message and, depending on version, by:The button indicator lamp flashing.
or
This warning lamp flashing in the
instrument panel.
Have it checked by a PEUGEOT dealer or a
qualified workshop.
If a fault occurs in STOP mode, the vehicle may
stall.
All of the instrument panel warning lamps come on.
Depending on the version, an alert message may
also be displayed, asking you to place the gear
lever in position N and put your foot on the brake
pedal.
You must switch off the ignition, then start the
engine again.
The Stop & Start system requires a 12 V
b attery with a special specification and
technology.
All work on this type of battery must be
carried out only by a PEUGEOT dealer or
a qualified workshop.
For more information on the 12
V batter y,
refer to the corresponding section.
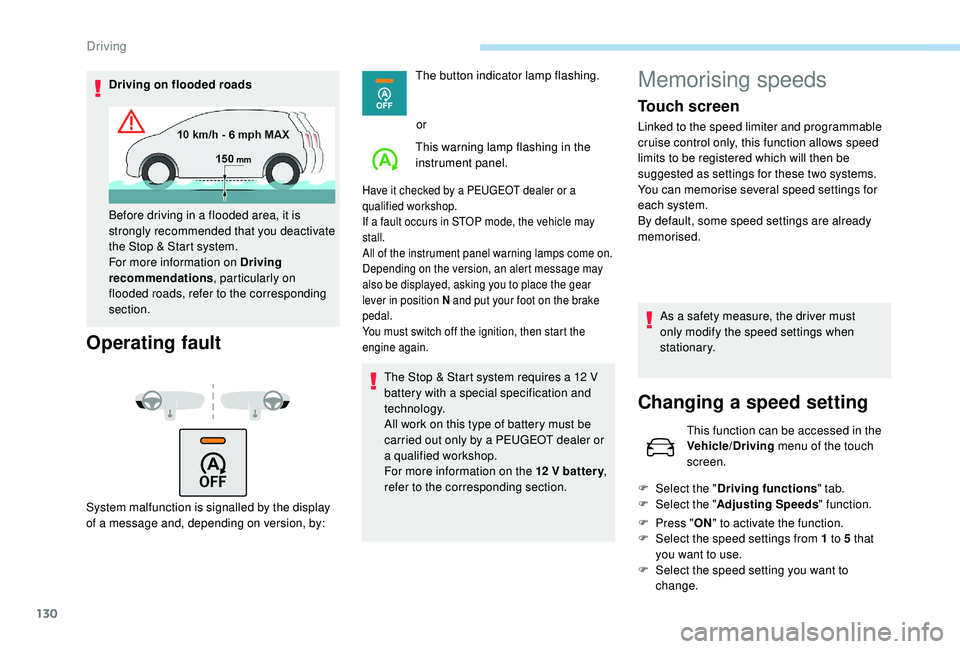
Before driving in a flooded area, it is
strongly recommended that you deactivate
the Stop & Start system.
For more information on Driving
recommendations
, particularly on
flooded roads, refer to the corresponding
section.
Memorising speeds
Touch screen
Linked to the speed limiter and programmable
cruise control only, this function allows speed
limits to be registered which will then be
suggested as settings for these two systems.
You can memorise several speed settings for
each system.
By default, some speed settings are already
memorised.
As a safety measure, the driver must
only modify the speed settings when
stationary.
Changing a speed setting
This function can be accessed in the
Vehicle/Driving menu of the touch
screen.
F
Sel
ect the " Driving functions " tab.
F
Sel
ect the " Adjusting Speeds " function.
F
P
ress " ON" to activate the function.
F
Sel
ect the speed settings from 1 to 5 that
you want to use.
F
S
elect the speed setting you want to
change.
Driving
Page 183 of 324

181
F Press the trigger fully in and remove the towball by pulling it toward you.
F
O
n the towball, push the latch to the left and
hold it in this position.
F
A
t the same time, push the trigger for wards
to unlock the mechanism (position B ).
F
I
nstall and clip the protective plug in the
carrier located below the rear bumper.
F
S
tow the towball in its bag.
Energy economy mode
System which manages the duration of use of
certain functions to conser ve a sufficient level
of charge in the battery.
After the engine has stopped, you can still use
functions such as the audio and telematics
system, windscreen wipers, dipped beam
headlamps,
courtesy lamps, etc. for a
maximum combined duration of about forty
minutes.
Switching to this mode
A message appears in the instrument panel
screen indicating that the vehicle has switched
to economy mode and the active functions are
put on standby.
If a telephone call is being made at this
time, it will be maintained for around
10
minutes with the Bluetooth hands-free
kit of your audio system.
Exiting the mode
These functions will be automatically restored
the next time the vehicle is used.
In order to restore the use of these functions
immediately, start the engine and let it run:
-
f
or less than ten minutes, to use the
equipment for approximately five minutes, A flat battery prevents the engine from
starting.
For more information on the 12
V batter y
,
refer to the corresponding section.
Load reduction mode
System which manages the use of certain
functions according to the level of charge
remaining in the battery.
When the vehicle is being driven, the load
reduction function temporarily deactivates
certain functions, such as air conditioning,
heated rear screen, etc.
The deactivated functions are reactivated
automatically as soon as conditions permit. -
f
or more than ten minutes, to use the
equipment for up to approximately thirty
minutes.
Let the engine run for the duration specified to
ensure that the battery charge is sufficient.
Do not repeatedly and continuously restart the
engine in order to charge the battery.
7
Practical information
Page 186 of 324

184
1.Screenwash fluid reservoir.
2. Engine coolant reservoir.
3. Brake fluid reser voir.
4. Battery/Fuses.
5. Fusebox.
6. A i r f i l t e r.
7. Engine oil dipstick.
8. Engine oil filler cap.
9. Remote earth point.
10. Priming pump*
The Diesel circuit is under very high
pressure.
All work on this circuit must be carried out
only by a PEUGEOT dealer or a qualified
workshop.
*
D
epending on engine.
Checking levels
Check all of these levels regularly, in line with
the manufacturer's service schedule. Top them
up if necessary, unless other wise indicated.
If a level drops significantly, have the
corresponding system checked by a PEUGEOT
dealer or a qualified workshop. The liquid must comply with the
manufacturer's recommendations and with
the vehicle's engine.
Take care when working under the bonnet,
as certain areas of the engine may be
extremely hot (risk of burns) and the
cooling fan could start at any time (even
with the ignition off).
Used products
Avoid prolonged contact of used oil or
fluids with the skin.
Most of these fluids are harmful to health
or indeed very corrosive.
Do not discard used oil or fluids into
sewers or onto the ground.
Take used oil to a PEUGEOT dealer or
a qualified workshop and dispose of it in
the containers reser ved for this purpose.
Engine oil level
The check is carried out either when
the ignition is switched on using the oil
level indicator in the instrument panel
for vehicles equipped with an electric
gauge, or using the dipstick.
To ensure that the reading is correct, your
vehicle must be parked on a level sur face
with the engine stopped for more than
30
minutes.
It is normal to top up the oil level between
two ser vices (or oil changes). PEUGEOT
recommends that you check the level, and top
up if necessary, every 3,000
miles (5,000 km).
Checking using the dipstick
The location of the dipstick is shown in the
corresponding underbonnet layout view.
F
T
ake the dipstick by its coloured grip and
pull it out completely.
F
W
ipe the end of the dipstick using a clean
non-fluffy cloth.
F
R
efit the dipstick and push fully down, then
pull it out again to make the visual check:
the correct level is between marks A and B .
Practical information