2018 Peugeot 308 fog
[x] Cancel search: fogPage 134 of 324
132
Specific speed limits, such as those for
heavy goods vehicles, are not displayed.
The display of the speed limit in the
instrument panel is updated as you pass
a speed limit sign intended for cars (light
vehicles).
Activation/Deactivation
By default, the system is automatically
activated at every engine start.
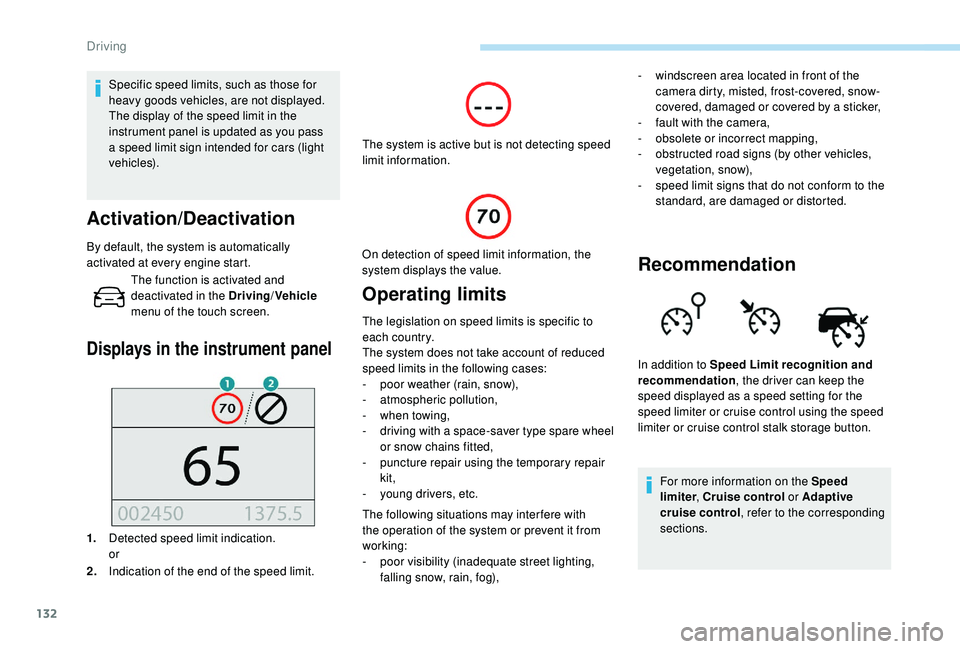
Displays in the instrument panel
1.Detected speed limit indication.
or
2. Indication of the end of the speed limit. The system is active but is not detecting speed
limit information.
On detection of speed limit information, the
system displays the value.
Operating limits
The legislation on speed limits is specific to
each country.
The system does not take account of reduced
speed limits in the following cases:
-
p
oor weather (rain, snow),
-
a
tmospheric pollution,
-
w
hen towing,
-
d
riving with a space-saver type spare wheel
or snow chains fitted,
-
p
uncture repair using the temporary repair
kit,
-
y
oung drivers, etc.
The following situations may interfere with
the operation of the system or prevent it from
working:
-
p
oor visibility (inadequate street lighting,
falling snow, rain, fog),
The function is activated and
deactivated in the Driving
/Vehicle
menu of the touch screen. -
w
indscreen area located in front of the
camera dirty, misted, frost-covered, snow-
covered, damaged or covered by a sticker,
-
f
ault with the camera,
-
o
bsolete or incorrect mapping,
-
o
bstructed road signs (by other vehicles,
vegetation, snow),
-
s
peed limit signs that do not conform to the
standard, are damaged or distorted.
Recommendation
For more information on the Speed
limiter , Cruise control or Adaptive
cruise control , refer to the corresponding
sections.
In addition to Speed Limit recognition and
recommendation
, the driver can keep the
speed displayed as a speed setting for the
speed limiter or cruise control using the speed
limiter or cruise control stalk storage button.
Driving
Page 147 of 324
145
The cruise control operates by day and
night, in fog or moderate rainfall.
However, it is strongly recommended that
you always keep a safe distance from
vehicles ahead, according to the driving
conditions, the weather and the road
sur face.
Use the cruise control only where the
driving conditions allow running at a
constant speed and keeping an adequate
safety distance.
Do not activate the cruise control in urban
areas where pedestrians are likely to
cross the road, in heavy traffic (except for
versions with EAT8 gearbox), on winding
or steep roads, on slippery or flooded
roads, when there is snowfall, if the front
bumper is damaged or when the brake
lamps have failed.
In certain circumstances, it may not
be possible for the speed setting to be
maintained or even reached: loaded
vehicle, ascending a steep hill, etc.The system is not intended for the
following situations:
-
t
he front end of the vehicle has been
modified (addition of long-range
headlamps, painting of the front
bumper),
-
d
riving on a racing track,
-
d
riving on a rolling road,
-
u
se of snow chains, non-slip covers or
studded tyres.
The use of mats not approved by
PEUGEOT may inter fere with the
operation of the cruise control.
To avoid any risk of jamming of the pedals:
-
e
nsure that the mat is secured
c o r r e c t l y,
-
n
ever fit one mat on top of another.
The following situations may interfere with
the operation of the system or prevent it
from working:
-
p
oor visibility (inadequate street
lighting, falling snow, heavy rain, dense
f o g , e t c .),
-
d
azzle (headlamps of an oncoming
vehicle, low sun, reflections on a damp
road, leaving a tunnel, alternating
shade and light, etc.),
-
c
amera or radar masked (mud, frost,
snow, condensation, etc.).
In these situations, detection performance
may be reduced.Malfunction
The adaptive cruise control deactivates
automatically if the use of a "space-saver"
type spare wheel is detected or if there is
a malfunction on the lateral brake lamps or
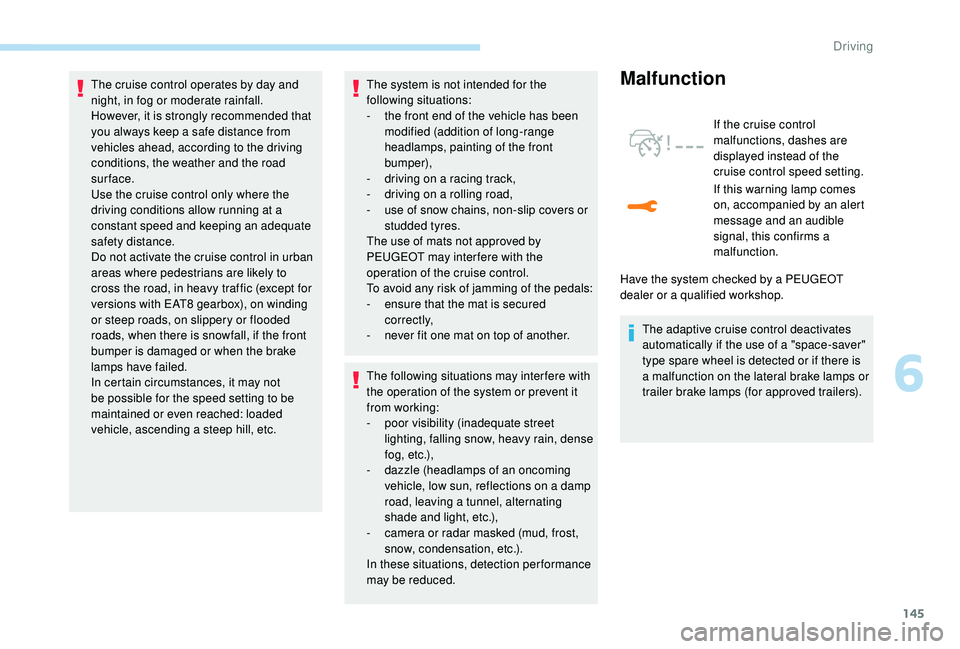
trailer brake lamps (for approved trailers). If the cruise control
malfunctions, dashes are
displayed instead of the
cruise control speed setting.
If this warning lamp comes
on, accompanied by an alert
message and an audible
signal, this confirms a
malfunction.
Have the system checked by a PEUGEOT
dealer or a qualified workshop.
6
Driving
Page 152 of 324
150
After three first level alerts, the system triggers
a new alert with the message "Take a break!",
accompanied by a more pronounced audible
signal.
In certain driving conditions (poor road
sur face or strong winds), the system may
give alerts independent of the driver's
level of vigilance.
The following situations may interfere with
the operation of the system or prevent it
working:
-
p
oor visibility (inadequate lighting of
the roadway, falling snow, heavy rain,
dense fog, etc.),
-
d
azzle (headlamps of an oncoming
vehicle, low sun, reflections on a damp
road, leaving a tunnel, alternating
shade and light, etc.),
-
w
indscreen area located in front of the
camera: dirty, misted up, frost-covered,
snow-covered, damaged or covered by
a s t i c ke r,
-
l
ane markings absent, worn, hidden
(snow, mud) or multiple (roadworks,
e t c .),
-
c
lose to the vehicle ahead (lane
markings not detected),
-
r
oads that are narrow, winding, etc. Clean the windscreen regularly,
particularly the area in front of the camera.
The internal sur face of the windscreen can
also become misted around the camera.
In humid and cold weather, demist the
windscreen regularly.
Do not allow snow to accumulate on the
bonnet or roof of the vehicle as this could
conceal the detection camera.
Active Lane Keeping
Assistance
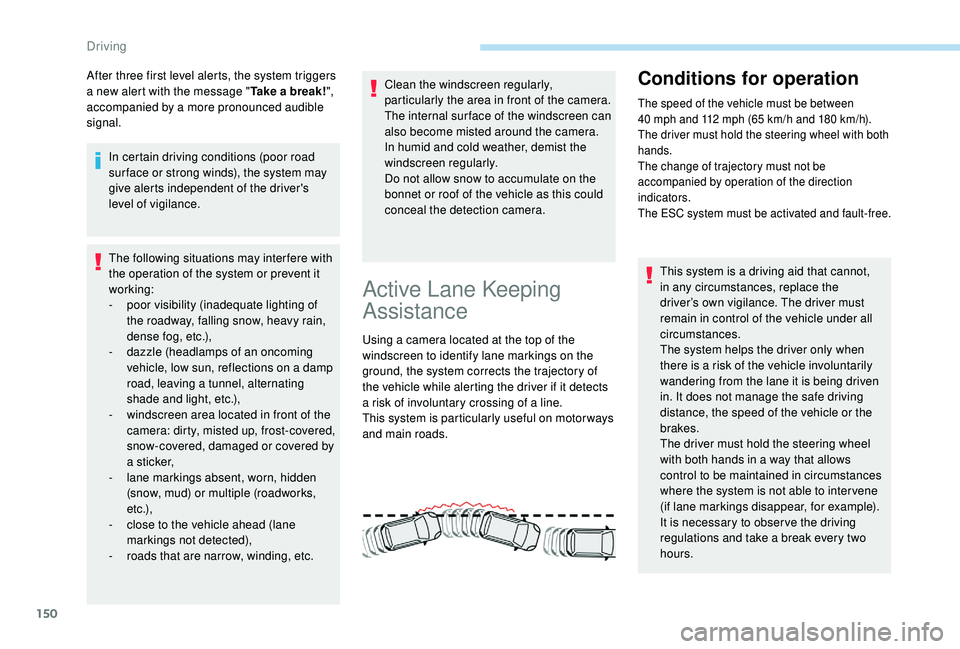
Using a camera located at the top of the
windscreen to identify lane markings on the
ground, the system corrects the trajectory of
the vehicle while alerting the driver if it detects
a risk of involuntary crossing of a line.
This system is particularly useful on motor ways
and main roads.
Conditions for operation
The speed of the vehicle must be between
40
mph and 112 mph (65 km/h and 180 km/h).
The driver must hold the steering wheel with both
hands.
The change of trajectory must not be
accompanied by operation of the direction
indicators.
The ESC system must be activated and fault-free.
This system is a driving aid that cannot,
in any circumstances, replace the
driver’s own vigilance. The driver must
remain in control of the vehicle under all
circumstances.
The system helps the driver only when
there is a risk of the vehicle involuntarily
wandering from the lane it is being driven
in. It does not manage the safe driving
distance, the speed of the vehicle or the
brakes.
The driver must hold the steering wheel
with both hands in a way that allows
control to be maintained in circumstances
where the system is not able to inter vene
(if lane markings disappear, for example).
It is necessary to obser ve the driving
regulations and take a break every two
hours.
Driving
Page 155 of 324
153
Operating limits
The system goes into standby automatically in
the following cases:
-
E
SC deactivated or operation triggered,
-
s
peed below 40 mph (65 km/h) or greater
than 112
mph (180 km/h),
-
c
onnected electrically to a trailer,
-
u
se of the "space-saver" spare
wheel detected (as detection is not
immediate, deactivation of the system is
recommended),
-
d
ynamic driving style detected, pressure on
the brake or accelerator pedal,
-
d
riving beyond lane markings,
-
a
ctivation of the direction indicators,
-
c
rossing the inside line on a bend,
-
d
riving in a tight corner,
-
i
nactivity by the driver detected during
correction. The following situations may interfere with
the operation of the system or prevent it
working:
-
c
onditions of poor visibility (inadequate
street lighting, snowfall, rain, fog),
-
d
azzle (headlamps of an oncoming
vehicle, low sun, reflections on a damp
road, leaving a tunnel, alternating
shade and light),
-
w
indscreen area located in front of the
camera: dirty, misted, frost-covered,
snow-covered, damaged or covered by
a s t i c ke r,
-
l
ane markings worn, hidden (snow,
mud) or multiple (roadworks, etc.),
-
r
unning close to the vehicle in front
(the lane markings may not be
detected),
-
r
oads that are narrow, winding, etc.
Risk of undesirable operation
Deactivation of the system is recommended in
the following situations:
-
d
riving on a road sur face in poor condition,
-
u
nfavourable climatic conditions,
-
d
riving on slippery sur faces (ice). The system is not intended for driving in the
following situations:
-
d
riving on a speed circuit,
-
d
riving with a trailer,
-
d
riving on a rolling road,
-
d
riving on unstable sur faces.
Deactivation/Activation
Without touch screen
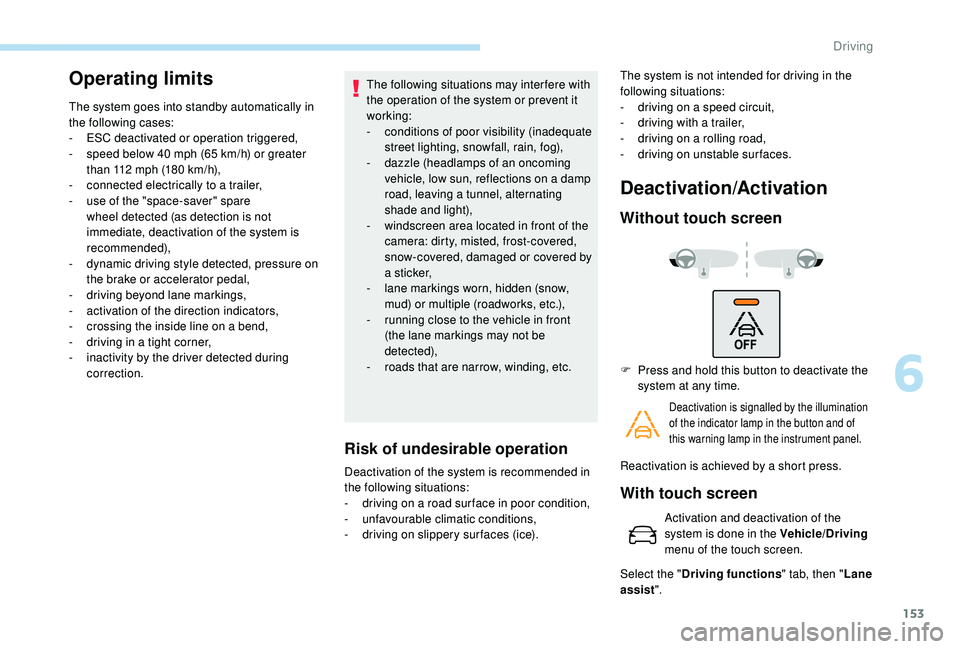
F Press and hold this button to deactivate the
system at any time.
Deactivation is signalled by the illumination
of the indicator lamp in the button and of
this warning lamp in the instrument panel.
Reactivation is achieved by a short press.
With touch screen
Activation and deactivation of the
system is done in the Vehicle/Driving
menu of the touch screen.
Select the " Driving functions " tab, then "Lane
assist ".
6
Driving
Page 157 of 324
155
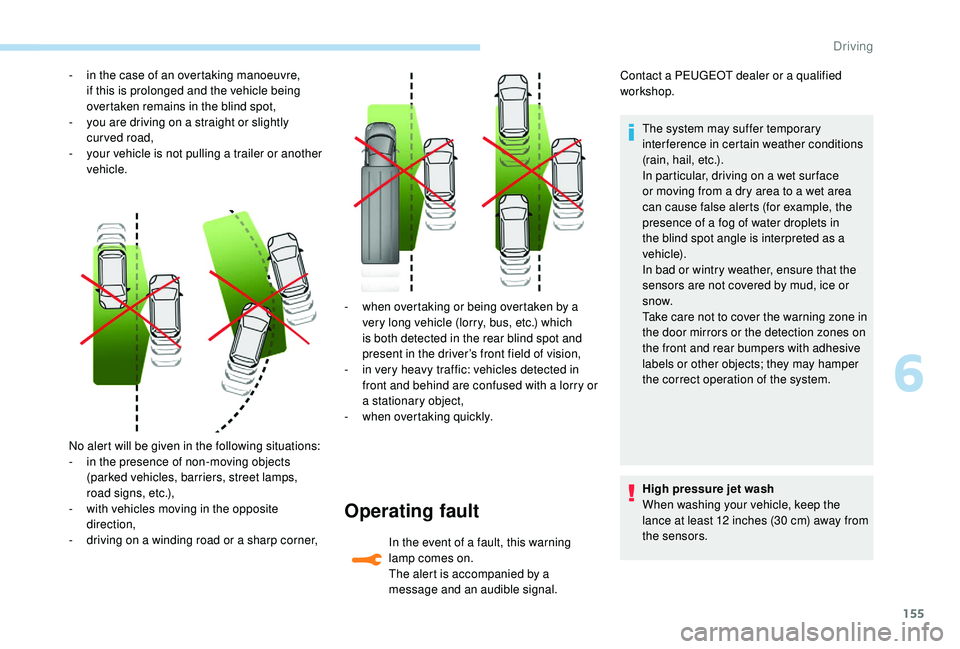
No alert will be given in the following situations:
- i n the presence of non-moving objects
(parked vehicles, barriers, street lamps,
road signs, etc.),
-
w
ith vehicles moving in the opposite
direction,
-
d
riving on a winding road or a sharp corner, -
w
hen overtaking or being overtaken by a
very long vehicle (lorry, bus, etc.) which
is both detected in the rear blind spot and
present in the driver’s front field of vision,
-
i
n very heavy traffic: vehicles detected in
front and behind are confused with a lorry or
a stationary object,
-
w
hen overtaking quickly.
Operating fault
In the event of a fault, this warning
lamp comes on.
The alert is accompanied by a
message and an audible signal.Contact a PEUGEOT dealer or a qualified
workshop.
The system may suffer temporary
interference in certain weather conditions
(rain, hail, etc.).
In particular, driving on a wet sur face
or moving from a dry area to a wet area
can cause false alerts (for example, the
presence of a fog of water droplets in
the blind spot angle is interpreted as a
vehicle).
In bad or wintry weather, ensure that the
sensors are not covered by mud, ice or
snow.
Take care not to cover the warning zone in
the door mirrors or the detection zones on
the front and rear bumpers with adhesive
labels or other objects; they may hamper
the correct operation of the system.
-
i
n the case of an overtaking manoeuvre,
if this is prolonged and the vehicle being
overtaken remains in the blind spot,
-
y
ou are driving on a straight or slightly
curved road,
-
y
our vehicle is not pulling a trailer or another
vehicle.
High pressure jet wash
When washing your vehicle, keep the
lance at least 12 inches (30 cm) away from
the sensors.
6
Driving
Page 159 of 324
157
The sound emitted by the speaker (front or
rear) locates the obstacle in relation to the
vehicle, in front or behind.
Deactivation/activation of
the front and rear parking
sensors
The system is deactivated in the
Vehicle/Driving menu, then the
Driving functions tab of the touch
screen.
F
P
ress this button. The indicator
lamp in the button comes on.
Pressing this button again reactivates the function.
The indicator lamp in the button goes off.
The function will be automatically
deactivated when connecting a trailer or a
bicycle carrier on a towing device installed
in accordance with the manufacturer's
recommendations.
The parking sensors are deactivated while the
Park Assist system is measuring a space.
For more information on Park Assist , refer to
the corresponding section.
Operating limits
- Certain obstacles located in the sensors’ blind spots may not be detected or no
longer be detected during the manoeuvre.
-
S
ounds such as those emitted by noisy
vehicles and machinery (e.g. lorries,
pneumatic drills, etc.) may inter fere with the
vehicle's sensors.
-
C
ertain materials (fabrics) absorb sound
waves: pedestrians may not be detected.
-
A
ccumulated snow or dead leaves on the
road sur face can inter fere with the vehicle's
sensors.
-
A f
ront or rear impact to the vehicle can
distort the settings of the sensors, which is
not always detected by the system: distance
measurements may be incorrect.
-
T
he tilting of the vehicle if the boot is
very loaded can affect the distance
measurements.
-
T
he sensors may be affected by poor
weather conditions (heavy rain, thick fog,
snowfall, etc.).
Maintenance
recommendations
In bad or wintry weather, ensure that the
sensors are not covered with mud, ice or
snow. When reverse gear is engaged, an
audible signal (long beep) indicates that
the sensors may be dirty.
High pressure jet wash
When washing your vehicle, keep the
lance at least 12 inches (30
cm) away from
the sensors.
Operating fault
On engaging reverse gear:
This warning lamp comes on in the
instrument panel and/or a message
appears, accompanied by an audible
signal.
Contact a PEUGEOT dealer or a qualified
workshop.
6
Driving
Page 208 of 324
206
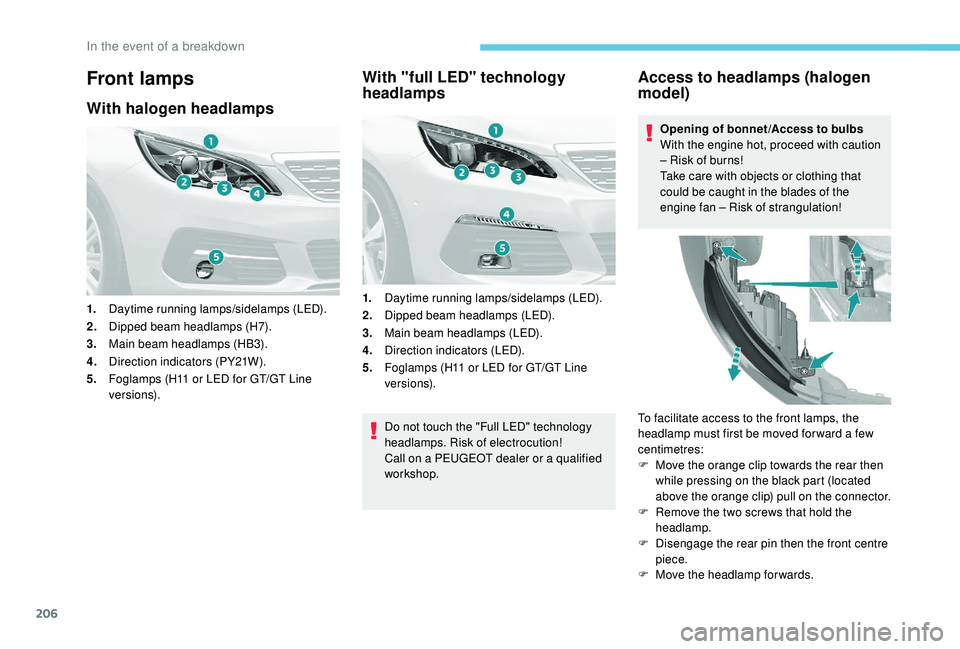
Front lamps
With halogen headlamps
1.Daytime running lamps/sidelamps (LED).
2. Dipped beam headlamps (H7).
3. Main beam headlamps (HB3).
4. Direction indicators (PY21W).
5. Foglamps (H11 or LED for GT/GT Line
ve r s i o n s).
With "full LED" technology
headlamps
1.Daytime running lamps/sidelamps (LED).
2. Dipped beam headlamps (LED).
3. Main beam headlamps (LED).
4. Direction indicators (LED).
5. Foglamps (H11 or LED for GT/GT Line
ve r s i o n s).
Do not touch the "Full LED" technology
headlamps. Risk of electrocution!
Call on a PEUGEOT dealer or a qualified
workshop.
Access to headlamps (halogen
model)
Opening of bonnet /Access to bulbs
With the engine hot, proceed with caution
– Risk of burns!
Take care with objects or clothing that
could be caught in the blades of the
engine fan – Risk of strangulation!
To facilitate access to the front lamps, the
headlamp must first be moved for ward a few
centimetres:
F
M
ove the orange clip towards the rear then
while pressing on the black part (located
above the orange clip) pull on the connector.
F
R
emove the two screws that hold the
headlamp.
F
D
isengage the rear pin then the front centre
piece.
F
M
ove the headlamp for wards.
In the event of a breakdown
Page 209 of 324
207
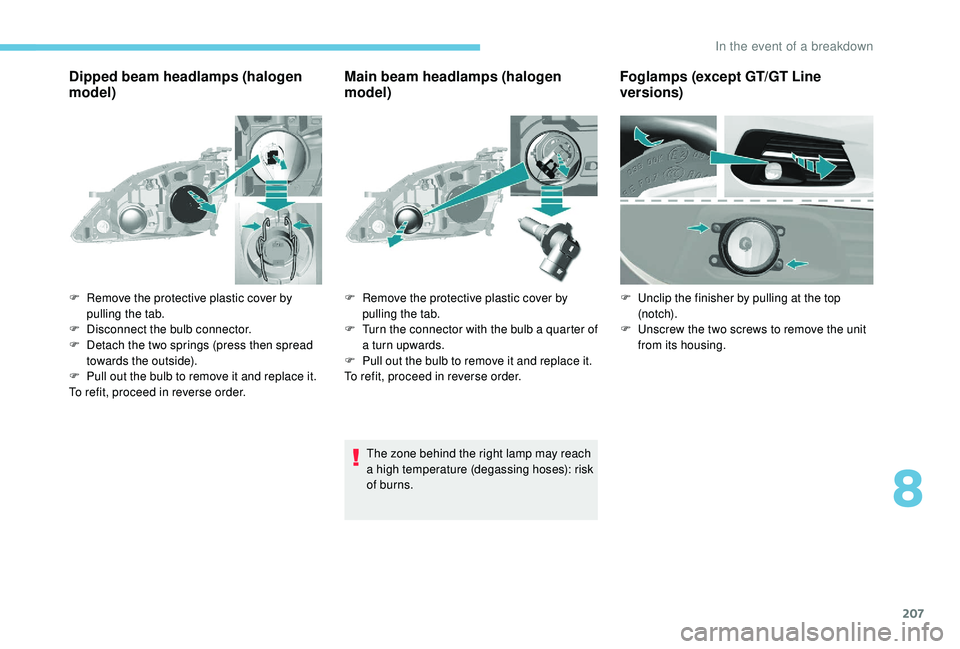
Dipped beam headlamps (halogen
model)Main beam headlamps (halogen
model)
The zone behind the right lamp may reach
a high temperature (degassing hoses): risk
of burns.
F
R
emove the protective plastic cover by
pulling the tab.
F
D
isconnect the bulb connector.
F
D
etach the two springs (press then spread
towards the outside).
F
P
ull out the bulb to remove it and replace it.
To refit, proceed in reverse order. F
R
emove the protective plastic cover by
pulling the tab.
F
T
urn the connector with the bulb a quarter of
a turn upwards.
F
P
ull out the bulb to remove it and replace it.
To refit, proceed in reverse order.
Foglamps (except GT/GT Line
versions)
F Unclip the finisher by pulling at the top (n otc h).
F
U
nscrew the two screws to remove the unit
from its housing.
8
In the event of a breakdown