2018 Peugeot 308 screen 2
[x] Cancel search: screen 2Page 176 of 324

174
Removing
F Use a screwdriver as a lever to release each fixing clip.
Do not forget to remove the very cold
climate screen:
-
w
hen the external temperature is greater
than 10°C (example: in summer, etc.),
-
i
n the event of towing,
-
a
t speeds above 75 mph (120 km/h).
Towing device
Load distribution
F D istribute the load in the trailer so that the
heaviest items are as close as possible to
the axle and the nose weight approaches
the maximum permitted without
exceeding it.
Air density decreases with altitude, thus
reducing engine performance. The maximum
load which can be towed must be reduced by
10% per 1,000
metres of altitude. Use towing devices and their genuine
harnesses approved by PEUGEOT. It
is recommended that the installation be
per formed by a PEUGEOT dealer or a
qualified workshop.
If the towing device is not fitted by
a PEUGEOT dealer, it must still be
fitted in accordance with the vehicle
manufacturer's instructions.
Certain driving assistance or manoeuvring
assistance functions are automatically
disabled if an approved towing device is
used.
Obser ve the maximum authorised towable
weight, indicated on your vehicle's
registration certificate, the manufacturer's
label as well as in the Technical data
section of this guide.
Complying with the maximum
authorised nose weight (towball)
also includes the use of accessories
(bicycle carriers, tow boxes, etc.).
Obser ve the legislation in force in the
country in which you are driving.
GTi towing
Your vehicle cannot be fitted with a towing
device.
Towing device with towball
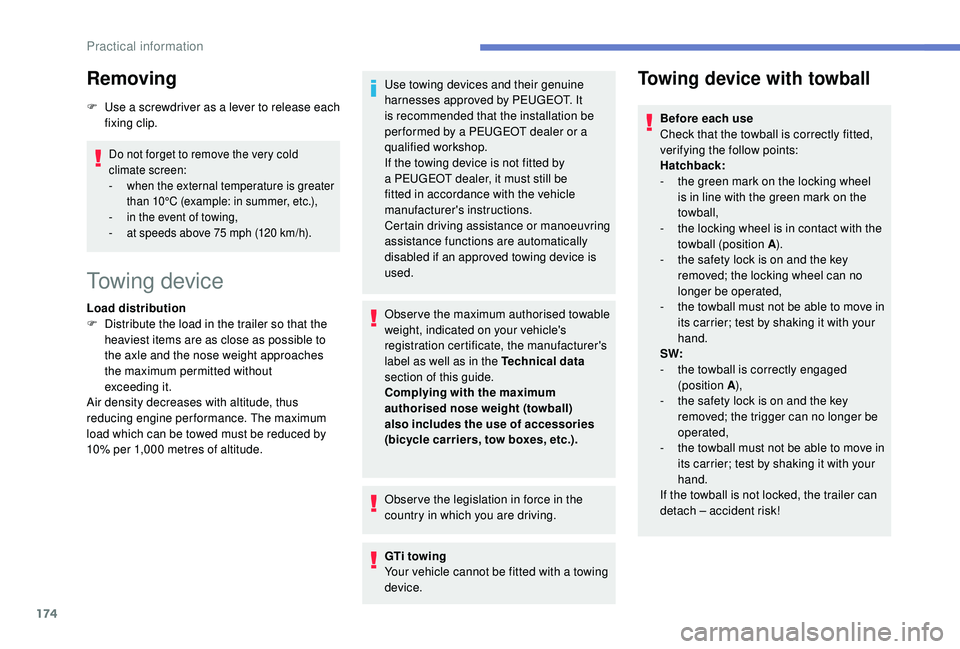
Before each use
Check that the towball is correctly fitted,
verifying the follow points:
Hatchback:
-
t
he green mark on the locking wheel
is in line with the green mark on the
towball,
-
t
he locking wheel is in contact with the
towball (position A ).
-
t
he safety lock is on and the key
removed; the locking wheel can no
longer be operated,
-
t
he towball must not be able to move in
its carrier; test by shaking it with your
hand.
SW:
-
t
he towball is correctly engaged
(position A ),
-
t
he safety lock is on and the key
removed; the trigger can no longer be
operated,
-
t
he towball must not be able to move in
its carrier; test by shaking it with your
hand.
If the towball is not locked, the trailer can
detach – accident risk!
Practical information
Page 183 of 324

181
F Press the trigger fully in and remove the towball by pulling it toward you.
F
O
n the towball, push the latch to the left and
hold it in this position.
F
A
t the same time, push the trigger for wards
to unlock the mechanism (position B ).
F
I
nstall and clip the protective plug in the
carrier located below the rear bumper.
F
S
tow the towball in its bag.
Energy economy mode
System which manages the duration of use of
certain functions to conser ve a sufficient level
of charge in the battery.
After the engine has stopped, you can still use
functions such as the audio and telematics
system, windscreen wipers, dipped beam
headlamps,
courtesy lamps, etc. for a
maximum combined duration of about forty
minutes.
Switching to this mode
A message appears in the instrument panel
screen indicating that the vehicle has switched
to economy mode and the active functions are
put on standby.
If a telephone call is being made at this
time, it will be maintained for around
10
minutes with the Bluetooth hands-free
kit of your audio system.
Exiting the mode
These functions will be automatically restored
the next time the vehicle is used.
In order to restore the use of these functions
immediately, start the engine and let it run:
-
f
or less than ten minutes, to use the
equipment for approximately five minutes, A flat battery prevents the engine from
starting.
For more information on the 12
V batter y
,
refer to the corresponding section.
Load reduction mode
System which manages the use of certain
functions according to the level of charge
remaining in the battery.
When the vehicle is being driven, the load
reduction function temporarily deactivates
certain functions, such as air conditioning,
heated rear screen, etc.
The deactivated functions are reactivated
automatically as soon as conditions permit. -
f
or more than ten minutes, to use the
equipment for up to approximately thirty
minutes.
Let the engine run for the duration specified to
ensure that the battery charge is sufficient.
Do not repeatedly and continuously restart the
engine in order to charge the battery.
7
Practical information
Page 186 of 324

184
1.Screenwash fluid reservoir.
2. Engine coolant reservoir.
3. Brake fluid reser voir.
4. Battery/Fuses.
5. Fusebox.
6. A i r f i l t e r.
7. Engine oil dipstick.
8. Engine oil filler cap.
9. Remote earth point.
10. Priming pump*
The Diesel circuit is under very high
pressure.
All work on this circuit must be carried out
only by a PEUGEOT dealer or a qualified
workshop.
*
D
epending on engine.
Checking levels
Check all of these levels regularly, in line with
the manufacturer's service schedule. Top them
up if necessary, unless other wise indicated.
If a level drops significantly, have the
corresponding system checked by a PEUGEOT
dealer or a qualified workshop. The liquid must comply with the
manufacturer's recommendations and with
the vehicle's engine.
Take care when working under the bonnet,
as certain areas of the engine may be
extremely hot (risk of burns) and the
cooling fan could start at any time (even
with the ignition off).
Used products
Avoid prolonged contact of used oil or
fluids with the skin.
Most of these fluids are harmful to health
or indeed very corrosive.
Do not discard used oil or fluids into
sewers or onto the ground.
Take used oil to a PEUGEOT dealer or
a qualified workshop and dispose of it in
the containers reser ved for this purpose.
Engine oil level
The check is carried out either when
the ignition is switched on using the oil
level indicator in the instrument panel
for vehicles equipped with an electric
gauge, or using the dipstick.
To ensure that the reading is correct, your
vehicle must be parked on a level sur face
with the engine stopped for more than
30
minutes.
It is normal to top up the oil level between
two ser vices (or oil changes). PEUGEOT
recommends that you check the level, and top
up if necessary, every 3,000
miles (5,000 km).
Checking using the dipstick
The location of the dipstick is shown in the
corresponding underbonnet layout view.
F
T
ake the dipstick by its coloured grip and
pull it out completely.
F
W
ipe the end of the dipstick using a clean
non-fluffy cloth.
F
R
efit the dipstick and push fully down, then
pull it out again to make the visual check:
the correct level is between marks A and B .
Practical information
Page 188 of 324

186
When the engine is hot, the temperature of this
fluid is regulated by the fan.
In addition, as the cooling system is pressurised,
wait at least one hour after switching off the
engine before carrying out any work.
To avoid the risk of scalding when you need to
top up in an emergency, place a cloth around
the cap and unscrew the cap by two turns to
allow the pressure to drop.
Once the pressure has dropped, remove the cap
and top up to the required level.
Fluid specification
This fluid must conform to the manufacturer's
recommendations.The cooling fan may star t after
switching off the engine: take care
with articles and clothing that might be
caught by the fan blades.
Screenwash fluid level
Top up to the required level when
necessary.
Fluid specification
For optimum cleaning and to avoid freezing,
this fluid must not be topped up or replaced
with plain water. In wintry conditions, it is recommended
that you use an ethyl alcohol or methanol
based fluid.
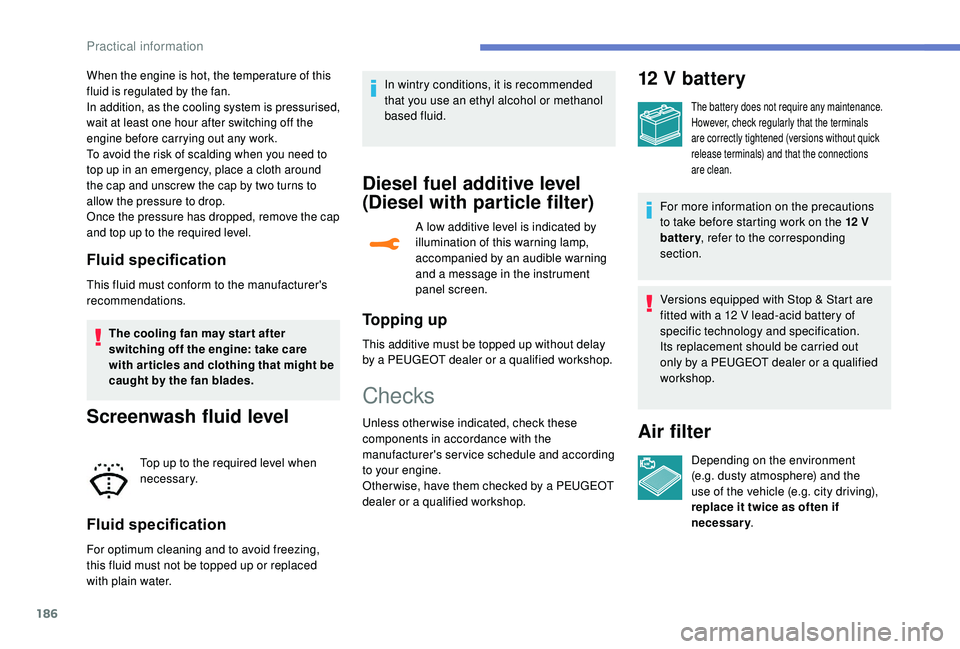
Diesel fuel additive level
(Diesel with particle filter)
A low additive level is indicated by
illumination of this warning lamp,
accompanied by an audible warning
and a message in the instrument
panel screen.
To p p i n g u p
This additive must be topped up without delay
by a PEUGEOT dealer or a qualified workshop.
Checks
Unless otherwise indicated, check these
components in accordance with the
manufacturer's service schedule and according
to your engine.
Other wise, have them checked by a PEUGEOT
dealer or a qualified workshop.
12 V battery
The battery does not require any maintenance.
However, check regularly that the terminals
are correctly tightened (versions without quick
release terminals) and that the connections
are clean.
For more information on the precautions
to take before starting work on the 12
V
battery , refer to the corresponding
section.
Versions equipped with Stop & Start are
fitted with a 12
V lead-acid battery of
specific technology and specification.
Its replacement should be carried out
only by a PEUGEOT dealer or a qualified
workshop.
Air filter
Depending on the environment
(e.g. dusty atmosphere) and the
use of the vehicle (e.g. city driving),
replace it twice as often if
necessary .
Practical information
Page 215 of 324

213
Table of fuses
FuseNo. Rating
(A) Functions
F9 5Alarm, emergency and assistance calls
F13 5Reversing camera and parking sensors
F15 1512
V accessory socket.
F16 15Cigarette lighter.
F17 15Audio system.
F18 20Touch screen, CD player, audio and navigation system.
F19 5Rain, sunshine sensor.
F20 5Airbags.
F21 5Instrument panel.
F22/F24 30Internal/external locks, front and rear.
F23 5Glove box lamp, vanity mirror, front and rear courtesy lamps.
F25/F27 15Front/rear screenwash pump.
F26 15Horn.
F30 15Rear wiper.
8
In the event of a breakdown
Page 235 of 324

233
Commercial version
Number of seats: 2 people.
Useable boot volume: 1.31 m3
In metres (m )
Load floor length 1.4 5 8
Load width at the wheel arches 1.03 6
Load width at the centre 1.07 7
Load height
-
a
t the centre 0.916
-
a
t the roof sill 0.831
-
b
elow the load space cover 0.5
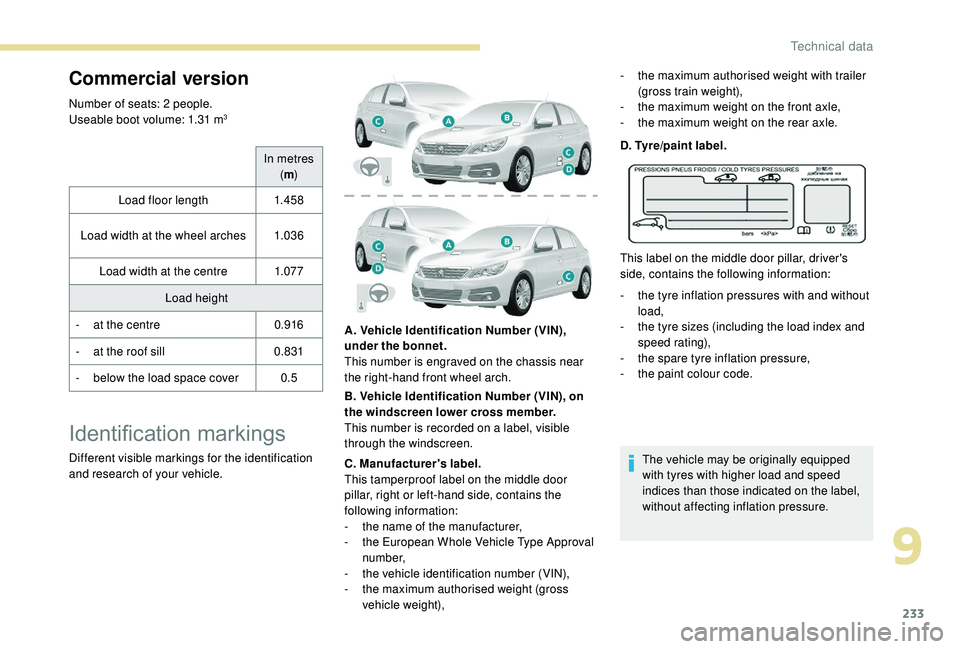
Identification markings
Different visible markings for the identification
and research of your vehicle. A. Vehicle Identification Number (VIN),
under the bonnet.
This number is engraved on the chassis near
the right-hand front wheel arch.
B. Vehicle Identification Number (VIN), on
the windscreen lower cross member.
This number is recorded on a label, visible
through the windscreen.
C. Manufacturer's label.
This tamperproof label on the middle door
pillar, right or left-hand side, contains the
following information:
-
t
he name of the manufacturer,
-
t
he European Whole Vehicle Type Approval
number,
-
t
he vehicle identification number (VIN),
-
t
he maximum authorised weight (gross
vehicle weight), D. Tyre/paint label.
This label on the middle door pillar, driver's
side, contains the following information:
-
t
he tyre inflation pressures with and without
load,
-
t
he tyre sizes (including the load index and
speed rating),
-
t
he spare tyre inflation pressure,
-
t
he paint colour code.
The vehicle may be originally equipped
with tyres with higher load and speed
indices than those indicated on the label,
without affecting inflation pressure.
-
t
he maximum authorised weight with trailer
(gross train weight),
-
t
he maximum weight on the front axle,
-
t
he maximum weight on the rear axle.
9
Technical data
Page 238 of 324

2
First steps
Press: On/Off.
Rotate: adjust volume.
Short press: change audio source
(radio; USB; AUX (if equipment
connected); streaming).
Long press: display the Telephone
menu (if a telephone is connected).
Adjust audio options:
Front/rear fader; left/right balance;
bass/treble; loudness; audio
ambience.
Activation/Deactivation of automatic
volume adjustment (linked to the
speed of the vehicle).
Radio:
Short press: display the list of radio
stations.
Long press: update the list.
Media:
Short press: display the list of
folders.
Long press: display the available
sorting options.Select the screen display mode,
between:
Date; Audio functions; Trip
computer; Telephone.
Confirm or display contextual menu.
Buttons 1 to 6.
Short press: select the preset radio
station.
Long press: preset a radio station.
Radio:
Automatic step by step search up/
down for radio stations.
Media:
Select previous/next USB,
streaming track.
Fast scroll in a list.
Radio:
Manual step by step search up/down
for radio stations.
Select previous/next MP3 folder.
Media:
Select previous/next folder/genre/
artist/playlist on the USB device.
Fast scroll in a list.Abandon the current operation.
Go up one level (menu or folder).
Access to the main menu.
Activate/Deactivate TA function
(traffic announcements).
Long press: select type of
announcement.
Selection of FM/DAB/AM
wavebands.
Steering mounted controls
Steering mounted controls
– Type 1
Radio:
Select the previous/next preset radio
station.
Select the previous/next item in a
menu or a list.
Media:
Select the previous/next track.
Select the previous/next item in a
menu or a list.
Bluetooth® audio system
Page 240 of 324

4
Radio:
Select the previous/next preset radio
station.
Select the previous/next item in a
menu or a list.
Media:
Select the previous/next track.
Select the previous/next item in a
menu or a list.
Press the thumbwheel: confirm.
Menus
Depending on version."Multimedia ": Media settings, Radio
settings.
" Telephone ": Call, Directory
management, Telephone
management, Hang up.
" Trip computer ".
" Maintenance ": Diagnosis, Warning
log, etc. "
Connections ": Manage
connections, search for devices.
" Personalisation-configuration ":
Define the vehicle parameters,
Choice of language, Display
configuration, Choice of units, Date
and time adjustment.
Press the " MENU" button.
Move from one menu to another.
Enter a menu.
Radio
Selecting a station
Press the SOURCE button
repeatedly and select the radio.
Press this button to select a
waveband (FM/AM/DAB).
Press one of the buttons for an
automatic search for radio stations. Press one of the buttons to carry out
a manual search up/down for radio
frequencies.
Press this button to display the list of
stations received locally.
To update this list, press for more
than two seconds. The sound is cut
while updating.
RDS
The external environment (hills, buildings,
tunnels, basement car parks, etc.) may
block reception, including in RDS mode.
This is a normal effect of the way in
which radio waves are transmitted and
does not indicate any failure of the audio
equipment.
If RDS is not available, the RDS symbol
appears struck out in the screen.
Bluetooth® audio system