2018 Peugeot 308 Stalk
[x] Cancel search: StalkPage 4 of 324

2
.
.
Instrument panel 8
W arning and indicator lamps 9
I
ndicators 23
Distance recorders
2
7
Lighting dimmer
2
8
rip computer
2
8
Monochrome screen C
3
0
Touch screen
3
2
Instruments and controls
4
S
etting the time and date
3
8
Remote control and key
3
9
Keyless Entry and Starting
4
1
Locking/unlocking from the inside
4
3
Back-up procedures
4
4
Doors
4
6
Boot
47
Alarm
48
Electric windows
5
0
PEUGEOT i- Cockpit
5
1
Front head restraints
5
1
Front seats
5
1
Steering wheel adjustment
5
5
Mirrors
5
5
Rear seats (hatchback)
5
6
Rear seats (SW)
5
7
Interior fittings
5
8
Boot fittings (hatchback)
6
2
Boot fittings (SW)
6
2
Heating and Ventilation
6
4
Manual air conditioning
6
6
Manual air conditioning (Touch screen)
6
6
Dual-zone automatic air conditioning (Touch screen) 67Recirculation of interior air 69
Front demist – defrost 7 0
Rear screen demist – defrost
7
0
Panoramic roof
7
1
Courtesy lamps
7
2
Footwell lighting
73
I
nterior ambient lighting
73 E
xterior lighting control stalk
7
4
Automatic illumination of headlamps
7
6
Automatic headlamp dipping
7
6
Guide-me-home lighting
7
8
Exterior welcome lighting
7
8
Direction indicators
7
9
Door mirror spotlamps
7
9
Headlamp adjustment
7
9
Wiper control stalk
8
0
Changing a wiper blade
8
2
Automatic windscreen wipers
8
3
General safety recommendations
8
4
Hazard warning lamps
8
4
Emergency or assistance call
8
5
Horn 86
Electronic stability control (ESC)
8
6
Seat belts
9
0
Airbags
92
Child seats
9
5
Child seat at the front
9
6
Deactivating the front passenger airbag
9
9
ISOFIX mountings and child seats
1
02
Child lock 1 07
InstrumentsAccess
Over view
Ease of use and comfort Lighting and visibility
Safety
Eco-driving
Contents
Page 7 of 324

5
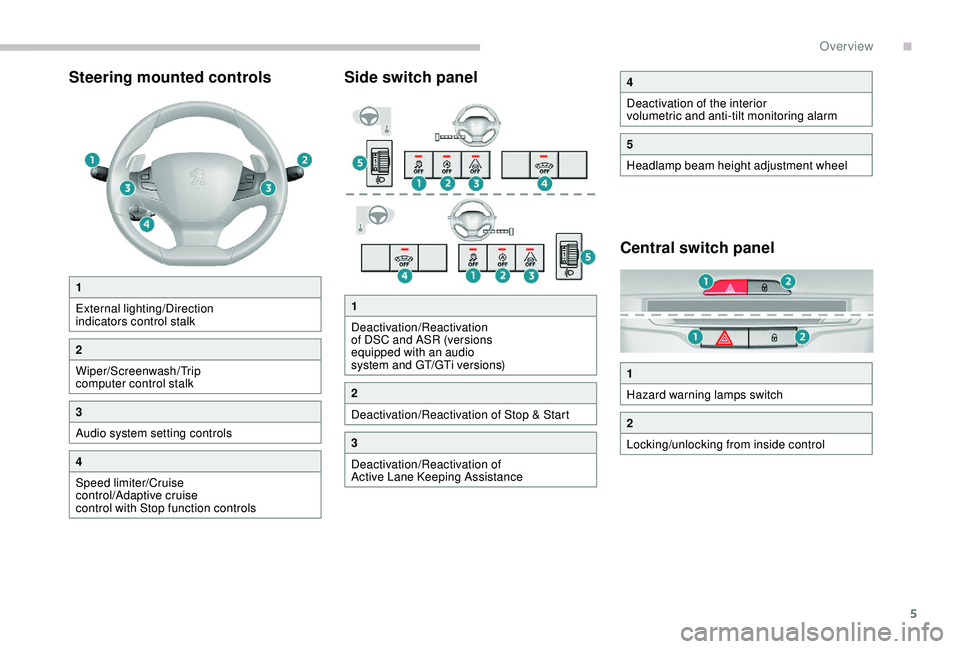
Steering mounted controlsSide switch panel
Central switch panel
1
External lighting/Direction
indicators control stalk
2
Wiper/Screenwash/Trip
computer control stalk
3
Audio system setting controls
4
Speed limiter/Cruise
control/Adaptive cruise
control with Stop function controls
4
Deactivation of the interior
volumetric and anti-tilt monitoring alarm
5
Headlamp beam height adjustment wheel
1
Hazard warning lamps switch
2
Locking/unlocking from inside control
1
Deactivation/Reactivation
of DSC and ASR (versions
equipped with an audio
system and GT/GTi versions)
2
Deactivation/Reactivation of Stop & Start
3
Deactivation/Reactivation of
Active Lane Keeping Assistance
.
Over view
Page 10 of 324

8
Instrument panel
Speedometer
Analogue speedometer (mph or km/h).
Coolant temperature and
fuel level indicators
1.Fuel gauge.
2. Engine coolant fluid temperature gauge.
Display screen
When travelling abroad, you may have
to change the distance unit: the display
of road speed must be in the official
units (miles or km) for the country. The
change of units is done via the screen
configuration menu, with the vehicle
stationary.
1. Engine oil level indicator.
2. Gear shift indicator.
State of the automatic gearbox.
3. Digital speedometer (mph or km/h).
4. Cruise control or speed limiter settings.
With display screen 2:
Instrument panel display screen:
-
G ear shift indicator.
-
S
tate of the automatic gearbox.
-
S
tate of the speed limiter or cruise control.
-
S
peed limit sign.
-
T
otal distance recorder.
-
T
rip distance recorder.
-
S
ervice spanner.
According to the page selected with the control
stalk (end of the wiper control stalk):
-
D
igital speedometer.
-
T
rip computer.
-
D
ynamic vehicle parameters (Driver Sport
Pack).
-
E
co mode.
-
D
riving aids.
-
R
epeat of the navigation instructions.
With display screen 1:
5.Ser vice indicator, then total distance
recorder (miles or km).
These functions are displayed successively
on switching on the ignition.
6. Trip distance recorder (miles or km).
Instruments
Page 23 of 324

21
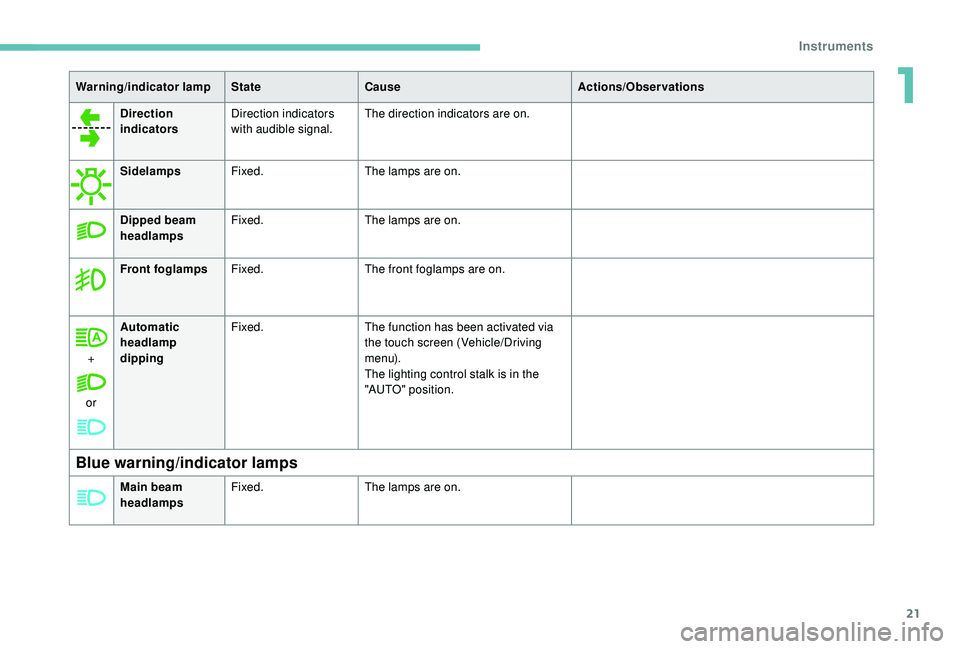
Direction
indicatorsDirection indicators
with audible signal. The direction indicators are on.
Sidelamps Fixed. The lamps are on.
Dipped beam
headlamps Fixed.
The lamps are on.
Front foglamps Fixed. The front foglamps are on.
+
or Automatic
headlamp
dipping
Fixed.
The function has been activated via
the touch screen (Vehicle/Driving
m e n u).
The lighting control stalk is in the
"AUTO" position.
Blue warning/indicator lamps
Warning/indicator lamp StateCause Actions/Observations
Main beam
headlamps Fixed.
The lamps are on.
1
Instruments
Page 31 of 324

29
F Press this button, located on the end of the wiper control stalk , to display the different
tabs in turn.
-
T
he current information tab with:
•
t
he range,
•
t
he current fuel consumption,
•
t
he Stop & Start time counter.-
Trip 1 with:
•
t
he average speed,
•
t
he average fuel consumption,
•
t
he distance travelled,
for the first trip.
-
Trip 2 with:
•
t
he average speed,
•
t
he average fuel consumption,
•
t
he distance travelled,
for the second trip.
Reset trip
For example, trip 1 can be used for daily figures
and trip 2 for monthly figures.
F
W
hen the required trip is displayed, press
the button on the end of the wiper control
stalk for more than two seconds.
Tr i p s 1 and 2 are independent but their use is
identical. With display screen
1 and the touch screen:
Information is accessible from the " Vehicle/
Driving " menu.
Permanent display:
F
Sel
ect the " Vehicle/Driving " menu.
F
I
n this menu, select the " Driving functions"
tab.
The information of the trip computer is
displayed in the primary page of the menu.
F
P
ress one of the buttons to display the
desired tab.
Temporary display in a specific window:
F
P
ress the end of the wiper control stalk for
access to the information and to display the
different tabs. The current information tab with:
-
t he range,
-
t
he current fuel consumption,
-
t
he Stop & Start time counter.
The trip 1 tab with:
-
t
he distance travelled,
-
t
he average fuel consumption,
-
t
he average speed for the first
trip.
The trip 2 tab with:
-
t
he distance travelled,
-
t
he average fuel consumption,
-
t
he average speed for the
second trip.
Reset trip
F When the desired trip is displayed, press the reset button or the end of the wiper
control stalk.
1
Instruments
Page 76 of 324

74
Exterior lighting control
stalk
Main lighting
Selection of main lighting mode
Without AUTO lighting
With AUTO lighting
Lighting off (ignition off)/Front daytime
running lamps (engine running).
Sidelamps only. Automatic illumination of headlamps.
Dipping the headlamps
Pull the lever to switch the lighting between
dipped and main beam headlamps.
In Lighting off or Sidelamps only modes, the
driver can switch on the main beam headlamps
directly by keeping the lever pulled.
Display
Illumination of the corresponding indicator
lamp in the instrument panel confirms that the
lighting selected is on.
Foglamps
In good or rainy weather, by both day
and night, the front foglamps and the
rear foglamps are prohibited. In these
situations, the power of their beams may
dazzle other drivers. They should only be
used in fog or falling snow.
In these weather conditions, it is your
responsibility to switch on the foglamps
and dipped headlamps manually as the
sunshine sensor may detect sufficient
light.
Switch off the front and rear foglamps
when they are no longer necessary.
Rear foglamp only
Turn the ring to align the desired symbol with
the marking.
Dipped or main beam headlamps.
The main or dipped beam headlamps must be
on.
F
T
o switch it on, turn the ring for wards.
Lighting and visibility
Page 78 of 324

76
Daytime running lamps/
Sidelamps
These lamps light up automatically when the
engine starts.
Automatic illumination of
headlamps
When a low level of ambient light is detected
by the sunshine sensor, the number plate
lamps,
sidelamps and dipped beam headlamps
are switched on automatically, without any
action on the part of the driver. They may also
Switching on
Switching off
F Turn the ring to another position. Deactivation of the function is accompanied
by the display of a message.
Operating fault
In the event of a malfunction of the
sunshine sensor, the lighting comes
on, this warning lamp is displayed in
the instrument panel, accompanied
by an audible signal and/or a
message.
Contact a PEUGEOT dealer or a qualified
workshop. In fog or snow, the sunshine sensor may
detect sufficient light. In this case, the
lighting will not come on automatically.
Do not cover the sunshine sensor,
integrated with the rain sensor and located
at the top of the windscreen behind the
rear view mirror; the associated functions
would no longer be controlled.
They provide the following functions:
-
D
aytime running lamps (lighting control
stalk at position " 0" or " AUTO " with
adequate light level).
-
S
idelamps (lighting control stalk at position
" AUTO " with low light levels or "Sidelamps
only" or "Dipped/main beam headlamps"). F
T
urn the ring to the AUTO position.
Activation of the function is accompanied by
the display of a message.
Automatic headlamp
dipping
System which automatically changes between
dipped and main beam according to the
exterior light level and the driving conditions,
using a camera located at the top of the
windscreen.
This system is a driving aid.
The driver remains responsible for the
vehicle's lighting, its correct use for the
prevailing conditions of light, visibility,
traffic and obser vation of driving and
vehicle regulations.
The system will be operational as soon as
you exceed 16
mph (25 km/h).
If the speed drops below 9
mph (15 km/h),
the system no longer operates.
come on if rain is detected, at the same time as
automatic operation of the windscreen wipers.
As soon as the light returns to a sufficient level
or after the windscreen wipers are switched off,
the lamps are switched off automatically.
Lighting and visibility
Page 79 of 324

77
Activation/Deactivation
F Turn the lighting control stalk ring to the "AUTO " position.
F
I
n the Vehicle/Driving menu,
select the " Driving functions "
tab, then " Automatic headlamp
dip ".
The status of the system remains in memory
when the ignition is switched off.
Operation
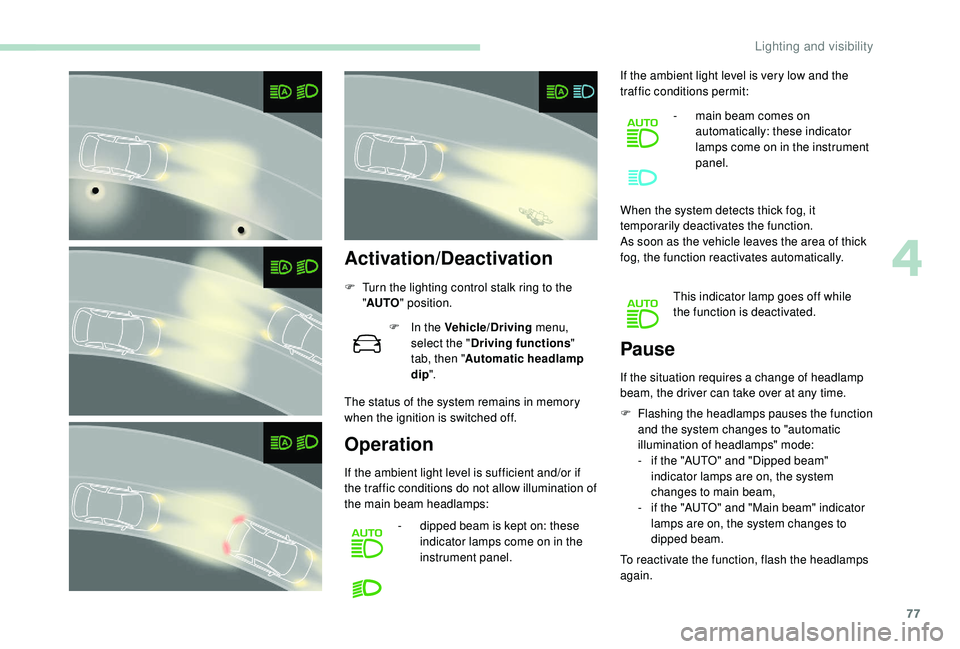
If the ambient light level is sufficient and/or if
the traffic conditions do not allow illumination of
the main beam headlamps: -
d
ipped beam is kept on: these
indicator lamps come on in the
instrument panel. If the ambient light level is very low and the
traffic conditions permit:
-
m
ain beam comes on
automatically: these indicator
lamps come on in the instrument
panel.
When the system detects thick fog, it
temporarily deactivates the function.
As soon as the vehicle leaves the area of thick
fog, the function reactivates automatically. This indicator lamp goes off while
the function is deactivated.
F
F
lashing the headlamps pauses the function
and the system changes to "automatic
illumination of headlamps" mode:
- i f the "AUTO" and "Dipped beam"
indicator lamps are on, the system
changes to main beam,
-
i
f the "AUTO" and "Main beam" indicator
lamps are on, the system changes to
dipped beam.
To reactivate the function, flash the headlamps
again.
Pause
If the situation requires a change of headlamp
beam, the driver can take over at any time.
4
Lighting and visibility