2018 PEUGEOT 108 mirror controls
[x] Cancel search: mirror controlsPage 4 of 180

2
.
.
Instrument panels 8
D isplays 9
Warning and indicator lamps
9
I
ndic ators
18
Trip computer
1
8
Adjusting the time
2
0Keys
22
"
K
eyless Entry and Starting" system
2
3
Doors 26
Boot
27
Front electric windows
2
8
Quarter windows
2
9
Electric fabric roof
2
9
Advice on care
3
1
Front seats
3
2
Rear seats
3
4
Mirrors
35
Steering wheel adjustment
3
6
Ventilation
3
6
Heating
3
7
Manual air conditioning
3
7
Automatic air conditioning
3
8
Front demist – defrost
4
0
Rear screen demist – defrost
4
1
Courtesy lamp
4
1
Boot lighting
4
1
Interior fittings
4
2
Rear shelf
4
4
Boot fittings
4
5Lighting control stalk
4
6
Automatic headlamp illumination
4
8
Direction indicators
4
8
Headlamp adjustment
4
9
Wiper control stalk
4
9
Changing a
wiper blade
5
0
General safety recommendations 5 1
H o r n 51
Hazard warning lamps
5
2
ESC system
5
2
Seat belts
5
4
Airbags
56
Child seats
5
9
Deactivating the front passenger airbag
6
0
ISOFIX mountings and child seats
6
6
i-Size child seats
7
0
Child lock
7
1
InstrumentsAccess
Over view
Ease of use and comfort Lighting and visibility
Safety
Eco-driving
Instruments and controls 4
E co-driving
6
Contents
Page 6 of 180

4
Instruments and controls1
Door mirrors
Electric windows
Central locking
2
Bonnet release
3
Dashboard fuses
4
Instrument panel
Rev counter
Central display
Warning and indicator lamps
Indicators
Trip computer
5
Courtesy lamp
Fabric electric roof opening control
Speed Limit recognition and
recommendation
Active City Brake
Rear view mirror
Sun visor
6
Touch screen
Radio
Setting the time
7
Heating, ventilation
Manual air conditioning
Automatic air conditioning
Front demist/defrost
Rear screen demisting/defrosting
8
12 V accessory socket
USB port
Auxiliary Jack socket
9
Manual gearbox
ETG gearbox
Gear efficiency indicator
Hill start assist
10
Manual parking brake
11
Front passenger airbag
12
Side vents
13
Glove box
Deactivating the front passenger airbag
Reinitialisation of the under-inflation
detection system
Over view
Page 7 of 180

5
Instruments and controls (continued)1
Lighting controls
Direction indicators
2
Stop & Start
Active City Brake
Electric mirrors adjustment
Headlamp adjustment
Deactivating the DSC/TRC systems.
Front foglamps (accessory)
3
Opening the fuel filler flap
4
ETG gearbox steering mounted control
paddles
5
Steering wheel height adjustment
Horn
Driver front airbag
6
Steering mounted controls
-
T
ouch screen, Radio
-
L
ane Departure Warning System
7
Speed limiter
8
Wiper control stalk
9
Ignition, starting/switching off (key)
Ignition, starting/switching off ("Keyless
Entry and Starting" system)
10
Hazard warning lamps
.
Over view
Page 34 of 180

32
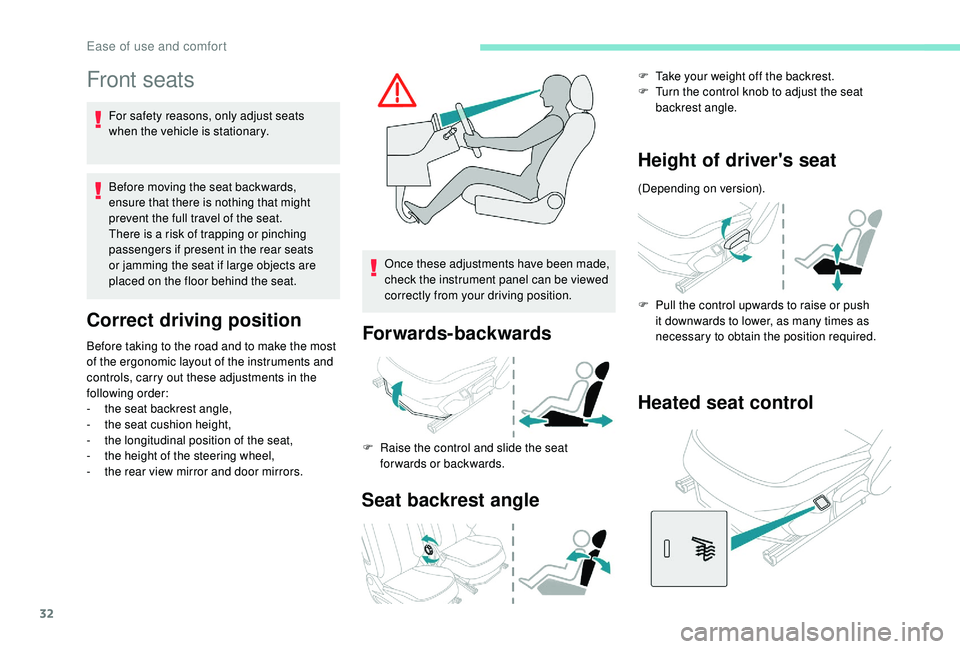
Front seats
For safety reasons, only adjust seats
when the vehicle is stationary.
Before moving the seat backwards,
ensure that there is nothing that might
prevent the full travel of the seat.
There is a risk of trapping or pinching
passengers if present in the rear seats
or jamming the seat if large objects are
placed on the floor behind the seat.
Correct driving position
Before taking to the road and to make the most
of the ergonomic layout of the instruments and
controls, carry out these adjustments in the
following order:
-
t
he seat backrest angle,
-
t
he seat cushion height,
-
t
he longitudinal position of the seat,
-
t
he height of the steering wheel,
-
t
he rear view mirror and door mirrors. Once these adjustments have been made,
check the instrument panel can be viewed
correctly from your driving position.Forwards-backwards
F Raise the control and slide the seat
forwards or backwards.
Seat backrest angle
F Take your weight off the backrest.
F T urn the control knob to adjust the seat
backrest angle.
Height of driver's seat
(Depending on version).
F
P
ull the control upwards to raise or push
it downwards to lower, as many times as
necessary to obtain the position required.
Heated seat control
Ease of use and comfort
Page 45 of 180

43
12 V accessory socket
Do not exceed the maximum power rating
of the socket (risk of damage to your
device).
The connection of an electrical device
not approved by PEUGEOT, such as
a
USB charger, may adversely affect the
operation of vehicle electrical systems,
causing faults such as poor radio
reception or inter ference with displays in
the screens.
USB port
To connect portable devices such as an iPod®
type digital audio player or USB memory stick.
It reads the audio files which are sent to your
audio system, to be listened to through the
vehicle's speakers.
You can manage these files using the steering
mounted controls or those on the front of the
audio system.
Connected to the USB port during
use, the portable device may recharge
automatically.
For more information on Audio
equipment and telematics and in
particular the use of this equipment, refer
to the corresponding section.
Auxiliary socket (JACK)
To connect a portable device so that you
c an listen to your music files via the vehicle's
speakers.
The management of the files is done using your
portable device.
For more information on Audio
equipment and telematics and in
particular the use of this equipment, refer
to the corresponding section.
The USB port and jack socket also allow
a smartphone to be connected:
-
e
ither as a MirrorLink
TM connection,
using just the USB port,
-
o
r as a
iPhone
® connection, by using
the USB port and the jack socket at the
same time.
These connections allow certain telephone
applications to be used on the touch screen.
F To connect a 12 V accessory (maximum
power: 120 Watts), lift the cover and
connect a
suitable adaptor.
3
Ease of use and comfort
Page 86 of 180

84
- when towing,
- d riving with a space-saver type spare wheel
or snow chains fitted,
-
p
uncture repair using the temporary repair
kit,
-
y
oung drivers, etc.
The following situations may inter fere with the
operation of the system or prevent it working:
-
p
oor visibility (inadequate street lighting,
falling snow, rain, fog),
-
w
indscreen area located in front of the
camera: dirty, misted, frost-covered, snow-
covered, damaged or covered by a
sticker,
-
f
ault with the camera,
-
h
idden road signs (other vehicles,
vegetation, snow),
-
s
peed limit signs that do not conform to the
standard, are damaged or distorted.
If an app on your smart phone is used
via Mirror Screen, the sign displayed by
the system may be temporarily hidden. It
will be redisplayed as soon as you pass
another sign.Speed limiter
System which prevents the
vehicle from exceeding the speed
programmed by the driver.
The limiter is switched on manually: this
can be done regardless of the vehicle speed.
However, if you are travelling at less than
18
mph (30 km/h), the programmed speed will
be set at 18
mph (30 km/h).
The speed limiter is paused using the control.
The programmed speed can be exceeded
temporarily by pressing the accelerator firmly
beyond the point of resistance.
To return to the programmed speed, simply
release the accelerator pedal until the set limit
speed has been reached again.
The programmed speed is erased when
the ignition is switched off.
The limiter cannot, under any
circumstances, replace respect for speed
limits, nor the vigilance of the driver.
Steering mounted control
The controls for this system are grouped
together on this steering mounted control.
1.Activation/deactivation of the limiter: by
pressing on the end of the control.
2. Programming the speed/decreasing the
value: by pressing the control downwards.
3. Resuming speed limitation/increasing the
value: by pressing the control upwards.
4. Pause limitation: by pulling the control
towards you.
Driving
Page 149 of 180

1
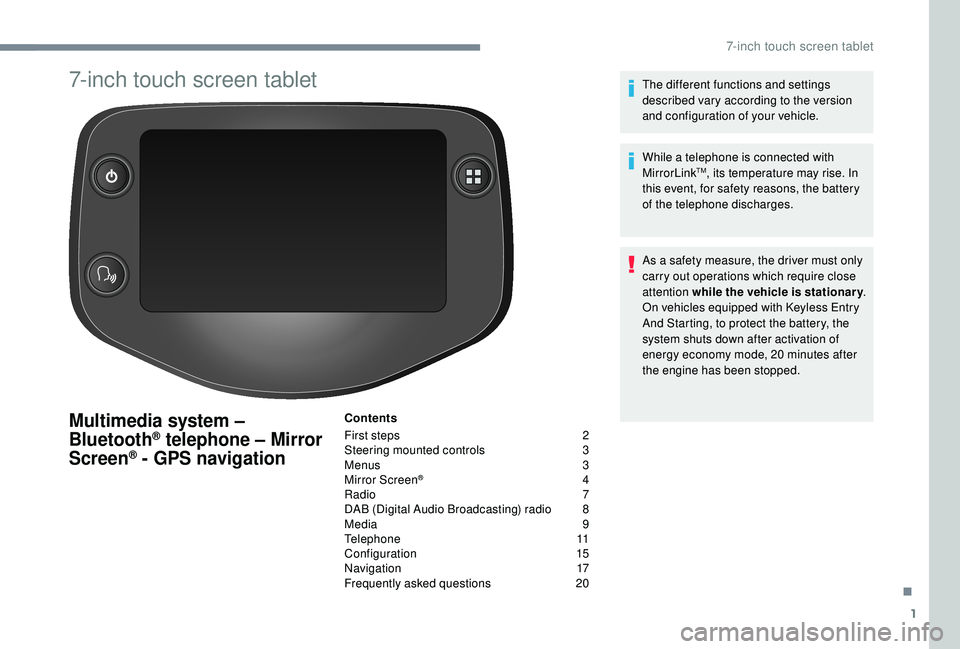
7-inch touch screen tablet
Multimedia system –
Bluetooth® telephone – Mirror
Screen® - GPS navigation
Contents
First steps
2
S
teering mounted controls
3
M
enus
3
M
irror Screen
® 4
R
adio
7
D
AB (Digital Audio Broadcasting) radio
8
M
edia
9
T
elephone
1
1
Configuration
1
5
Navigation
1
7
Frequently asked questions
20T
he different functions and settings
described vary according to the version
and configuration of your vehicle.
While a telephone is connected with
MirrorLink
TM, its temperature may rise. In
this event, for safety reasons, the battery
of the telephone discharges.
As a
safety measure, the driver must only
carry out operations which require close
attention while the vehicle is stationary .
On vehicles equipped with Keyless Entry
And Starting, to protect the battery, the
system shuts down after activation of
energy economy mode, 20
minutes after
the engine has been stopped.
.
7-inch touch screen tablet