2018 PEUGEOT 108 heating
[x] Cancel search: heatingPage 4 of 180

2
.
.
Instrument panels 8
D isplays 9
Warning and indicator lamps
9
I
ndic ators
18
Trip computer
1
8
Adjusting the time
2
0Keys
22
"
K
eyless Entry and Starting" system
2
3
Doors 26
Boot
27
Front electric windows
2
8
Quarter windows
2
9
Electric fabric roof
2
9
Advice on care
3
1
Front seats
3
2
Rear seats
3
4
Mirrors
35
Steering wheel adjustment
3
6
Ventilation
3
6
Heating
3
7
Manual air conditioning
3
7
Automatic air conditioning
3
8
Front demist – defrost
4
0
Rear screen demist – defrost
4
1
Courtesy lamp
4
1
Boot lighting
4
1
Interior fittings
4
2
Rear shelf
4
4
Boot fittings
4
5Lighting control stalk
4
6
Automatic headlamp illumination
4
8
Direction indicators
4
8
Headlamp adjustment
4
9
Wiper control stalk
4
9
Changing a
wiper blade
5
0
General safety recommendations 5 1
H o r n 51
Hazard warning lamps
5
2
ESC system
5
2
Seat belts
5
4
Airbags
56
Child seats
5
9
Deactivating the front passenger airbag
6
0
ISOFIX mountings and child seats
6
6
i-Size child seats
7
0
Child lock
7
1
InstrumentsAccess
Over view
Ease of use and comfort Lighting and visibility
Safety
Eco-driving
Instruments and controls 4
E co-driving
6
Contents
Page 6 of 180

4
Instruments and controls1
Door mirrors
Electric windows
Central locking
2
Bonnet release
3
Dashboard fuses
4
Instrument panel
Rev counter
Central display
Warning and indicator lamps
Indicators
Trip computer
5
Courtesy lamp
Fabric electric roof opening control
Speed Limit recognition and
recommendation
Active City Brake
Rear view mirror
Sun visor
6
Touch screen
Radio
Setting the time
7
Heating, ventilation
Manual air conditioning
Automatic air conditioning
Front demist/defrost
Rear screen demisting/defrosting
8
12 V accessory socket
USB port
Auxiliary Jack socket
9
Manual gearbox
ETG gearbox
Gear efficiency indicator
Hill start assist
10
Manual parking brake
11
Front passenger airbag
12
Side vents
13
Glove box
Deactivating the front passenger airbag
Reinitialisation of the under-inflation
detection system
Over view
Page 32 of 180
30
Position 0:Roof completely closed.
Position 1: Stop position during automatic
closure of the roof.
Position 2: Roof completely open.
Opening
F Press briefly on the control in the opening
direction to open the roof by stages.
or
F
P
ress the control in the opening direction
and keep it pressed until the beginning
of operation, to fully open the roof. A new
press stops the roof moving.
Closing
F Press briefly on the control in the closing direction to close the roof in stages.
or
F
P
ress the control in the closing direction
and keep it pressed until the beginning of
operation to close the roof to position 1 .
Pressing it again stops the roof moving.
F
T
o close the roof completely, keep the
control pressed (between positions 1
and 0)
until the roof is heard to lock. The operation of closing the roof could
cause serious injuries: pay particular
attention to children.
If the roof does not close correctly:
-
c
heck that nothing is hindering the closure
(ignition off),
-
r
epeat the command to close (engine
running).
If the problem persists, contact a PEUGEOT
dealer or a qualified workshop.
Protecting the electric control
motors for opening and closing
the roof
During repeated opening and closing
movements of the roof, it is possible that
heating up of the electric motors no longer
allows the roof to be opened or closed. Allow
the motors to cool by not trying to move the
roof for ten minutes.
Operating fault
If there is an electrical fault, contact
a
PEUGEOT dealer or a qualified workshop.
Acoustic air deflector
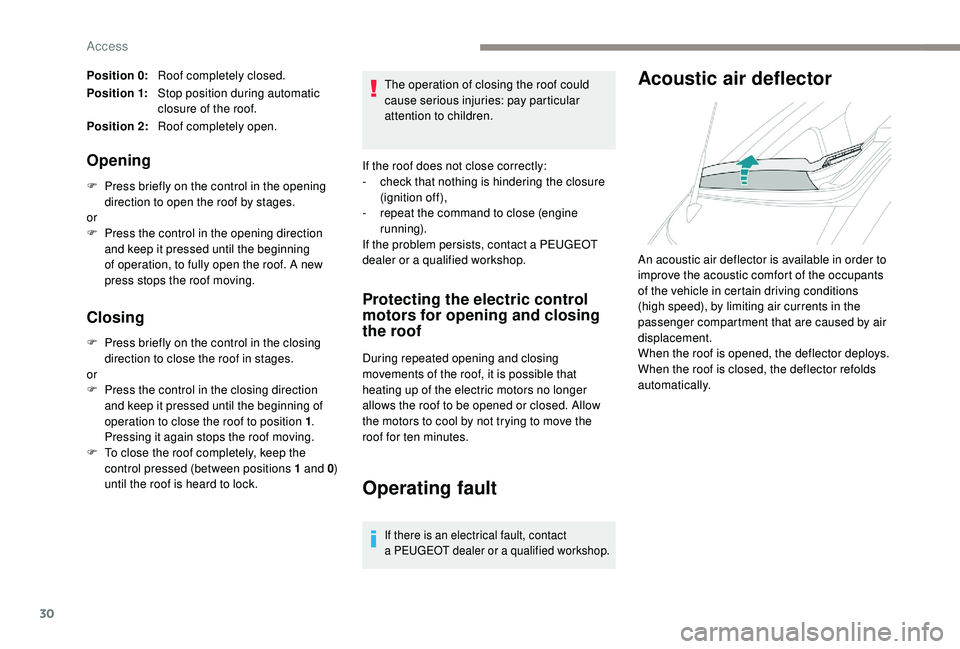
An acoustic air deflector is available in order to
improve the acoustic comfort of the occupants
of the vehicle in certain driving conditions
(high speed), by limiting air currents in the
passenger compartment that are caused by air
displacement.
When the roof is opened, the deflector deploys.
When the roof is closed, the deflector refolds
automatically.
Access
Page 35 of 180
33
With the engine running, the front seats can be
heated separately.
F
P
ress the switch. The indicator lamp comes
on.
F
P
ressing a
second time stops operation.
The temperature is controlled automatically.
The heated seat function is deactivated
approximately two minutes after the ignition is
switched off. To reactivate the function, switch
on the ignition and press the control again.
Switch off the heated seats as soon as
you consider it necessary, as reducing
the consumption of electrical current
reduces fuel consumption.
Do not use the function when the seat is
not occupied.
Reduce the intensity of the heating as
soon as possible.
When the seat and passenger
compartment have reached an
adequate temperature, you can stop
the function; reducing the consumption
of electrical current reduces fuel
consumption. Prolonged use at the highest setting is
not recommended for those with sensitive
skin.
There is a
risk of burns for people whose
perception of heat is impaired (illness,
taking medication, for example).
There is a
risk of overheating the system if
material with insulating properties is used,
such as cushions or seat covers.
Do not use the function:
-
i
f wearing damp clothing,
-
i
f child seats are fitted.
To avoid breaking the heating element in
the seat:
-
d
o not place heavy objects on the seat,
-
d
o not kneel or stand on the seat,
-
d
o not place sharp objects on the seat,
-
d
o not spill liquids onto the seat.
To avoid the risk of short-circuit:
-
d
o not use liquid products for cleaning
the seat,
-
n
ever use the heating function when
the seat is damp.Access to rear seats
(3-door)
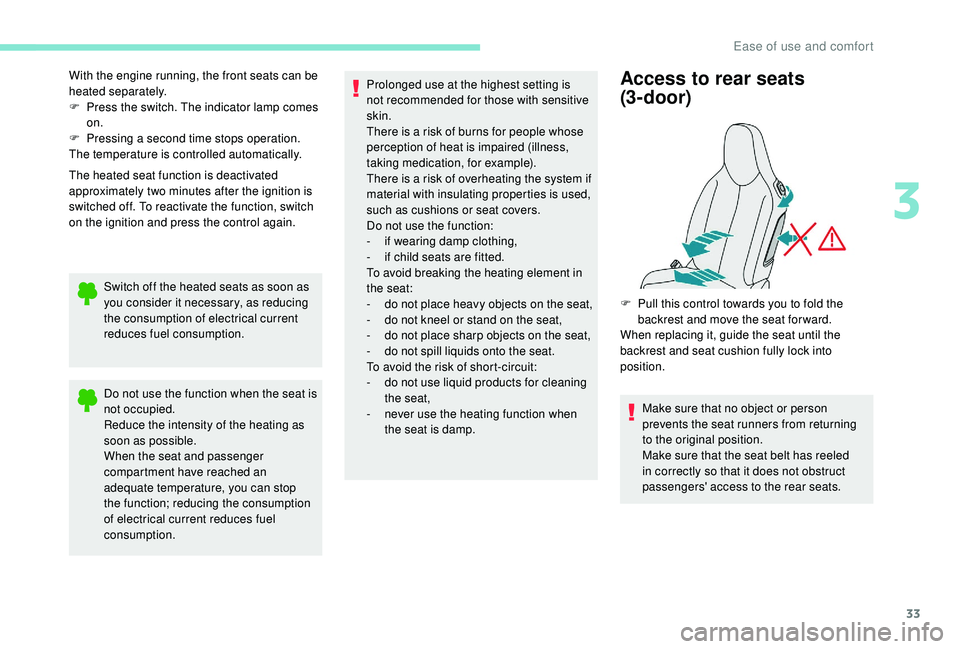
F Pull this control towards you to fold the backrest and move the seat for ward.
When replacing it, guide the seat until the
backrest and seat cushion fully lock into
position.
Make sure that no object or person
prevents the seat runners from returning
to the original position.
Make sure that the seat belt has reeled
in correctly so that it does not obstruct
passengers' access to the rear seats.
3
Ease of use and comfort
Page 39 of 180
37
The condensation created by the air
conditioning results in a discharge of water
under the vehicle which is per fectly normal.
The air conditioning system does not
contain chlorine and does not present
any danger to the ozone layer.
Heating
The heating system only operates with the
engine running.
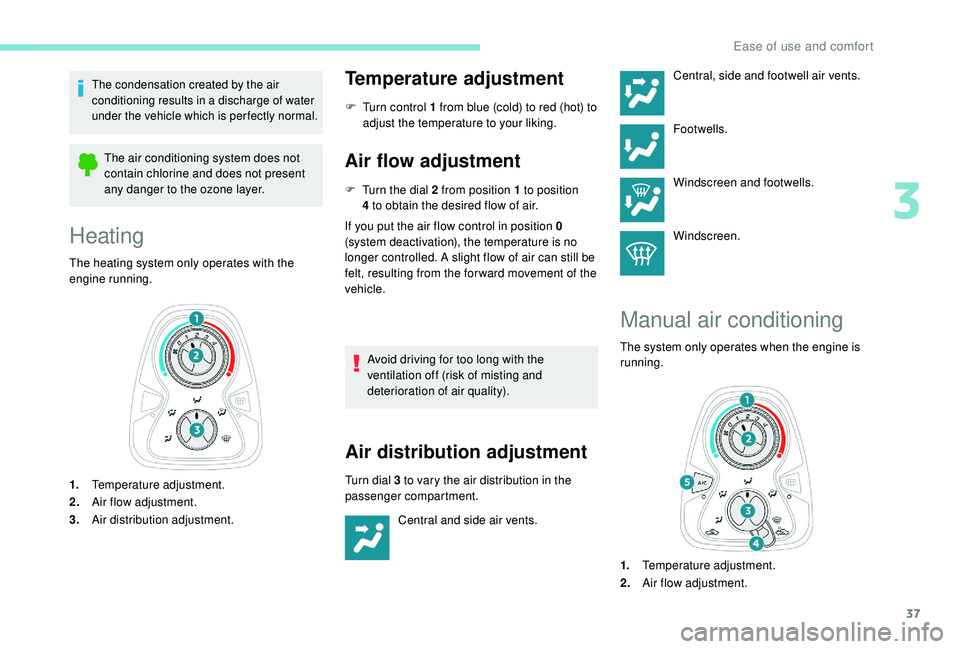
1. Temperature adjustment.
2. Air flow adjustment.
3. Air distribution adjustment.
Temperature adjustment
F Turn control 1 from blue (cold) to red (hot) to
adjust the temperature to your liking.
Air flow adjustment
F Turn the dial 2 from position 1 to position
4 to obtain the desired flow of air.
If you put the air flow control in position 0
(system deactivation), the temperature is no
longer controlled. A slight flow of air can still be
felt, resulting from the for ward movement of the
vehicle.
Avoid driving for too long with the
ventilation off (risk of misting and
deterioration of air quality).
Air distribution adjustment
Turn dial 3 to vary the air distribution in the
p assenger compartment.
Central and side air vents. Central, side and footwell air vents.
Footwells.
Windscreen and footwells.
Windscreen.
Manual air conditioning
The system only operates when the engine is
running.
1.
Temperature adjustment.
2. Air flow adjustment.
3
Ease of use and comfort
Page 41 of 180
39
passenger compartment temperature, air flow
and air distribution.
This system is designed to operate effectively
in all seasons, with the windows and the
electric fabric roof closed.
For your convenience the settings are retained
between vehicle starts.
When the engine is cold, the air flow will only
reach its optimum level gradually to prevent too
much cold air being distributed.
F
P
ress button 6 " AUTO". The symbol AUTO
goes off.
By pressing button 6 " AUTO" again, you can
choose the following modes in succession:
Enables optimum operation of the
system.
Offers thermal comfort while limiting
air f low.
Gives priority to dynamic air
distribution mainly through the side
vents.
Manual control
If you want, you can make a different choice
f rom that offered by the system by changing
a
setting. The other functions will still be
managed automatically.
Temperature adjustment
The value shown on the display is a level
o f comfort, not a temperature in Celsius or
Fahrenheit.
F
P
ress button 1 down to decrease the value
or up to increase it.
A setting of around 21
provides optimum
comfort. Nonetheless, depending on your
needs, a setting between 18
and 24 is typical.
On entering the vehicle, if the interior is very
cold or very warm, there is no need to change
the value displayed in order to obtain the
comfort required. The system automatically
corrects the temperature difference as quickly
as possible.
For maximum cooling or heating of the
passenger compartment, it is possible
to exceed the lowest value of 14
or the
highest value of 28.
F
P
ress the temperature setting button
down or up until LO or HI is displayed.
Air flow adjustment
F Press button 2 (filled fan or empty fan) to
increase or reduce the air flow.
The air flow symbol (a fan) gradually fills.
Air distribution adjustment
F Press button 3 successively to direct the air
flow alternatively towards:
-
t
he central and side air vents,
-
t
he central vent, the side vents and the
footwells,
-
t
he footwells,
-
t
he windscreen and the footwells,
-
t
he central vent, the side vents and the
windscreen.
-
t
he windscreen.
Air conditioning On/Off
F Press button 5 to switch off the air
conditioning.
Switching the system off could result in
discomfort (humidity, condensation).
Pressing again returns to automatic operation
of the air conditioning. The symbol A/C is
displayed.
The "
AUTO " symbol disappears if you change
a
setting.
3
Ease of use and comfort
Page 42 of 180

40
Deactivating the system
F Press air flow button 2 (empty fan) until the fan symbol disappears.
This action deactivates all functions of the air
conditioning system.
Temperature is no longer regulated. A slight air
flow can still be felt however, resulting from the
for ward movement of the vehicle.
Pressing the 6 " AUTO" button again reactivates
the system with the values in use at the time it
was switched off.
Avoid driving for long periods with the
system deactivated (risk of misting and
deterioration of air quality).
Recirculation of interior air
Recirculation of interior air isolates the
passenger compartment from exterior odours
and fumes.
Return to exterior air intake as soon as possible
to avoid deterioration of the air quality and the
formation of mist.Avoid using recirculation of interior air for
prolonged periods – Risk of misting and
deterioration of the air quality!
With a manual air conditioning
system
F Move the manual control 4 to the left to be
in the "Recirculation of interior air" position
or to the right to return to the "Exterior air
intake" position.
With an automatic air
conditioning system
F Press button 4 to recirculate the interior air
or to allow the intake of exterior air.
Pressing button 4
again or the "AUTO" button
6
returns to automatic management of the
intake of air. The air recirculation symbol goes
of f.
Front demist – defrost
These markings on the control
panels indicate the control positions
for rapid demisting or defrosting of
the windscreen and side windows.
During the winter period, direct
the side air vents towards the side
windows to optimise their demisting
and defrosting. With Stop & Start, when demisting –
defrosting has been activated, STOP
mode is not available.
With the heating/ventilation
system
F Put the temperature and air flow controls to
the dedicated marked position.
F
S
et the air distribution control to the
"Windscreen" position.
With the manual air
conditioning system
F Put the temperature and air flow controls to the dedicated marked position.
F
P
ut the air intake control to the "Exterior air
intake" position (manual control moved to
the right).
F
S
et the air distribution control to the
"Windscreen" position.
F
S
witch on the air conditioning by pressing
the A /C button; the indicator lamp for the
button comes on.
Ease of use and comfort
Page 43 of 180
41
With the automatic air
conditioning system
F Press the dedicated button, its indicator lamp comes on.
F
T
o switch it off, press this button again; its
indicator lamp goes off.
The other settings (air flow, air distribution,
etc.) are controlled automatically.
Rear screen demist –
defrost
The control button is located
on the heating/ventilation or air
conditioning system control panel.
Switching on
The rear screen demist – defrost can only
operate when the engine is running.
F
P
ress this button to demist /defrost the rear
screen and, depending on version, the door
mirrors. The indicator lamp associated with
the button comes on.
Switching off
F Press this button again to switch off the demisting/defrosting. The indicator lamp
associated with the button goes off.
Switch off the demisting/defrosting of
the rear screen and door mirrors, if
fitted, as soon as appropriate, as lower
current consumption results in reduced
fuel consumption.
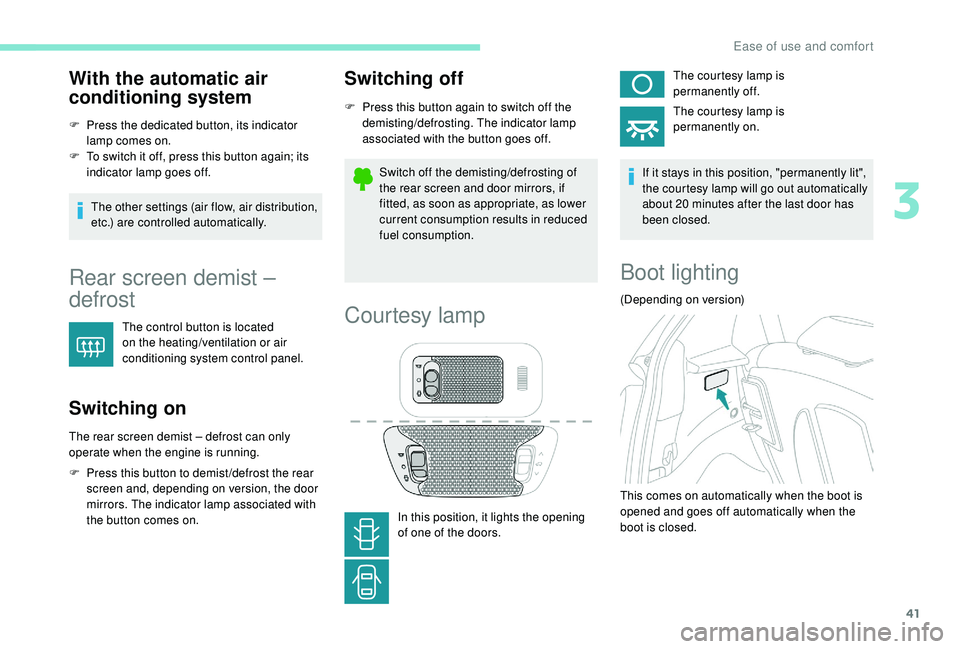
Courtesy lamp
In this position, it lights the opening
of one of the doors. The courtesy lamp is
permanently off.
The courtesy lamp is
permanently on.
If it stays in this position, "permanently lit",
the courtesy lamp will go out automatically
about 20 minutes after the last door has
been closed.
Boot lighting
(Depending on version)
This comes on automatically when the boot is
opened and goes off automatically when the
boot is closed.
3
Ease of use and comfort