2018 PEUGEOT 108 window
[x] Cancel search: windowPage 42 of 180
 until the fan symbol disappears.
This action deactivates all functions of the air
conditioning system.
Temperature is no longer regula")
40
Deactivating the system
F Press air flow button 2 (empty fan) until the fan symbol disappears.
This action deactivates all functions of the air
conditioning system.
Temperature is no longer regulated. A slight air
flow can still be felt however, resulting from the
for ward movement of the vehicle.
Pressing the 6 " AUTO" button again reactivates
the system with the values in use at the time it
was switched off.
Avoid driving for long periods with the
system deactivated (risk of misting and
deterioration of air quality).
Recirculation of interior air
Recirculation of interior air isolates the
passenger compartment from exterior odours
and fumes.
Return to exterior air intake as soon as possible
to avoid deterioration of the air quality and the
formation of mist.Avoid using recirculation of interior air for
prolonged periods – Risk of misting and
deterioration of the air quality!
With a manual air conditioning
system
F Move the manual control 4 to the left to be
in the "Recirculation of interior air" position
or to the right to return to the "Exterior air
intake" position.
With an automatic air
conditioning system
F Press button 4 to recirculate the interior air
or to allow the intake of exterior air.
Pressing button 4
again or the "AUTO" button
6
returns to automatic management of the
intake of air. The air recirculation symbol goes
of f.
Front demist – defrost
These markings on the control
panels indicate the control positions
for rapid demisting or defrosting of
the windscreen and side windows.
During the winter period, direct
the side air vents towards the side
windows to optimise their demisting
and defrosting. With Stop & Start, when demisting –
defrosting has been activated, STOP
mode is not available.
With the heating/ventilation
system
F Put the temperature and air flow controls to
the dedicated marked position.
F
S
et the air distribution control to the
"Windscreen" position.
With the manual air
conditioning system
F Put the temperature and air flow controls to the dedicated marked position.
F
P
ut the air intake control to the "Exterior air
intake" position (manual control moved to
the right).
F
S
et the air distribution control to the
"Windscreen" position.
F
S
witch on the air conditioning by pressing
the A /C button; the indicator lamp for the
button comes on.
Ease of use and comfort
Page 60 of 180

58
Deployment
The lateral airbag is deployed unilaterally in the
event of a serious side impact applied to all or
part of the side impact zone B , perpendicular
to the longitudinal centreline of the vehicle
on a
horizontal plane and directed from the
outside towards the inside of the vehicle.
The lateral airbag inflates between the hip and
shoulder of the front occupant of the vehicle
and the corresponding door trim panel.
Curtain airbags
System contributing towards greater protection
for the driver and passengers in the event of
a
serious side impact in order to limit the risk of
injury to the side of the head.
Each curtain airbag is built into the pillars and
the upper passenger compartment area.
Deployment
The curtain airbag is deployed at the same
time as the corresponding lateral airbag in the
event of a
serious side impact applied to all or
part of the side impact zone B , perpendicular
to the longitudinal centreline of the vehicle
on a
horizontal plane and directed from the
outside towards the inside of the vehicle.
The curtain airbag inflates between the front or
rear occupant of the vehicle and the windows.
Operating fault
If this warning lamp on the
instrument panel comes on, contact
a
PEUGEOT dealer or a qualified
workshop to have the system
checked. The airbags may no longer
be deployed in the event of a
serious
impact.
In the event of a
minor impact or bump on
the side of the vehicle or if the vehicle rolls
over, the airbags may not be deployed.
In the event of a
rear or front collision,
none of the lateral airbags are deployed.
Advice
For the airbags to be fully effective,
observe the safety recommendations
below.
Adopt a
normal and upright sitting
position.
Fasten your seat belt, ensuring it is
positioned correctly.
Do not leave anything between the
occupants and the airbags (a child, pet,
object, etc.), nor fix or attach anything
close to or in the way of the airbag release
trajectory; this could cause injuries during
their deployment.
Never modify the original definition of your
vehicle, particularly in the area directly
around the airbags.
After an accident or if the vehicle has
been stolen or broken into, have the
airbag systems checked.
All work on the airbag system must be
carried out by a
PEUGEOT dealer or
a
qualified workshop.
Even if all of the precautions mentioned
are obser ved, a risk of injury or of minor
burns to the head, chest or arms when an
airbag is deployed cannot be ruled out.
The airbag inflates almost instantly (within
a
few milliseconds) then deflates within
the same time discharging the hot gas via
openings provided for this purpose.
Safety
Page 73 of 180

71
Children at the rear
At rear seating positions, always leave
sufficient space between the front seat
and:
-
a "
rear ward facing" child seat,
-
t
he child's feet for a child seat fitted
forward facing.
To do this, move the front seat for wards
and, if necessary, move its backrest into
the upright position.
For optimal installation of the forward
facing child seat, verify that its backrest is
as close as possible to the backrest of the
vehicle seat, if possible in contact with it.
Children at the front
The legislation on carrying children on the
front passenger seat is specific to each
country. Refer to the legislation in force in
the country in which you are driving.
Deactivate the front passenger airbag
when a "rear ward facing" child seat is
installed on the front passenger seats.
Other wise, there is a
risk of serious or
fatal injury to the child if the airbag is
deployed. Installing a
booster seat
The chest part of the seat belt must be
positioned on the child's shoulder without
touching the neck.
Ensure that the lap part of the seat belt
passes correctly over the child's thighs.
We recommend using a
booster seat with
a
backrest, equipped with a belt guide at
shoulder level.
Additional protections
To prevent accidental opening of the doors
and rear windows, use the child lock.
Take care not to open the rear windows by
more than one third.
To protect young children from the rays
of the sun, fit side blinds on the rear
windows.
As a
safety precaution, do not leave:
-
a c
hild or children alone and
unattended in a
vehicle,
-
a c
hild or an animal in a vehicle
which is exposed to the sun, with the
windows closed,
-
t
he keys within reach of children inside
the vehicle.Child lock
This prevents the rear doors from being opened
from the inside.
The control is located on the edge of each rear
d o o r.
F
L
ower the control lever.
Check the status of this safety feature each
time before you switch on the ignition.
This system is independent of the central
locking.
5
Safety
Page 119 of 180
 Functions
1 5Reversing lamp – Fuel injection system – Audio system – VSC system
2 15Front and rear screenwash
3 5Main supply unit – Instrument panel – Display screen �")
117
Fuse N°Rating (A) Functions
1 5Reversing lamp – Fuel injection system – Audio system – VSC system
2 15Front and rear screenwash
3 5Main supply unit – Instrument panel – Display screen – Air conditioning – Heated rear window and door mirrors –
Heated seats – Electric fabric roof – Audio system
4 5Electrical power steering – Stop & Start
5 15Rear wiper
6 5Fan assembly – ABS system – VSC system
7 25Windscreen wipers
8 10Heated door mirrors
9 1512
V socket (max 120W)
10 7. 5Door mirrors – Audio system – Stop & Start – Instrument panel – Display screen
11 5Steering lock – Fuel injection system – ETG gearbox
12 7. 5Airbags
13 5Instrument panel – Display screen -Stop & Start
14 15Steering – Fuel injection system – Brake lamps
15 7. 5Fuel injection system – Stop & Start
16 7. 5Engine self-diagnosis
17 10Brake lamps – Third brake lamp – Fuel injection system – ABS system – VSC system – ETG gearbox – "Keyless
Entry and Starting" system
8
In the event of a breakdown
Page 120 of 180

118
1810Sidelamps – Number plate lamps – Rear foglamp – Front foglamps – Rear lamps – Lighting dimmer
19 40Air conditioning
20 40Air conditioning – Engine self-diagnosis – Sidelamps – License plate lamps – Rear foglamps – Front foglamps
– Rear lamps – Lighting dimmer – Brake lamps – Third brake lamp – Fuel injection system – ABS system – VSC
system – ETG gearbox – "Keyless Entry and Starting" system – Electric windows
21 30Fuel injection system – Stop & Start – Main supply unit
22 7. 5Fuel injection system
23 20Fuel injection system – Stop & Start
24 25Main supply unit
25 30Electric windows
26 25Electric windows
27 10Air conditioning
28 5Rear foglamp
In the event of a breakdown
Page 125 of 180
 of the flat battery A (at the metal
elbow) then to the positive terminal (+) of the
slave battery B or the booster.
F
C
onnect one end of")
123
F Connect the red cable to the positive terminal (+) of the flat battery A (at the metal
elbow) then to the positive terminal (+) of the
slave battery B or the booster.
F
C
onnect one end of the green or black
cable to the negative terminal (-) of backup
battery B or the booster (or an earth point
on the other vehicle).
F
C
onnect the other end of the green or black
cable to earth point C on the broken down
vehicle.
F
S
tart the engine of the vehicle with the
good battery and leave it running for a
few
minutes.
F
O
perate the starter on the broken down
vehicle and let the engine run.
If the engine does not start straight away,
switch off the ignition and wait a
few moments
before trying again.
F
W
ait for it to return to idle.
F
D
isconnect the jump lead cables in reverse
order .
F
R
efit the plastic cover to the (+) terminal, if
your vehicle has one.
F
A
llow the engine to run for at least
30
minutes, by driving or with the vehicle
stationary, so that the battery reaches an
adequate state of charge.Before disconnecting the battery
Wait 2 minutes after switching off the ignition
b efore disconnecting the battery.
Close the windows, the electric fabric roof and
the doors before disconnecting the battery.
After reconnecting the battery
After each time that the battery has been
reconnected, switch on the ignition and wait
1
minute before starting the engine, to allow
the electronic systems to initialise. However,
if minor problems persist after this procedure,
contact a
PEUGEOT dealer or a qualified
workshop.
Some functions, including Stop & Start,
are not available if the battery is not
sufficiently charged.
Charging the battery using
a battery charger
Never try to charge a frozen battery – risk
o f explosion!
If the battery has frozen, have it checked
by a
PEUGEOT dealer or by a qualified
workshop who will check that the internal
components have not been damaged and
that the container has not cracked, which
would mean a
risk of toxic and corrosive
acid leaking.
Towing the vehicle
Your vehicle can only be towed from the
front .
F
D
isconnect the battery from the vehicle.
F
F
ollow the instructions of use provided by
the manufacturer of the charger.
F
R
econnect the battery starting with the
positive terminal (+).
F
C
heck that the terminals and connectors
are clean. If they are covered with sulphate
(whitish or greenish deposit), remove and
clean them. F
T
ake the detachable towing ring kept in the
toolbox under the boot mat.
F
U
nclip the plastic cover by pressing on the
lower part.
F
S
crew the towing eye in fully.
F
I
nstall the towing arm.
F
W
ith a manual gearbox: move the gear lever
to neutral.
8
In the event of a breakdown
Page 145 of 180

15
Frequently asked questions
Telephone, Bluetooth®
QUESTIONRESPONSESOLUTION
I'm not able to connect my Bluetooth telephone. Your Bluetooth telephone may be disabled or
invisible.-
C
heck that your Bluetooth telephone is
enabled.
-
C
heck in the telephone settings that it is
"visible to all".
The Bluetooth telephone is not compatible with
the system You can check the compatibility of your
telephone at www.peugeot.co.uk (services).
CarPlay
® and Android Auto do not work. CarPlay® and Android Auto may not activate if
the USB cables are of poor quality. Use authentic USB cables to ensure
compatibility.
No sound can be heard from the connected
Bluetooth telephone. The sound depends on both the system and
the telephone.Increase the volume of the audio system,
possibly to the maximum, and increase the
sound from the telephone if required.
Ambient noise affects the quality of the
telephone call. Reduce ambient noise (close windows, reduce
ventilation, slow down, etc.).
The contacts are not listed in alphabetical
o r d e r. Some telephones offer display options.
Depending on the settings chosen, contacts
can be transferred in a
specific order. Modify the telephone directory display settings.
The system does not receive SMS. The Bluetooth mode of your telephone does
not allow transmission of SMS text messages
to the system.
.
Radio
Page 162 of 180
14
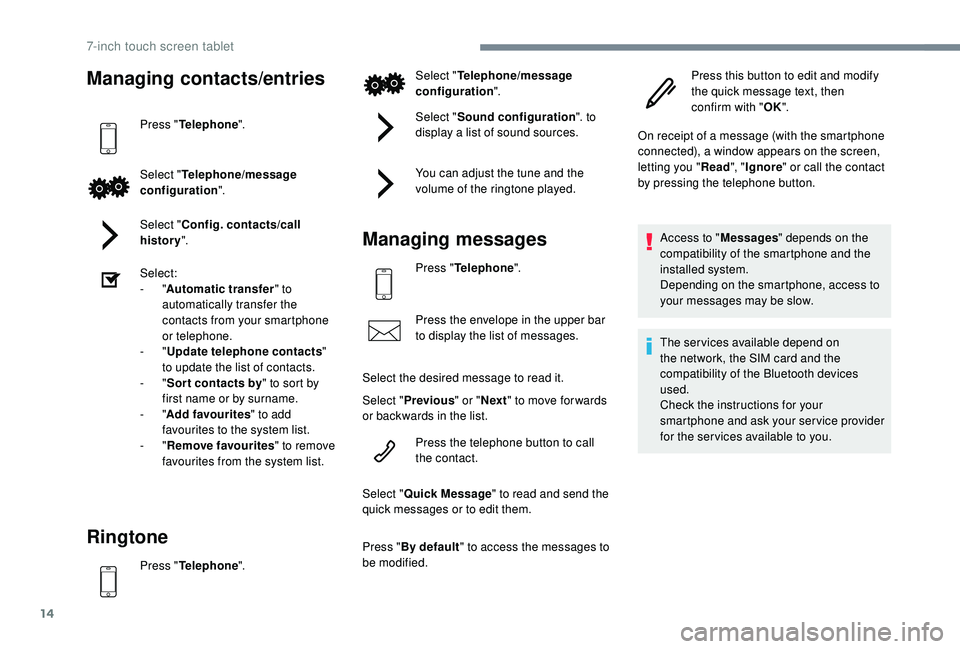
Managing contacts/entries
Press "Telephone ".
Select " Telephone/message
configuration ".
Select " Config. contacts/call
history ".
Select:
-
"Automatic transfer " to
automatically transfer the
contacts from your smartphone
or telephone.
-
"Update telephone contacts "
to update the list of contacts.
-
"Sor t contacts by " to sort by
first name or by surname.
-
"Add favourites " to add
favourites to the system list.
-
"Remove favourites " to remove
favourites from the system list.
Ringtone
Press " Telephone ". Select "
Telephone/message
configuration ".
Select " Sound configuration ". to
display a list of sound sources.
You can adjust the tune and the
volume of the ringtone played.
Managing messages
Press " Telephone ".
Press the envelope in the upper bar
to display the list of messages.
Select the desired message to read it.
Select " Previous " or "Next " to move for wards
or backwards in the list.
Press the telephone button to call
the contact.
Select " Quick Message " to read and send the
quick messages or to edit them.
Press " By default " to access the messages to
be modified. Press this button to edit and modify
the quick message text, then
confirm with "
OK".
On receipt of a message (with the smartphone
connected), a window appears on the screen,
letting you " Read", "Ignore " or call the contact
by pressing the telephone button.
Access to " Messages" depends on the
compatibility of the smartphone and the
installed system.
Depending on the smartphone, access to
your messages may be slow.
The services available depend on
the network, the SIM card and the
compatibility of the Bluetooth devices
used.
Check the instructions for your
smartphone and ask your ser vice provider
for the ser vices available to you.
7-inch touch screen tablet