2018 PEUGEOT 108 Parking brake
[x] Cancel search: Parking brakePage 99 of 180

97
Compatibility of fuels
Fuel used for petrol engines
The petrol engines are compatible with biofuels
that conform to current and future European
standards and which can be obtained from
filling stations:
Petrol that meets standard EN228,
mixed with a biofuel that meets
standard EN15376.
The only petrol additives authorised
for use are those that meet the
B715001
standard.
Travelling abroad
Cer tain fuels could damage the engine of
your vehicle.
In cer tain countries, the use of a par ticular
fuel may be required (specific octane
rating, specific trade name, etc.) to ensure
correct operation of the engine.
For any additional information, contact a
dealer.
Snow chains
In wintry conditions, snow chains
improve traction as well as the
behaviour of the vehicle when
braking.
Snow chains must be fitted only to the
front wheels. They must never be fitted to
"space-saver" type spare wheels.
Take account of the legislation in force in
your country on the use of snow chains
and the maximum authorised speed.
Installation tips
It is strongly recommended that before
you leave, you practise fitting the snow
chains on a level and dry sur face.
Avoid driving with snow chains on roads
that have been cleared of snow to avoid
damaging your vehicle's tyres and the
road sur face. If your vehicle is fitted with
alloy wheels, check that no part of the
chain or its fixings is in contact with the
wheel rim.
Only use the chains designed to be fitted to the
type of wheels fitted to your vehicle:
Original tyre size Maximum link size
165/65
R14 9
mm
165/60
R15
F
I
f you have to fit the chains during a
journey,
stop the vehicle on a
flat sur face on the side
of the road.
F
A
pply the parking brake and position any
wheel chocks under the wheels to prevent
movement of your vehicle.
F
F
it the chains following the instructions
provided by the manufacturer.
F
M
ove off gently and drive for a
few
moments, without exceeding 31
mph
(50
km/h).
F
S
top your vehicle and check that the snow
chains are correctly tightened. For more information on snow chains,
contact a
PEUGEOT dealer or a qualified
workshop.
When you drive with snow chains, you
should deactivate the lane departure
warning system.
7
Practical information
Page 105 of 180
103
Brake pads
Brake wear depends on the style
of driving, particularly in the case
of vehicles used in town, over short
distances. It may be necessary to
have the condition of the brakes
checked, even between vehicle
services.
Unless there is a
leak in the circuit, a drop in
the brake fluid level indicates that the brake
pads are worn.
Brake disc/drum wear
For information on checking
brake disc/drum wear, contact
a
PEUGEOT dealer or a qualified
workshop.
Parking brake
If excessive travel or a loss of
e ffectiveness of this system is
noticed, the parking brake must
be checked, even between two
services.
This system must be checked by a
PEUGEOT
dealer or a
qualified workshop.
Wheels and tyres
The pressure must be checked on
all tyres, including the spare wheel,
when the tyres are "cold", at least
once a month and before a long
j o u r n ey. Driving with worn or damaged tyres reduces
braking efficiency and control of the vehicle's
steering. Regular inspections of the condition
of tyres (tread and sides) and rims are
recommended as well as making sure that
valves are fitted.
Using different size wheels and tyres from
those specified can affect the lifetime of tyres,
wheel rotation, ground clearance and the
speedometer reading and have an adverse
effect on road holding.
Fitting different tyres on the front and rear axles
can cause the ESC to mistime.
Only use products recommended by
PEUGEOT or products of equivalent
quality and specification.
In order to optimise the operation of
components as important as those in the
braking system, PEUGEOT selects and
offers very specific products.
After washing the vehicle, dampness, or
in wintry conditions, ice can form on the
brake discs and pads: braking efficiency
may be reduced. Make light brake
applications to dry and defrost the brakes.
ETG gearbox
The ETG gearbox does not require
any maintenance (no oil change).
The pressures given on the tyre pressure label
are valid for "cold" tyres. If you have driven for
more than 10
minutes or more than 6 miles
(10
kilometres) at more than 31 mph (50 km/h),
0.3
bar (30 kPa) should be added to the values
given on the label.
Under-inflation increases fuel consumption.
Non-compliant tyre pressure causes premature
wear on tyres and has an adverse effect on the
vehicle's road holding – Risk of an accident!
7
Practical information
Page 106 of 180
104
Temporary puncture
repair kit
Scan the QR code on page 3 to view
e xplanatory videos.
Comprising a
compressor and a sealant
cartridge, it allows the temporary repair of
a
tyre so that you can drive to the nearest
garage.
It is designed to repair most punctures which
could affect the tyre, located on the tyre tread
or shoulder.
Access to the kit
This kit is installed in the storage box, under
the boot floor. The vehicle's electric system allows the
connection of the compressor for long
enough to inflate a
tyre after a puncture
repair.
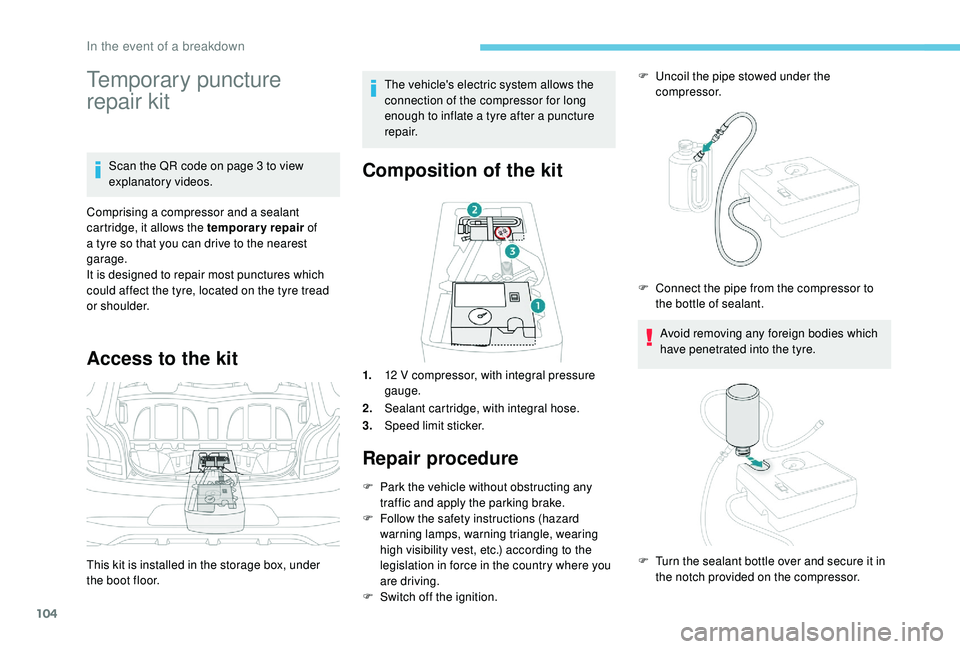
Composition of the kit
1. 12 V compressor, with integral pressure
gauge.
2. Sealant cartridge, with integral hose.
3. Speed limit sticker.
Repair procedure
F Park the vehicle without obstructing any
traffic and apply the parking brake.
F
F
ollow the safety instructions (hazard
warning lamps, warning triangle, wearing
high visibility vest, etc.) according to the
legislation in force in the country where you
are driving.
F
S
witch off the ignition. F
U
ncoil the pipe stowed under the
compressor.
Avoid removing any foreign bodies which
have penetrated into the tyre.
F
C
onnect the pipe from the compressor to
the bottle of sealant.
F
T
urn the sealant bottle over and secure it in
the notch provided on the compressor.
In the event of a breakdown
Page 110 of 180
108
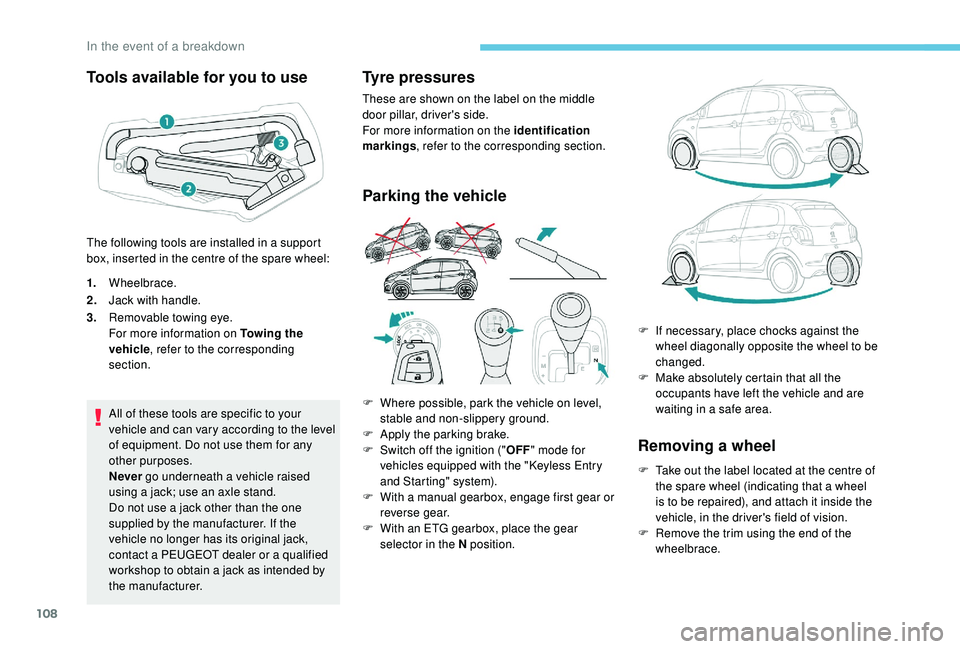
Tools available for you to use
1.Wheelbrace.
2. Jack with handle.
3. Removable towing eye.
For more information on Towing the
vehicle , refer to the corresponding
section.
All of these tools are specific to your
vehicle and can vary according to the level
of equipment. Do not use them for any
other purposes.
Never go underneath a
vehicle raised
using a
jack; use an axle stand.
Do not use a
jack other than the one
supplied by the manufacturer. If the
vehicle no longer has its original jack,
contact a
PEUGEOT dealer or a qualified
workshop to obtain a
jack as intended by
the manufacturer.
Tyre pressures
These are shown on the label on the middle
door pillar, driver's side.
For more information on the identification
markings , refer to the corresponding section.
Parking the vehicle
Removing a wheel
F Take out the label located at the centre of the spare wheel (indicating that a wheel
is to be repaired), and attach it inside the
vehicle, in the driver's field of vision.
F
R
emove the trim using the end of the
wheelbrace.
The following tools are installed in a
support
box, inserted in the centre of the spare wheel:
F
W
here possible, park the vehicle on level,
stable and non-slippery ground.
F
A
pply the parking brake.
F
S
witch off the ignition ("
OFF" mode for
vehicles equipped with the " K
eyless Entry
and Starting" system).
F
W
ith a
manual gearbox, engage first gear or
reverse gear.
F
W
ith an ETG gearbox, place the gear
selector in the N position. F
I
f necessary, place chocks against the
wheel diagonally opposite the wheel to be
changed.
F
M
ake absolutely certain that all the
occupants have left the vehicle and are
waiting in a safe area.
In the event of a breakdown
Page 124 of 180
122
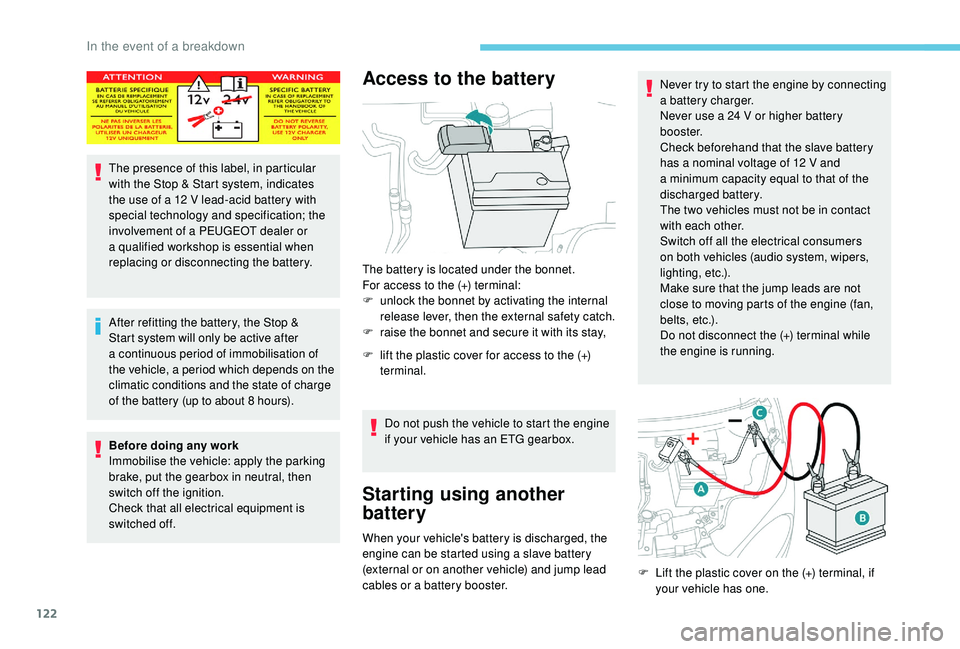
The presence of this label, in particular
with the Stop & Start system, indicates
the use of a 12 V lead-acid battery with
special technology and specification; the
involvement of a
PEUGEOT dealer or
a
qualified workshop is essential when
replacing or disconnecting the battery.
After refitting the battery, the Stop &
Start system will only be active after
a
continuous period of immobilisation of
the vehicle, a period which depends on the
climatic conditions and the state of charge
of the battery (up to about 8
hours).
Before doing any work
Immobilise the vehicle: apply the parking
brake, put the gearbox in neutral, then
switch off the ignition.
Check that all electrical equipment is
switched off.
Access to the battery
The battery is located under the bonnet.
For access to the (+) terminal:
F
u
nlock the bonnet by activating the internal
release lever, then the external safety catch.
F
r
aise the bonnet and secure it with its stay,
F
l
ift the plastic cover for access to the (+)
terminal.
Do not push the vehicle to start the engine
if your vehicle has an ETG gearbox.
Starting using another
battery
When your vehicle's battery is discharged, the
engine can be started using a slave battery
(external or on another vehicle) and jump lead
cables or a
battery booster. Never try to start the engine by connecting
a
battery charger.
Never use a 24 V or higher battery
b o o s t e r.
Check beforehand that the slave battery
has a nominal voltage of 12 V and
a
minimum capacity equal to that of the
discharged battery.
The two vehicles must not be in contact
with each other.
Switch off all the electrical consumers
on both vehicles (audio system, wipers,
lighting, etc.).
Make sure that the jump leads are not
close to moving parts of the engine (fan,
belts, etc.).
Do not disconnect the (+) terminal while
the engine is running.
F
L
ift the plastic cover on the (+) terminal, if
your vehicle has one.
In the event of a breakdown
Page 126 of 180
124
Failure to follow this instruction may cause
damage to some components (braking,
transmission, etc.) and the absence of
braking assistance when the engine is
restarted.
F
U
nlock the steering and release the parking
brake.
F
S
witch on the hazard warning lamps on
both vehicles.
Never use the radiator crossmember.
When towing, the speed limiter must be
deactivated, as well as the "Active City
Brake" system if so equipped. General recommendations
Obser ve the legislation in force in the
country where you are driving.
Ensure that the weight of the towing
vehicle is higher than that of the towed
vehicle.
The driver must remain at the wheel of
the towed vehicle and must have a
valid
driving licence.
When towing a
vehicle with all four
wheels on the ground, always use an
approved towing arm; rope and straps are
prohibited.
The towing vehicle must move off gently.
When the vehicle is towed with its engine
off, there is no longer braking and steering
assistance.
In the following cases, you must always
call on a
professional recovery ser vice:
-
v
ehicle broken down on a motor way or
fast road,
-
w
hen it is not possible to put the
gearbox into neutral, unlock the
steering, or release the parking brake,
-
t
owing with only two wheels on the
ground,
-
w
here there is no approved towbar
available.
F
W
ith an ETG gearbox: move the selector to
position N .
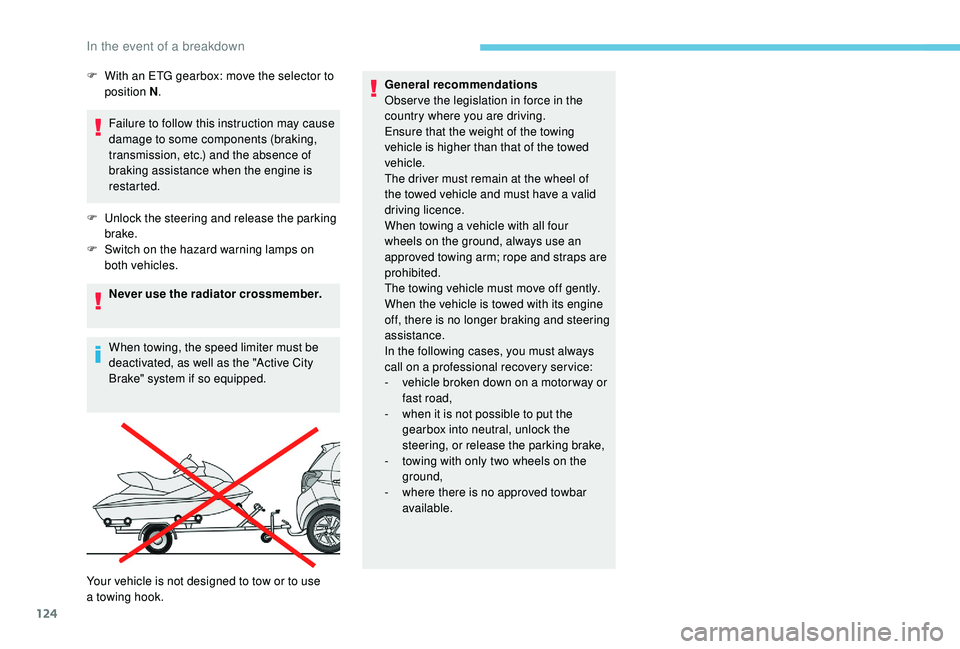
Your vehicle is not designed to tow or to use
a
towing hook.
In the event of a breakdown
Page 164 of 180
16
Installing the update
The download of the update must be
carried out with the engine running,
the vehicle stationary, and the parking
brake applied.
Insert a
USB device in the USB port.Press " Configuration ".
Press " General ".
Press " Software update ".
Press " Update ".
A page is displayed with the old and the new
version of the software for your reference.
Press " Update software ".
Do not remove the USB device or turn off
the system until the update is complete. If
the update is interrupted, start the system
update over again.
Once the update is done, the system restarts
automatically.
Customising the homepage
image
It is advisable to restrict file names to
32 characters, without using special characters
(e.g. : " ?; ù) so as to avoid any reading or
display problems.
Use a
USB device, not a mass storage
device (telephone or media player).
To protect the system, do not use a
USB
hub.
To update the system, you must have a
USB
device meeting the conditions below:
-
T
he USB device must be empty.
-
U
se only USB devices in the FAT32 (File
Allocation Table) format.
-
D
o not lock the USB device and check that
it can save files.
On the USB device create a
folder named
" Startupimage " (with the upper-case letter
" S ").
Copy the photo(s) into the " Startupimage"
f o l d e r.
Insert a
USB device in the USB port.Press " Configuration ". Press "
General ".
Check that the " Animation" option is activated.
Press " Customise startup image" .
A page is displayed with a
menu in which
thumbnails will be added.
Press " Transfer ", then accept over writing the
current images because the system does not
allow adding to old images.
Do not remove the USB device nor turn off
the system until the copying is complete. If
the copying is interrupted, start over.
The system returns to the presentation menu
page with the thumbnails added.
Choose an image and press " OK".
To take this into account, turn the system off
and back on. The image is not displayed in full screen
mode.
7-inch touch screen tablet
Page 174 of 180
172
Safety, children ......57, 59 - 61, 64, 66 - 68, 70 -71
Screen, colour ............................................... 3-
4
Screenwash
.................................................... 49
Screenwash, rear
............................................ 50
Seat belts
................................ 12, 34, 54-56, 64
Seats, front
...............................
.......................32
Seats, heated
.................................................. 33
Seats, rear
................................................. 33-34
Selector, gear
............................................ 76 -79
Servicing
........................................................... 6
M
aintenance, routine
........................................
6
Manual mode
............................................
76 -79
Mat
..................................................................
44
Mirror, rear view
..............................................
35
Mirror, vanity
...................................................
42
Mirrors, door .................................................... 35
Mode, driving
............................................
76 -79
Mode, Easy (automatic mode)
.................. 76 -79
Mountings, ISOFIX
................................... 66, 69
Lamp, boot
......................................................
41
Lamps, front
..................................................
112
Lamps, rear
...................................................
113
Lane Departure Warning System (LDWS)
...........................
15 -16 , 9 0 - 91
Level, brake fluid
...........................................
101
Level, engine coolant
....................................
101
Level, engine oil
.....................................
10 0 -101
Level, screenwash fluid
.........................
10
1-102
Levels and checks
..............................
....
9 9 -10 2
Lighting
..........................................................
112
Lighting, guide-me home
................................
48
Lighting dimmer
.........................................
18 -19
Loading
.............................................................
6
Locating your vehicle
......................................
23
Locking/unlocking a door from the inside...26-27
Low fuel level
............................................ 18
, 9 6 OIl, engine
...............................
...............10 0 -101
Oil change
.............................................. 10
0 -101
Oil consumption
.....................................
10 0 -101
Opening the bonnet
..................................
98-99
Opening the boot
................................
23 -24, 27
Opening the doors
....................................
23 -24
Number plate lamps
......................................
113
Pads, brake
................................................... 103
Parcel shelf, rear
.............................................44
Parking brake
..........................................76, 103
Pedal, clutch.................................................. 102
Plates, identification ...................................... 127
Player, USB
................................................... 9, 9
Port, USB
.......................................... 42- 43, 9, 9
Power steering
...............................
.................12
Pressures, tyres
............................103, 107, 127
Pre-tensioning seat belts
..........................55-56
Protecting children
.......57, 59 - 61, 64, 66 - 68, 70
Puncture
..........................104, 10 6 -108, 110 -111 Radio
.......................................................
7, 7, 1 0
Radio, digital (Digital Audio Broadcasting – DAB) ..............................
8, 8 -9
RDS
................
...................................................
8
Rear screen, demisting
...................................
41
Recharging the battery
.................................
123
Recirculation, air
.......................................
38-40
Reinitialisation of the under- inflation detection system
.............................
93
Reminder, lighting on
...................................... 47
R
emote control
....................................
22-23, 26
Removing and fitting a fuse
............
11
4 -11 6 , 11 9
Removing a wheel ..................
1 0 7-1 0 8 , 11 0 -111
Removing the mat
...........................................
44
Replacing bulbs ...................................... 111 -112
Replacing the air filter ................................... 10
2
Replacing the oil filter ................................... 10
2
Replacing the passenger compartment filter ...102
Reservoir, screenwash
.......................... 101-102
Reversing camera
...............................
............ 91
Reversing lamps
..............................
............. 113
Roof, electric fabric
......................................... 29
Roof bars
......................................................... 98
S
M
L
O
N
P
R
Alphabetical index