Page 140 of 460
∙ Do not use double adapters or morethan one electrical accessory.
∙ Use power outlets with the engine running to avoid discharging the ve-
hicle battery.
∙ Avoid using power outlets when the air conditioner, headlights or rear win-
dow defroster is on.
∙ Before inserting or disconnecting a plug, be sure the electrical accessory
being used is turned off. ∙ Push the plug in as far as it will go. If
good contact is not made, the plug
may overheat or the internal tem-
perature fuse may open.
∙ When not in use, be sure to close the cap. Do not allow water or any other
liquid to contact the outlet.
Page 145 of 460
CAUTION
∙ Do not use for anything other thansunglasses.
∙ Do not leave sunglasses in the sun- glasses holder while parking in direct
sunlight. The heat may damage the
sunglasses.
CUP HOLDERS
Page 154 of 460
When the OFF switch�2is pushed, the in-
terior lights will illuminate when pushed.
When the DOOR/OFF switch is pushed and
the ON switch is pushed, all of the lights will
come on.
NOTE:
The footwell lights (if so equipped) and
step lights (if so equipped) illuminate
when the driver and passenger doors
are open regardless of the interior light
switch position. These lights will turn off
automatically af ter a period of time
while doors are open to prevent the bat-
tery from becoming discharged.
Page 156 of 460

WARNING
∙ Do not use the HomeLink® UniversalTransceiver with any garage door
opener that lacks safety stop and re-
verse features as required by federal
safety standards. (These standards
became effective for opener models
manufactured af ter April 1, 1982). A
garage door opener which cannot de-
tect an object in the path of a closing
garage door and then automatically
stop and reverse, does not meet cur-
rent federal safety standards. Using a
garage door opener without these
features increases the risk of serious
injury or death.
∙ During the programming procedure your garage door or security gate will
open and close (if the transmitter is
within range). Make sure that people
or objects are clear of the garage door,
gate, etc. that you are programming.
∙ Your vehicle’s engine should be turned off while programming the
HomeLink® Universal Transceiver.
PROGRAMMING HOMELINK®
If you have any questions or are having
difficulty programming your HomeLink®
buttons, refer to the HomeLink® web site at:
www.homelink.com or call 1-800-355-3515.
NOTE:
Place the ignition switch in the ACC posi-
tion (if so equipped) when programming
HomeLink®. It is also recommended that
a new battery be placed in the hand-held
transmitter of the device being pro-
grammed to HomeLink® for quicker pro-
gramming and accurate transmission of
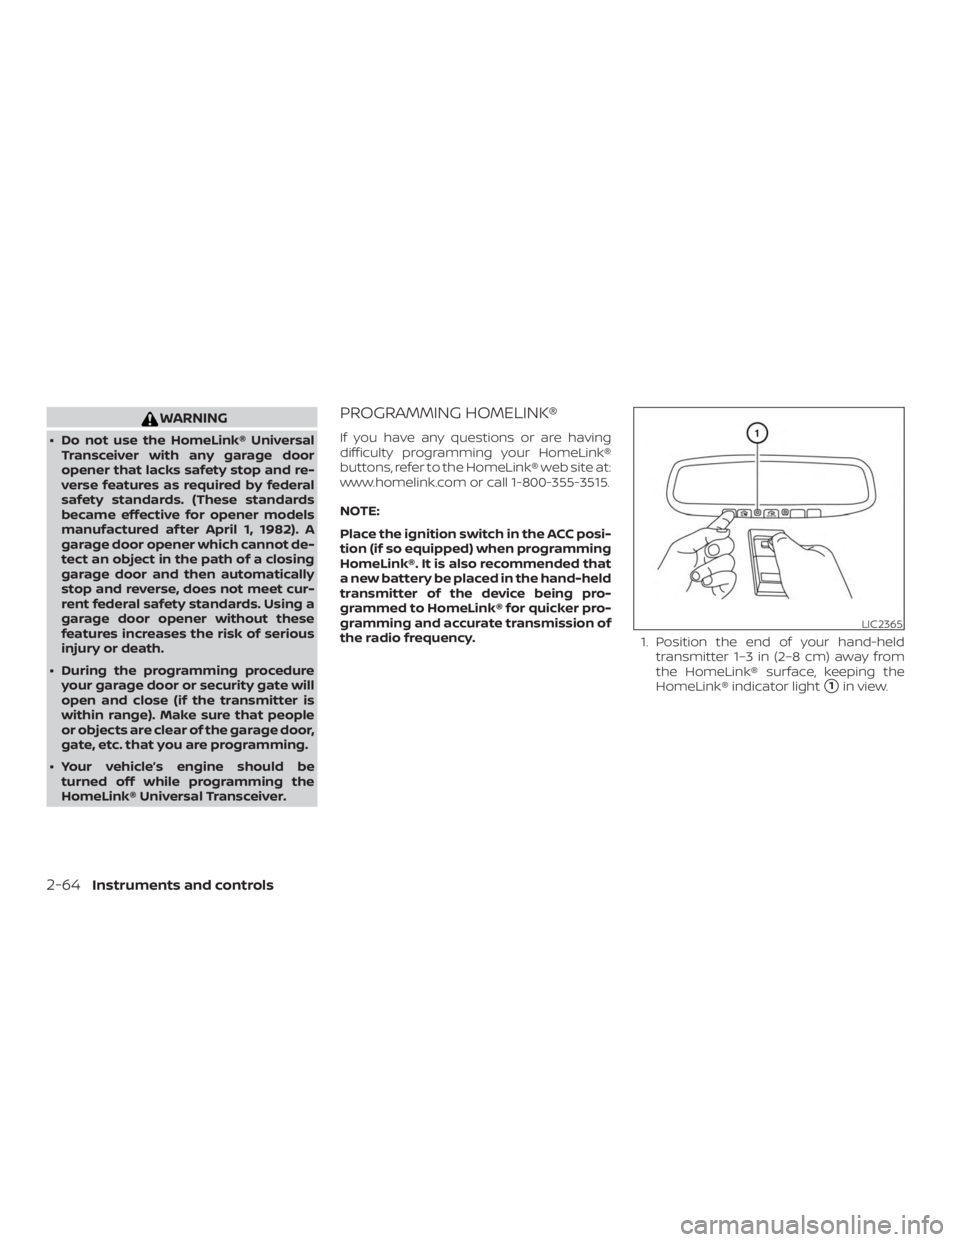
the radio frequency. 1. Position the end of your hand-held
transmitter 1–3 in (2–8 cm) away from
the HomeLink® surface, keeping the
HomeLink® indicator light
�1in view.
Page 172 of 460

Locking doors
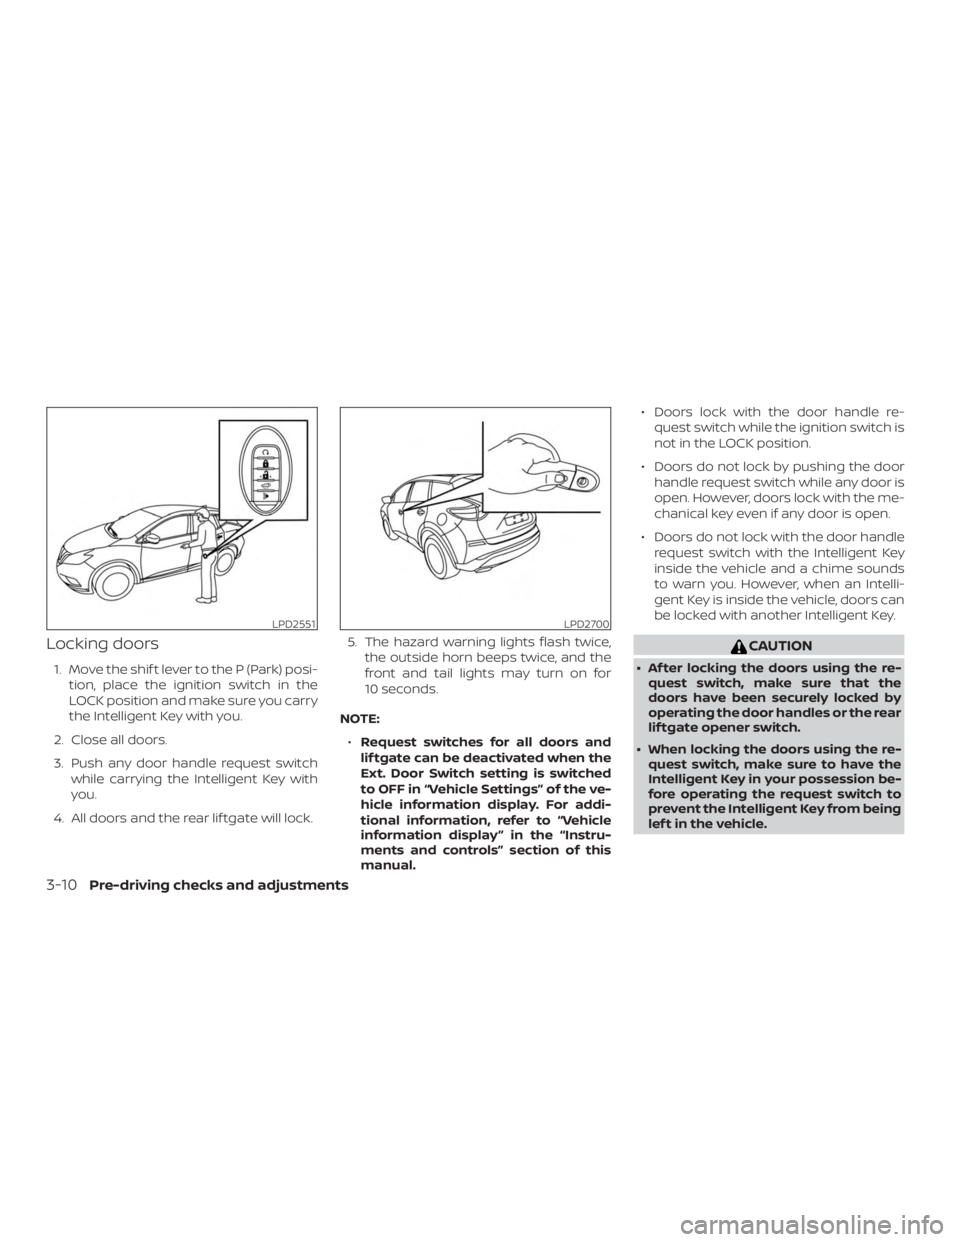
1. Move the shif t lever to the P (Park) posi-tion, place the ignition switch in the
LOCK position and make sure you carry
the Intelligent Key with you.
2. Close all doors.
3. Push any door handle request switch while carrying the Intelligent Key with
you.
4. All doors and the rear lif tgate will lock. 5. The hazard warning lights flash twice,
the outside horn beeps twice, and the
front and tail lights may turn on for
10 seconds.
NOTE: ∙ Request switches for all doors and
lif tgate can be deactivated when the
Ext. Door Switch setting is switched
to OFF in “Vehicle Settings” of the ve-
hicle information display. For addi-
tional information, refer to “Vehicle
information display ” in the “Instru-
ments and controls” section of this
manual. ∙ Doors lock with the door handle re-
quest switch while the ignition switch is
not in the LOCK position.
∙ Doors do not lock by pushing the door handle request switch while any door is
open. However, doors lock with the me-
chanical key even if any door is open.
∙ Doors do not lock with the door handle request switch with the Intelligent Key
inside the vehicle and a chime sounds
to warn you. However, when an Intelli-
gent Key is inside the vehicle, doors can
be locked with another Intelligent Key.
Page 184 of 460
1. Pull the hood lock release handle�1
located below the driver side instru-
ment panel until the hood springs up
slightly.
2. Locate the lever
�2in between the
hood and grille and push the lever side-
ways with your fingertips and raise the
hood
�3.
When closing the hood, lower the hood to
approximately 12 in (30 cm) above the latch
and release it. This allows proper engage-
ment of the hood latch.
Page 198 of 460
VANITY MIRRORS
To access the vanity mirror, pull the sun
visor down and flip open the mirror cover.
The vanity mirror will illuminate when the
mirror cover is open.CARD HOLDER
To use the card holder, slide card into the
clip. Do not view information while operat-
ing the vehicle.
MANUAL ANTI-GLARE REARVIEW
MIRROR (if so equipped)
Use the night position�1to reduce glare
from the headlights of vehicles behind you
at night.
Use the day position
�2when driving in
daylight hours.
Page 199 of 460
AUTOMATIC ANTI-GLARE
REARVIEW MIRROR (if so equipped)
The inside mirror is designed so that it au-
tomatically dims during night time condi-
tions and according to the intensity of the
headlights of the vehicle following you. The
automatic anti-glare feature is activated
when the ignition switch is in the ON posi-
tion.NOTE:
Do not hang any objects over the sen-
sors
�1or apply glass cleaner to the sen-
sors. Doing so will reduce the sensitivity
of the sensors, resulting in improper op-
eration.
The indicator light
�2will illuminate when
the automatic anti-glare feature is operat-
ing.
∙ To turn off the anti-glare feature, press the O button. The indicator light will
turn off.
∙ To turn on the anti-glare feature, press the | button. The indicator light will turn
on.
For information on HomeLink® Universal
Transceiver operation, refer to the
“HomeLink® Universal Transceiver” in the
“Instruments and controls” section of this
manual.
OUTSIDE MIRRORS