Page 127 of 460

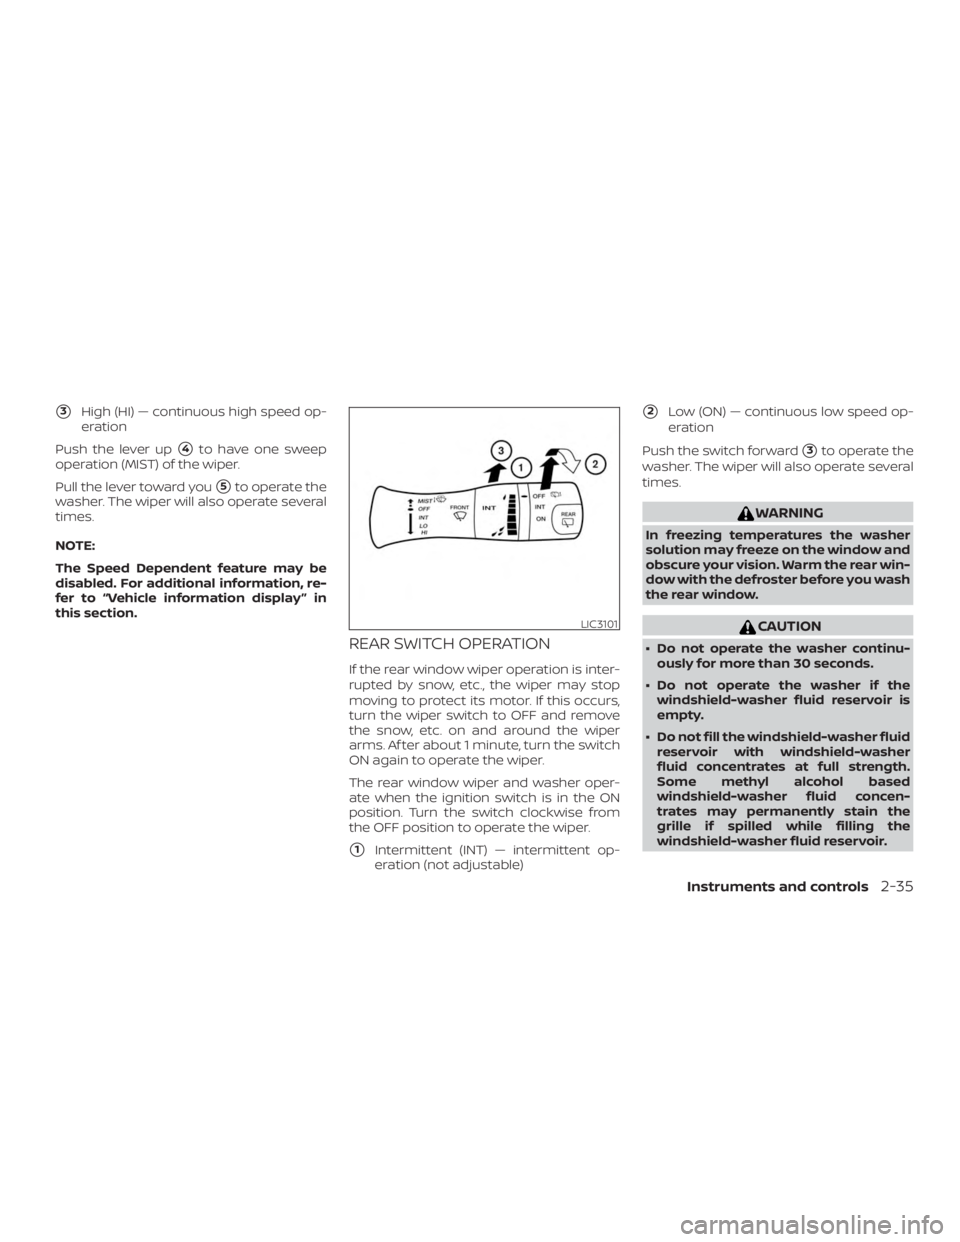
�3High (HI) — continuous high speed op-
eration
Push the lever up
�4to have one sweep
operation (MIST) of the wiper.
Pull the lever toward you
�5to operate the
washer. The wiper will also operate several
times.
NOTE:
The Speed Dependent feature may be
disabled. For additional information, re-
fer to “Vehicle information display ” in
this section.
REAR SWITCH OPERATION
If the rear window wiper operation is inter-
rupted by snow, etc., the wiper may stop
moving to protect its motor. If this occurs,
turn the wiper switch to OFF and remove
the snow, etc. on and around the wiper
arms. Af ter about 1 minute, turn the switch
ON again to operate the wiper.
The rear window wiper and washer oper-
ate when the ignition switch is in the ON
position. Turn the switch clockwise from
the OFF position to operate the wiper.
�1Intermittent (INT) — intermittent op-
eration (not adjustable)
�2Low (ON) — continuous low speed op-
eration
Push the switch forward
�3to operate the
washer. The wiper will also operate several
times.
Page 340 of 460

∙ Do not allow passengers to stay in thevehicle while it is on the jack.
∙ Never run the engine with a wheel(s) off the ground. It may cause the ve-
hicle to move.
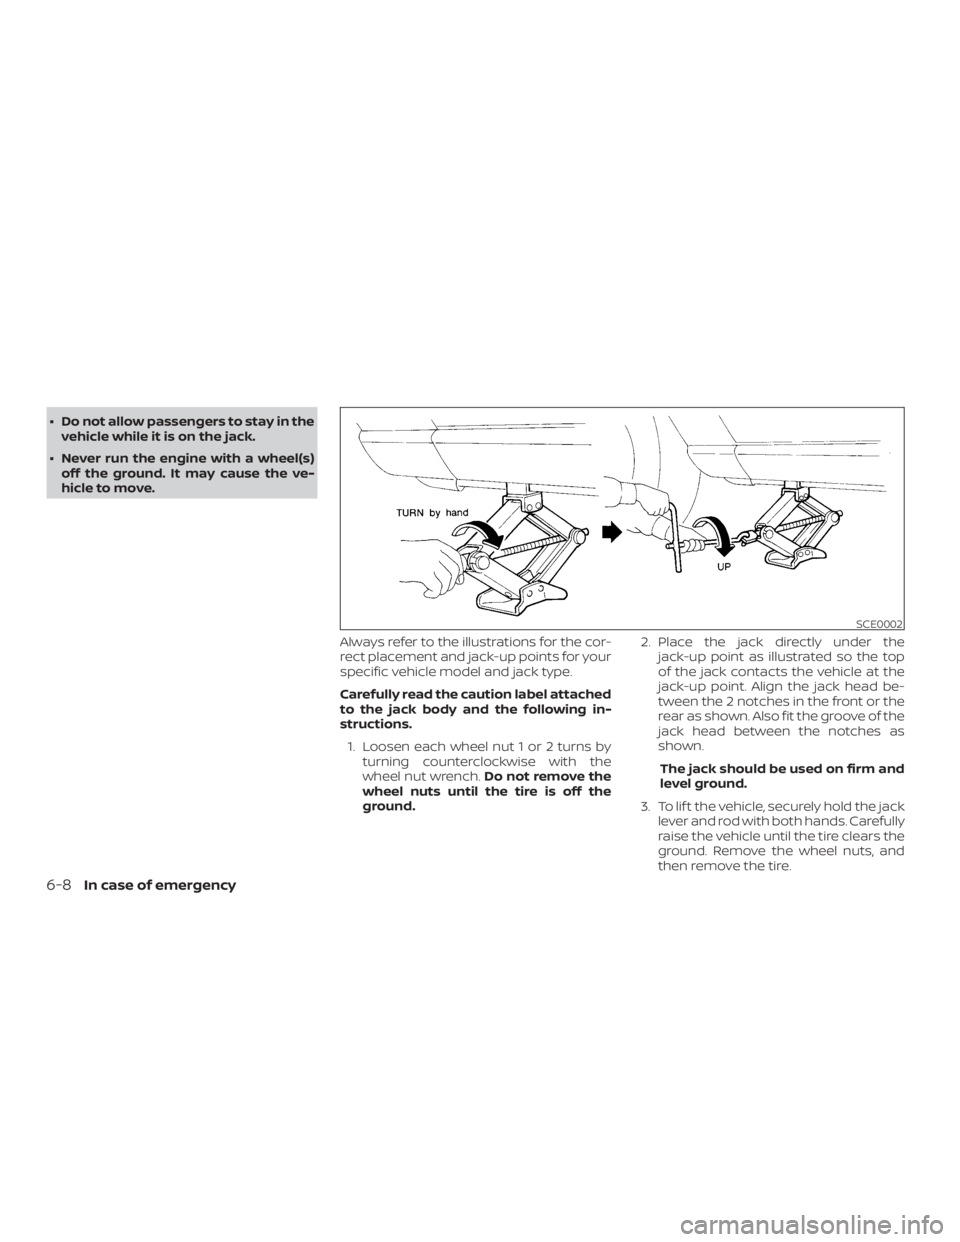
Always refer to the illustrations for the cor-
rect placement and jack-up points for your
specific vehicle model and jack type.
Carefully read the caution label attached
to the jack body and the following in-
structions.1. Loosen each wheel nut 1 or 2 turns by turning counterclockwise with the
wheel nut wrench. Do not remove the
wheel nuts until the tire is off the
ground. 2. Place the jack directly under the
jack-up point as illustrated so the top
of the jack contacts the vehicle at the
jack-up point. Align the jack head be-
tween the 2 notches in the front or the
rear as shown. Also fit the groove of the
jack head between the notches as
shown.
The jack should be used on firm and
level ground.
3. To lif t the vehicle, securely hold the jack lever and rod with both hands. Carefully
raise the vehicle until the tire clears the
ground. Remove the wheel nuts, and
then remove the tire.
Page 365 of 460
3. Place a large drain pan under the oilfilter
�B.
4. Remove pins
�Afrom the right engine
protector located inside the right
wheel well and then remove protector.
Remove oil filter
�Bwith an oil filter
wrench by turning it counterclockwise.
Then remove the oil filter by turning it
by hand.