2018 NISSAN 370Z ignition
[x] Cancel search: ignitionPage 264 of 453
4-96Center display, heater, air conditioner, audio, phone and voice recognition systems
“Select Phone”
Use the Select Phone command to select
from a list of phones connected to the
vehicle. The system will list the names
assigned to each phone and then prompt
you for the phone you wish to select. Only
one phone can be active at a time.
“Delete Phone”
Use the Delete Phone command to delete
a phone that is connected to the vehicle.
The system will list the names assigned to
each phone and then prompt you for the
phone you wish to delete. Deleting a
phone from the vehicle will also delete
that phonebook for that phone.
“Bluetooth Off”
Use the Bluetooth Off command to pre-
vent a wireless connection to your phone.
“Replace phone”
This can be used to reconnect a new
phone with the vehicle you have changed
your cellular phone.
SPEAKER ADAPTATION (SA) MODE
Speaker Adaptation allows up to two out-
of dialect users to train the system to
improve recognition accuracy. By repeat-
ing a number of commands, the users
can create a voice model of their own
voice that is stored in the system. The
system is capable of storing a differentspeaker adaptation model for each con-
nected phone.
Training procedure
1. Position the vehicle in a reasonably
quiet outdoor location.
2. Sit in the driver’s seat with the engine running, the parking brake on, and the
transmission in Park.
3. Push and hold the
button for
more than 5 seconds.
4. The system announces: “Press the PHONE SEND (
) button for the
hands-free phone system to enter
the speaker adaptation mode or press
the PHONE END (
) button to select
a different language.”
5. Push the
button.
For information on selecting a differ-
ent language, see “Choosing a lan-
guage” (P.4-90).
6. If the connected phone is already in use, the system will prompt you to
overwrite. Follow the instructions pro-
vided by the system.
7. When preparation is complete and you are ready to begin, push the
button.
8. The SA mode will be explained. Follow the instructions provided by the sys-
tem. 9. When training is finished, the system
will tell you an adequate number of
phrases have been recorded.
10. The system will announce that speak- er adaptation has been completed
and the system is ready.
The SA mode will stop if:
. The
button is pressed for more
than 5 seconds in SA mode.
. The vehicle is driven during SA mode.
. The ignition switch is placed in the
OFF or LOCK position.
Training phrases
During the SA mode, the system instructs
you to say the following phrases.
(The system will prompt you for each
phrase.)
.phonebook transfer entry
. dial 3 0 4 2 9
. delete call back number
. Incoming
. Transfer entry
. 8 pause 9 3 2 pause 7
. delete all entries
. call 7 2 4 0 9
. phonebook delete entry
. next entry
Page 270 of 453
4-102Center display, heater, air conditioner, audio, phone and voice recognition systems
SAA2533
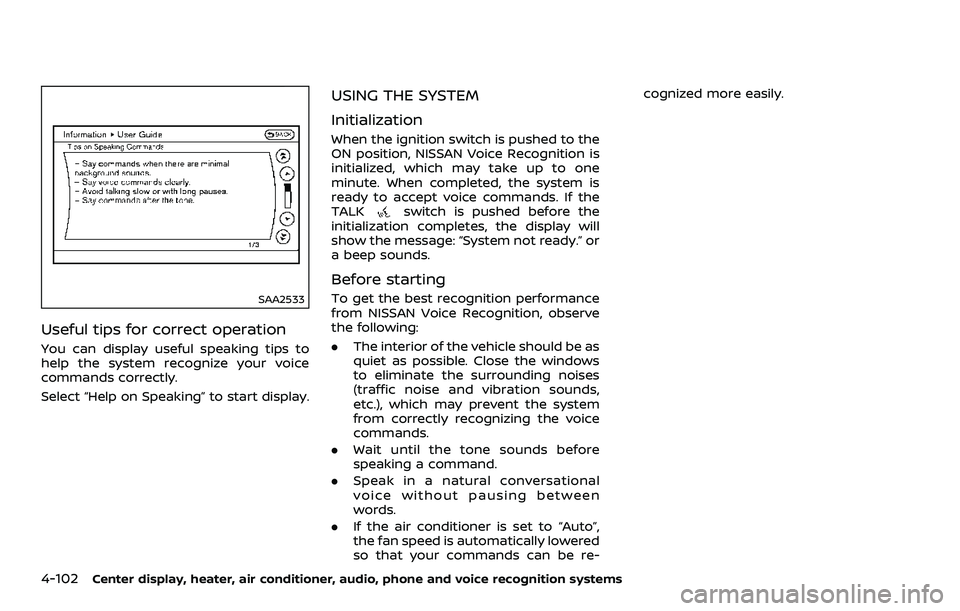
Useful tips for correct operation
You can display useful speaking tips to
help the system recognize your voice
commands correctly.
Select “Help on Speaking” to start display.
USING THE SYSTEM
Initialization
When the ignition switch is pushed to the
ON position, NISSAN Voice Recognition is
initialized, which may take up to one
minute. When completed, the system is
ready to accept voice commands. If the
TALK
switch is pushed before the
initialization completes, the display will
show the message: “System not ready.” or
a beep sounds.
Before starting
To get the best recognition performance
from NISSAN Voice Recognition, observe
the following:
. The interior of the vehicle should be as
quiet as possible. Close the windows
to eliminate the surrounding noises
(traffic noise and vibration sounds,
etc.), which may prevent the system
from correctly recognizing the voice
commands.
. Wait until the tone sounds before
speaking a command.
. Speak in a natural conversational
voice without pausing between
words.
. If the air conditioner is set to “Auto”,
the fan speed is automatically lowered
so that your commands can be re- cognized more easily.
Page 287 of 453
SAA2547
Displaying user guide
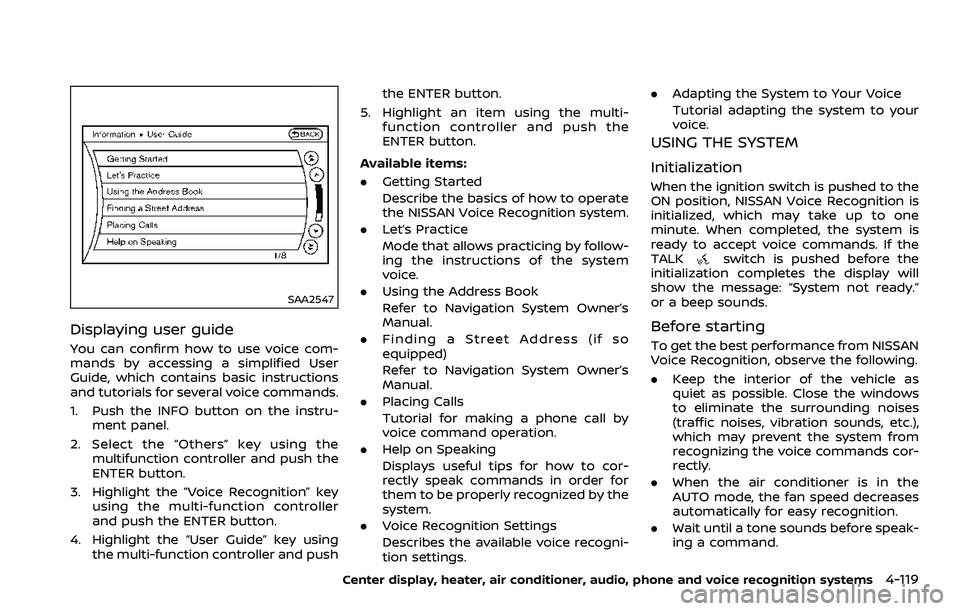
You can confirm how to use voice com-
mands by accessing a simplified User
Guide, which contains basic instructions
and tutorials for several voice commands.
1. Push the INFO button on the instru-ment panel.
2. Select the “Others” key using the multifunction controller and push the
ENTER button.
3. Highlight the “Voice Recognition” key using the multi-function controller
and push the ENTER button.
4. Highlight the “User Guide” key using the multi-function controller and push the ENTER button.
5. Highlight an item using the multi- function controller and push the
ENTER button.
Available items:
. Getting Started
Describe the basics of how to operate
the NISSAN Voice Recognition system.
. Let’s Practice
Mode that allows practicing by follow-
ing the instructions of the system
voice.
. Using the Address Book
Refer to Navigation System Owner’s
Manual.
. Finding a Street Address (if so
equipped)
Refer to Navigation System Owner’s
Manual.
. Placing Calls
Tutorial for making a phone call by
voice command operation.
. Help on Speaking
Displays useful tips for how to cor-
rectly speak commands in order for
them to be properly recognized by the
system.
. Voice Recognition Settings
Describes the available voice recogni-
tion settings. .
Adapting the System to Your Voice
Tutorial adapting the system to your
voice.
USING THE SYSTEM
Initialization
When the ignition switch is pushed to the
ON position, NISSAN Voice Recognition is
initialized, which may take up to one
minute. When completed, the system is
ready to accept voice commands. If the
TALK
switch is pushed before the
initialization completes the display will
show the message: “System not ready.”
or a beep sounds.
Before starting
To get the best performance from NISSAN
Voice Recognition, observe the following.
. Keep the interior of the vehicle as
quiet as possible. Close the windows
to eliminate the surrounding noises
(traffic noises, vibration sounds, etc.),
which may prevent the system from
recognizing the voice commands cor-
rectly.
. When the air conditioner is in the
AUTO mode, the fan speed decreases
automatically for easy recognition.
. Wait until a tone sounds before speak-
ing a command.
Center display, heater, air conditioner, audio, phone and voice recognition systems4-119
Page 293 of 453
5 Starting and driving
Precautions when starting and driving ....................... 5-2Exhaust gas (carbon monoxide) ................................. 5-2
Three-way catalyst ................................................................ 5-3
Tire Pressure Monitoring System (TPMS) ............ 5-3
Avoiding collision and rollover ..................................... 5-6
Off-road recovery ................................................................... 5-6
Rapid air pressure loss ....................................................... 5-6
Drinking alcohol/drugs and driving ......................... 5-7
Push-button ignition switch ................................................. 5-8 Operating range for engine start function ........ 5-8
Push-button ignition switch operation ................. 5-9
Push-button ignition switch positions .................. 5-9
Emergency engine shut off .......................................... 5-10
Intelligent Key battery discharge ............................. 5-10
Before starting the engine .................................................... 5-11
Starting the engine ..................................................................... 5-11
Driving the vehicle ...................................................................... 5-12 Automatic transmission .................................................. 5-12
Manual Transmission ......................................................... 5-17
Parking brake ........................................................................\
......... 5-21
Cruise control ........................................................................\
........ 5-22 Precautions on cruise control ................................... 5-22
Cruise control operations ............................................. 5-23
Break-in schedule ...................................................................... 5-24
Fuel efficient driving tips ...................................................... 5-24 Increasing fuel economy ..................................................... 5-25
Parking/parking on hills ....................................................... 5-26
Power steering ........................................................................\
..... 5-27
Brake system ........................................................................\
........ 5-27
Braking precautions ........................................................ 5-27
Parking brake break-in ................................................. 5-28
Brake assist ........................................................................\
............ 5-28 Brake assist ........................................................................\
.... 5-28
Anti-lock Braking System (ABS) ............................. 5-28
Vehicle Dynamic Control (VDC) system ................... 5-30
Performance dampers (NISMO models) .................. 5-32
Cold weather driving .............................................................. 5-33 Freeing a frozen door lock ........................................ 5-33
Antifreeze ........................................................................\
......... 5-33
Battery ........................................................................\
................ 5-33
Draining of coolant water .......................................... 5-33
Tire equipment .................................................................... 5-33
Special winter equipment .......................................... 5-33
Driving on snow or ice .................................................. 5-33
Engine block heater (if so equipped) ................ 5-34
Active noise cancellation/Active sound
enhancement (if so equipped) ........................................ 5-35 Active noise cancellation ............................................ 5-35
Active sound enhancement ...................................... 5-35
Page 295 of 453
THREE-WAY CATALYST
The three-way catalyst is an emission
control device installed in the exhaust
system. Exhaust gases in the three-way
catalyst are burned at high temperatures
to help reduce pollutants.
WARNING
.The exhaust gas and the exhaust
system are very hot. Keep people,
animals or flammable materials
away from the exhaust system
components.
. Do not stop or park the vehicle
over flammable materials such as
dry grass, waste paper or rags.
They may ignite and cause a fire.
CAUTION
.Do not use leaded gasoline. De-
posits from leaded gasoline ser-
iously reduce the three-way
catalyst’s ability to help reduce
exhaust pollutants.
. Keep your engine tuned up. Mal-
functions in the ignition, fuel in-
jection, or electrical systems can cause overrich fuel flow into the
three-way catalyst, causing it to
overheat. Do not keep driving if
the engine misfires, or if notice-
able loss of performance or other
unusual operating conditions are
detected. Have the vehicle in-
spected. It is recommended you
visit a NISSAN dealer for this
service.
. Avoid driving with an extremely
low fuel level. Running out of fuel
could cause the engine to misfire,
damaging the three-way catalyst.
. Do not race the engine while
warming it up.
. Do not push or tow your vehicle
to start the engine.
TIRE PRESSURE MONITORING SYS-
TEM (TPMS)
Each tire, including the spare (if provided),
should be checked monthly when cold
and inflated to the inflation pressure
recommended by the vehicle manufac-
turer on the vehicle placard or tire infla-
tion pressure label. (If your vehicle has
tires of a different size than the size
indicated on the vehicle placard or tire
inflation pressure label, you should deter-
mine the proper tire inflation pressure for those tires.)
As an added safety feature, your vehicle
has been equipped with a Tire Pressure
Monitoring System (TPMS) that illumi-
nates a low tire pressure telltale when
one or more of your tires is significantly
under-inflated. Accordingly, when the low
tire pressure telltale illuminates, you
should stop and check your tires as soon
as possible, and inflate them to the
proper pressure. Driving on a significantly
under-inflated tire causes the tire to
overheat and can lead to tire failure.
Under-inflation also reduces fuel effi-
ciency and tire tread life, and may affect
the vehicle’s handling and stopping abil-
ity.
Please note that the TPMS is not a
substitute for proper tire maintenance,
and it is the driver’s responsibility to
maintain correct tire pressure, even if
under-inflation has not reached the level
to trigger illumination of the TPMS low
tire pressure telltale.
Your vehicle has also been equipped with
a TPMS malfunction indicator to indicate
when the system is not operating prop-
erly. The TPMS malfunction indicator is
combined with the low tire pressure tell-
tale. When the system detects a malfunc-
tion, the telltale will flash for
approximately one minute and then re-
Starting and driving5-3
Page 296 of 453
5-4Starting and driving
main continuously illuminated. This se-
quence will continue upon subsequent
vehicle start-ups as long as the malfunc-
tion exists. When the malfunction indica-
tor is illuminated, the system may not be
able to detect or signal low tire pressure
as intended. TPMS malfunctions may
occur for a variety of reasons, including
the installation of replacement or alter-
nate tires or wheels on the vehicle that
prevent the TPMS from functioning prop-
erly. Always check the TPMS malfunction
telltale after replacing one or more tires
or wheels on your vehicle to ensure that
the replacement or alternate tires and
wheels allow the TPMS to continue to
function properly.
Additional information
.Since the spare tire is not equipped
with the TPMS, the TPMS does not
monitor the tire pressure of the spare
tire.
. The TPMS will activate only when the
vehicle is driven at speeds above 16
MPH (25 km/h). Also, this system may
not detect a sudden drop in tire
pressure (for example a flat tire while
driving).
. The low tire pressure warning light
does not automatically turn off when
the tire pressure is adjusted. After the
tire is inflated to the recommended pressure, the vehicle must be driven at
speeds above 16 MPH (25 km/h) to
activate the TPMS and turn off the low
tire pressure warning light. Use a tire
pressure gauge to check the tire
pressure.
. The CHECK TIRE PRESSURE warning
also appears on the vehicle informa-
tion display when the low tire pres-
sure warning light is illuminated and
low tire pressure is detected. The
CHECK TIRE PRESSURE warning turns
off when the low tire pressure warn-
ing light turns off.
The CHECK TIRE PRESSURE warning
appears each time the ignition switch
is placed in the ON position as long as
the low tire pressure warning light
remains illuminated.
The CHECK TIRE PRESSURE warning
does not appear if the low tire pres-
sure warning light illuminates to in-
dicate a TPMS malfunction.
. Tire pressure rises and falls depending
on the heat caused by the vehicle’s
operation and the outside tempera-
ture. Do not reduce the tire pressure
after driving because the tire pressure
rises after driving. Low outside tem-
perature can lower the temperature
of the air inside the tire which can
cause a lower tire inflation pressure. This may cause the low tire pressure
warning light to illuminate. If the
warning light illuminates in low ambi-
ent temperature, check the tire pres-
sure for all four tires.
For additional information, see “Low tire
pressure warning light” (P.2-13) and “Tire
Pressure Monitoring System (TPMS)” (P.6-
3).
WARNING
. If the low tire pressure warning
light illuminates while driving,
avoid sudden steering maneu-
vers or abrupt braking, reduce
vehicle speed, pull off the road
to a safe location and stop the
vehicle as soon as possible. Driv-
ing with under-inflated tires may
permanently damage the tires
and increase the likelihood of tire
failure. Serious vehicle damage
could occur and may lead to an
accident and could result in ser-
ious personal injury. Check the
tire pressure for all four tires.
Adjust the tire pressure to the
recommended COLD tire pressure
shown on the Tire and Loading
Information label to turn the low
tire pressure warning light OFF. If
Page 300 of 453
5-8Starting and driving
WARNING
Do not operate the push-button
ignition switch while driving the ve-
hicle except in an emergency. (The
engine will stop when the ignition
switch is pushed 3 consecutive times
or the ignition switch is pushed and
held for more than 2 seconds.) If the
engine stops while the vehicle is
being driven, this could lead to a
crash and serious injury.
Before operating the push-button igni-
tion switch, be sure to move the shift
lever to the P (Park) position (for auto-
matic transmission model) or the shift
lever to the N (Neutral) position (for
manual transmission model).
SSD0825
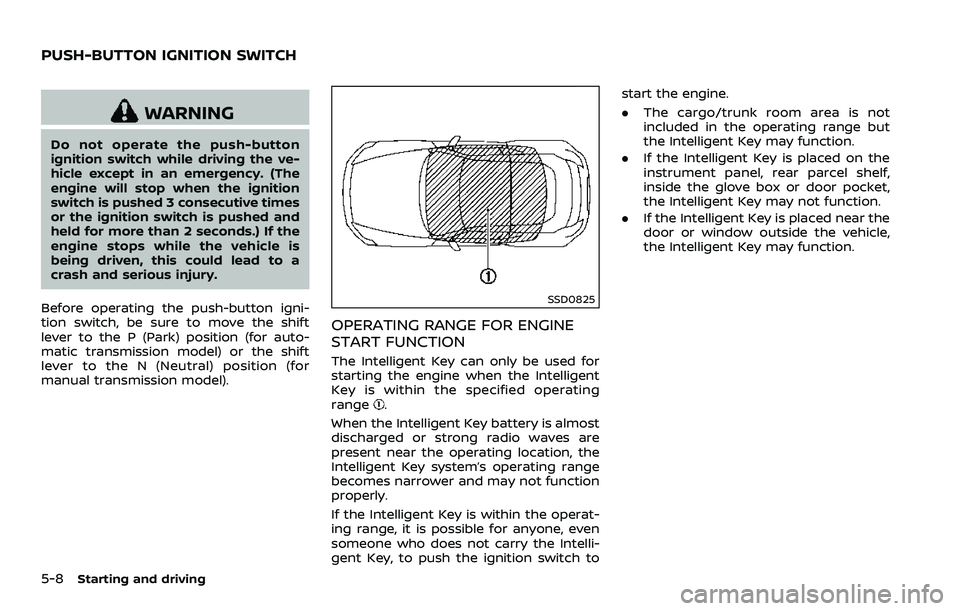
OPERATING RANGE FOR ENGINE
START FUNCTION
The Intelligent Key can only be used for
starting the engine when the Intelligent
Key is within the specified operating
range
.
When the Intelligent Key battery is almost
discharged or strong radio waves are
present near the operating location, the
Intelligent Key system’s operating range
becomes narrower and may not function
properly.
If the Intelligent Key is within the operat-
ing range, it is possible for anyone, even
someone who does not carry the Intelli-
gent Key, to push the ignition switch to start the engine.
.
The cargo/trunk room area is not
included in the operating range but
the Intelligent Key may function.
. If the Intelligent Key is placed on the
instrument panel, rear parcel shelf,
inside the glove box or door pocket,
the Intelligent Key may not function.
. If the Intelligent Key is placed near the
door or window outside the vehicle,
the Intelligent Key may function.
PUSH-BUTTON IGNITION SWITCH
Page 301 of 453
SSD1021
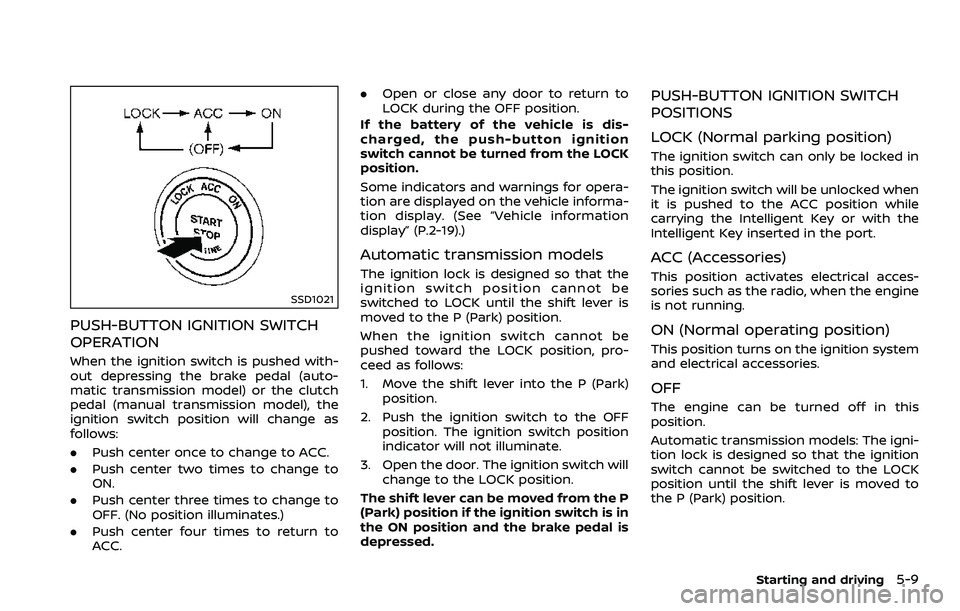
PUSH-BUTTON IGNITION SWITCH
OPERATION
When the ignition switch is pushed with-
out depressing the brake pedal (auto-
matic transmission model) or the clutch
pedal (manual transmission model), the
ignition switch position will change as
follows:
.Push center once to change to ACC.
. Push center two times to change to
ON.
. Push center three times to change to
OFF. (No position illuminates.)
. Push center four times to return to
ACC. .
Open or close any door to return to
LOCK during the OFF position.
If the battery of the vehicle is dis-
charged, the push-button ignition
switch cannot be turned from the LOCK
position.
Some indicators and warnings for opera-
tion are displayed on the vehicle informa-
tion display. (See “Vehicle information
display” (P.2-19).)
Automatic transmission models
The ignition lock is designed so that the
ignition switch position cannot be
switched to LOCK until the shift lever is
moved to the P (Park) position.
When the ignition switch cannot be
pushed toward the LOCK position, pro-
ceed as follows:
1. Move the shift lever into the P (Park) position.
2. Push the ignition switch to the OFF position. The ignition switch position
indicator will not illuminate.
3. Open the door. The ignition switch will change to the LOCK position.
The shift lever can be moved from the P
(Park) position if the ignition switch is in
the ON position and the brake pedal is
depressed.
PUSH-BUTTON IGNITION SWITCH
POSITIONS
LOCK (Normal parking position)
The ignition switch can only be locked in
this position.
The ignition switch will be unlocked when
it is pushed to the ACC position while
carrying the Intelligent Key or with the
Intelligent Key inserted in the port.
ACC (Accessories)
This position activates electrical acces-
sories such as the radio, when the engine
is not running.
ON (Normal operating position)
This position turns on the ignition system
and electrical accessories.
OFF
The engine can be turned off in this
position.
Automatic transmission models: The igni-
tion lock is designed so that the ignition
switch cannot be switched to the LOCK
position until the shift lever is moved to
the P (Park) position.
Starting and driving5-9