2018 NISSAN 370Z window
[x] Cancel search: windowPage 58 of 453
1-34Safety — Seats, seat belts and supplemental restraint system
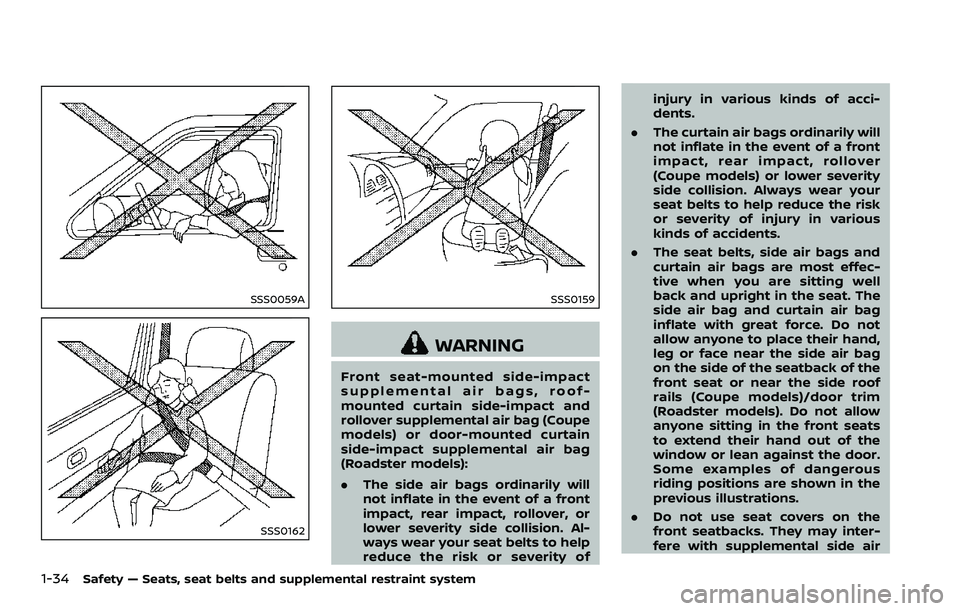
SSS0059A
SSS0162
SSS0159
WARNING
Front seat-mounted side-impact
supplemental air bags, roof-
mounted curtain side-impact and
rollover supplemental air bag (Coupe
models) or door-mounted curtain
side-impact supplemental air bag
(Roadster models):
.The side air bags ordinarily will
not inflate in the event of a front
impact, rear impact, rollover, or
lower severity side collision. Al-
ways wear your seat belts to help
reduce the risk or severity of injury in various kinds of acci-
dents.
. The curtain air bags ordinarily will
not inflate in the event of a front
impact, rear impact, rollover
(Coupe models) or lower severity
side collision. Always wear your
seat belts to help reduce the risk
or severity of injury in various
kinds of accidents.
. The seat belts, side air bags and
curtain air bags are most effec-
tive when you are sitting well
back and upright in the seat. The
side air bag and curtain air bag
inflate with great force. Do not
allow anyone to place their hand,
leg or face near the side air bag
on the side of the seatback of the
front seat or near the side roof
rails (Coupe models)/door trim
(Roadster models). Do not allow
anyone sitting in the front seats
to extend their hand out of the
window or lean against the door.
Some examples of dangerous
riding positions are shown in the
previous illustrations.
. Do not use seat covers on the
front seatbacks. They may inter-
fere with supplemental side air
Page 71 of 453

2 Instruments and controls
Cockpit ........................................................................\
........................... 2-3
Instrument panel ........................................................................\
... 2-4
Meters and gauges ...................................................................... 2-5Speedometer and odometer ......................................... 2-6
Tachometer ........................................................................\
......... 2-7
Engine coolant temperature gauge ........................ 2-7
Fuel gauge ........................................................................\
............ 2-8
Triple meter ........................................................................\
......... 2-8
Warning lights, indicator lights and
audible reminders ....................................................................... 2-10
Checking lights ........................................................................\
2-11
Warning lights ........................................................................\
... 2-11
Indicator lights ........................................................................\
2-15
Audible reminders ................................................................ 2-18
Vehicle information display ................................................. 2-19 Operational indicators ...................................................... 2-19
Warnings and alerts ............................................................ 2-21
Maintenance indicators .................................................. 2-23
Trip computer ........................................................................\
. 2-23
Security systems ........................................................................\
. 2-29
Vehicle Security System ................................................. 2-29
NISSAN Vehicle Immobilizer System ..................... 2-30
Wiper and washer switch ..................................................... 2-32
Rear window defroster switch ......................................... 2-33 Headlight and turn signal switch ................................. 2-34
Xenon headlights .............................................................. 2-34
Headlight switch ................................................................ 2-34
Turn signal switch ............................................................ 2-37
Fog light switch (if so equipped) .......................... 2-38
Horn ........................................................................\
.............................. 2-38
Heated seats (if so equipped) .......................................... 2-38
Climate controlled seats (if so equipped) .............. 2-40
Vehicle Dynamic Control (VDC) OFF switch .......... 2-41
Power outlet ........................................................................\
.......... 2-42
Storage ........................................................................\
....................... 2-43 Instrument pocket (except for navigation
system equipped models) .......................................... 2-43
Cup holders ........................................................................\
.... 2-43
Glove box ........................................................................\
......... 2-44
Console box ........................................................................\
... 2-44
Rear parcel box ................................................................... 2-45
Cargo cover (if so equipped) .................................... 2-45
Windows ........................................................................\
.................... 2-46 Power windows .................................................................. 2-46
Interior lights ........................................................................\
......... 2-50 Map lights ........................................................................\
........ 2-50
Interior light control switch ...................................... 2-50
Vanity mirror lights ................................................................... 2-51
Page 74 of 453

2-4Instruments and controls
SSI0653
1. Ventilator (P.4-24)
2. Center display and multi-function controlpanel (if so equipped) (P.4-4) or Instru-
ment pocket (if so equipped) (P.2-43)
— Navigation system* (if so equipped)
— Vehicle information and setting but-
tons (if so equipped) (P.4-8) — Bluetooth® Hands-Free Phone System
(if so equipped) (P.4-76, P.4-86)
3. Front passenger air bag status light (P.1-36)
4. Front passenger supplemental air bag (P.1-30)
5. Fuse box cover (P.8-18) 6. Push-button ignition switch (P.5-8)
7. Hazard warning flasher switch (P.6-2)
8. Seat heater switch (if so equipped)
(P.2-38) or Climate controlled seat switch
(if so equipped) (P.2-40)
9. Soft top operating switch (for Roadster models) (P.3-23) or Rear hatch release
switch (for Coupe models) (P.3-19)
10. SynchroRev Match mode (S-MODE) switch (if so equipped) (P.5-18)
11. Heater and air conditioner (P.4-25) — Rear window defroster switch (P.2-33)
12. Audio system (P.4-30)
13. Power outlet (P.2-42)
14. Glove box (P.2-44)
*: Refer to the separate Navigation Sys-
tem Owner’s Manual.
INSTRUMENT PANEL
Page 91 of 453
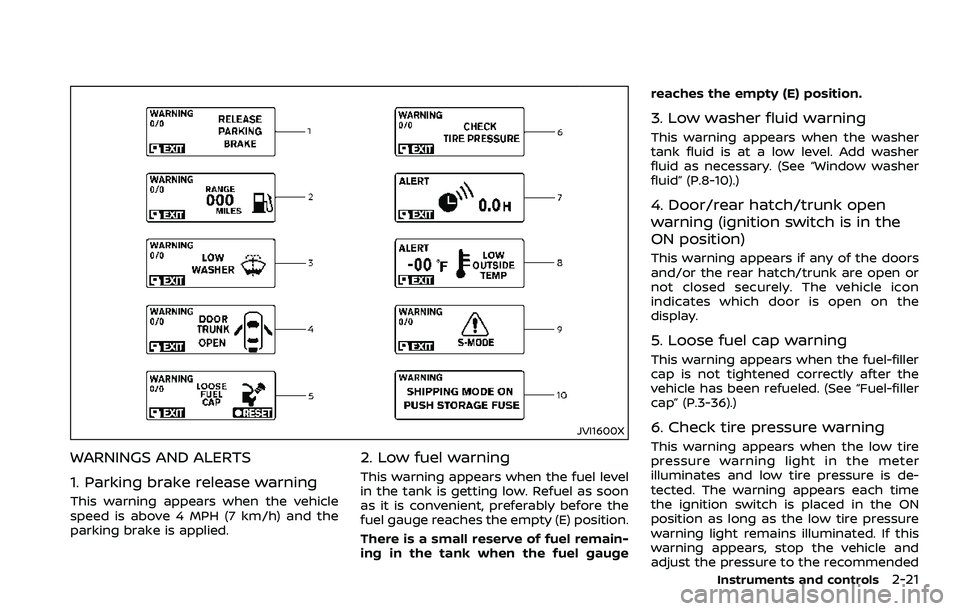
JVI1600X
WARNINGS AND ALERTS
1. Parking brake release warning
This warning appears when the vehicle
speed is above 4 MPH (7 km/h) and the
parking brake is applied.
2. Low fuel warning
This warning appears when the fuel level
in the tank is getting low. Refuel as soon
as it is convenient, preferably before the
fuel gauge reaches the empty (E) position.
There is a small reserve of fuel remain-
ing in the tank when the fuel gaugereaches the empty (E) position.
3. Low washer fluid warning
This warning appears when the washer
tank fluid is at a low level. Add washer
fluid as necessary. (See “Window washer
fluid” (P.8-10).)
4. Door/rear hatch/trunk open
warning (ignition switch is in the
ON position)
This warning appears if any of the doors
and/or the rear hatch/trunk are open or
not closed securely. The vehicle icon
indicates which door is open on the
display.
5. Loose fuel cap warning
This warning appears when the fuel-filler
cap is not tightened correctly after the
vehicle has been refueled. (See “Fuel-filler
cap” (P.3-36).)
6. Check tire pressure warning
This warning appears when the low tire
pressure warning light in the meter
illuminates and low tire pressure is de-
tected. The warning appears each time
the ignition switch is placed in the ON
position as long as the low tire pressure
warning light remains illuminated. If this
warning appears, stop the vehicle and
adjust the pressure to the recommended
Instruments and controls2-21
Page 100 of 453
2-30Instruments and controls
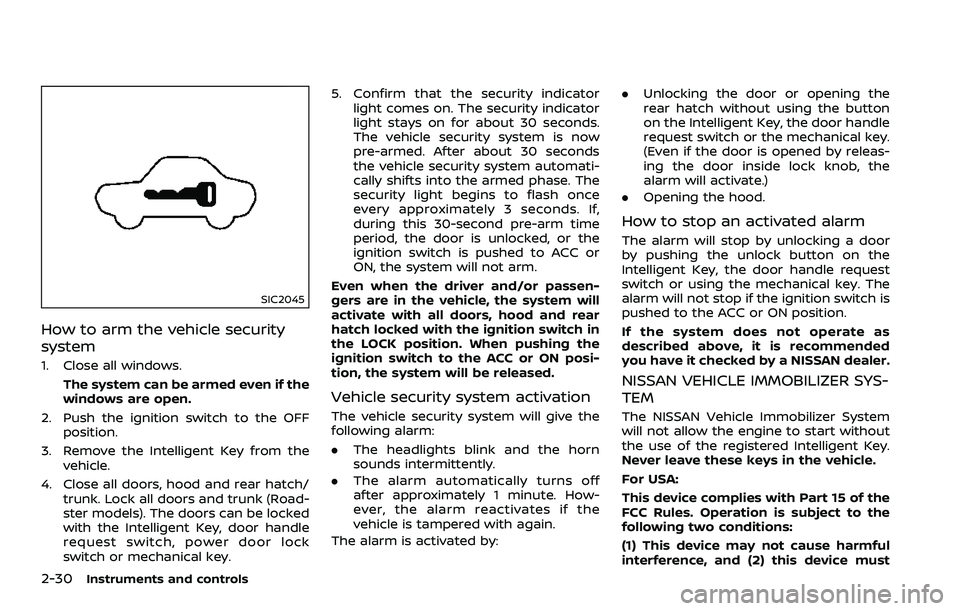
SIC2045
How to arm the vehicle security
system
1. Close all windows.The system can be armed even if the
windows are open.
2. Push the ignition switch to the OFF position.
3. Remove the Intelligent Key from the vehicle.
4. Close all doors, hood and rear hatch/ trunk. Lock all doors and trunk (Road-
ster models). The doors can be locked
with the Intelligent Key, door handle
request switch, power door lock
switch or mechanical key. 5. Confirm that the security indicator
light comes on. The security indicator
light stays on for about 30 seconds.
The vehicle security system is now
pre-armed. After about 30 seconds
the vehicle security system automati-
cally shifts into the armed phase. The
security light begins to flash once
every approximately 3 seconds. If,
during this 30-second pre-arm time
period, the door is unlocked, or the
ignition switch is pushed to ACC or
ON, the system will not arm.
Even when the driver and/or passen-
gers are in the vehicle, the system will
activate with all doors, hood and rear
hatch locked with the ignition switch in
the LOCK position. When pushing the
ignition switch to the ACC or ON posi-
tion, the system will be released.
Vehicle security system activation
The vehicle security system will give the
following alarm:
. The headlights blink and the horn
sounds intermittently.
. The alarm automatically turns off
after approximately 1 minute. How-
ever, the alarm reactivates if the
vehicle is tampered with again.
The alarm is activated by: .
Unlocking the door or opening the
rear hatch without using the button
on the Intelligent Key, the door handle
request switch or the mechanical key.
(Even if the door is opened by releas-
ing the door inside lock knob, the
alarm will activate.)
. Opening the hood.
How to stop an activated alarm
The alarm will stop by unlocking a door
by pushing the unlock button on the
Intelligent Key, the door handle request
switch or using the mechanical key. The
alarm will not stop if the ignition switch is
pushed to the ACC or ON position.
If the system does not operate as
described above, it is recommended
you have it checked by a NISSAN dealer.
NISSAN VEHICLE IMMOBILIZER SYS-
TEM
The NISSAN Vehicle Immobilizer System
will not allow the engine to start without
the use of the registered Intelligent Key.
Never leave these keys in the vehicle.
For USA:
This device complies with Part 15 of the
FCC Rules. Operation is subject to the
following two conditions:
(1) This device may not cause harmful
interference, and (2) this device must
Page 102 of 453

2-32Instruments and controls
WARNING
In freezing temperatures the washer
solution may freeze on the wind-
shield and obscure your vision which
may lead to an accident. Warm wind-
shield with the defroster before you
wash the windshield.
CAUTION
.Do not operate the washer con-
tinuously for more than 30 sec-
onds.
. Do not operate the washer if the
reservoir tank is empty.
. Do not fill the window washer
reservoir tank with washer fluid
concentrates at full strength.
Some methyl alcohol based
washer fluid concentrates may
permanently stain the grille if
spilled while filling the window
washer reservoir tank.
. Pre-mix washer fluid concen-
trates with water to the manu-
facturer’s recommended levels
before pouring the fluid into the
window washer reservoir tank. Do not use the window washer re-
servoir tank to mix the washer
fluid concentrate and water.JVI1012X
The windshield wiper and washer oper-
ates when the ignition switch is in the ON
position.
Push the lever down to operate the wiper
at the following speed:
Intermittent — intermittent operation can
be adjusted by turning the knob toward
(Slower) or(Faster).
When the speed sensing wiper interval
function (for models with navigation sys-
tem) is turned on, the intermittent opera-
tion speed varies in accordance with the
vehicle speed. (For example, when the
vehicle speed is high, the intermittent
operation speed will be faster.)
Models with navigation system:
Note that the function is set to disabled
WIPER AND WASHER SWITCH
Page 103 of 453
as the factory default setting. To turn this
function on and off, see “How to use
SETTING button” (P.4-11).
Low — continuous low speed operationHigh — continuous high speed operation
Push the lever upto have one sweep
operation of the wiper.
Pull the lever toward you
to operate the
washer. Then the wiper will also operate
several times.
Wiper drip wipe system:
The wiper will also operate once about 3
seconds after the washer and wiper are
operated. This operation is to wipe
washer fluid that has dripped on the
windshield.
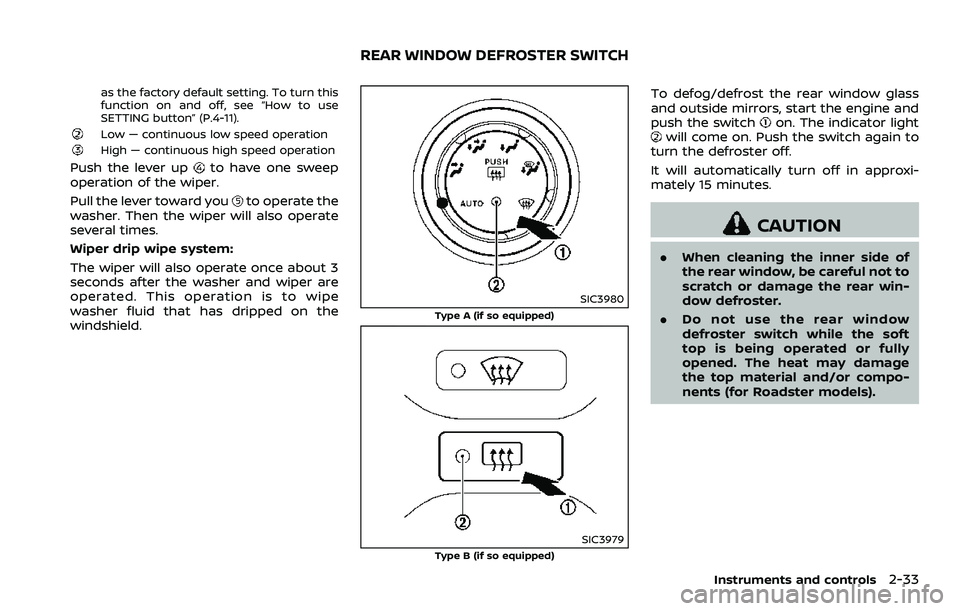
SIC3980
Type A (if so equipped)
SIC3979Type B (if so equipped)
To defog/defrost the rear window glass
and outside mirrors, start the engine and
push the switch
on. The indicator lightwill come on. Push the switch again to
turn the defroster off.
It will automatically turn off in approxi-
mately 15 minutes.
CAUTION
. When cleaning the inner side of
the rear window, be careful not to
scratch or damage the rear win-
dow defroster.
. Do not use the rear window
defroster switch while the soft
top is being operated or fully
opened. The heat may damage
the top material and/or compo-
nents (for Roadster models).
Instruments and controls2-33
REAR WINDOW DEFROSTER SWITCH
Page 112 of 453
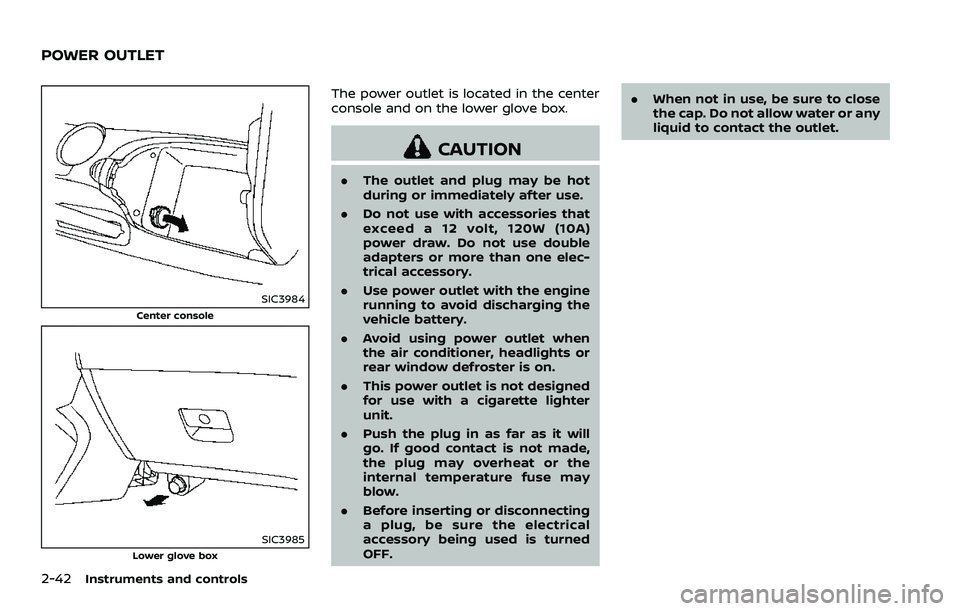
2-42Instruments and controls
SIC3984
Center console
SIC3985Lower glove box
The power outlet is located in the center
console and on the lower glove box.
CAUTION
.The outlet and plug may be hot
during or immediately after use.
. Do not use with accessories that
exceed a 12 volt, 120W (10A)
power draw. Do not use double
adapters or more than one elec-
trical accessory.
. Use power outlet with the engine
running to avoid discharging the
vehicle battery.
. Avoid using power outlet when
the air conditioner, headlights or
rear window defroster is on.
. This power outlet is not designed
for use with a cigarette lighter
unit.
. Push the plug in as far as it will
go. If good contact is not made,
the plug may overheat or the
internal temperature fuse may
blow.
. Before inserting or disconnecting
a plug, be sure the electrical
accessory being used is turned
OFF. .
When not in use, be sure to close
the cap. Do not allow water or any
liquid to contact the outlet.
POWER OUTLET