2018 MITSUBISHI OUTLANDER III change time
[x] Cancel search: change timePage 260 of 441
Multi Information display - Type 2
Features and controls 5-179
5
N00556801209
The “Average fuel consumption reset mode”,
it” and “Temperature
unit” setting can be
modified as desired,
when the ignition switch is in the “ON” posi-tion.
N00575501029
You can change the mode condition for theaverage fuel consumption display to “Autoreset” or “Manual reset”.
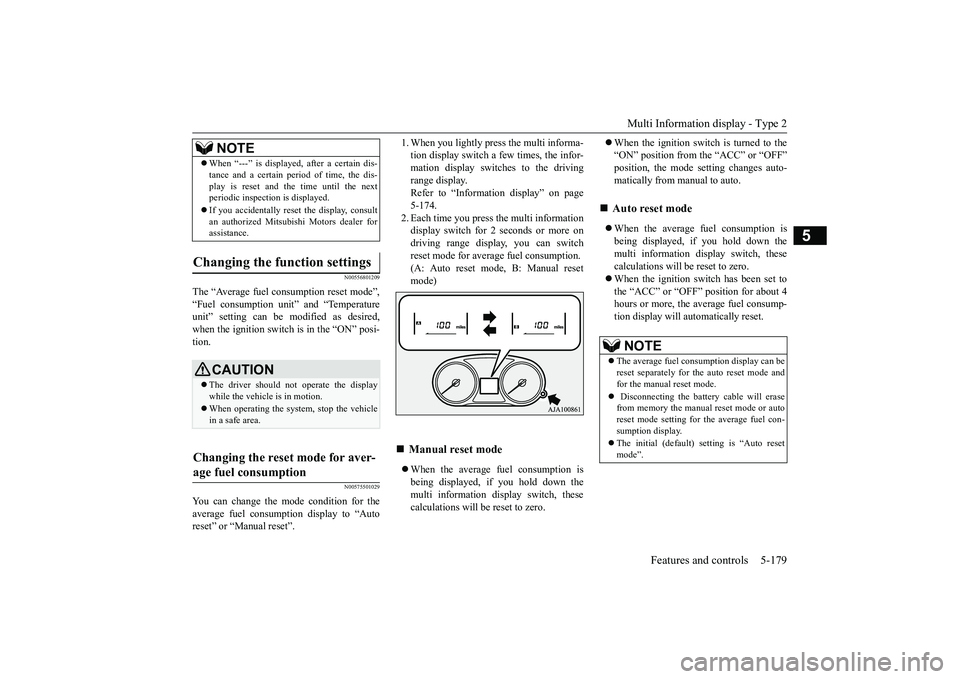
tion display switch a few times, the infor-mation display switches to the drivingrange display.Refer to “Information display” on page5-174.2. Each time you press the multi informationdisplay switch for 2 seconds or more ondriving range display, you can switchreset mode for average fuel consumption.(A: Auto reset mode, B: Manual resetmode)When the average fuel consumption isbeing displayed, if you hold down themulti information display switch, thesecalculations will
be reset to zero.
When the ignition switch is turned to the“ON” position from the “ACC” or “OFF”position, the mode se
tting changes auto-
matically from manual to auto.When the average fuel consumption isbeing displayed, if you hold down themulti information display switch, thesecalculations will be reset to zero.When the ignition switch has been set tothe “ACC” or “OFF” position for about 4hours or more, the average fuel consump-tion display will automatically reset.
When “---” is displaye
d, after a certain dis-
tance and a certain pe
riod of time, the dis-
play is reset and the time until the nextperiodic inspecti
on is displayed.
If you accidentally rese
t the display, consult
an authorized Mitsubishi Motors dealer forassistance.
Changing the function settings
CAUTIONThe driver should not operate the displaywhile the vehicle is in motion.When operating the system, stop the vehiclein a safe area.
Changing the reset mode for aver-age fuel consumption
NOTE
Manual reset mode
Auto reset mode NOTE
The average fuel cons
umption display can be
reset separately for the auto reset mode andfor the manual reset mode. Disconnecting the batt
ery cable will erase
from memory the manual reset mode or autoreset mode setting for the average fuel con-sumption display.The initial (default) setting is “Auto resetmode”.
BK0249100US.book 179 ページ 2017年5月10日 水曜日 午前8時49分
Page 261 of 441
Multi Information display - Type 25-180 Features and controls
5
N00557101179
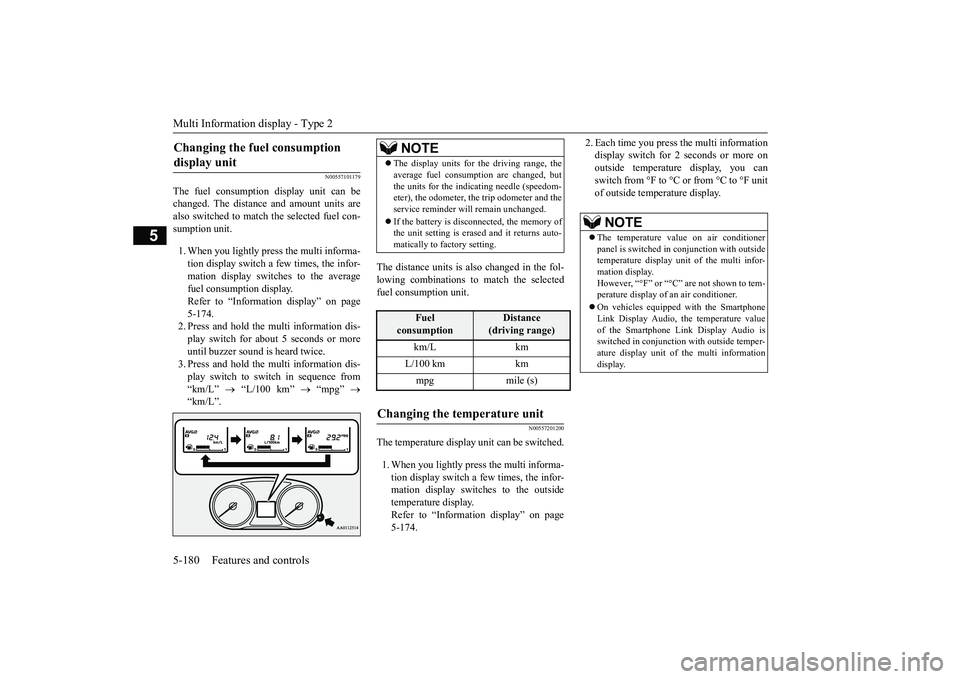
The fuel consumption display unit can bechanged. The distance and amount units arealso switched to match the selected fuel con-sumption unit.1. When you lightly press the multi informa-tion display switch a few times, the infor-mation display switches to the averagefuel consumption display.Refer to “Information display” on page5-174.2. Press and hold the multi information dis-play switch for about 5 seconds or moreuntil buzzer sound is
heard twice.
3. Press and hold the multi information dis-play switch to swit
ch in sequence from
“km/L”
“L/100 km”
“mpg”
The distance units is also changed in the fol-lowing combinations to match the selectedfuel consumption unit.
N00557201200
The temperature display unit can be switched.1. When you lightly press the multi informa-tion display switch a few times, the infor-mation display switches to the outsidetemperature display.Refer to “Information display” on page5-174.
2. Each time you press the multi informationdisplay switch for 2 seconds or more onoutside temperatur
e display, you can
switch from °F to °C or from °C to °F unitof outside temperature display.
Changing the fuel consumption display unit
NOTE
The display units for the driving range, theaverage fuel consumption are changed, butthe units for the indica
ting needle (speedom-
eter), the odometer, the trip odometer and theservice reminder will
remain unchanged.
If the battery is disconnected, the memory ofthe unit setting is erased and it returns auto-matically to factory setting.
Fuel
consumption
Distance
(driving range)
L/100 km kmmpg mile (s)
Changing the temperature unit
NOTE
The temperature value on air conditionerpanel is switched in
conjunction with outside
temperature display unit of the multi infor-mation display.However, “°F” or “°C” are not shown to tem-perature display of
an air conditioner.
On vehicles equippe
d with the Smartphone
Link Display Audio, the temperature valueof the Smartphone Li
nk Display Audio is
switched in conjunction
with outside temper-
ature display unit of
the multi information
display.
BK0249100US.book 180 ページ 2017年5月10日 水曜日 午前8時49分
Page 283 of 441

Indicators5-202 Features and controls
5
N00519900127N00520000216
The arrows will flash in time with the corre-sponding exterior turn signals when the turnsignal lever is used.Both arrows will flash
when the hazard warn-
ing flasher swit
ch is pressed.
N00520100086
A blue light comes on when the headlightsare on high beam.
N00520200175
This indicator comes on while the front foglights are on.
N00551301078
This indicator light illuminates while theparking lights are on.
N00575601020
This indicator comes on in blue while thecoolant temperature is low.
N00579200030
This function displays
how fuel-efficiently
you are driving under different driving condi-tions.The ECO drive assist di
splay will change as
follows if you do fuel-efficient driving usingthe accelerator in a way well matched withthe vehicle speed.
24- Engine malfuncti
on indicator (“SER-
VICE ENGINE SOON” or “Checkengine light”)
P. 5-204
25- Seat belt remi
nder/warning light
P. 4-23
26- Tire pressure moni
toring system warn-
ing light
P. 5-138
27- Brake warning light (red)
P. 5-203
28- Multi information display
P. 5-173
Indicators Turn signal indicators/Hazard warning lights
NOTE
If the indicator flashes faster than usual or ifthe indicator stays on wi
thout flashing, check
for a malfunctioning turn signal light bulb orturn signal connection.
High beam indicator Front fog light indicator
(if so
equipped)Position indicator Low coolant temperature indi-cator - blue (Vehicle equipped with the multi information dis-play - Type 2)
NOTE
When the indicator go
es out, this should be
used as a rough indication of when the heat-ing starts working.
ECO Drive Assist (Vehicle equipped with the multi infor-mation display - Type 2)
ECO drive levelLow High
BK0249100US.book 202 ページ 2017年5月10日 水曜日 午前8時49分
Page 289 of 441
Combination headlights and dimmer switch5-208 Features and controls
5
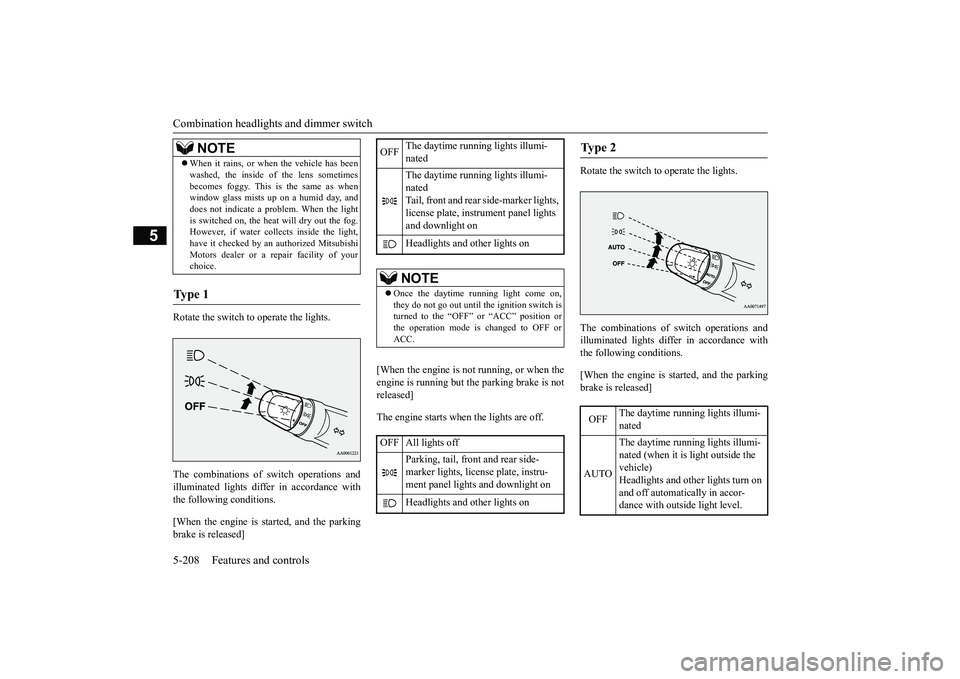
Rotate the switch to operate the lights.The combinations of
switch operations and
illuminated lights differ in accordance withthe following conditions.[When the engine is st
arted, and the parking
brake is released]
[When the engine is not
running, or when the
engine is running but the parking brake is notreleased]The engine starts when the lights are off.
Rotate the switch to operate the lights.The combinations of
switch operations and
illuminated lights differ in accordance withthe following conditions.[When the engine is st
arted, and the parking
brake is released]
When it rains, or wh
en the vehicle has been
washed, the inside of the lens sometimesbecomes foggy. This is the same as whenwindow glass mists up on a humid day, anddoes not indicate a pr
oblem. When the light
is switched on, the heat will dry out the fog.However, if water collects inside the light,have it checked by an authorized MitsubishiMotors dealer or a re
pair facility of your
choice.
Ty p e 1
NOTE
OFF
The daytime running lights illumi-natedThe daytime running lights illumi-natedTail, front and rear
side-marker lights,
license plate, inst
rument panel lights
and downlight onHeadlights and other lights onNOTE
Once the daytime running light come on,they do not go out until the ignition switch isturned to the “OFF” or “ACC” position orthe operation mode is changed to OFF orACC.
OFF All lights off
Parking, tail, front
and rear side-
marker lights, license plate, instru-ment panel lights
and downlight on
Headlights and other lights on
Ty p e 2 OFF
The daytime running lights illumi-nated
AUTO
The daytime running lights illumi-nated (when it is
light outside the
vehicle)Headlights and other lights turn on and off automatically in accor-dance with outside light level.
BK0249100US.book 208 ページ 2017年5月10日 水曜日 午前8時49分
Page 290 of 441
![MITSUBISHI OUTLANDER III 2018 Owners Manual Combination headlights and dimmer switch
Features and controls 5-209
5
[When the engine is not
running, or when the
engine is running but the parking brake is notreleased]The engine starts when the l MITSUBISHI OUTLANDER III 2018 Owners Manual Combination headlights and dimmer switch
Features and controls 5-209
5
[When the engine is not
running, or when the
engine is running but the parking brake is notreleased]The engine starts when the l](/manual-img/19/58144/w960_58144-289.png)
Combination headlights and dimmer switch
Features and controls 5-209
5
[When the engine is not
running, or when the
engine is running but the parking brake is notreleased]The engine starts when the lights are off.
N00532601649
If the following operation is performedwith the combination headlights and dim-mer switch in the “ ” or “ ” position,the lights automatically turn off.[Except for vehicles equipped with theF. A . S . T. - k e y ]The ignition switch is turned to the “OFF”
the key is removed
from the ignition switch and the driver’sdoor is opened.[For vehicles equipped with the F.A.S.T.-key]The operation mode is changed to OFF orACC and the driver’s door is opened.If the following operation is performedwith the combination headlights and dim-mer switch in the “ ” or “ ” position,the lights automatically turn off afterapproximately 3 minutes.[Except for vehicles equipped with theF. A . S . T. - k e y ]The ignition switch is turned to the “OFF”
the key is removed
from the ignition switch and the driver’sdoor is not opened.
The daytime running lights illumi-natedTail, front and re
ar side-marker
lights, license pl
ate, instrument
panel lights and downlight onHeadlights and other lights on
NOTE
Once the daytime running light come on,they do not go out until the ignition switch isturned to the “OFF” or “ACC” position orthe operation mode is changed to OFF orACC.OFF All lights offAUTO
Headlights and other lights turn on and off automatically in accor-dance with outside light level.Parking, tail, front
and rear side-
marker lights, license plate, instru-ment panel lights and downlight onHeadlights and other lights on
NOTE
The sensitivity of the automatic on/off con-trol can be adjusted.For further informati
on, please contact your
authorized Mitsubishi
Motors dealer or a
repair facility
of your choice.
On vehicles equippe
d with the Smartphone
Link Display Audio, sc
reen operations can
be used to make the adjustment.Refer to the separate
owner’s manual for
details.Do not cover the sensor (A) for the automaticon/off control by affixing
a sticker or label to
the windshield.If the lights do not turn on or off with theswitch in the “AUTO”operate the switch. Have the system checkedby an authorized Mitsubishi Motors dealer ora repair facility of your choice.
Light auto-cutout function (headlights and other lights)
BK0249100US.book 209 ページ 2017年5月10日 水曜日 午前8時49分
Page 297 of 441
Headlight leveling swit
ch (if so equipped)
5-216 Features and controls
5
3. Within 60 seconds of turning the ignitionswitch to the “OFF” or “LOCK” positionor putting the operation mode in OFF, pullthe turn signal lever toward you.4. The headlights will come on in the lowbeam setting for approximately 30 sec-onds. After the headlights go off, theheadlights can be turned on again in thelow beam setting for approximately 30seconds by pulling the turn signal levertoward you within 60 seconds of turningthe ignition switch to the “OFF” or“LOCK” position or putting the operationmode in OFF. To turn on the headlightsagain after 60 seconds of turning the igni-tion switch to the “OFF” or “LOCK”position or putting th
e operation mode in
OFF, repeat the process from step 1.
N00537101115
The direction of the headlight beam (thedirection in which th
e light shines) alters
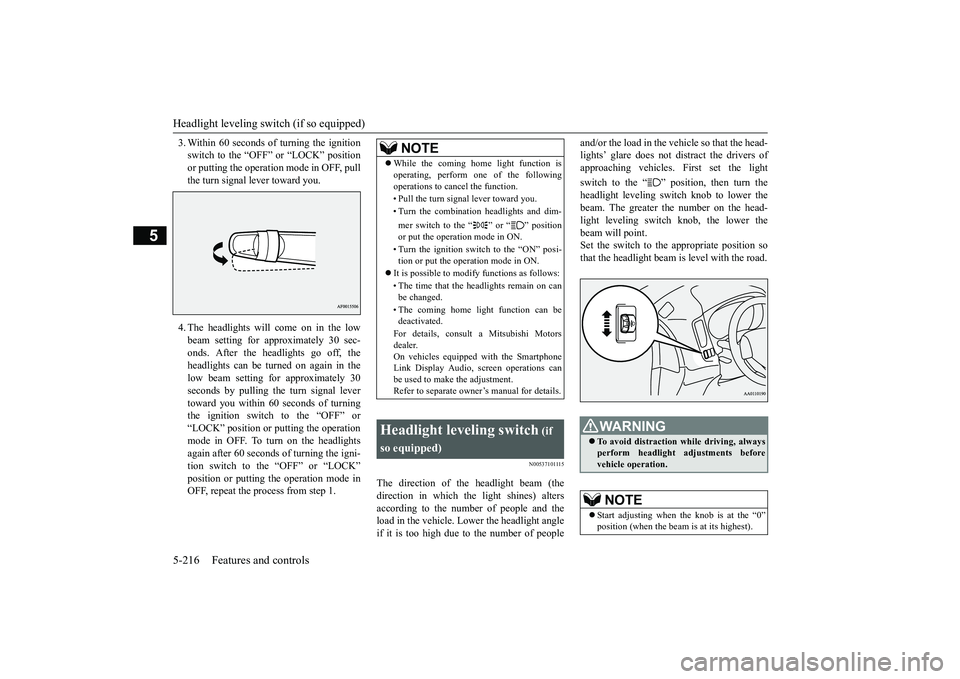
according to the number of people and theload in the vehicle. Lo
wer the headlight angle
if it is too high due to the number of people
and/or the load in the vehicle so that the head-lights’ glare does not distract the drivers ofapproaching vehicles. First set the lightswitch to the “ ” position, then turn theheadlight leveling switch knob to lower thebeam. The greater the number on the head-light leveling switch knob, the lower thebeam will point.Set the switch to the appropriate position sothat the headlight beam is level with the road.
NOTE
While the coming home light function isoperating, perform one of the followingoperations to canc
el the function.
• Pull the turn signal lever toward you.• Turn the combination headlights and dim-mer switch to the “ ” or “ ” positionor put the operation mode in ON.• Turn the ignition switch to the “ON” posi-tion or put the opera
tion mode in ON.
It is possible to modify functions as follows:• The time that the headlights remain on canbe changed.• The coming home light function can bedeactivated.For details, consult a Mitsubishi Motorsdealer.On vehicles equipped with the SmartphoneLink Display Audio, sc
reen operations can
be used to make the adjustment.Refer to separate owne
r’s manual for details.
Headlight leveling switch
(if
so equipped)
WA R N I N GTo avoid distraction wh
ile driving, always
perform headlight adjustments beforevehicle operation.NOTE
Start adjusting when the knob is at the “0”
is at its highest).
BK0249100US.book 216 ページ 2017年5月10日 水曜日 午前8時49分
Page 298 of 441
Turn signal lever
Features and controls 5-217
5
N00522601590
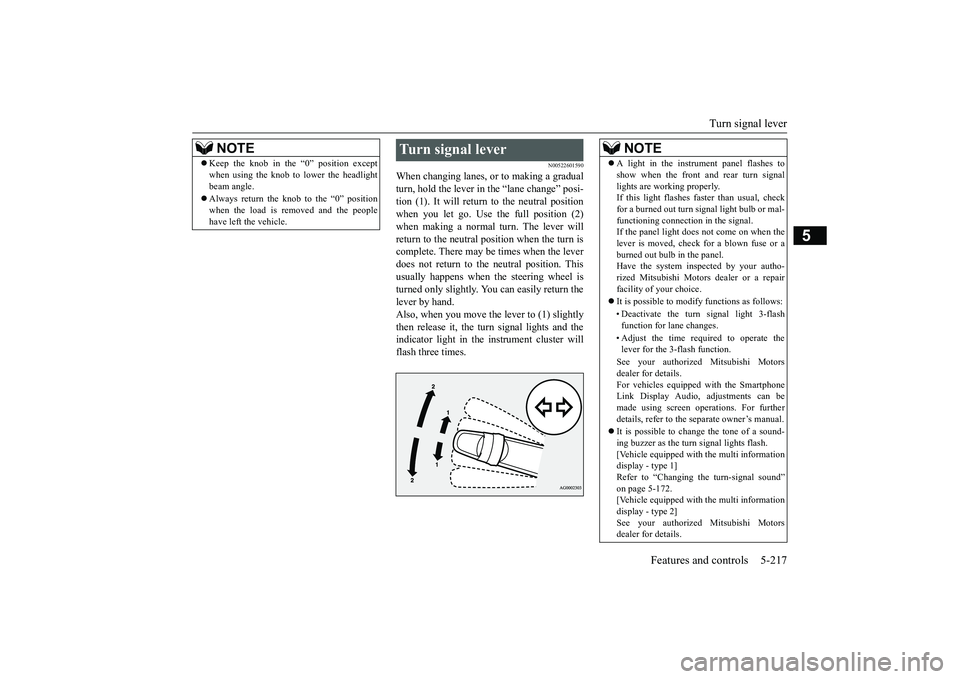
When changing lanes, or
to making a gradual
turn, hold the lever in the “lane change” posi-tion (1). It will return
to the neutral position
when you let go. Use the full position (2)when making a normal turn. The lever willreturn to the neutral position when the turn iscomplete. There may be times when the leverdoes not return to the neutral position. Thisusually happens when the steering wheel isturned only slightly. You
can easily return the
lever by hand.Also, when you move the lever to (1) slightlythen release it, the turn signal lights and theindicator light in the instrument cluster willflash three times.
Keep the knob in the “0” position exceptwhen using the knob to lower the headlightbeam angle.Always return the knob to the “0” positionwhen the load is removed and the peoplehave left
the vehicle.
NOTE
Turn signal lever
NOTE
A light in the instrument panel flashes toshow when the front and rear turn signallights are working properly.If this light flashes fa
ster than usual, check
for a burned out turn signal light bulb or mal-functioning connection in the signal.If the panel light does not come on when thelever is moved, check for a blown fuse or aburned out bulb in the panel.Have the system inspected by your autho-rized Mitsubishi Motors dealer or a repairfacility of your choice.It is possible to modi
fy functions as follows:
• Deactivate the turn signal light 3-flashfunction for lane changes.• Adjust the time required to operate thelever for the 3-flash function.See your authorized Mitsubishi Motorsdealer for details.For vehicles equipped with the SmartphoneLink Display Audio, adjustments can bemade using screen ope
rations. For further
details, refer to the
separate owner’s manual.
It is possible to change the tone of a sound-ing buzzer as the turn signal lights flash.[Vehicle equipped with the multi informationdisplay - type 1]Refer to “Changing the turn-signal sound”on page 5-172.[Vehicle equipped with the multi informationdisplay - type 2]See your authorized Mitsubishi Motorsdealer for details.
BK0249100US.book 217 ページ 2017年5月10日 水曜日 午前8時49分
Page 307 of 441
Heated steering wheel sw
itch (if so equipped)
5-226 Features and controls
5
N00589100032
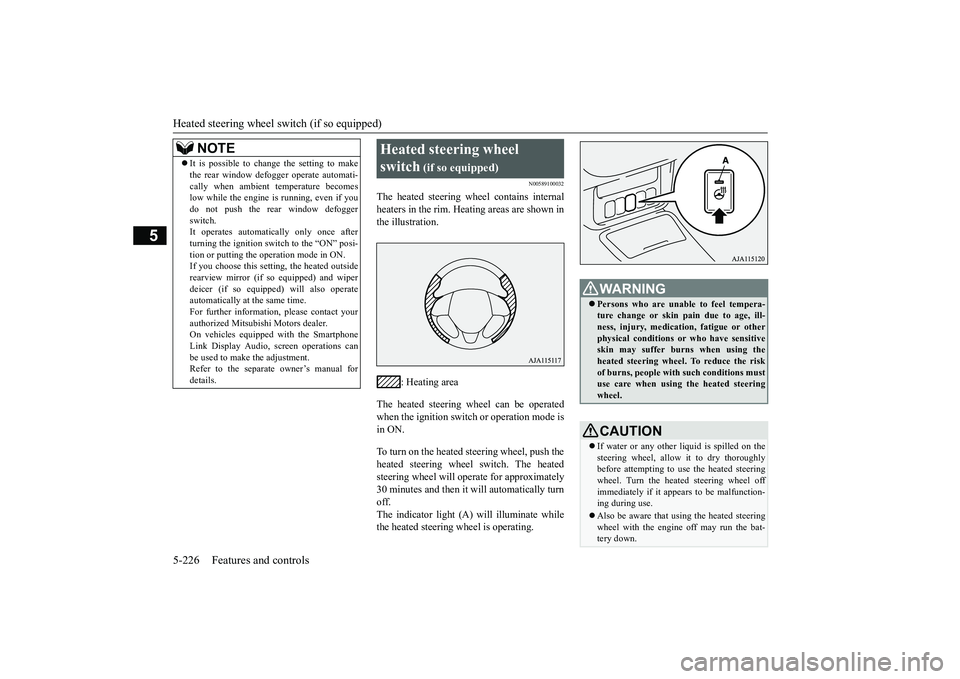
The heated steering wheel contains internalheaters in the rim. Heating areas are shown inthe illustration.
: Heating area
The heated steering wheel can be operatedwhen the ignition switch or operation mode isin ON.To turn on the heated steering wheel, push theheated steering wheel switch. The heatedsteering wheel will ope
rate for approximately
30 minutes and then it
will automatically turn
off.The indicator light (A) will illuminate whilethe heated steering wheel is operating.
It is possible to change the setting to makethe rear window def
ogger operate automati-
cally when ambient temperature becomeslow while the engine is running, even if youdo not push the rear window defoggerswitch.It operates automatica
lly only once after
turning the ignition switch to the “ON” posi-tion or putting the ope
ration mode in ON.
If you choose this setti
ng, the heated outside
rearview mirror (if so
equipped) and wiper
deicer (if so equippe
d) will also operate
automatically at the same time.For further information, please contact yourauthorized Mitsubishi Motors dealer.On vehicles equippe
d with the Smartphone
Link Display Audio, sc
reen operations can
be used to make the adjustment.Refer to the separate
owner’s manual for
details.NOTE
Heated steering wheel switch
(if so equipped)
Persons who are unable
to feel tempera-
ture change or skin
pain due to age, ill-
ness, injury, medicati
on, fatigue or other
physical conditions or
who have sensitive
skin may suffer burns when using theheated steering wheel. To reduce the riskof burns, people with such conditions mustuse care when using the heated steeringwheel.CAUTIONIf water or any other li
quid is spilled on the
steering wheel, allow it to dry thoroughlybefore attempting to use the heated steeringwheel. Turn the heated steering wheel offimmediately if it appe
ars to be malfunction-
ing during use.Also be aware that us
ing the heated steering
wheel with the engine off may run the bat-tery down.
BK0249100US.book 226 ページ 2017年5月10日 水曜日 午前8時49分