2018 MITSUBISHI OUTLANDER III ECO mode
[x] Cancel search: ECO modePage 138 of 441
Steering wheel height
and reach adjustment
Features and controls 5-57
5
Warning light (yellow)Warning displayIf there is a malfunction in the system, thewarning light will come on. In addition, thewarning display appears on the informationscreen in the multi information display.
Under normal conditions, the warning lightonly comes on when the operation mode isput in ON and goes off a few seconds later.
N00511501241
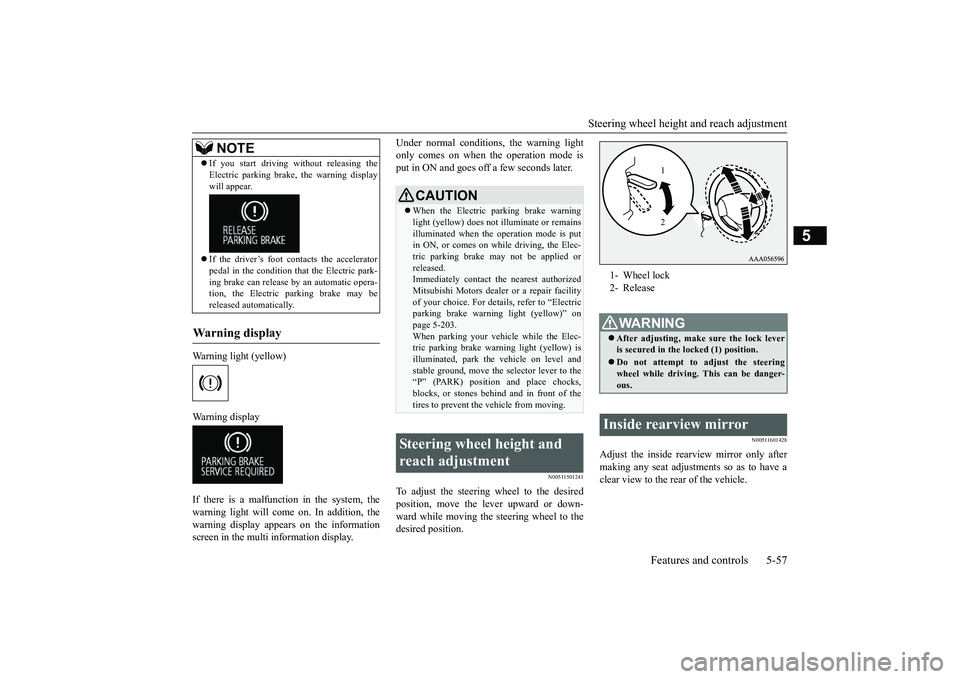
To adjust the steering wheel to the desiredposition, move the lever upward or down-ward while moving the steering wheel to thedesired position.
N00511601428
Adjust the inside rearview mirror only aftermaking any seat adjustme
nts so as to have a
clear view to the rear of the vehicle.
If you start driving wi
thout releasing the
Electric parking brake, the warning displaywill appear.If the driver’s foot contacts the acceleratorpedal in the condition th
at the Electric park-
ing brake can release by an automatic opera-tion, the Electric parking brake may bereleased automatically.
Wa r n i n g d is p la y
NOTE
CAUTIONWhen the Electric parking brake warninglight (yellow) does not
illuminate or remains
illuminated when the operation mode is putin ON, or comes on while driving, the Elec-tric parking brake may not be applied orreleased.Immediately contact the nearest authorizedMitsubishi Motors dealer
or a repair facility
of your choice. For detail
s, refer to “Electric
parking brake warni
ng light (yellow)” on
page 5-203.When parking your vehi
cle while the Elec-
tric parking brake warning light (yellow) isilluminated, park th
e vehicle on level and
stable ground, move the
selector lever to the
“P” (PARK) position and place chocks,blocks, or stones behind and in front of thetires to prevent the vehicle from moving.
Steering wheel height and reach adjustment
1- Wheel lock2- ReleaseWA R N I N GAfter adjusting, make sure the lock leveris secured in the locked (1) position.Do not attempt to adjust the steeringwheel while driving. This can be danger-ous.
Inside rearview mirror
12
BK0249100US.book 57 ページ 2017年5月17日 水曜日 午後2時31分
Page 143 of 441
Outside rearview mirrors5-62 Features and controls
5
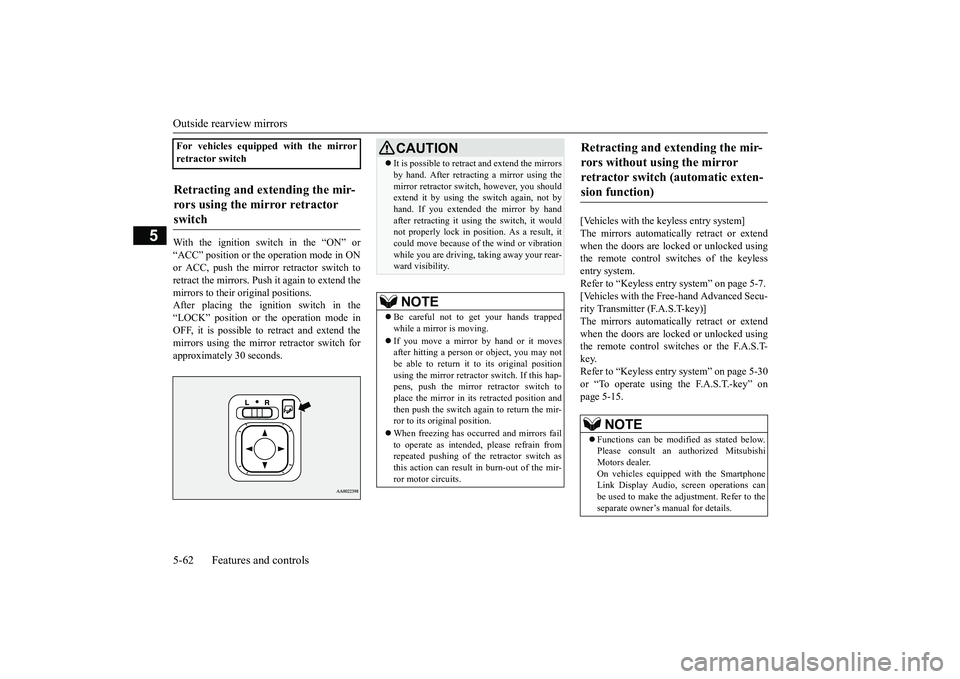
With the ignition switch in the “ON” or“ACC” position or the
operation mode in ON
or ACC, push the mirror retractor switch toretract the mirrors. Push it again to extend themirrors to their original positions.After placing the ignition switch in the“LOCK” position or the operation mode inOFF, it is possible to
retract and extend the
mirrors using the mirror retractor switch forapproximately 30 seconds.
[Vehicles with the keyless entry system]The mirrors automatically retract or extendwhen the doors are locked or unlocked usingthe remote control switches of the keylessentry system.Refer to “Keyless entry system” on page 5-7.[Vehicles with the Free-hand Advanced Secu-rity Transmitter (F.A.S.T-key)]The mirrors automatically retract or extendwhen the doors are locked or unlocked usingthe remote control switches or the F.A.S.T-key.Refer to “Keyless entry system” on page 5-30or “To operate using the F.A.S.T.-key” onpage 5-15.
For vehicles equipped with the mirrorretractor switchRetracting and extending the mir-rors using the mirror retractor switch
CAUTIONIt is possible to retract and extend the mirrorsby hand. After retracti
ng a mirror using the
mirror retractor switch, however, you shouldextend it by using the switch again, not byhand. If you extended the mirror by handafter retracting it using
the switch, it would
not properly lock in pos
ition. As a result, it
could move because of the wind or vibrationwhile you are driving, taking away your rear-ward visibility.NOTE
Be careful not to get your hands trappedwhile a mirror is moving.If you move a mirror by hand or it movesafter hitting a person or object, you may notbe able to return it to its original positionusing the mirror retractor switch. If this hap-pens, push the mirror retractor switch toplace the mirror in its
retracted position and
then push the switch again to return the mir-ror to its original position.When freezing has occurred and mirrors failto operate as intended,
please refrain from
repeated pushing of the retractor switch asthis action can result in burn-out of the mir-ror motor circuits.
Retracting and extending the mir-rors without using the mirror retractor switch (automatic exten-sion function)
NOTE
Functions can be modified as stated below.Please consult an authorized MitsubishiMotors dealer.On vehicles equippe
d with the Smartphone
Link Display Audio, sc
reen operations can
be used to make the adjustment. Refer to theseparate owner’s
manual for details.
BK0249100US.book 62 ページ 2017年5月10日 水曜日 午前8時49分
Page 144 of 441
Ignition switch (if so equipped)Features and controls 5-63
5
N00549301299
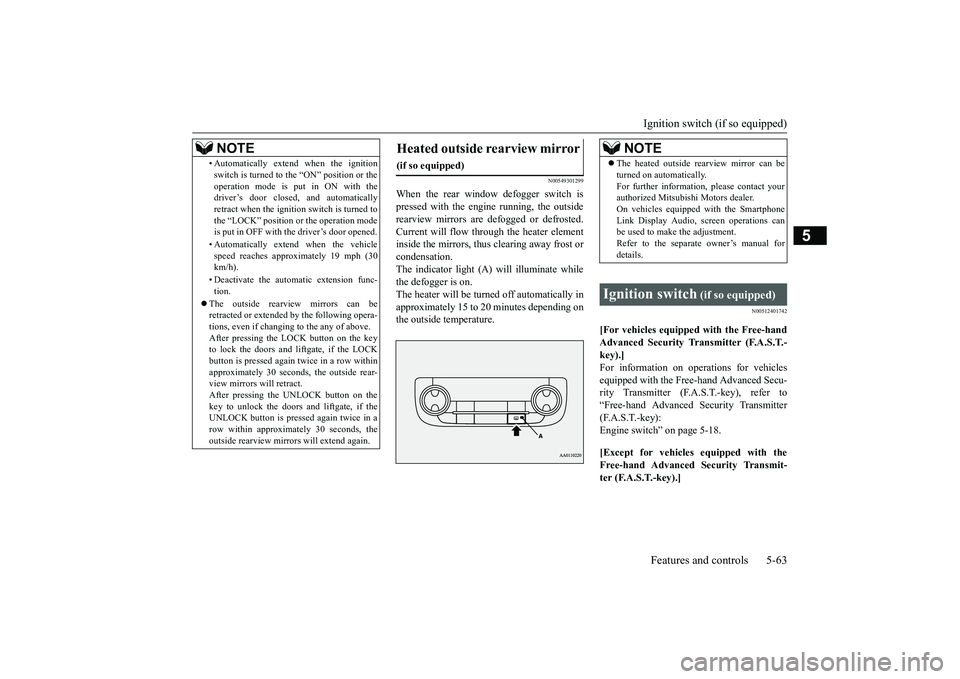
When the rear window defogger switch ispressed with the engine running, the outsiderearview mirrors are defogged or defrosted.Current will flow through the heater elementinside the mirrors, thus clearing away frost orcondensation.The indicator light (A) will illuminate whilethe defogger is on.The heater will be turned off automatically inapproximately 15 to 20 minutes depending onthe outside temperature.
N00512401742
[For vehicles equipped with the Free-handAdvanced Security Tr
ansmitter (F.A.S.T.-
key).]For information on operations for vehiclesequipped with the Free-hand Advanced Secu-rity Transmitter (F.A
.S.T.-key), refer to
“Free-hand Advanced
Security Transmitter
(F.A.S.T.-key):Engine switch” on page 5-18.[Except for vehicles equipped with theFree-hand Advanced Security Transmit-ter (F.A.S.T.-key).]
• Automatically extend when the ignitionswitch is turned to the “ON” position or theoperation mode is put in ON with thedriver’s door closed, and automaticallyretract when the ignition switch is turned tothe “LOCK” position or the operation modeis put in OFF with the driver’s door opened.• Automatically extend when the vehiclespeed reaches approximately 19 mph (30km/h).• Deactivate the automatic extension func-tion.
The outside rearvi
ew mirrors can be
retracted or extended
by the following opera-
tions, even if changing to the any of above.After pressing the LOCK
button on the key
to lock the doors and liftgate, if the LOCKbutton is pressed again twice in a row withinapproximately 30 seconds
, the outside rear-
view mirrors will retract.After pressing the
UNLOCK button on the
key to unlock the doors and liftgate, if theUNLOCK button is pressed again twice in arow within approximately 30 seconds, theoutside rearview mirro
rs will extend again.
NOTE
Heated outside rearview mirror
(if so equipped)
NOTE
The heated outside re
arview mirror can be
turned on automatically.For further informati
on, please contact your
authorized Mitsubish
i Motors dealer.
On vehicles equipped with the SmartphoneLink Display Audio, sc
reen operations can
be used to make the adjustment.Refer to the separate owner’s manual fordetails.
Ignition switch
(if so equipped)
BK0249100US.book 63 ページ 2017年5月10日 水曜日 午前8時49分
Page 147 of 441

Starting the engine5-66 Features and controls
5
Remove the key at
the “LOCK” position.
Turn the steering wheel until it is locked.Turn the key to the “ACC” position whilemoving the steering
wheel slightly.
N00512601858
[For vehicles equipped with the Free-handAdvanced Security Transmitter (F.A.S.T.-key).]For information on operation for vehiclesequipped with the Free-hand Advanced Secu-rity Transmitter (F.A.S.T.-key), refer to
“Free-hand Advanced
Security Transmitter
(F.A.S.T.-key): Starting” on page 5-13.[Except for vehicles equipped with theFree-hand Advanced Se
curity Transmit-
ter (F.A.S.T.-key).]Do not operate the starter motor continu-ously for longer than 15 seconds as thiscould run the battery
down or damage the
starter motor. If the engine does not start,turn the ignition switch back to the “OFF”or “LOCK” position, wait a few seconds,and then try again. Trying repeatedly withthe engine or starter motor still turningwill damage the starter mechanism.If the engine will not
start because the bat-
tery is weak or discharged, refer to“Jump-starting the engine” (on page 8-2)for instructions.A longer warm up period will only con-sume extra fuel. The engine is warmed upenough for driving when the bar graph ofengine coolant temper
ature display starts
to move or the low coolant temperatureindicator goes out. Refer to “Engine cool-ant temperature display” on page 5-161 or“Low coolant temper
ature indicator” on
page 5-202.
This model is equipped with an electronicallycontrolled fuel injection system. This is a sys-tem that automatically controls fuel injection.There is usually no need to depress the accel-erator pedal when starting the engine.The starter should not be run for more than 15seconds at a time.To prevent battery drain, wait a few secondsbetween attempts to restart the engine.1. Make sure all occupants are properlyseated with seat belts fastened.
To l o c k
To u n l o c k
CAUTIONRemove the key when leaving the vehicle.NOTE
If the front wheels are turned, the anti-theftlock may sometimes make it difficult to turnthe key from “LOCK” to “ACC”. Firmlyturn the steering wheel to the left or to theright as you turn the key.
Starting the engine
Tips for starting
WA R N I N GNever run the engine in
a closed or poorly
ventilated area any longer than is neededto move your vehicle
out of the area. Car-
bon monoxide gas, wh
ich is odorless and
extremely poisonous, could build up andcause serious injury or death.CAUTIONDo not push-start the vehicle.Do not run the engine at high rpms or driveat high speeds until
the engine has had a
chance to warm up.Release the ignition sw
itch as soon as the
engine starts. Otherwis
e, the starter motor
will be damaged
Starting the engine
BK0249100US.book 66 ページ 2017年5月10日 水曜日 午前8時49分
Page 149 of 441
Automatic transaxle (if so equipped)5-68 Features and controls
5
N00513200216
Automatic transaxle will automaticallychange its gear depe
nding on road and driv-
ing conditions. This
helps achieve smooth
driving and excellent fuel efficiency.Also you can manually shift up and shiftdown the transaxle. Refer to “Sports mode”The transaxle prevents
unnecessary upshifts
even when the accelerator pedal is releasedand ensures smooth driving.According to the condi
tions, the transaxle
will automatically shift to a lower gear toachieve stronger engine braking. This mayhelp reduce your need to use the servicebrake.
N00513801424
As an additional safe
ty precaution, models
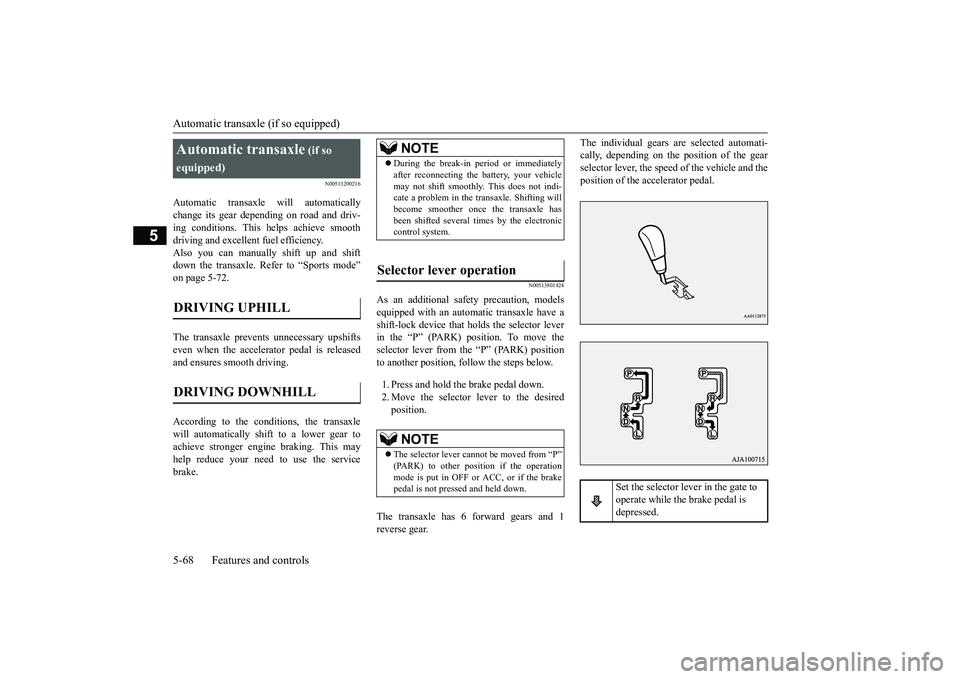
equipped with an automatic transaxle have ashift-lock device that holds the selector leverin the “P” (PARK) position. To move theselector lever from the “P” (PARK) positionto another position, follow the steps below.1. Press and hold the brake pedal down.2. Move the selector lever to the desiredposition.
The transaxle has 6 forward gears and 1reverse gear.
The individual gears are selected automati-cally, depending on the position of the gearselector lever, the speed of the vehicle and theposition of the ac
celerator pedal.
Automatic transaxle
(if so
equipped)
DRIVING DOWNHILL
NOTE
During the break-in pe
riod or immediately
after reconnecting the
battery, your vehicle
may not shift smoothly.
This does not indi-
cate a problem in the transaxle. Shifting willbecome smoother once the transaxle hasbeen shifted several
times by the electronic
control system.
Selector lever operation
NOTE
The selector lever cannot
be moved from “P”
mode is put in OFF or ACC, or if the brakepedal is not pressed and held down.
Set the selector lever in the gate to operate while the brake pedal is depressed.
BK0249100US.book 68 ページ 2017年5月10日 水曜日 午前8時49分
Page 150 of 441
Automatic transaxle (if so equipped)
Features and controls 5-69
5
N00563101086
When the selector lever cannot be shiftedfrom the “P” (PARK) position to anotherposition while the brake pedal is pressed andheld down with the operation mode in ON,the battery may be flat or the shift-lock mech-anism may be malfunctioning.Immediately have your
vehicle checked by an
authorized Mitsubishi Motors dealer or arepair facility of your choice.If you need to move the vehicle, shift theselector lever as follows.1. Make sure the parking brake is firmlyapplied.2. Stop the engine if it is running.
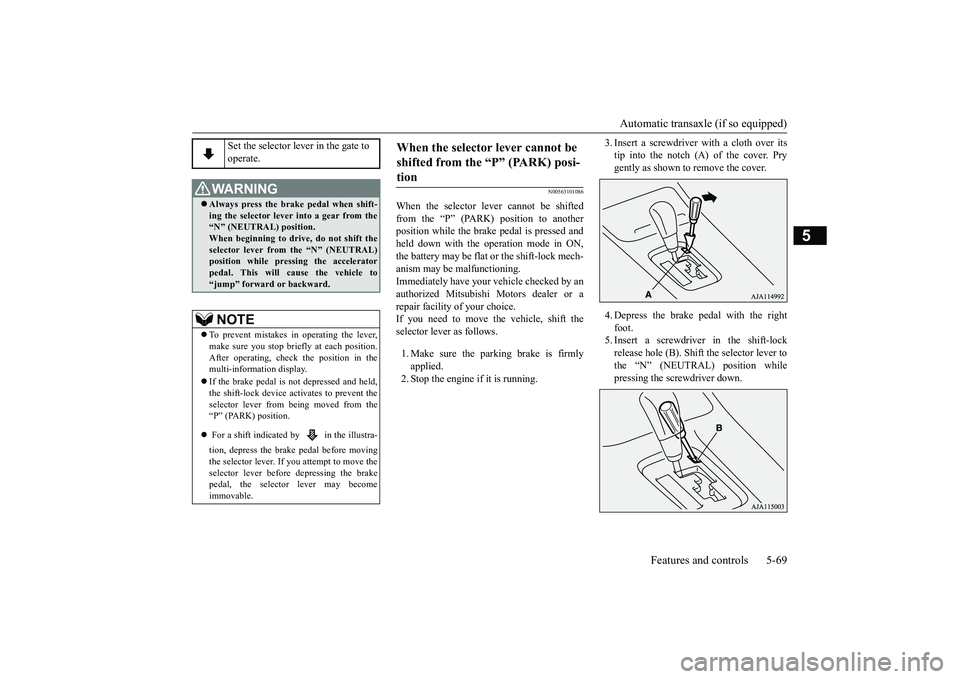
3. Insert a screwdrive
r with a cloth over its
tip into the notch (A) of the cover. Prygently as shown to remove the cover.4. Depress the brake
pedal with the right
foot.5. Insert a screwdriver in the shift-lockrelease hole (B). Shift the selector lever tothe “N” (NEUTRAL) position whilepressing the screwdriver down.
Set the selector lever in the gate to operate.
WA R N I N GAlways press the brake pedal when shift-ing the selector
lever into a gear from the
“N” (NEUTRAL) position. When beginning to drive, do not shift theselector lever from
the “N” (NEUTRAL)
position while pressing the acceleratorpedal. This will cause the vehicle to“jump” forward or backward.NOTE
To prevent mistakes in operating the lever,make sure you stop brie
fly at each position.
After operating, chec
k the position in the
multi-information display.If the brake pedal is not depressed and held,the shift-lock device ac
tivates to prevent the
selector lever from being moved from the“P” (PARK) position. For a shift indicated by in the illustra-tion, depress the brake pedal before movingthe selector lever. If you attempt to move theselector lever before depressing the brakepedal, the selector lever may becomeimmovable.
When the selector lever cannot be shifted from the “P” (PARK) posi-tion
BK0249100US.book 69 ページ 2017年5月10日 水曜日 午前8時49分
Page 151 of 441
Automatic transaxle (if so equipped)5-70 Features and controls
5
N00513901441
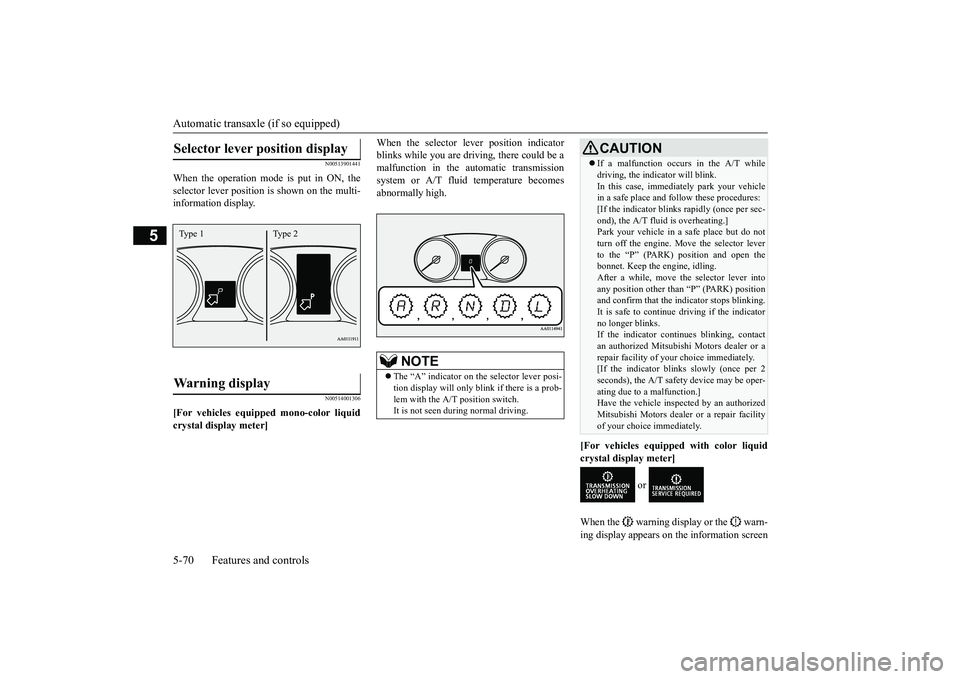
When the operation mode is put in ON, theselector lever position
is shown on the multi-
information display.
N00514001306
[For vehicles equipped mono-color liquidcrystal display meter]
When the selector le
ver position indicator
blinks while you are driv
ing, there could be a
malfunction in the automatic transmissionsystem or A/T fluid temperature becomesabnormally high.
[For vehicles equipped with color liquidcrystal display meter]
or
When the warning display or the warn-ing display appears on the information screen
Selector lever position display
Warning display
Type 1 Type 2
NOTE
The “A” indicator on the selector lever posi-tion display will only blink if there is a prob-lem with the A/T position switch.It is not seen during normal driving.
CAUTIONIf a malfunction occurs in the A/T whiledriving, the indicator will blink.In this case, immediat
ely park your vehicle
in a safe place and fo
llow these procedures:
[If the indicator blinks
rapidly (once per sec-
ond), the A/T fluid is overheating.]Park your vehicle in a safe place but do notturn off the engine. M
ove the selector lever
to the “P” (PARK) position and open thebonnet. Keep the engine, idling.After a while, move the selector lever intoany position other than “P” (PARK) positionand confirm that the i
ndicator stops blinking.
It is safe to continue driving if the indicatorno longer blinks.If the indicator contin
ues blinking, contact
an authorized Mitsubish
i Motors dealer or a
repair facility of your
choice i
mmediately.
[If the indicator blinks slowly (once per 2seconds), the A/T safety
device may be oper-
ating due to a malfunction.]Have the vehicle inspected by an authorizedMitsubishi Motors dealer
or a repair facility
of your choice immediately.
BK0249100US.book 70 ページ 2017年5月10日 水曜日 午前8時49分
Page 158 of 441
Continuously variable transmission (CVT) (if so equipped)
Features and controls 5-77
5
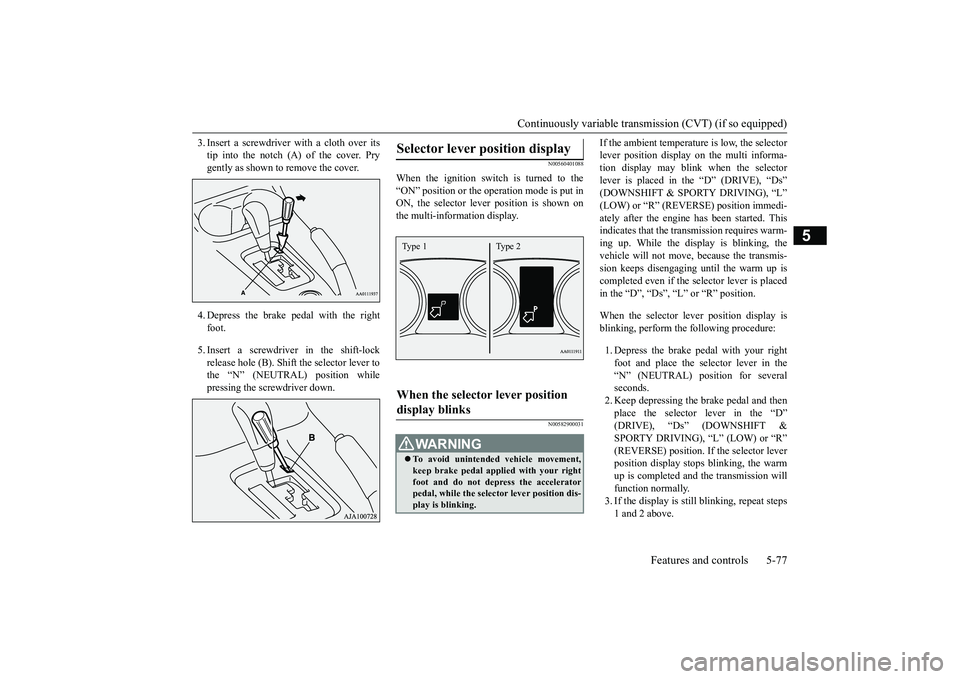
3. Insert a screwdrive
r with a cloth over its
tip into the notch (A) of the cover. Prygently as shown to remove the cover.4. Depress the brake pe
dal with the right
foot.5. Insert a screwdriver in the shift-lockrelease hole (B). Shift the selector lever tothe “N” (NEUTRAL) position whilepressing the screwdriver down.
N00560401088
When the ignition switch is turned to the“ON” position or the ope
ration mode is put in
ON, the selector leve
r position is shown on
the multi-information display.
N00582900031
If the ambient temperature is low, the selectorlever position display on the multi informa-tion display may blink when the selectorlever is placed in the “D” (DRIVE), “Ds”ately after the engine has been started. Thisindicates that the tran
smission requires warm-
ing up. While the display is blinking, thevehicle will not move,
because the transmis-
sion keeps disengaging until the warm up iscompleted even if the selector lever is placedin the “D”, “Ds”, “L” or “R” position.When the selector le
ver position display is
blinking, perform th
e following procedure:
1. Depress the brake pedal with your rightfoot and place the se
lector lever in the
“N” (NEUTRAL) position for severalseconds.2. Keep depressing the brake pedal and thenplace the selector lever in the “D”SPORTY DRIVING), “L” (LOW) or “R”(REVERSE) position. If the selector leverposition display stops
blinking, the warm
up is completed and the transmission willfunction normally.3. If the display is still
blinking, repeat steps
1 and 2 above.
Selector lever position display
When the selector lever position display blinks
WA R N I N GTo avoid unintended
vehicle movement,
keep brake pedal applied with your rightfoot and do not depress the acceleratorpedal, while the selector lever position dis-play is blinking.Type 1 Type 2
BK0249100US.book 77 ページ 2017年5月10日 水曜日 午前8時49分