2018 MITSUBISHI OUTLANDER III tow
[x] Cancel search: towPage 292 of 441

Combination headlights and dimmer switch
Features and controls 5-211
5
light in the instrument
cluster i
ndicates when
the headlights are on high beam.
N00550001209
You can flash the high beams by pulling thelever gently toward you (2). The lights willgo back to normal when you let go. While thehigh beam is on, you will see a blue light onthe instrument panel.
N00591300028
The automatic high beam
system turns the
high beam light on or
off automatically
according to surrounding light conditions.The sensor (A) detects lights, such as thelights of an oncoming
vehicle, a vehicle
ahead or street lights.
N00593600038
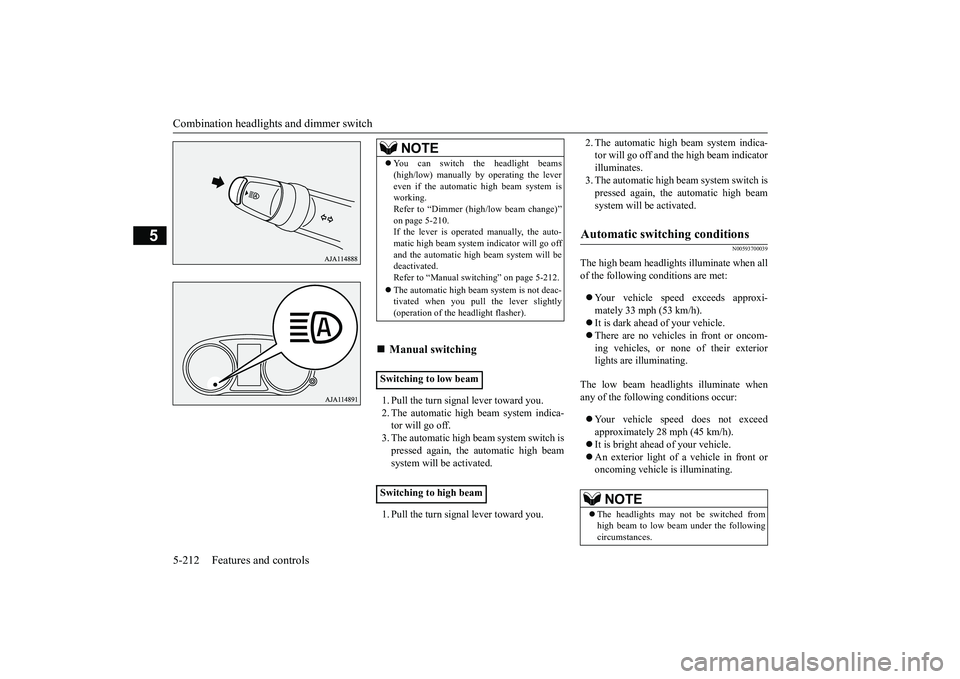
1. Rotate the light switch to “ ” positionor “AUTO” position when the engine isrunning.2. Press the automatic high beam systemswitch.The automatic high beam system is acti-vated and the indicator is illuminated.If the automatic high beam system switchis pressed again, the automatic high beamsystem will be deac
tivated and automatic
high beam system indicator will go off.
Headlight flasher
NOTE
You can flash the high beams by pulling thelever toward you, even if the light switch isoff.
If you turn the lights off with the head lightsset to high-beam illumin
ation, the headlights
are automatically returned to their low-beamsetting when the light
switch is next turned
to the “ ” position.
Automatic high beam system
(if
so equipped)
NOTE
WA R N I N GDo not rely solely on the Automatic HighBeam. Always observe surrounding trafficand light conditions. If necessary, manu-ally turn the high beams on or off.Refer to “Dimmer (high/low beamchange)” on page 5-210.
How to use the automatic high beam system
NOTE
If the headlights are on when the light switchis in the “AUTO” position, the automatichigh beam system works.
BK0249100US.book 211 ページ 2017年5月10日 水曜日 午前8時49分
Page 293 of 441
Combination headlights and dimmer switch5-212 Features and controls
5
1. Pull the turn signal lever toward you.2. The automatic high beam system indica-tor will go off.3. The automatic high beam system switch ispressed again, the
automatic high beam
system will be activated.1. Pull the turn signal lever toward you.
2. The automatic high beam system indica-tor will go off and the high beam indicatorilluminates.3. The automatic high beam system switch ispressed again, the
automatic high beam
system will be activated.
N00593700039
The high beam headlight
s illuminate when all
of the following conditions are met:Your vehicle speed exceeds approxi-mately 33 mph (53 km/h).It is dark ahead of your vehicle.There are no vehicles in front or oncom-ing vehicles, or none of their exteriorlights are illuminating.
The low beam headlights illuminate whenany of the following conditions occur:Your vehicle speed does not exceedapproximately 28 mph (45 km/h).It is bright ahead of your vehicle.An exterior light of a vehicle in front oroncoming vehicle
is illuminating.
NOTE
You can switch the headlight beams(high/low) manually by operating the levereven if the automatic high beam system isworking.Refer to “Dimmer (hi
gh/low beam change)”
on page 5-210.If the lever is operated manually, the auto-matic high beam system
indicator will go off
and the automatic high beam system will bedeactivated.Refer to “Manual switching” on page 5-212.The automatic high beam
system is not deac-
tivated when you pull the lever slightly(operation of the headlight flasher).
Manual switching
Switching to low beamSwitching to high beam
Automatic switching conditions
NOTE
The headlights may not be switched fromhigh beam to low beam under the followingcircumstances.
BK0249100US.book 212 ページ 2017年5月10日 水曜日 午前8時49分
Page 294 of 441

Combination headlights and dimmer switch
Features and controls 5-213
5
The sensitivity of the sensor can be temporar-ily lowering in the following ways.1. Park your vehicle in
a safe place and the
ignition switch is turned to the “OFF” or“LOCK” position or the operation modeis put in OFF.2. Press the automatic high beam systemswitch more than 15 times within 5 sec-onds after operation mode is turned on.
• A vehicle in front
or oncoming vehicle is
hindered by any object such as continuousbends, elevated median
/island, traffic signs,
roadside trees.• Your vehicle passes
an oncoming vehicle
suddenly on a bend with poor visibility.• Another vehicle crosse
s ahead of your vehi-
cle.
The headlights may remain at low beam (orbe switched from high beam to low beam)when a reflective object (e.g. street light,traffic signal, notic
eboard and signboard)
reflects light. Any of the following
factors may influence
the headlight beam switching timing:• How brightly the exteri
or lights of a vehicle
in front or oncoming
vehicle il
luminate.
• Movement or direction of a vehicle in frontor oncoming vehicle.• Only right or left exte
rior light of a vehicle
in front or oncoming
vehicle is illuminat-
ing.• A vehicle in front or
oncoming vehicle is a
motorcycle.• Road conditions (gradient, bends and roadsurface).• The number of occupants and luggage load.The automatic high beam system recognisesenvironmental conditi
ons by sensing a light
source ahead of your vehicle. Therefore, youmay feel like someth
ing is not quite right
when the headlight beams are switched auto-matically.NOTE
The system may not de
tect a light vehicle
such as a bicycle.The system may not detect an ambientbrightness precisely. Th
is causes the traffic
to be dazzled by high beam or the low beamto be maintained. In such cases, you shouldswitch the headlight beams manually.• In bad weather (heavy rain, fog, snow orsandstorm).• The windshield is
dirty or fogged up.
• The windshield is cracked or broken.• The sensor is deformed or dirty.• A light, which is similar to the headlights ortail lights, is shin
ing around your vehicle.
• A vehicle in front
or oncoming vehicle is
driven without lights,
the exterior lights are
dirty or discoloured, or the direction of theheadlight beams is adjusted improperly. • It becomes dark and bright suddenly andcontinuously around your vehicle.• Your vehicle is driv
en on uneven surfaces.
• Your vehicle is driven on a winding road.• A reflective object su
ch as a noticeboard or
a mirror reflects a light ahead of your vehi-cle.• When lights of the vehi
cle in front or head-
lights of an oncoming ve
hicle blend into the
other lights.• The rear end of a vehicle in front (such as acontainer truck) re
flect a strong light.
• Your vehicle's headligh
t is broken or dirty.
NOTE
• Your vehicle is inclined
due to a flat tire or
towing.• The warning display appears.(Refer to “System problem warning” onpage 5-214.)good usage conditions: • Do not attempt to disassemble the sensor.• Do not affix a sticke
r or label on the wind-
shield near the sensor.• Avoid overload.• Do not modify your vehicle.• When the windshield is
replaced, use the
Mitsubishi Motors genuine parts.
To adjust the sensitivity of the sensor
NOTE
BK0249100US.book 213 ページ 2017年5月10日 水曜日 午前8時49分
Page 297 of 441
Headlight leveling swit
ch (if so equipped)
5-216 Features and controls
5
3. Within 60 seconds of turning the ignitionswitch to the “OFF” or “LOCK” positionor putting the operation mode in OFF, pullthe turn signal lever toward you.4. The headlights will come on in the lowbeam setting for approximately 30 sec-onds. After the headlights go off, theheadlights can be turned on again in thelow beam setting for approximately 30seconds by pulling the turn signal levertoward you within 60 seconds of turningthe ignition switch to the “OFF” or“LOCK” position or putting the operationmode in OFF. To turn on the headlightsagain after 60 seconds of turning the igni-tion switch to the “OFF” or “LOCK”position or putting th
e operation mode in
OFF, repeat the process from step 1.
N00537101115
The direction of the headlight beam (thedirection in which th
e light shines) alters
according to the number of people and theload in the vehicle. Lo
wer the headlight angle
if it is too high due to the number of people
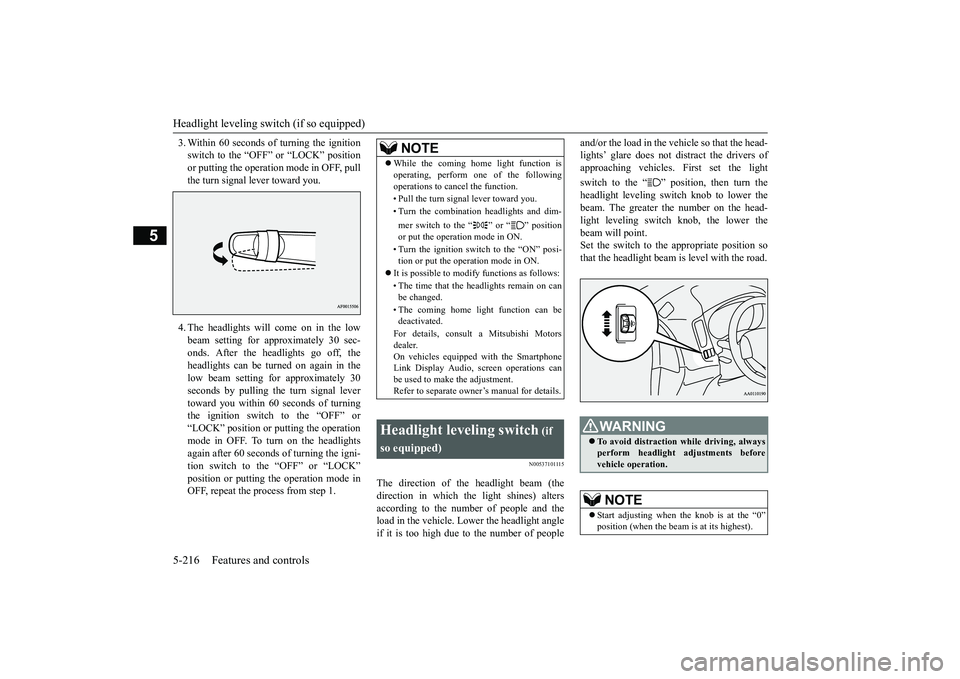
and/or the load in the vehicle so that the head-lights’ glare does not distract the drivers ofapproaching vehicles. First set the lightswitch to the “ ” position, then turn theheadlight leveling switch knob to lower thebeam. The greater the number on the head-light leveling switch knob, the lower thebeam will point.Set the switch to the appropriate position sothat the headlight beam is level with the road.
NOTE
While the coming home light function isoperating, perform one of the followingoperations to canc
el the function.
• Pull the turn signal lever toward you.• Turn the combination headlights and dim-mer switch to the “ ” or “ ” positionor put the operation mode in ON.• Turn the ignition switch to the “ON” posi-tion or put the opera
tion mode in ON.
It is possible to modify functions as follows:• The time that the headlights remain on canbe changed.• The coming home light function can bedeactivated.For details, consult a Mitsubishi Motorsdealer.On vehicles equipped with the SmartphoneLink Display Audio, sc
reen operations can
be used to make the adjustment.Refer to separate owne
r’s manual for details.
Headlight leveling switch
(if
so equipped)
WA R N I N GTo avoid distraction wh
ile driving, always
perform headlight adjustments beforevehicle operation.NOTE
Start adjusting when the knob is at the “0”
is at its highest).
BK0249100US.book 216 ページ 2017年5月10日 水曜日 午前8時49分
Page 304 of 441
Wiper and washer switch
Features and controls 5-223
5
N00504601400
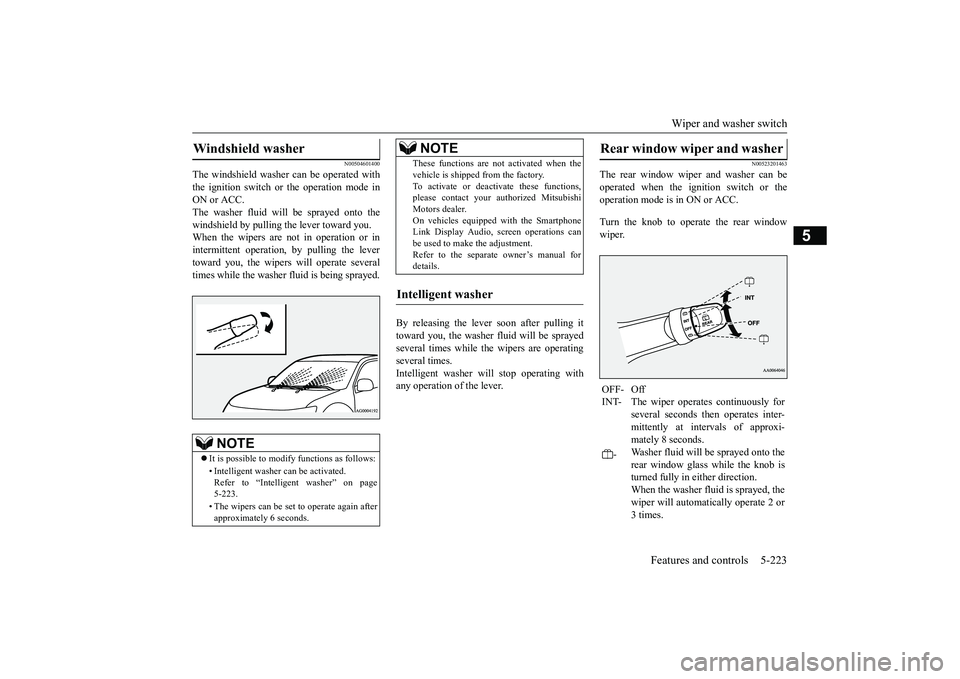
The windshield washer can be operated withthe ignition switch or the operation mode inON or ACC.The washer fluid will be sprayed onto thewindshield by pulling th
e lever toward you.
When the wipers are not in operation or inintermittent operation,
by pulling the lever
toward you, the wipers will operate severaltimes while the washer fluid is being sprayed.
By releasing the lever soon after pulling ittoward you, the washer
fluid will be sprayed
several times while the wipers are operatingseveral times.Intelligent washer will stop operating withany operation of the lever.
N00523201463
The rear window wiper and washer can beoperated when the ignition switch or theoperation mode is in ON or ACC.Turn the knob to operate the rear windowwiper.
Windshield washer
NOTE
It is possible to modify functions as follows:• Intelligent washer
can be activated.
Refer to “Intelligent washer” on page5-223.• The wipers can be set
to operate again after
approximately 6 seconds.
These functions are not activated when thevehicle is shipped from the factory.To activate or deacti
vate these functions,
please contact your authorized MitsubishiMotors dealer.On vehicles equippe
d with the Smartphone
Link Display Audio, sc
reen operations can
be used to make the adjustment.Refer to the separate
owner’s manual for
details.
Intelligent washer
NOTE
Rear window wiper and washer OFF- OffINT- The wiper operates continuously for
several seconds then operates inter-mittently at intervals of approxi-mately 8 seconds.
-
Washer fluid will be sprayed onto therear window glass while the knob isturned fully in either direction.When the washer fluid is sprayed, thewiper will automatically operate 2 or3 times.
BK0249100US.book 223 ページ 2017年5月10日 水曜日 午前8時49分
Page 325 of 441
Cargo area cover (if so equipped)5-244 Features and controls
5
N00528301179
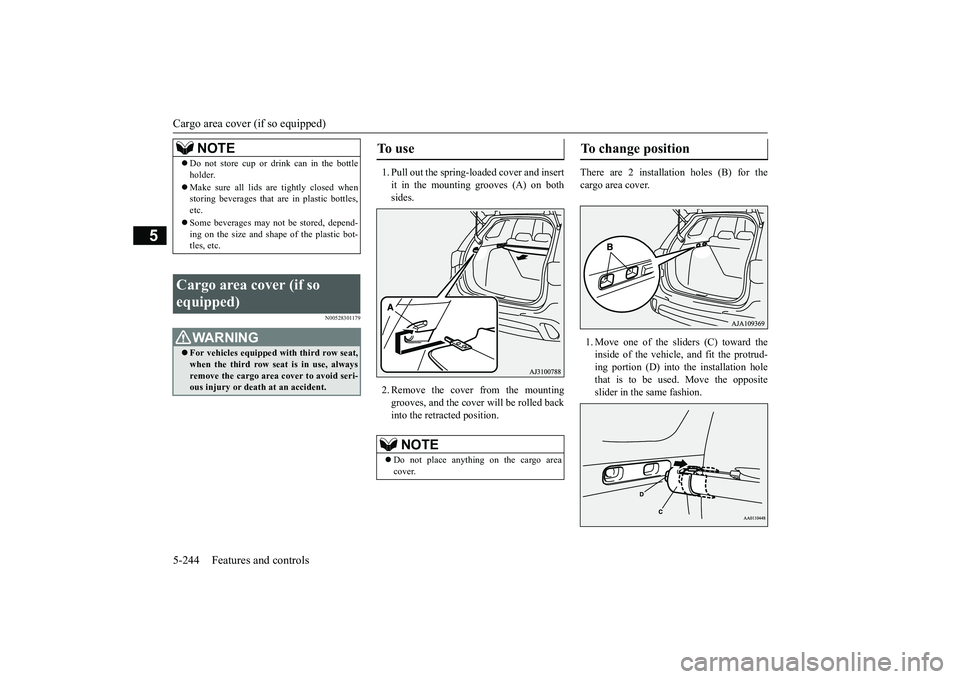
1. Pull out the spring-loaded cover and insertit in the mounting grooves (A) on bothsides.2. Remove the cover from the mountinggrooves, and the cover
will be rolled back
into the retracted position.
There are 2 installation holes (B) for thecargo area cover.1. Move one of the sliders (C) toward theinside of the vehicle, and fit the protrud-ing portion (D) into the installation holethat is to be used. Move the oppositeslider in the same fashion.
NOTE
Do not store cup or drink can in the bottleholder.Make sure all lids are tightly closed whenstoring beverages that
are in plastic bottles,
etc.Some beverages may not
be stored, depend-
ing on the size and shape of the plastic bot-tles, etc.
Cargo area cover (if so equipped)
WA R N I N GFor vehicles equipped with third row seat,when the third row seat
is in use, always
remove the cargo area
cover to avoid seri-
ous injury or deat
h at an accident.
To u s e
NOTE
Do not place anything on the cargo areacover.
To change position
BK0249100US.book 244 ページ 2017年5月10日 水曜日 午前8時49分
Page 326 of 441
Cargo area cover (if so equipped)
Features and controls 5-245
5
2. After changing the position, gently shakethe entire cargo area cover to make sure itis securely retained.
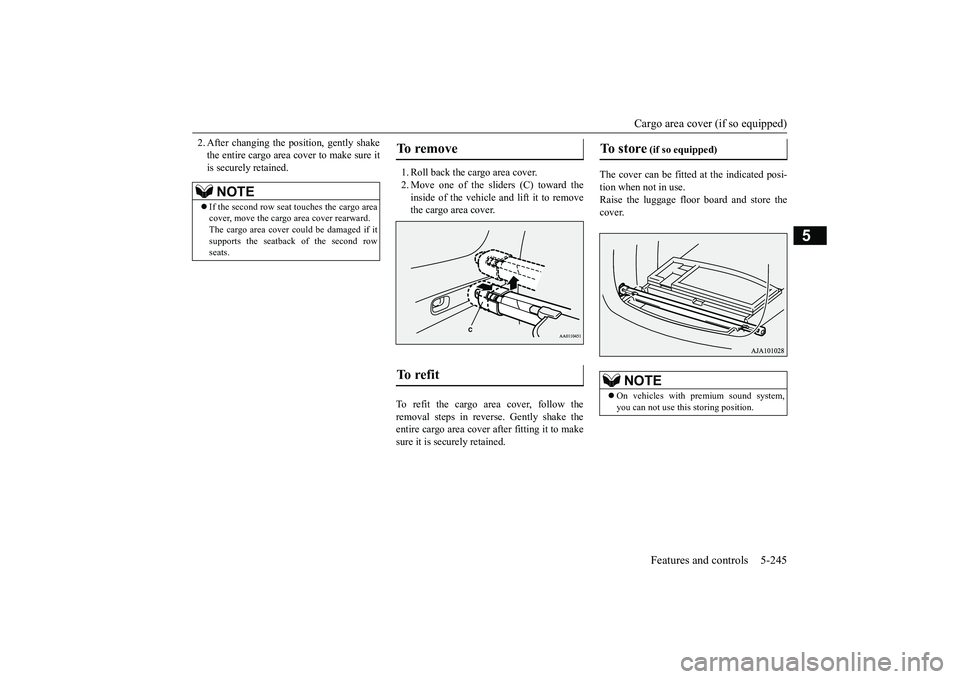
1. Roll back the cargo area cover.2. Move one of the sliders (C) toward theinside of the vehicle
and lift it to remove
the cargo area cover.
To refit the cargo area cover, follow theremoval steps in reverse. Gently shake theentire cargo area cover after fitting it to makesure it is securely retained.
The cover can be fitted at the indicated posi-tion when not in use.Raise the luggage floor
board and store the
cover.
NOTE
If the second row seat touches the cargo areacover, move the cargo area cover rearward.The cargo area cover c
ould be damaged if it
supports the seatback of the second rowseats.
To remove To r e f i t
To store
(if so equipped)
NOTE
On vehicles with premium sound system,you can not use this storing position.
BK0249100US.book 245 ページ 2017年5月10日 水曜日 午前8時49分
Page 330 of 441
6
Driving safetyDriving precaution ...........................................................................6-2Fuel economy .......
...........
...........
............
...........
.........
........
.........
.....6-2
Driving, alcohol and drugs ..
...........
...........
...........
...........
...........
.....6-2
Floor mat ..........................................................................................6-3Vehicle preparation before driving ..................................................6-4Safe driving techniques ....................................................................6-4Driving during cold weather ............................................................6-5Braking ............................................................................................6-5Parking .............................................................................................6-6Loading information ........................................................................6-6Cargo loads ....................................................................................6-10Trailer towing ................................................................................ 6-11
BK0249100US.book 1 ページ 2017年5月10日 水曜日 午前8時49分