2018 MITSUBISHI OUTLANDER III turn signal
[x] Cancel search: turn signalPage 97 of 441

Free-hand Advanced
Security Transmitter (F.A.S
.T.-key) (if so equipped)
5
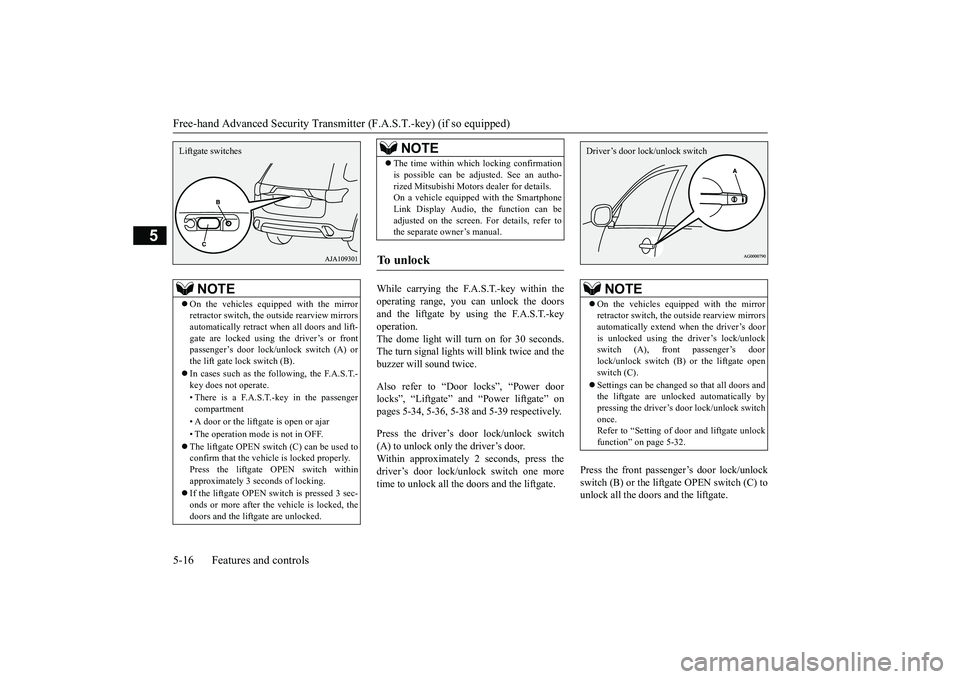
While carrying the F.A.S.T.-key within theoperating range, you can unlock the doorsand the liftgate by using the F.A.S.T.-keyoperation.The dome light will turn on for 30 seconds.The turn signal lights will blink twice and thebuzzer will
sound twice.
Also refer to “Door locks”, “Power doorlocks”, “Liftgate” and “Power liftgate” onpages 5-34, 5-36, 5-38 and 5-39 respectively.Press the driver’s door lock/unlock switch(A) to unlock only the driver’s door.Within approximately 2 seconds, press thedriver’s door lock/unlock switch one moretime to unlock all the
doors and the liftgate.
Press the front passenger’s door lock/unlockswitch (B) or the liftgate OPEN switch (C) tounlock all the doors and the liftgate.
NOTE
On the vehicles equipped with the mirrorretractor switch, the out
side rearview mirrors
automatically retract when all doors and lift-gate are locked using the driver’s or frontpassenger
Page 98 of 441

Free-hand Advanced Securi
ty Transmitter (F.A.S.T.-key) (if so equipped)
Features and controls 5-17
5
N00585700056
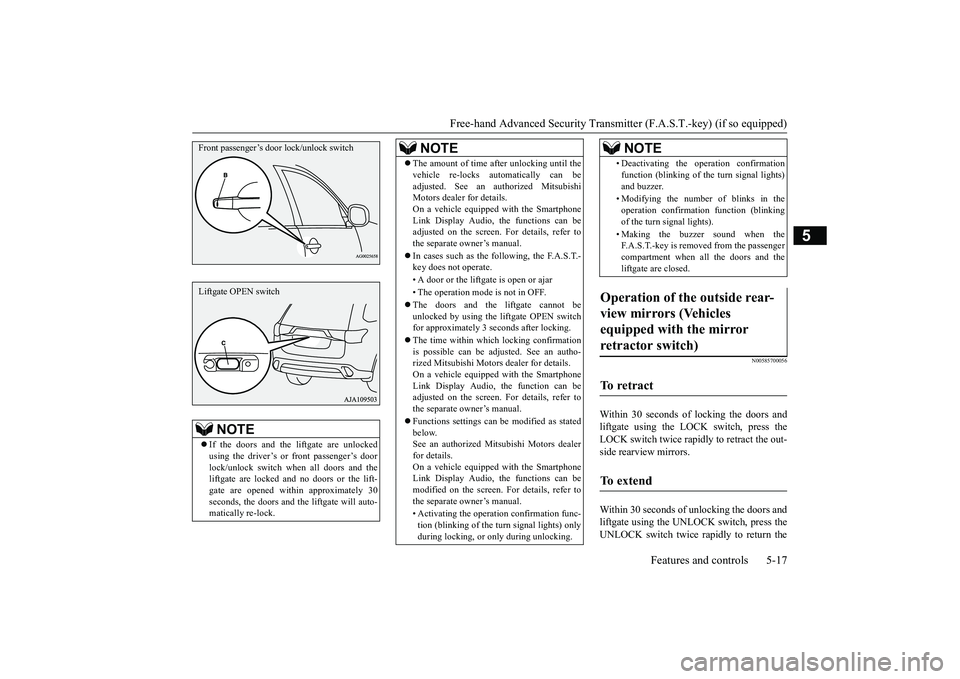
Within 30 seconds of locking the doors andliftgate using the LOCK switch, press theLOCK switch twice rapidly to retract the out-side rearview mirrors.Within 30 seconds of unlocking the doors andliftgate using the UNLOCK switch, press theUNLOCK switch twice rapidly to return the
NOTE
If the doors and the liftgate are unlockedusing the driver’s or front passenger’s doorlock/unlock switch when all doors and theliftgate are locked and no doors or the lift-gate are opened with
in approximately 30
seconds, the doors and th
e liftgate will auto-
matically re-lock.Front passenger’s door lock/unlock switchLiftgate OPEN switch
The amount of time af
ter unlocking until the
vehicle re-locks au
tomatically can be
adjusted. See an authorized MitsubishiMotors dealer for details.On a vehicle equipped with the SmartphoneLink Display Audio, the functions can beadjusted on the screen. For details, refer tothe separate owner’s manual.In cases such as the following, the F.A.S.T.-key does not operate.• A door or the liftgate is open or ajar• The operation mode
is not in OFF.
The doors and the liftgate cannot beunlocked by using the li
ftgate OPEN switch
for approximately 3 seconds after locking.The time within which locking confirmationis possible can be adjusted. See an autho-rized Mitsubishi Motors
dealer for details.
On a vehicle equipped with the SmartphoneLink Display Audio, the function can beadjusted on the screen. For details, refer tothe separate owner’s manual.Functions settings can
be modified as stated
below.See an authorized Mitsubishi Motors dealerfor details.On a vehicle equipped with the SmartphoneLink Display Audio, the functions can bemodified on the screen. For details, refer tothe separate owner’s manual.• Activating the operati
on confirmation func-
tion (blinking of the turn signal lights) onlyduring locking, or only during unlocking.NOTE
• Deactivating the operation confirmationfunction (blinking of th
e turn signal lights)
and buzzer.• Modifying the number of blinks in theoperation confirmati
on function (blinking
of the turn signal lights).• Making the buzzer sound when theF.A.S.T.-key is removed from the passengercompartment when all the doors and theliftgate are closed.
Operation of the outside rear-view mirrors (Vehicles equipped with the mirror retractor switch)
To r e t r a c t
To e x t e n d
NOTE
BK0249100US.book 17 ページ 2017年5月10日 水曜日 午前8時49分
Page 111 of 441

Free-hand Advanced
Security Transmitter (F.A.S
.T.-key) (if so equipped)
5
7. Release in sequence the LOCK andUNLOCK buttons within 10 seconds ofpressing the LOCK button in step 6. Theimmobilizer display on the informationscreen in the multi-information displaywill blink.When registration of ID
code is complete,
the buzzer will sound 3 times and theimmobilizer display will come on for 30seconds.If an error occurs, F.A.S.T.-key program-ming will be terminated and the buzzerwill sound for 3 seconds.8. If you wish to register another F.A.S.T.-key, repeat the process from step 1 afterthe operation mode is put in OFF.9. When all F.A.S.T.-keys are registered,remove the F.A.S.T.-key from the keyslot.
N00515501281
Press the remote control transmitter buttonsto lock or unlock the doors and the liftgate.It can also help you
signal for attention by
setting off the panic alarm.
Press the LOCK button (1) to lock all thedoors and the liftgate.The turn signal lights will also blink once.
NOTE
F.A.S.T.-key programming will be termi-nated if the operation
mode is put in OFF
before the immobilizer
display starts blink-
ing.
NOTE
The immobilizer displa
y will go off immedi-
ately if the operation mode is put in OFF.Perform the operation when the interrupt dis-play screen is not show
ing. The interrupt dis-
play screen may prevent you from seeing theimmobilizer display.It is not possible to re
gister a F.A.S.T.-key if
the immobilizer displa
y goes off during the
procedure.
Keyless entry system
1-
LOCK ( ) button
2-
UNLOCK ( ) button
3- Power liftgate but
ton (if so equipped)
4- PANIC button5- Operation indicator light
NOTE
On vehicles equipped wi
th the mirror retrac-
tor switch, the outside rearview mirrors auto-matically retr
act or extend when the doors
and the liftgate are locked or unlocked usingthe remote control transmitter buttons.Refer to “Features a
nd controls: Outside
rearview mirrors” on page 5-60.
To l o c k
NOTE
On vehicles equipped wi
th the mirror retrac-
tor switch, the outside rearview mirrors auto-matically retract when the LOCK button (1)is pressed.If you press the LOCK button (1) twice, thehorn will sound once.
BK0249100US.book 30 ページ 2017年5月10日 水曜日 午前8時49分
Page 112 of 441

Free-hand Advanced Securi
ty Transmitter (F.A.S.T.-key) (if so equipped)
Features and controls 5-31
5
Press the UNLOCK button (2) to unlock thedriver’s door only.Within approximately 2 seconds, press theUNLOCK button one more time to unlock allthe doors and liftgate.The dome light will turn on for 30 seconds.The turn signal lights will also blink twice.The front side-marker
and parking lights will
also turn on for appr
oximately 30 seconds.
Refer to “Welcome light” on page 5-215.
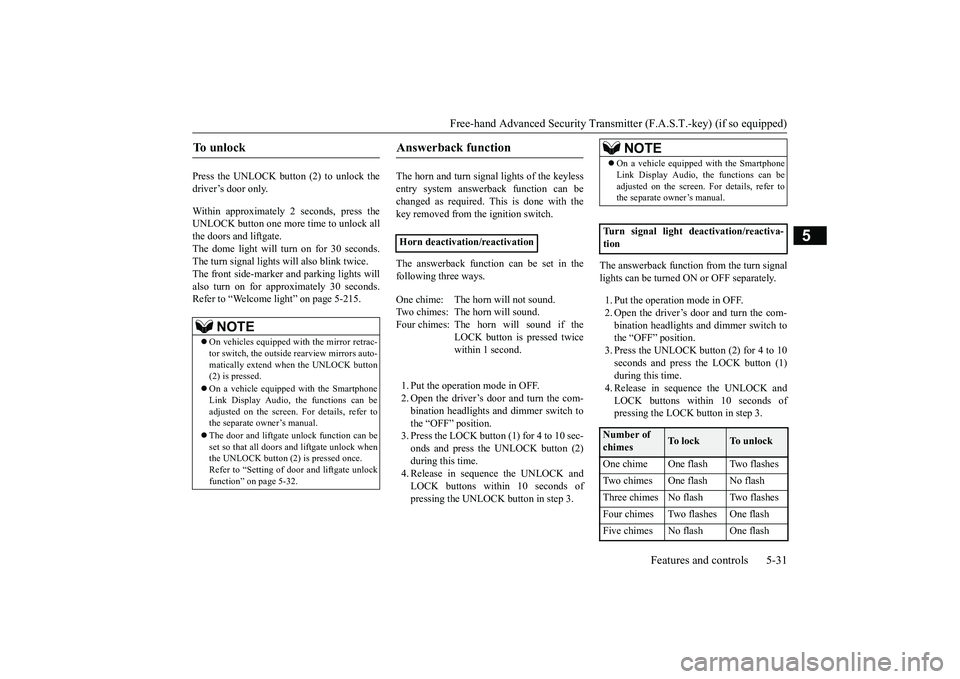
The horn and turn signal lights of the keylessentry system answerback function can bechanged as required. This is done with thekey removed from the ignition switch.The answerback function can be set in thefollowing three ways.1. Put the operation mode in OFF.2. Open the driver’s door and turn the com-bination headlights a
nd dimmer switch to
the “OFF” position.3. Press the LOCK button (1) for 4 to 10 sec-onds and press the UNLOCK button (2)during this time.4. Release in sequence the UNLOCK andLOCK buttons within 10 seconds ofpressing the UNLOCK button in step 3.
The answerback function from the turn signallights can be turned ON or OFF separately.1. Put the operation mode in OFF.2. Open the driver’s door and turn the com-bination headlights and dimmer switch tothe “OFF” position.3. Press the UNLOCK button (2) for 4 to 10seconds and press the LOCK button (1)during this time.4. Release in sequence the UNLOCK andLOCK buttons within 10 seconds ofpressing the LOCK button in step 3.
To u n l o c k
NOTE
On vehicles equipped wi
th the mirror retrac-
tor switch, the outside rearview mirrors auto-matically extend when
the UNLOCK button
(2) is pressed.On a vehicle equipped with the SmartphoneLink Display Audio, the functions can beadjusted on the screen. For details, refer tothe separate owner’s manual.The door and liftgate unlock function can beset so that all doors and liftgate unlock whenthe UNLOCK button (2) is pressed once.Refer to “Setting of door
and liftgate unlock
function” on page 5-32.
Answerback function
Horn deactivation/reactivationOne chime: The horn will not sound.Two chimes: The horn will sound.Four chimes: The horn will sound if the
LOCK button is pressed twicewithin 1 second.
NOTE
On a vehicle equipped with the SmartphoneLink Display Audio, the functions can beadjusted on the screen. For details, refer tothe separate owner’s manual.
Turn signal light deactivation/reactiva-tionNumber of chimes
To l o c k
To u n l o c k
One chime One flash Two flashesTwo chimes One flash No flashThree chimes No flash Two flashesFour chimes Two flashes One flashFive chimes No flash One flash
BK0249100US.book 31 ページ 2017年5月10日 水曜日 午前8時49分
Page 207 of 441

Blind Spot Warning (BSW) (with Lane Change Assist) (if so equipped)
5-126 Features and controls
5
N00592200040
The Blind Spot Warning (BSW) is a driving
aid system that alerts the driver when another
vehicle which may not be visible through the
outside rearview mirror is traveling in the
next lane behind your vehicle.
When a vehicle in the next lane is traveling at
same speed or faster in the detection areas,
the Blind Spot Warning light in the corre-
sponding outside rearview mirror will illumi-
nate. If the turn signal lever is operated to the
side where the Blind Spot Warning light is
illuminated, the Blind Spot Warning light will
blink and the system will beep three times to
alert the driver.
• Do not put anything including a sticker or
film to the outer side of the windshield in
front of or surrounding area of the sensor.
Also, do not put anything including a
sticker or film to the inner side of the wind-
shield under the sensor.• Do not attempt to deta ch or disassemble the
sensor.• If the windshield is misted, remove the mist from the windshield by using the defogger
switch.• Maintain the wiper blades in good condi- tion. Refer to “Wiper blades” on page 9-44.
When replacing the wiper blades, use only
Mitsubishi Motors Genuine parts or equiva-
lent.• Do not dirty or damage the sensor.• Do not spray glass cleaner on the sensor.Also, do not spill liquid, such as a bever-
age, to the sensor.• Do not install an elec tronic device, such as
antenna, or a device that emits strong elec-
tric waves, near the sensor.CAUTION
• Always use tires of the same size, same
type and same brand, and which have no
significant wear differences.• Do not modify the vehicle’s suspensions. If the windshield on the sensor or in the sur-
rounding area of the sensor is cracked or
scratched, the sensor may not detect an
object properly. This could cause a serious
accident. Turn off the FCM and have your
vehicle inspected as soon as possible at an
authorized Mitsubishi Motors dealer.
If you need to replace the windshield, con-
tact an authorized Mitsubishi Motors dealer. The sensor emits infrared rays when the
operation mode is in ON. Do not look into
the sensor by using optical goods such as a
magnifying glass. The infrared ray might
injure your eyes.Laser radar specifications
Laser classificationMax average power 45 mWPulse duration 33 nsWavelength905 nmDivergent angle
(horizon x vertical)28° x 12°
CAUTION
Laser classification labelBlind Spot Warning (BSW)
(with Lane Change Assist)
(if
so equipped)
BK0249100US.book 126 ページ 2017年5月10日 水曜日 午前8時49分
Page 210 of 441

Blind Spot Warning (BSW) (with Lane Change Assist) (if so equipped)
Features and controls 5-129
5
When the BSW indicator light in the instru-ment cluster is on, if a vehicle is approachingyour vehicle in the dete
ction area, the Blind
Spot Warning light in the outside rearviewmirror illuminates.If the turn signal lever is operated to the sidewhere the Blind Spot Warning light is illumi-nated, the Blind Spot Warning light will blinkand the system will beep three times to alertthe driver.
N00592400039
If a problem occurs with the system, a visualwarning specific to the type of the problem isgiven together with an audible alarm.The warnings are combined with the RearCross Traffic Alert (RCTA) system.
NOTE
When the operation mode is set to OFF, theselected condition just
before setting to OFF
is retained.The BSW operates when all of the followingconditions are met.• The operation mode is put in ON.• The selector lever is
in positions other than
“P” (PARK) and “R” (REVERSE).• The speed of your vehi
cle is approximately
6 mph (10km/h) or higher.
When the sensor detects an approaching vehicle
NOTE
The Blind Spot Warni
ng light in the outside
rearview mirror may come
on or blink in the
following conditions.• When driving very near the guardrail or theconcrete wall.
• When driving on the entrance and outlet ofthe tunnel or very near
the wall or near the
evacuation area inside the tunnel.• When turning a intersection in a town area.• Under adverse
weather condi
tions (rain,
snow, sand storms etc.).• When the your vehicle
drives with blowing
up the water, snow or sand etc. on the road.• When driving near a curb, pot hole andtramline.
Set the BSW to OFF when towing.The Blind Spot Warning light in the outsiderearview mirror may
not look due to strong
direct sunlight or th
e glare from the head-
lamps of vehicles
behind you during night
driving.
System problem warning
NOTE
BK0249100US.book 129 ページ 2017年5月10日 水曜日 午前8時49分
Page 216 of 441

Lane Departure Warning System (LDW) (if so equipped)
Features and controls 5-135
5
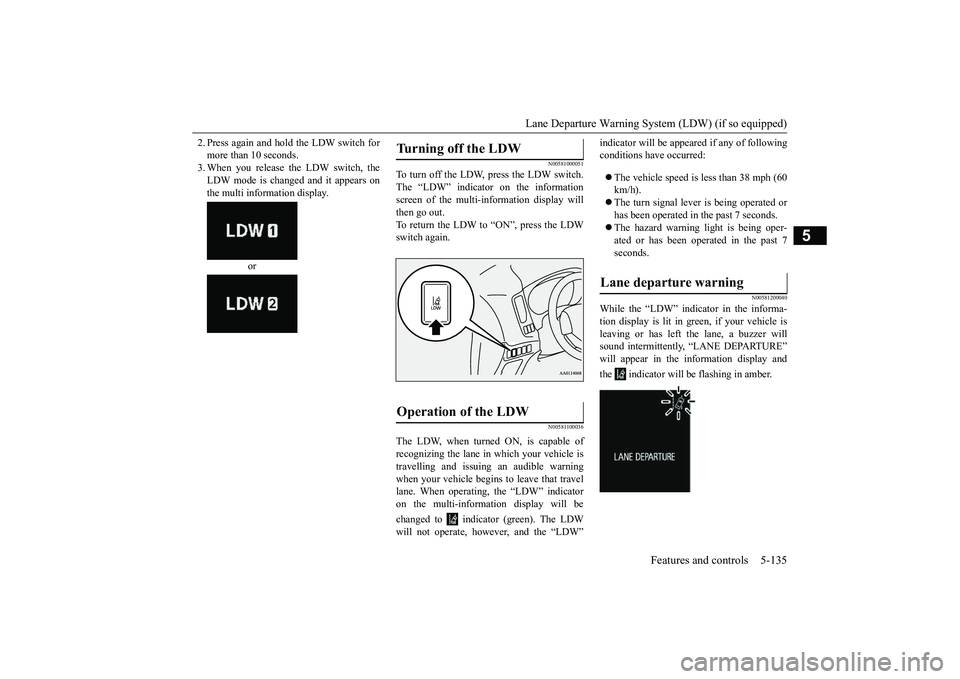
2. Press again and hold the LDW switch formore than 10 seconds.3. When you release the LDW switch, theLDW mode is changed and it appears onthe multi information display. or
N00581000051
To turn off the LDW, press the LDW switch.The “LDW” indicator on the informationscreen of the multi-information display willthen go out.To return the LDW to “ON”, press the LDWswitch again.
N00581100036
The LDW, when turned ON, is capable ofrecognizing the lane in which your vehicle istravelling and issuing an audible warningwhen your vehicle begins to leave that travellane. When operating, the “LDW” indicatoron the multi-information display will bechanged to indicator (green). The LDWwill not operate, how
ever, and the “LDW”
conditions have occurred:The vehicle speed is less than 38 mph (60km/h).The turn signal lever is being operated orhas been operated in the past 7 seconds.The hazard warning light is being oper-ated or has been operated in the past 7seconds.
N00581200040
While the “LDW” indicator in the informa-tion display is lit in gr
een, if your vehicle is
leaving or has left the lane, a buzzer willsound intermittently, “LANE DEPARTURE”will appear in the information display andthe indicator will be flashing in amber.
Turning off the LDW
Operation of the LDW
Lane departure warning
BK0249100US.book 135 ページ 2017年5月10日 水曜日 午前8時49分
Page 220 of 441

Tire pressure monitoring system
Features and controls 5-139
5
Each tire, including the spare (if provided),should be checked monthly when cold andinflated to the inflation pressure recom-mended by the vehicle manufacturer on thevehicle placard or tire
inflation pressure label.
(If your vehicle has tires of a different sizethan the size indicated on the vehicle placardor tire inflation pressure label, you shoulddetermine the proper ti
re inflation pressure
for those tires.)As an added safety feat
ure, your vehicle has
been equipped with a tire pressure monitoringsystem (TPMS) that illuminates a low tirepressure telltale when
one or more of your
tires is significantly under-inflated.Accordingly, when the low tire pressure tell-tale illuminates, you
should stop and check
your tires as soon as possible, and inflatethem to the proper pressure. Driving on a sig-nificantly under-inflated
tire causes the tire to
overheat and can lead
to tire failure.
Under-inflation also reduces fuel efficiencyand tire tread life, and may affect the vehi-cle’s handling and stoppi
ng ability. Please
note that the TPMS is
not a substitute for
proper tire maintenance, and it is the driver’sresponsibility to
maintain corre
ct tire pres-
sure, even if under-infl
ation has not reached
the level to trigger illumination of the TPMSlow tire pressure telltale.Your vehicle has also
been equipped with a
TPMS malfunction indica
tor to indicate when
the system is not operating properly. TheTPMS malfunction indicator is combinedwith the low tire pressure telltale.When the system detects a malfunction, thetelltale will flash for approximately one min-ute and then remain c
ontinuously illuminated.
This sequence will c
ontinue upon subsequent
vehicle start-ups as long as the malfunctionexists.When the malfunction indicator is illumi-nated, the system may not
be able to detect or
signal low tire pr
essure as intended.
TPMS malfunctions ma
y occur for a variety
of reasons, including the installation ofreplacement or alternate tires or wheels on thevehicle that prevent the TPMS from function-ing properly. Always
check the TPMS mal-
function telltale after
replacing one or more
tires or wheels on your vehicle to ensure thatthe replacement or alternate tires and wheels
CAUTIONIf the tire pressure monitoring system warn-ing light does not illumi
nate when the igni-
tion switch is turned to the “ON” position orthe operation mode is put in ON, it meansthat the tire pressure monitoring system isnot working properly. Have the systeminspected by an authorized MitsubishiMotors dealer.In such situations, a malfunctioning of thesystem may be preventing the monitoring ofthe tire pressure. Avoid sudden braking,sharp turning and high-speed driving.If a malfunction is detected in the tire pres-sure monitoring system, the tire pressuremonitoring system warning light will blinkfor approximately 1 mi
nute and then remain
continuously illuminate
d. The warning light
will issue further warnings each time theengine is restarted as
long as the malfunction
exists.Check to see whether the warning light goesoff after few minutes driving.If it then goes off during driving, there is noproblem.However, if the warning light does not gooff, or if it blinks again when the engine isrestarted, have the
vehicle inspected by an
authorized Mitsubish
i Motors dealer.
In such situations, a malfunctioning of thesystem may be preventing the monitoring ofthe tire pressure. For safety reasons, whenthe warning light appears while driving,avoid sudden braking, sharp turning andhigh-speed driving.
NOTE
In addition, the warni
ng display is displayed
on the information screen in the multi-infor-mation display.
BK0249100US.book 139 ページ 2017年5月10日 水曜日 午前8時49分