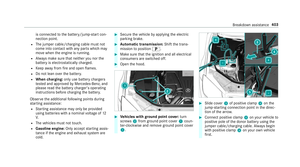
Page 177 of 562

Engagingreve rsege ar R#Depress the brake pedal and push the
DIRECT SELECT le ver up past thefirs t point
of resis tance.
The transmission position displ aysho wsk
in the multifunction displa y.
Shifting toneutral N
#Depress the brake pedal and push the
DIRECT SELECT le ver up or down tothefirs t
point of resis tance.
The transmission position displ aysho wsi
in the multifunction displa y.
Subsequently releasing the brake pedal will
allow youto mo vetheve hicle freel y,e.g. topush
it or tow it away.
If yo uwa ntthe automatic transmission to
re main in neutral N even if the ignition is
switched off:
#St art theve hicle.
#Depress the brake pedal and shift toneutral
i.
#Re lease the brake pedal.
#Switch the ignition off. %
Ifyo uth en exitth eve hicle leaving the
SmartK eyintheve hicle, the automatic trans‐
mission remains in neutral i
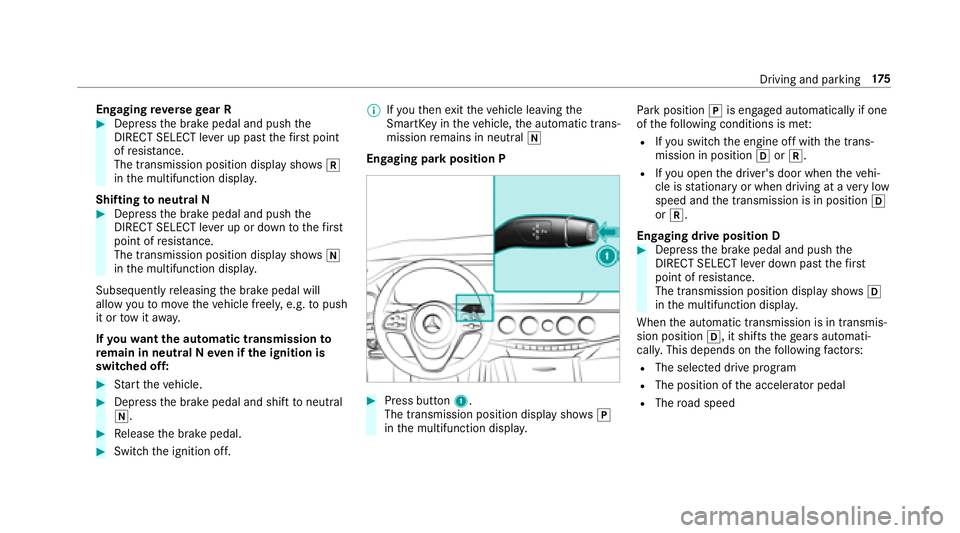
Engaging park position P
#Press button 1.
The transmission position display sho wsj
in the multifunction displa y. Pa
rk position jis engaged automatically if one
of thefo llowing conditions is me t:
RIfyo u switch the engine off with the trans‐
mission in position hork.
RIfyo u open the driver's door when theve hi‐
cle is stationary or when driving at a very low
speed and the transmission is in position h
or k.
Engaging drive position D
#Depress the brake pedal and push the
DIRECT SELECT le ver down past thefirs t
point of resis tance.
The transmission position displ aysho wsh
in the multifunction displa y.
When the automatic transmission is in transmis‐
sion position h, it shiftsthege ars automati‐
call y.This depends on thefo llowing factors:
RThe selected drive program
RThe position of the accelera tor pedal
RThe road speed
Driving and parking 17
5
Page 178 of 562

Manualgear shifting
&
WARNING Risk of skidding and of an
accident due toshifting down on slippery
ro ad sur faces
If yo u shift downonslipp eryroad sur faces to
inc rease the engine braking ef fect, the drive
wheels may lose traction.
#Do not shift down on slippery road sur‐
fa ces toinc rease the engine braking
ef fect.
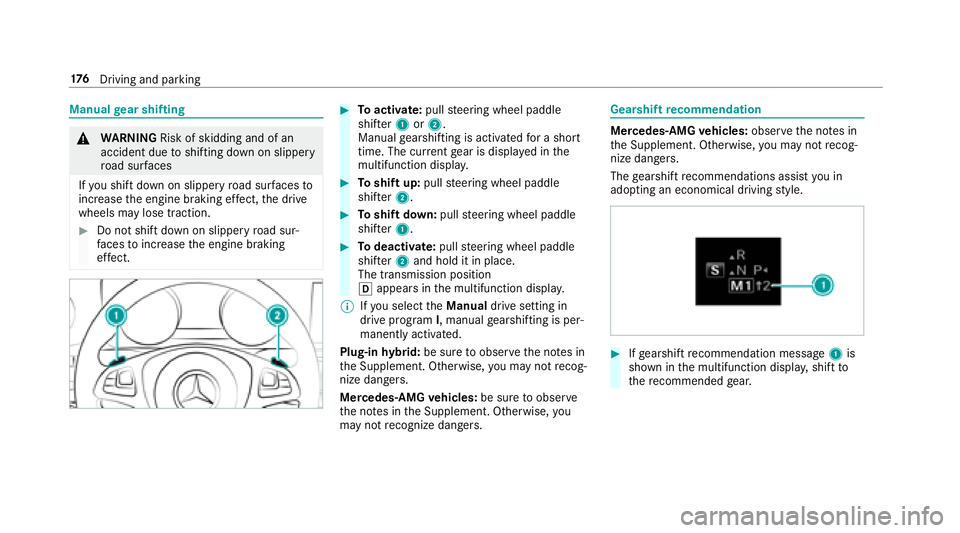
#To activate: pullsteering wheel paddle
shif ter1 or2.
Manual gearshifting is activated for a short
time. The cur rent gear is displa yed in the
multifunction displa y.
#Toshift up: pullsteering wheel paddle
shif ter2.
#To shift down: pullsteering wheel paddle
shif ter1.
#To deactivate: pullsteering wheel paddle
shif ter2 and hold it in place.
The transmission position
h appears in the multifunction displa y.
% Ifyo u select theManual drive setting in
drive prog ram I, manual gearshifting is per‐
manent lyactivated.
Plug-in hybrid: be sure toobser vethe no tes in
th e Supplement. Otherwise, you may not recog‐
nize dangers.
Mercedes -AMG vehicles: be sure toobser ve
th e no tes in the Supplement. Otherwise, you
may not recognize dangers.
Gearshift recommendation
Mercedes -AMG vehicles: observeth e no tes in
th e Supplement. Otherwise, you may not recog‐
nize dangers.
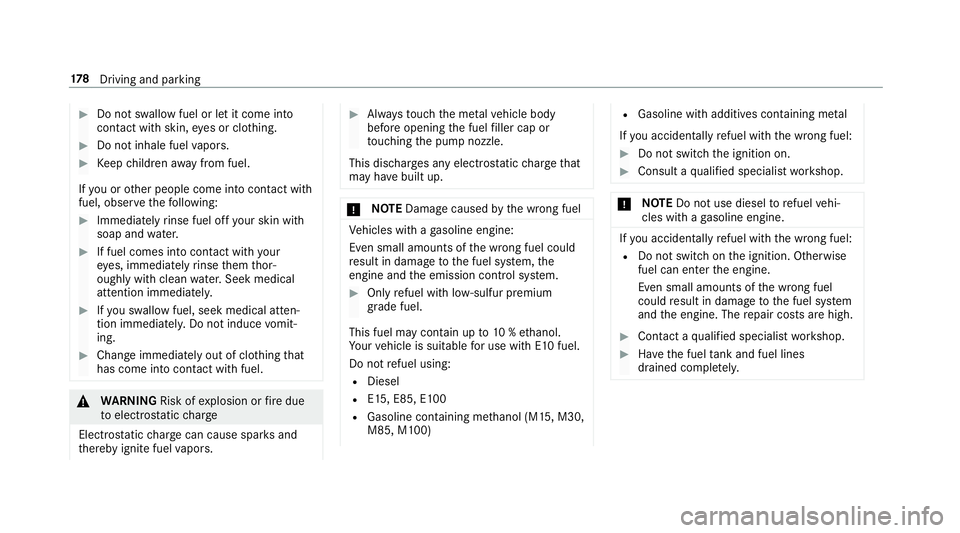
The gearshift recommendations assist you in
adopting an economical driving style.
#If ge arshift recommendation message 1is
shown in the multifunction displa y,shift to
th ere commended gear.
17 6
Driving and pa rking
Page 179 of 562

Using kickdown
Mercedes-AMGvehicles: be sure toobser ve
th e no tes in the Supplement. Otherwise, you
may not recognize dangers.
#Maximum acceleration: depress the accel‐
erator pedal be yond the pressure point.
During kickdown, you cannot shift gears using
th esteering wheel paddle shif ters. The au to‐
matic transmission shifts up tothe next gear
when the maximum engine speed is reached to
pr otect the engine from overrev ving.
#Ease off the accelera tor pedal once the
desired speed is reached.
Glide mode function
Plug-in hybrid: be sure toobser vethe no tes in
th e Supplement. Otherwise, you may not recog‐
nize dangers.
Mercedes -AMG vehicles: be sure toobser ve
th e no tes in the Supplement. Otherwise, you
may not recognize dangers. Wi
th an anticipatory driving style, glide mode
helps youto reduce fuel consum ption.
Glide mode is characterized bythefo llowing:
RThe combustion engine is disconnected from
th e driv etra in and theve hicle continues to
ro ll in neut ral.
RThe transmission position his displa yed in
green in the multifunction displa y.
Glide mode is activated if thefo llowing condi‐
tions are me t:
RDrive program Eis selected.
RThe speed is wi thin a suitable range.
RThe cours e ofthero ad is suitable, e.g. no
st eep uphill or downhill gradients or tight
bends.
RYo udo not depress the accelera tor or brake
pedal.
% Glide mode can also be activated if you ha ve
selected the "Eco" setting forth e drive
(engine management) when in drive program
I. Glide mode is deactivated again if one of
the
conditions is no longer met.
Ve hicles with Active Di stance Assistant
DI STRO NIC:When Active Dis tance Assist ant
DI STRO NIC is active, theglide mode function is
re stricted.
Re fueling
Refueling theve hicle
&
WARNING Risk offire and explosion
caused byfuel
Fu els are highly inflammable.
#You must avoidfire , open flames, creat‐
ing spar ksand smoking.
#Before refueling, switch off the engine
and, if ins talled in your vehicle, thest a‐
tionary heater.
& WARNING Risk of injury from fuel
Fu els are poisonous and harmful to your
health
Driving and parking 17
7
Page 180 of 562

#Do not swallow fuel or let it come into
contact withskin, eyes or clo thing.
#Do not inhale fuel vapors.
#Ke ep children away from fuel.
If yo u or other people come into contact with
fuel, obser vethefo llowing:
#Immediately rinse fuel off your skin wit h
soap and water.
#If fuel comes into contact with your
ey es, immediately rinse them thor‐
oughly with clean water.Seek medical
attention immediately.
#If yo u sw allow fuel, seek medical atten‐
tion immediatel y.Do not induce vomit‐
ing.
#Change immediately out of clo thing that
has come into con tact wi thfuel.
&
WARNING Risk ofexplosion or fire due
to electros tatic charge
Electros taticch arge can cause spark s and
th ereby ignite fuel vapors.
#Alw aysto uch the me talve hicle body
before opening the fuel filler cap or
to uching the pump nozzle.
This dischar ges any electros tatic charge that
may ha vebuilt up.
* NO
TEDama gecaused bythe wrong fuel
Ve hicles with a gasoline engine:
Even small amounts of the wrong fuel could
re sult in damage tothe fuel sy stem, the
engine and the emission control sy stem.
#Only refuel with lo w-sulfur premium
grade fuel.
This fuel may contain up to10 %ethanol.
Yo ur vehicle is suitable for use with E10 fuel.
Do not refuel using:
RDiesel
RE15, E85, E100
RGasoline containing me thanol (M15, M30,
M85, M100)
RGasoline with additives con taining me tal
If yo u accidenta llyrefuel with the wrong fuel:
#Do not switch the ignition on.
#Consult a qualified specialist workshop.
* NO
TEDo not use diesel torefuel vehi‐
cles with a gasoline engine.
Ifyo u accidenta llyrefuel with the wrong fuel:
RDo not switch on the ignition. Otherwise
fuel can enter the engine.
Even small amounts of the wrong fuel
could result in damage tothe fuel sy stem
and the engine. The repair costs are high.
#Contact a qualified specialist workshop.
#Ha ve the fuel tank and fuel lines
drained compl etely.
17 8
Driving and pa rking
Page 181 of 562

*NO
TEDama getothe fuel sy stem caused
by ove rfilled fuel tanks.
#Only fill th e fuel tank until the pump
nozzle switches off.
* NO
TEFuel may spr ayout when you
re mo vethe fuel pump nozzle.
#Only fill th e fuel tank until the pump
nozzle switches off.
Re quirements:RUn lock theve hicle.
% Do not get into theve hicle again during the
re fueling process. Otherwise, electros tatic
ch arge could build up again.
Obser vethe no tes on operating fluids
(
→page 447).
Plug-in hybrid: obser vethe no tes in the Supple‐
ment. Otherwise, you may not recognize dan‐
ge rs. Re
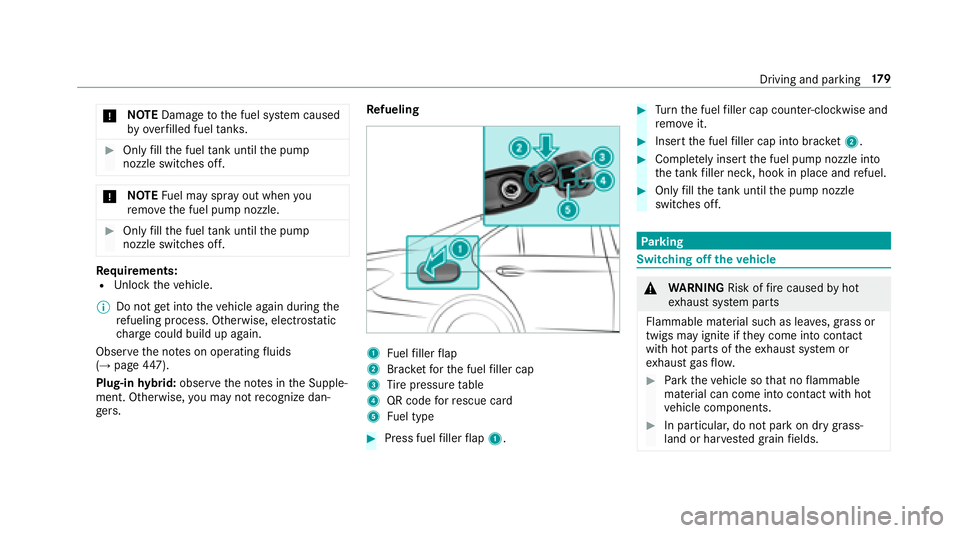
fueling1Fuelfiller flap
2Brac ketfo rth e fuel filler cap
3Ti re pressure table
4QR code forre scue card
5Fu el type
#Press fuel filler flap 1.
#Turn the fuel filler cap coun ter-clockwise and
re mo veit.
#Insert the fuel filler cap into brac ket2.
#Co mp lete ly inse rtthe fuel pump nozzle into
th eta nk filler nec k,hook in place and refuel.
#Only fill th eta nk until the pump nozzle
switches off.
Pa rking
Switching off theve hicle
&
WARNING Risk offire caused byhot
ex haust sy stem parts
Flammable material such as lea ves, grass or
twigs may ignite if they come into contact
wi th hot parts of theex haust sy stem or
ex haust gasflow .
#Park theve hicle so that no flammable
material can come into con tact wi thhot
ve hicle components.
#In particular, do not park on dry grass‐
land or har vested grain fields.
Driving and parking 17
9
Page 182 of 562

&WARNING Risk of accident and injury
due tochildren left unatte nded inthe
ve hicle
If yo u lea vechildren unaccompanied in the
ve hicle, they may be able toset theve hicle in
motion, forex ample by:
RRe leasing the parking brake.
RShifting the transmission out of park
position j.
RStarting the engine.
In addition, they may operate vehicle equip‐
ment.
#Ne ver lea vechildren and animals unat‐
te nded in theve hicle.
#When leaving theve hicle, alw aysta ke
th e SmartK eywith you and lock the
ve hicle.
* NO
TEDama getotheve hicle or the driv‐
et ra in caused bytheve hicle rolling away
#Alw ays proper lysecure theve hicle
against rolling away.
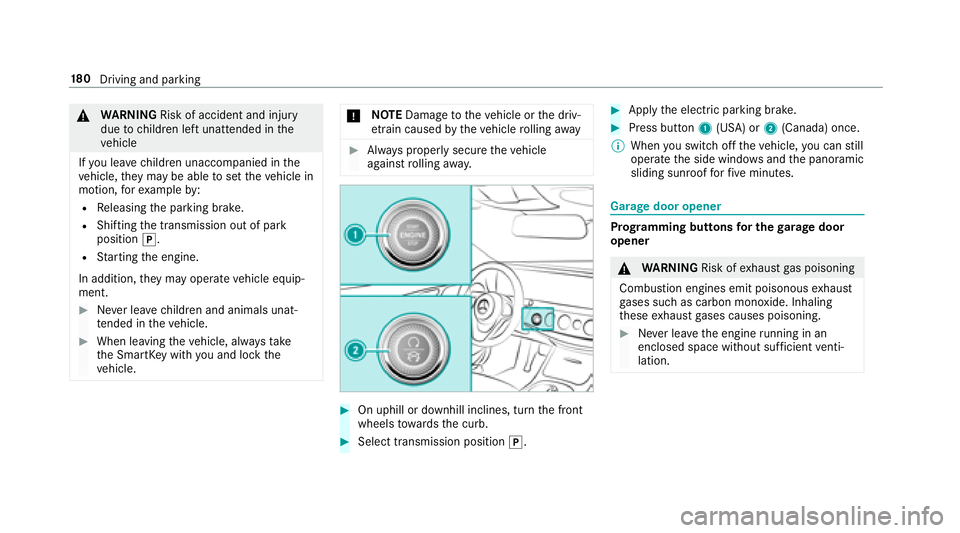
#On uphill or downhill inclines, turn the front
wheels towa rdsth e curb.
#Select transmission position j.
#Applythe electric parking brake.
#Press button 1(USA) or 2(Canada) once.
% When you switch offtheve hicle, you can still
opera tethe side windo wsand the panoramic
sliding sunroof forfive minutes.
Garage door opener
Prog ramming buttons for the garage door
opener
& WARNING Risk ofexhaust gas poisoning
Combustion engines emit poisonous exhaust
ga ses such as carbon monoxide. Inhaling
th ese exhaust gases causes poisoning.
#Ne ver lea vethe engine running in an
enclosed space wi thout suf ficient venti‐
lation.
18 0
Driving and pa rking
Page 183 of 562

&WARNING Risk of injury and entrapment
when opening thega rage door using the
ga rage door opener
When you operate or program thega rage
door with the integrated garage door opener,
persons in thera nge of mo vement of the
ga rage door can become trapped or stru ck
by thega rage door.
#When using the integrated garage door
opener, alw ays make sure that nobody
is within the sweep of thega rage door.
Only operate thega rage door opener on thefo l‐
lowing garage doors:
RGarage doors with a saf etyst op and reve rs‐
ing feature.
RGarage doors which con form tothe cur rent
U. S. safe tystandards.
Re quirements:
RThe vehicle is par ked outside of thega rage .
RThe engine is switched off.
#Check if the transmit ter frequency of the
re mo tecontrol has the frequency range of
280 to868 MHz.
Ra dio equipment appr oval number:
RNZLMUA HL5 (USA)
R4112 A-MUAHL5 (Canada)
#Press and hold button 1,2or3 that you
wish toprog ram.
Indicator lamp 4flashes yello w.
% It can take up to20 seconds before the indi‐
cator lamp flashes yello w.
#Re lease the pr eviously pressed button.
Indicator lamp 4continues toflash yello w.
#Po int remo tecontrol 5at a dist ance of 1 in
(1 cm) to3 in (8 cm) towa rds buttons 1,2
or 3.
#Press and hold button 6ofremo tecontrol
5 until:
RIndicator la mp4lights up greencontin‐
uousl y.Programming is comple te.
RIndicator lamp 4flashes green. Pro‐
gr amming was successful. Additionally,
synchronization of thero lling code with
th ega rage door sy stem must also take
place.
#If indicator lamp 4does not light up or flash
green: repeat the procedure.
#Re lease all of the buttons.
Driving and parking 18
1
Page 184 of 562

%The remo tecontrol forth ega rage door drive
is not included in the scope of delivery of the
ga rage door opener.
Synchronizing thero lling code
Re quirements:
RThe garage door sy stem uses a rolling code.
RThe vehicle must be within range of the
ga rage door or exterior gate drive.
RThe vehicle as well as persons and objects,
are located outside the sweep of thega rage
door.
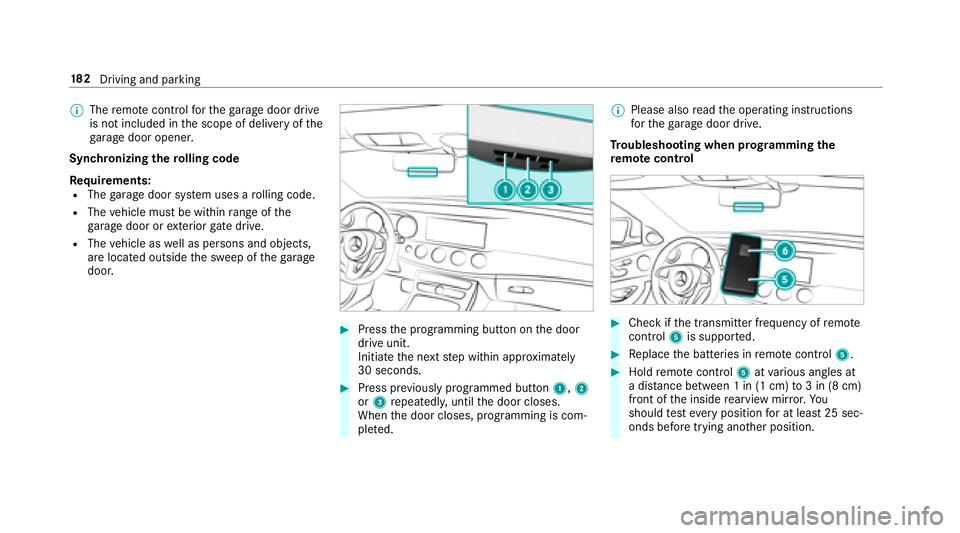
#Press the programming button on the door
drive unit.
Initiate the next step within appr oximately
30 seconds.
#Press pr eviously prog rammed button 1,2
or 3 repeatedl y,until the door closes.
When the door closes, programming is com‐
ple ted. %
Please also read the operating instructions
fo rth ega rage door drive.
Tr oubleshooting when prog ramming the
re mo tecontro l
#Check if the transmit ter frequency of remo te
control 5is suppo rted.
#Re place the batteries in remo tecontrol 5.
#Holdremo tecontrol 5atvarious angles at
a dis tance between 1 in (1 cm) to3 in (8 cm)
front of the inside rearview mir ror.Yo u
should test eve ryposition for at least 25 sec‐
onds before trying ano ther position.
18 2
Driving and pa rking