2018 MERCEDES-BENZ GLS SUV air conditioning
[x] Cancel search: air conditioningPage 6 of 398
1, 2, 3 ...
4ETS (Electronic Traction System)see ETS/4ETS (Electronic Trac-
tion System)
4MATIC (permanent four-wheel
drive) .................................................. 218
12 V socket
see Sockets
115 V socket ...................................... 313
360° camera
Cleaning ........................................ .334
Display in the multimedia system .. 205
Function/notes .............................2 03
A
ABS (Anti-lock Braking System)
Display message ............................ 249
Function/notes ................................ 66
Important safety notes .................... 66
Warning lamp ................................. 282
Accident
Automatic measures after an acci-
dent ................................................. 59
Activating media mode
General notes ................................ 298
Activating/deactivating cooling
with air dehumidification ................. 131
Active Blind Spot Assist
Activating/deactivating (on-
board computer) ............................ 242
Display message ............................ 269
Function/information .................... 213
Trailer towing ................................. 215
Active Brake Assist
Activating or deactivating .............. 242
Display message ............................ 254
Function/notes ................................ 67
Active Brake Assist with cross-
traffic function
Activating or deactivating .............. 242
Display message ............................ 255
Function/notes ................................ 72
Important safety notes .................... 73
Warning lamp ................................. 290
Active Curve System
Display message ............................ 266 Function/notes ............................. 189
Active Lane Keeping Assist
Activating/deactivating (on-
board computer) ............................ 242
Display message ............................ 268
Function/information .................... 215
Trailer towing ................................. 218
Active light function ......................... 117
ADAPTIVE BRAKE ................................. 72
Adaptive Highbeam Assist
Display message ............................ 261
Function/notes ............................. 118
Switching on/off ........................... 118
Additives (engine oil) ........................ 390
Address book
see also Digital Operator's Man-
ual .................................................. 292
Adjusting the volume
Multimedia system ........................ 293
ADS (Adaptive Damping System)
Function/notes ............................. 188
Air bags
Deployment ..................................... 56
Display message ............................ 258
Front air bag (
driver, front
passenger) ....................................... 50
Important safety notes .................... 49
Introduction ..................................... 49
Knee bag .......................................... 50
Occupant Classification System
(OCS) ............................................... 51
PASSENGER AIR BAG indicator
lamps ............................................... 45
Side impact air bag .......................... 51
Window curtain air bag .................... 51
Air filter (display message) .............. 264
AIR FLOW ........................................... 132
Air vents
Glove box ....................................... 136
Important safety notes .................. 136
Rear ............................................... 137
Setting ........................................... 136
Setting the center air vents ........... 136
Setting the side air vents ............... 136
Air-conditioning system
see Climate control
4Index
Page 20 of 398
Rear seatsAdjusting ....................................... 101
Display message ............................ 277
Rear view camera
Cleaning instructions ..................... 334
Display in the multimedia system .. 200
Function/notes ............................. 199
Switching on/off ........................... 200
Rear window defroster
Problem (malfunction) ................... 135
Switching on/off ........................... 134
Rear window wiper
Replacing the wiper blade .............. 124
Switching on/off ........................... 123
Rear-view mirror
Anti-glare (manual) ........................ 110
Dipping (automatic) ....................... 112
Reflective safety jacket .................... 338
Refrigerant (air-conditioning sys-
tem)
Important safety notes .................. 391
Refueling
Fuel gauge ....................................... 37
Important safety notes .................. 155
Refueling process .......................... 156
see Fuel
Remote control
Garage door opener ....................... 321
Replacing bulbs
General notes ................................ 120
High-beam headlamps ................... 121
Important safety notes .................. 120
Installing/removing the cover
(front wheel arch) .......................... 121
Low-beam headlamps .................... 121
Overview of bulb types .................. 120
Turn signals (front) ......................... 122
Reporting safety defects .................... 32
Rescue card ......................................... 32
Reserve (fuel tank)
see Fuel
Reserve fuel
Display message ............................ 263
Warning lamp ................................. 288
Residual heat (climate control) ........ 135
Restraint system
Display message ............................ 256
Introduction ..................................... 44 Warning lamp ................................. 287
Warning lamp (function) ................... 45
Reversing feature
Panorama sliding sunroof ................ 93
Roller sunblinds ............................... 95
Side windows ................................... 89
Sliding sunroof ................................. 93
Tailgate ............................................ 85
Reversing lamps (
display mes-
sage) ................................................... 260
Roadside Assistance (breakdown) .... 29
Roller sunblind
Panorama roof with power tilt/
sliding panel ..................................... 94
Rear side windows ......................... 310
Roof carrier ........................................ 308
Roof lining and carpets (cleaning
guidelines) ......................................... 337
Roof load (maximum) ........................ 392
Route (navigation)
see Route guidance (navigation)
Route guidance
see also Digital Operator's Man-
ual .................................................. 292
Route guidance (navigation) ............ 237
Route guidance active ...................... 238
S
Safety
Children in the vehicle ..................... 59
see Occupant safety
see Operating safety
Safety system
see Driving safety systems
SD card
Inserting ........................................ 298
Inserting/removing ........................ 298
Removing ....................................... 298
SD memory card
see also Digital Operator's Man-
ual .................................................. 292
Selecting ........................................ 239
Search & Send
see also Digital Operator's Man-
ual .................................................. 292
Seat
Correct driver's seat position ........... 97
18Index
Page 21 of 398

Seat beltsAdjusting the driver's and front-
passenger seat belt .........................4 8
Adjusting the height ......................... 48
Cleaning ......................................... 336
Correct usage .................................. 47
Fastening ......................................... 48
Important safety guidelines ............. 46
Introduction .....................................4 5
Releasin g ......................................... 48
Switching belt adjustment on/off
(on-board computer) ...................... 244
Warning lamp ................................. 280
Warning lamp (function) ................... 48
Seats
Adjusting (electrically) ..................... 98
Adjusting the 4-way lumbar sup-
port ................................................ 106
Adjusting the head restraint ............ 99
Calling up a stored setting (mem-
ory function) .................................. 114
Cleaning the cover ......................... 336
Entry position (3rd row of seats) .... 103
Exit position (3rd row of seats) ...... 104
Folding down/up (third row of
seats) ............................................. 101
Folding the 2nd row of seats
forward electrically ........................ 105
Folding the 2nd row of seats
forward manually ........................... 103
Folding the rear bench seat for-
wards/back ................................... 303
Important safety notes .................... 97
Overview .......................................... 97
Seat heating problem .................... 108
Seat ventilation problem ................ 108
Storing settings (memory func-
tion) ............................................... 113
Switching seat heating on/off ....... 106
Switching seat ventilation on/off .. 107
Section
Sliding sunroof ................................. 92
Selector lever
Cleaning ......................................... 336
Sensors (cleaning instructions) ....... 334
Service menu (on-board com-
puter) .................................................. 242 Service message
see ASSYST PLUS
Service products
Brake fluid ..................................... 390
Coolant (engine) ............................ 390
DEF special add
itives ..................... 389
Engine oil ....................................... 389
Fuel ................................................ 387
Important safety notes .................. 386
Refrigerant (air-conditioning sys-
tem) ............................................... 391
Washer fluid ................................... 391
Setting the air distribution ............... 133
Setting the airflow ............................ 133
Setting the date/time format
see also Digital Operator's Man-
ual .................................................. 292
Setting the language
see also Digital Operator's Man-
ual .................................................. 292
Setting the time
see also Digital Operator's Man-
ual .................................................. 292
Settings
Factory (on-board computer) ......... 245
On-board computer ....................... 243
SETUP (on-board computer,
Mercedes-AMG vehicles) .................. 246
Side impact air bag ............................. 51
Side marker lamp (display mes-
sage) ................................................... 260
Side windows
Cleaning ......................................... 333
Convenience closing feature ............ 90
Convenience opening feature .......... 90
Hinged side windows ....................... 89
Important safety information ........... 88
Opening/closing .............................. 89
Overview .......................................... 88
Problem (malfunction) ..................... 92
Resetting ......................................... 91
Reversing feature ............................. 89
SIRIUS services
see also Digital Operator's Man-
ual .................................................. 292
Sliding sunroof
Important safety notes .................... 92
Index19
Page 146 of 398
leave the vehicle when it is held by hill start
assist.
Hill start assist is not active if:
Ryou are pulling away on a level road or on a
downhill gradient.
Rthe transmission is in position N.
Rthe electric parking brake is applied.
RESP®is malfunctioning.
ECO start/stop function
Introduction
The ECO start/stop function switches the
engine off automatically if the vehicle is stopped
under certain conditions.
The engine starts automatically when the driver
wants to pull away again. The ECO start/stop
function thereby helps you to reduce the fuel
consumption and emissions of your vehicle.
Important safety notes
GWARNING
If the engine is switched off automatically and
you exit the vehicle, the engine is restarted
automatically. The vehicle may begin moving.
There is a risk of accident and injury.
If you wish to exit the vehicle, always turn off
the ignition and secure the vehicle against
rolling away.
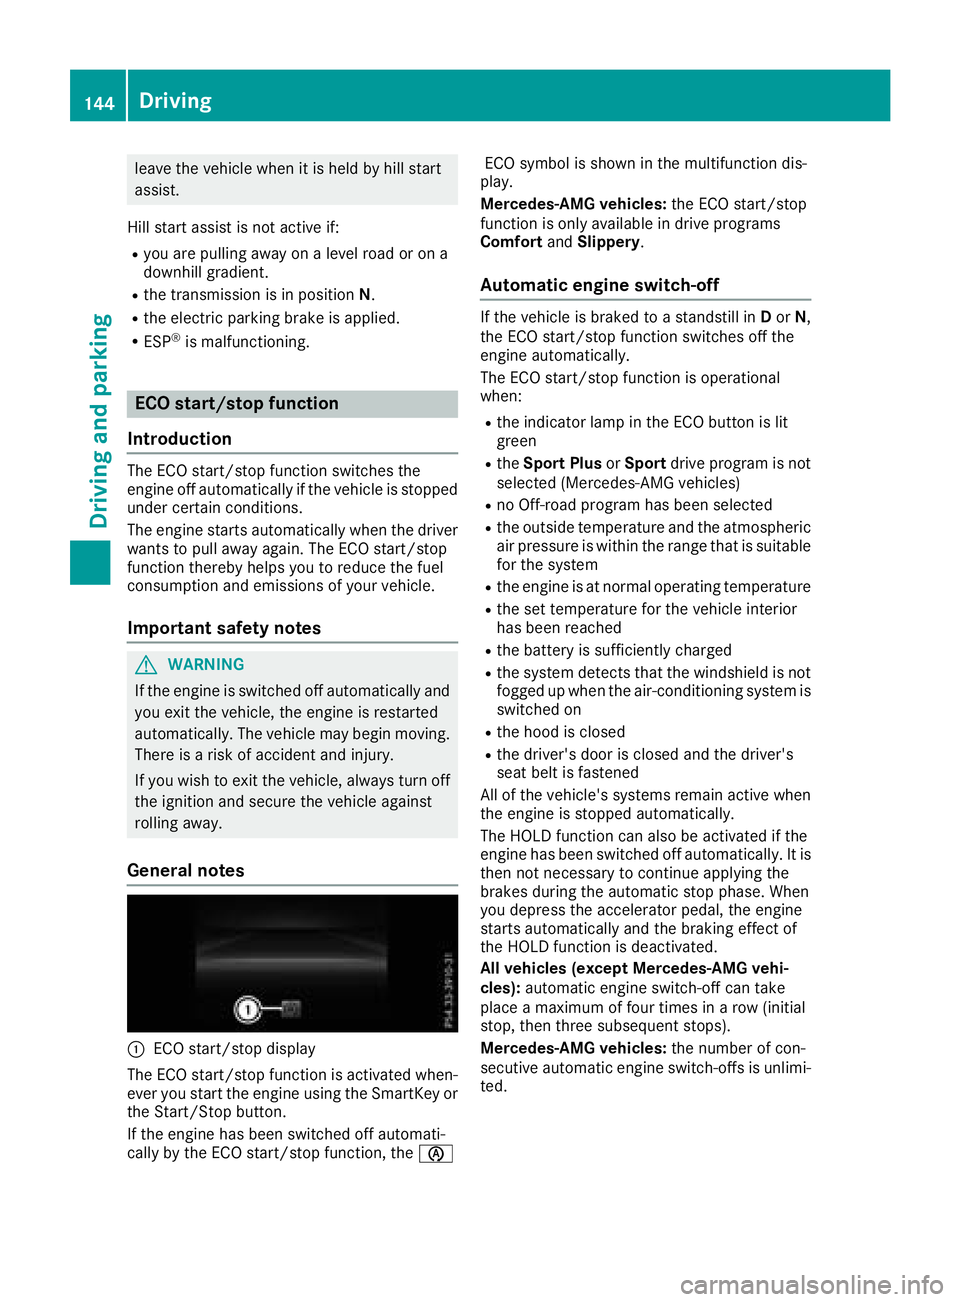
General notes
:ECO start/stop display
The ECO start/stop function is activated when-
ever you start the engine using the SmartKey or the Start/Stop button.
If the engine has been switched off automati-
cally by the ECO start/stop function, the èECO symbol is shown in the multifunction dis-
play.
Mercedes-AMG vehicles: the ECO start/stop
function is only available in drive programs
Comfort andSlippery.
Automatic engine switch-off
If the vehicle is braked to a standstill in Dor N,
the ECO start/stop function switches off the
engine automatically.
The ECO start/stop function is operational
when:
Rthe indicator lamp in the ECO button is lit
green
Rthe Sport Plus orSport drive program is not
selected (Mercedes-AMG vehicles)
Rno Off-road program has been selected
Rthe outside temperature and the atmospheric
air pressure is within the range that is suitable
for the system
Rthe engine is at normal operating temperature
Rthe set temperature for the vehicle interior
has been reached
Rthe battery is sufficiently charged
Rthe system detects that the windshield is not
fogged up when the air-conditioning system is switched on
Rthe hood is closed
Rthe driver's door is closed and the driver's
seat belt is fastened
All of the vehicle's systems remain active when
the engine is stopped automatically.
The HOLD function can also be activated if the
engine has been switched off automatically. It is
then not necessary to continue applying the
brakes during the automatic stop phase. When
you depress the accelerator pedal, the engine
starts automatically and the braking effect of
the HOLD function is deactivated.
All vehicles (except Mercedes-AMG vehi-
cles): automatic engine switch-off can take
place a maximum of four times in a row (initial
stop, then three subsequent stops).
Mercedes-AMG vehicles: the number of con-
secutive automatic engine switch-offs is unlimi-
ted.
144Driving
Driving and parking
Page 147 of 398
Automa tic engine start
The engin estart sautomatically if:
Ryou switch off th eECO start/sto pfunction by
pressing th eECO butto n
Rin transmission position Dor Nthebrak e
pedal is release dand th eHOLD function is no t
active
Ryou depress th eaccelerato rpedal
Ryou engage revers egear R
Ryou mov eth etransmission out of position P
Ryou switch to theSport Plu sor Sport drive
program (Mercedes-AM Gvehicles)
Ryou activat emanual gearshifting (Mercedes-
AM Gvehicles)
Ryou switch to th eOffroa ddrive program
(vehicles without Off-Road Engineering pack- age)
Ryou switch to th eOffroa dor Offroa dPlu s
drive program (vehicles wit hOff-Road Engi-
neering package)
Ryou unfasten your seat belt or open th edriv-
er' sdoor
Rth evehicl estart sto rol l
Rthebrak esystem require sthis
Rth etemperature in th evehicl einterior devi-
ate sfrom th eset range
Rth esystem detects moisture on th ewind-
shield when th eair-conditioning system is
switched on
Rth ebattery's condition of charge is to olow
Shifting th etransmission to position Pdoes no t
start th eengine.
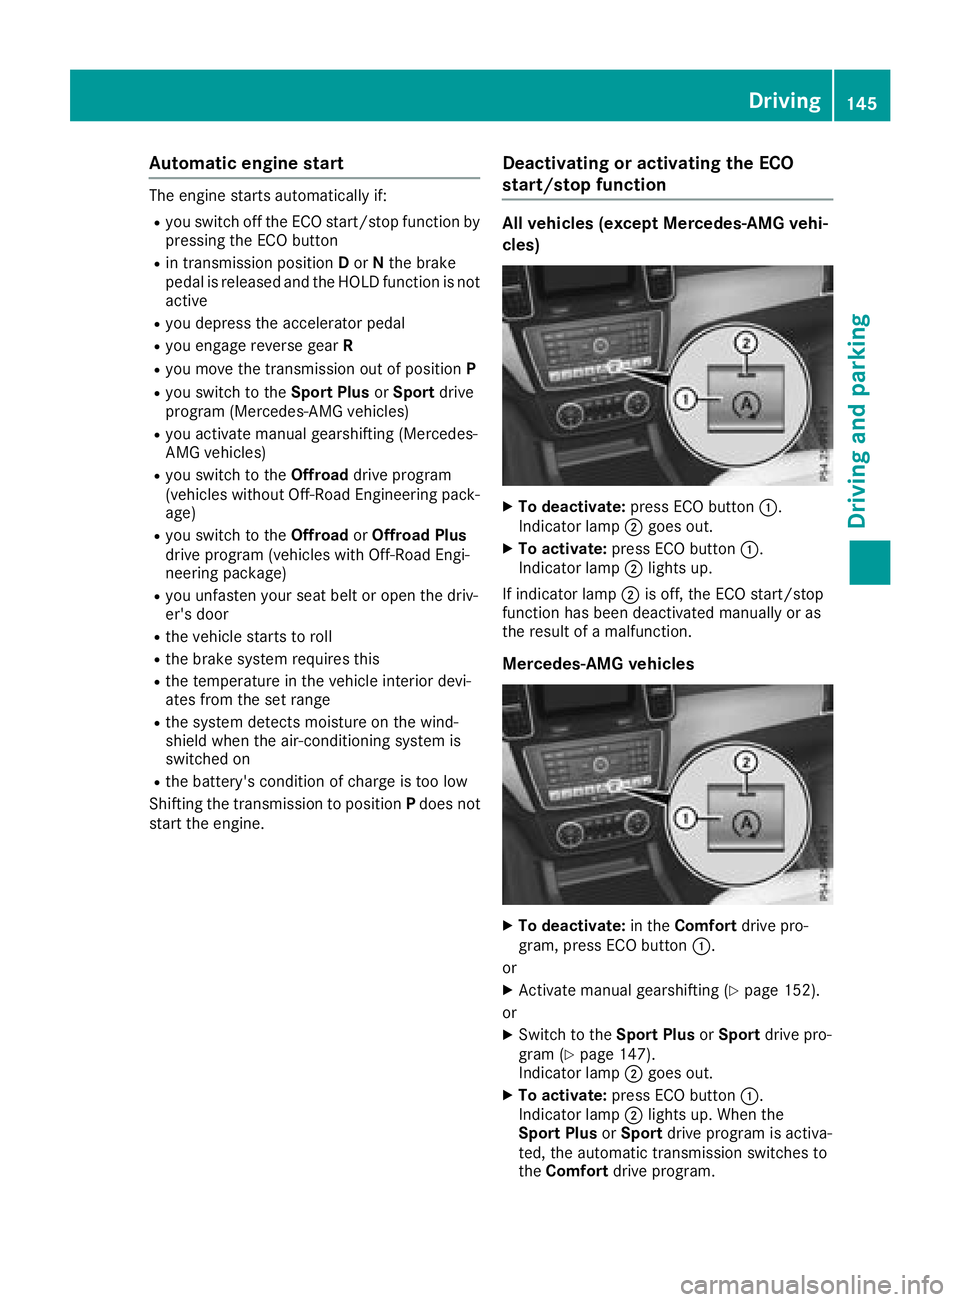
Deactivating oractivating the ECO
start/stop function
All vehicles (excep tMercedes-AM G vehi-
cles)
XTo deactivate: press ECO butto n:.
Indicato rlamp ;goe sout .
XTo activate: press ECO butto n:.
Indicato rlamp ;lights up.
If indicator lamp ;is off ,th eECO start/sto p
function has been deactivated manually or as
th eresult of amalfunction .
Mercedes-AM G vehicles
XTo deactivate: in theComfor tdrive pro -
gram ,press ECO butto n:.
or
XActivat emanual gearshifting (Ypage 152).
or
XSwitc hto th eSport Plu sor Sport drive pro -
gram (Ypage 147).
Indicato rlamp ;goes out .
XTo activate: press ECO butto n:.
Indicato rlamp ;lights up. When th e
Sport Plu sor Sport drive program is activa-
ted, th eautomatic transmission switches to
th eComfor tdrive program .
Driving145
Driving and parking
Z
Page 230 of 398
Most U.S. states and all Canadian provinces
require by law:
RSafety chains between the towing vehicle and
the trailer. The chains should be cross-wound
under the trailer drawbar. They must be fas-
tened to the vehicle's trailer coupling, not to
the bumper or the axle.
Leave enough play in the chains to make tight
cornering possible.
RA separate brake system for certain types of
trailer.
RSafety switch for braked trailers. Check the
specific legal requirements applicable to your
state.
If the trailer becomes detached from the tow-
ing vehicle, the safety feature triggers the
trailer brakes.
Towing a trailer
There are numerous legal requirements con-
cerning the towing of a trailer, e.g. speed restric-
tions. Make sure that your car/trailer combina-tion complies with the local regulations:
Rin your place of residence
Rin the location to which you are driving
The police and local authorities can provide reli-
able information.
Observe the following when towing a trailer:
RTo gain driving experience and to become
accustomed to the new handling characteris-
tics, you should practice the following in a
traffic-free location:
-cornering
-stopping
-backing up
RBefore driving, check:
-trailer tow hitch
-safety switch for braked trailers
-safety chains
-electrical connections
-lights
-wheels
RAdjust the exterior mirrors to provide an
unobstructed view of the rear section of the
trailer.
RIf the trailer has electronically controlled
brakes, pull away carefully. Brake manually using the brake controller and check whether
the brakes function correctly.
RSecure any objects on the trailer to prevent
the cargo from slipping when the vehicle is in
motion.
RWhen you couple up a trailer, check at regular
intervals that the load is firmly secured. If the
trailer is equipped with trailer lights and
brakes, check the trailer to ensure that these
are working.
RBear in mind that the handling will be less
stable when towing a trailer than when driving
without one. Avoid sudden steering move-
ments.
RThe vehicle/trailer combination is heavier,
accelerates more slowly, has a decreased
gradient climbing capability and a longer
braking distance.
It is more susceptible to side winds and
requires more careful steering.
RIf possible, do not brake suddenly, but instead
depress the brake pedal moderately at first so
that the trailer can activate its brakes. Then
increase the pressure on the brake pedal.
RIf the automatic transmission repeatedly
shifts between gears on uphill or downhill gra-
dients, shift to a lower gear using the left-hand
steering wheel paddle shifter.
A lower gear and lower speed reduce the risk
of engine failure.
RWhen driving downhill, shift to a lower gear to
utilize the engine's braking effect.
Avoid continuous brake application as this
may overheat the vehicle brakes and, if instal-
led, the trailer brakes.
RIf the coolant temperature increases dramat-
ically while the air-condit ioning system is
switched on, switch off the air-conditioning
system.
Coolant heat can also be dissipated by open-
ing the windows and switching the ventilation blower and the interior temperature to the
highest level.
RWhen overtaking, pay particular attention to
the extended length of your vehicle/trailer
combination.
Due to the length of the vehicle/trailer com-
bination, you require additional road space in
relation to the vehicle you are overtaking
before you can change back to the original
lane.
228Towing a trailer
Driving and parking
Page 375 of 398
Speed rating
The speed rating is part of the tire identification.It specifies the speed range for which the tire is
approved.
GTW (Gross Trailer Weight)
The GTW is the weight of a trailer including the
weight of the load, luggage, accessories etc. on
the trailer.
GVW (Gross Vehicle Weight)
The gross vehicle weight includes the weight of
the vehicle including fuel, tools, the spare wheel,
accessories installed, occupants, luggage and
the drawbar noseweight, if applicable. The gross
vehicle weight must not exceed the gross vehi-
cle weight rating GVWR as specified on the vehi- cle identification plate on the B-pillar on the
driver's side.
GVWR (Gross Vehicle Weight Rating)
The GVWR is the maximum permissible gross
weight of a fully loaded vehicle (the weight of the
vehicle including all accessories, occupants,
fuel, luggage and the drawbar noseweight, if
applicable). The gross vehicle weight rating is
specified on the vehicle identification plate on
the B-pillar on the driver's side.
Maximum loaded vehicle weight
The maximum weight is the sum of:
Rthe curb weight of the vehicle
Rthe weight of the accessories
Rthe load limit
Rthe weight of the factory installed optional
equipment
Kilopascal (kPa)
Metric unit for tire pressure. 6.9 kPa corre-
sponds to 1 psi. Another unit for tire pressure is
bar. 100 kilopascals (kPa) are the equivalent of
1 bar.
Load index
In addition to the load-bearing index, the load
index may also be imprinted on the sidewall of
the tire. This specifies the load-bearing capacity
more precisely.
Curb weight
The weight of a vehicle with standard equipment
including the maximum capacity of fuel, oil and
coolant. It also includes the air-conditioning sys- tem and optional equipment if these are instal-
led in the vehicle, but does not include passen-
gers or luggage.
Maximum load rating
The maximum tire load is the maximum permis-
sible weight in kilograms or lbs for which a tire is approved.
Maximum permissible tire pressure
Maximum permissible tire pressure for one tire.
Maximum load on one tire
Maximum load on one tire. This is calculated by
dividing the maximum axle load of one axle by
two.
PSI (pounds per square inch)
A standard unit of measure for tire pressure.
Aspect ratio
Relationship between tire height and tire widt h
in percent.
Tire pressure
This is pressure inside the tire applying an out-
ward force to each square inch of the tire's sur-
face. The tire pressure is specified in pounds per
square inch (psi), in kilopascal (kPa) or in bar.
The tire pressure should only be corrected when the tires are cold.
Cold tire pressure
The tires are cold:
Rif the vehicle has been parked with the tires
out of direct sunlight for at least three hours
and
Rif the vehicle has not been driven further than
1 mile (1.6 km)
Tread
The part of the tire that comes into contact with
the road.
Bead
The tire bead ensures that the tire sits securely
on the wheel. There are several steel wires in the
bead to prevent the tire from coming loose from
the wheel rim.
All about wheels and tires373
Wheels and tires
Z