Page 383 of 398

Removing/stowing the emergency
spare wheel
Vehicles with a "Minispare" emergency
spare wheel under the cargo compart-
ment floor
Always observe the instructions and safety
notes in the "Mounting a wheel" section
(
Ypage 375).
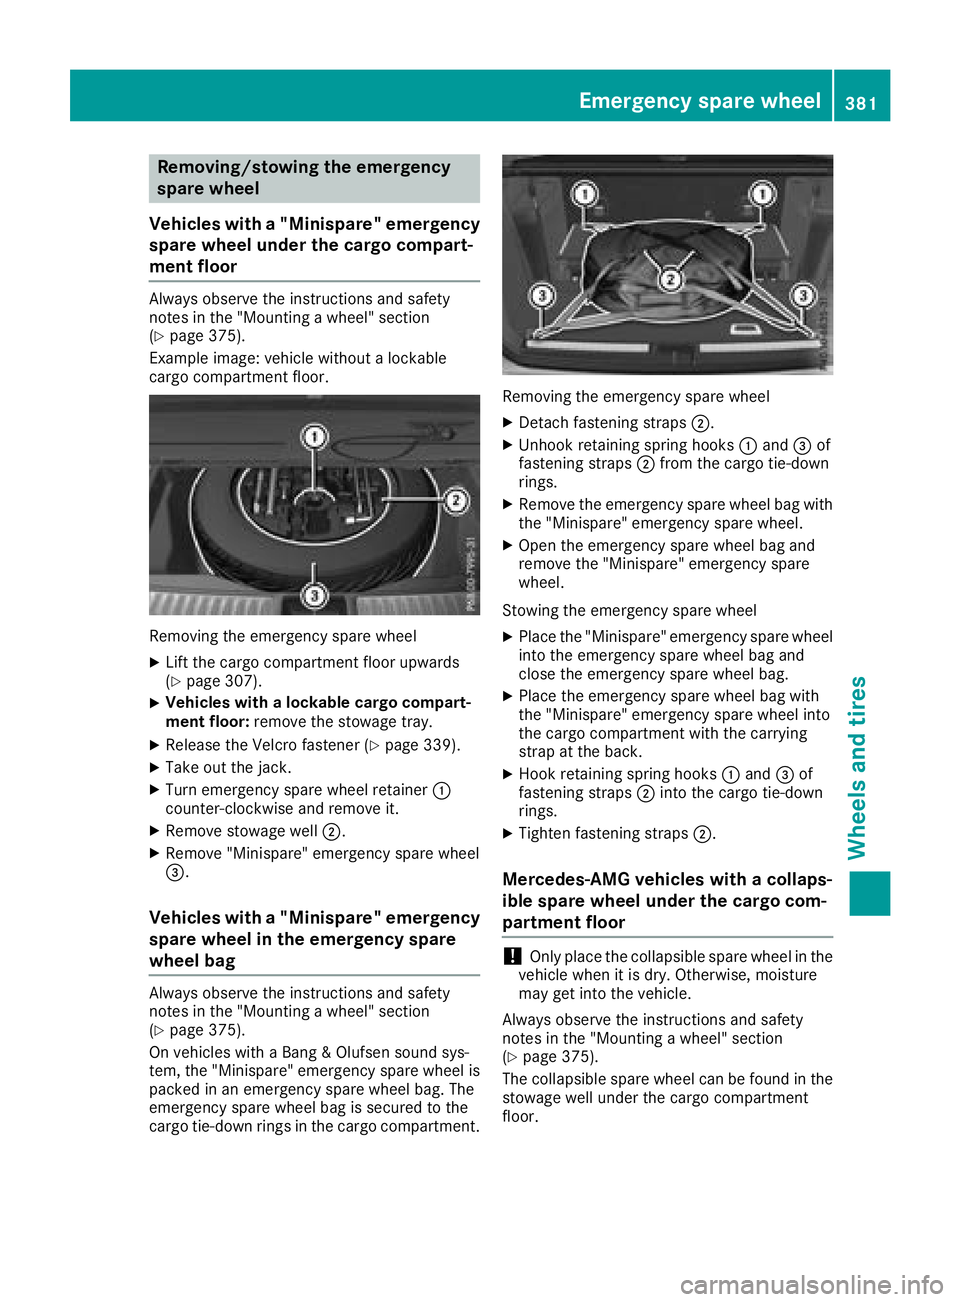
Example image: vehicle without a lockable
cargo compartment floor.
Removing the emergency spare wheel
XLift the cargo compartment floor upwards
(Ypage 307).
XVehicles with a lockable cargo compart-
ment floor: remove the stowage tray.
XRelease the Velcro fastener (Ypage 339).
XTake out the jack.
XTurn emergency spare wheel retainer :
counter-clockwise and remove it.
XRemove stowage well ;.
XRemove "Minispare" emergency spare wheel
=.
Vehicles with a "Minispare" emergency
spare wheel in the emergency spare
wheel bag
Always observe the instructions and safety
notes in the "Mounting a wheel" section
(
Ypage 375).
On vehicles with a Bang & Olufsen sound sys-
tem, the "Minispare" emergency spare wheel is
packed in an emergency spare wheel bag. The
emergency spare wheel bag is secured to the
cargo tie-down rings in the cargo compartment.
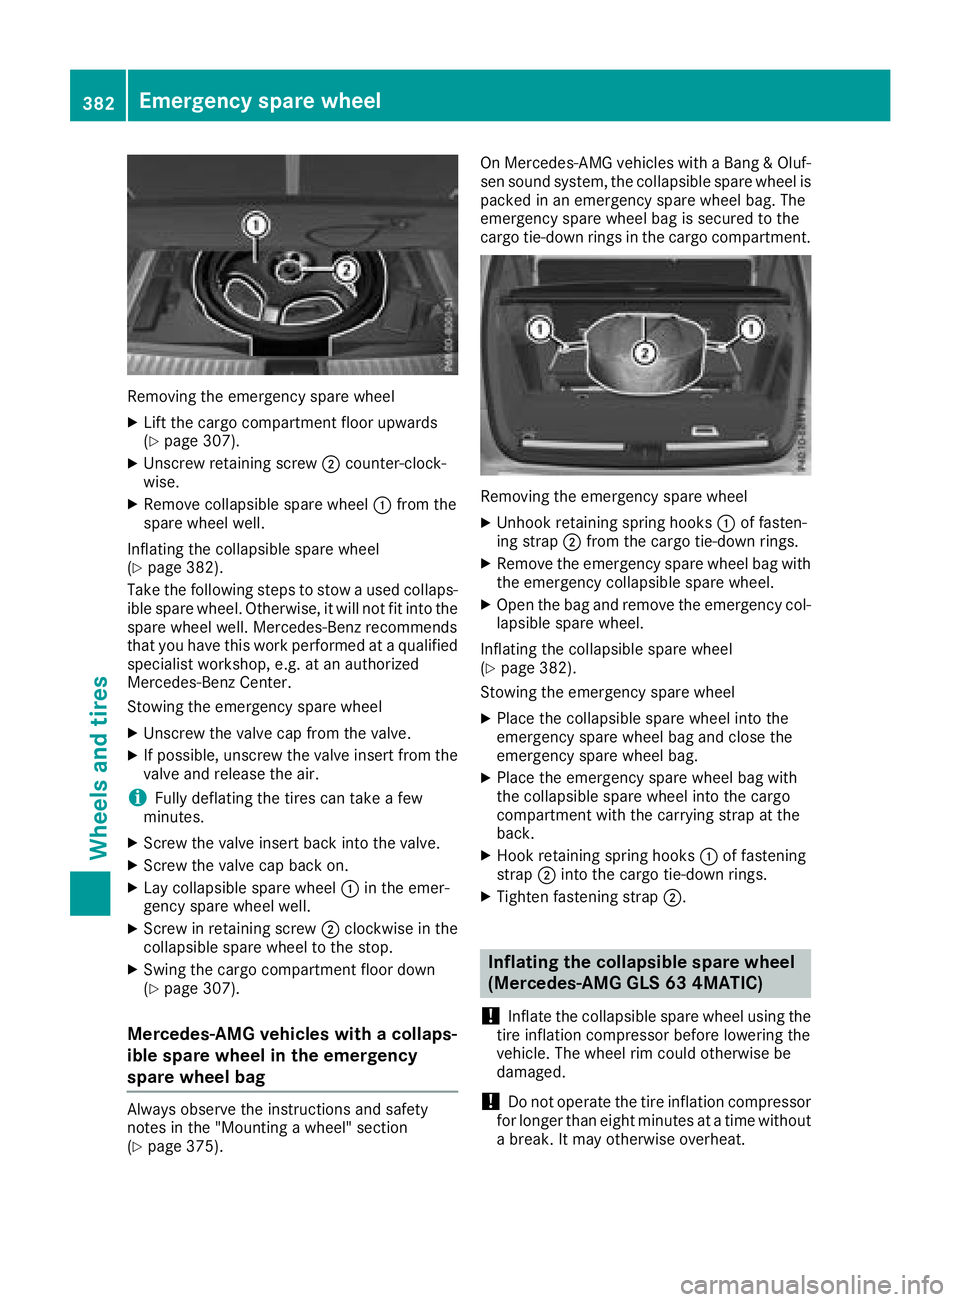
Removing the emergency spare wheel
XDetach fastening straps ;.
XUnhook retaining spring hooks :and =of
fastening straps ;from the cargo tie-down
rings.
XRemove the emergency spare wheel bag with
the "Minispare" emergency spare wheel.
XOpen the emergency spare wheel bag and
remove the "Minispare" emergency spare
wheel.
Stowing the emergency spare wheel
XPlace the "Minispare" emergency spare wheel
into the emergency spare wheel bag and
close the emergency spare wheel bag.
XPlace the emergency spare wheel bag with
the "Minispare" emergency spare wheel into
the cargo compartment with the carrying
strap at the back.
XHook retaining spring hooks :and =of
fastening straps ;into the cargo tie-down
rings.
XTighten fastening straps ;.
Mercedes-AMG vehicles with a collaps-
ible spare wheel under the cargo com-
partment floor
!Only place the collapsible spare wheel in the
vehicle when it is dry. Otherwise, moisture
may get into the vehicle.
Always observe the instructions and safety
notes in the "Mounting a wheel" section
(
Ypage 375).
The collapsible spare wheel can be found in the
stowage well under the cargo compartment
floor.
Emergency spare wheel381
Wheels and tires
Z
Page 384 of 398

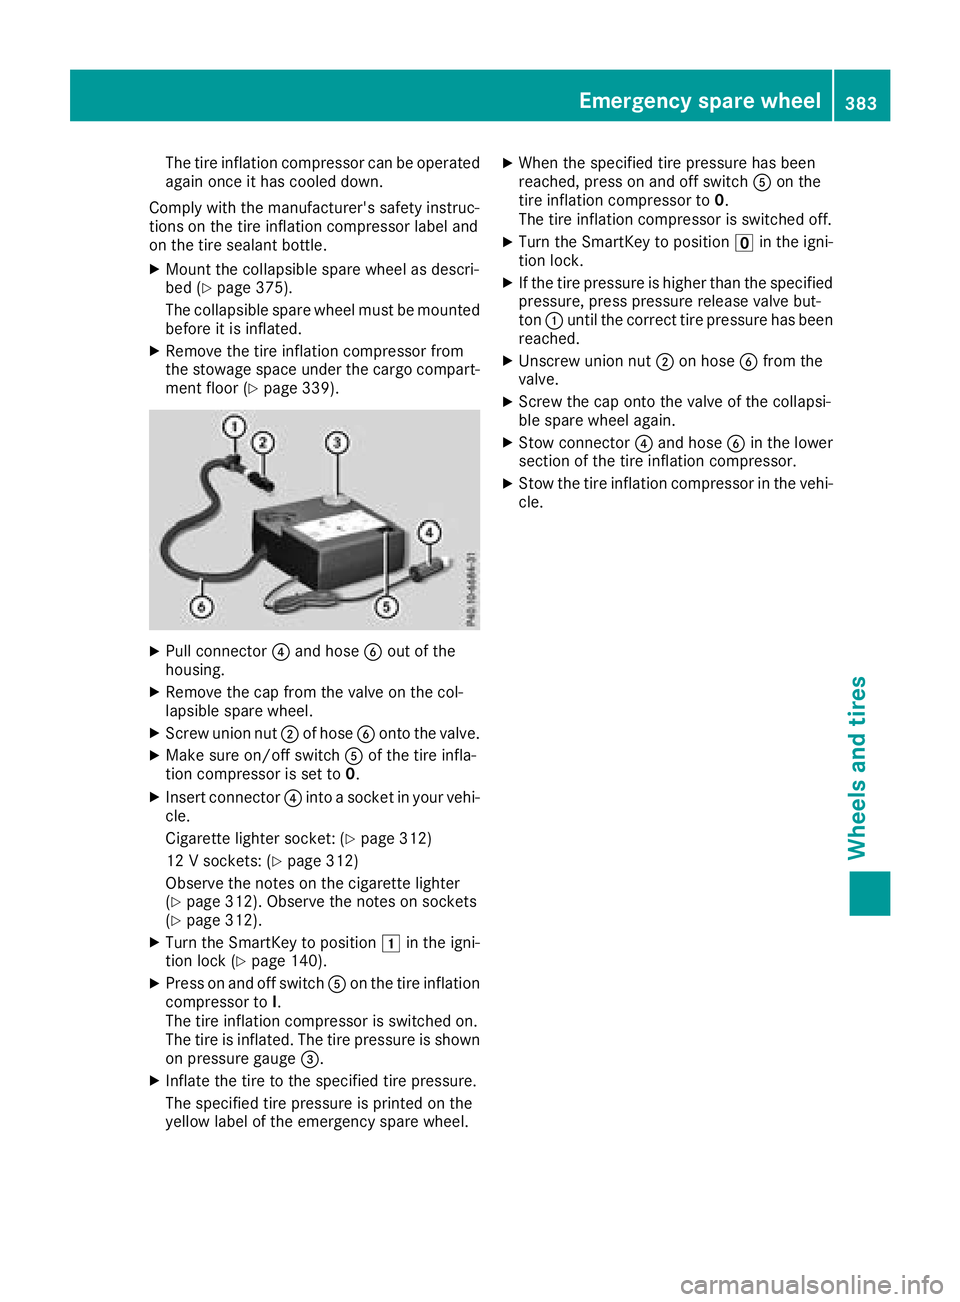
Removingth eemergenc yspar ewhee l
XLiftth ecargo compartmen tfloor upwards
(Ypage 307).
XUnscrew retaining screw ;counter-clock -
wise.
XRemove collapsible spar ewhee l: from th e
spar ewhee lwell.
Inflating th ecollapsible spar ewhee l
(
Ypage 382).
Tak eth efollowin gsteps to stow aused collaps -
ible spar ewheel. Otherwise, it will no tfit int oth e
spar ewhee lwell. Mercedes-Ben zrecommends
that you hav ethis wor kperformed at aqualified
specialist workshop, e.g. at an authorize d
Mercedes-Ben zCenter.
Stowin gth eemergenc yspar ewhee l
XUnscrew th evalv ecap from th evalve.
XIf possible, unscrew th evalv einsert from th e
valv eand release th eair.
iFull ydeflating th etires can tak e afew
minutes.
XScrew th evalv einsert bac kint oth evalve.
XScrew th evalv ecap bac kon .
XLay collapsible spar ewhee l: in th eemer-
gency spar ewhee lwell.
XScrew in retaining screw ;clockwise in th e
collapsible spar ewhee lto th estop.
XSwing th ecargo compartmen tfloor down
(Ypage 307).
Mercedes-AMG vehicles with a collaps-
ible spare wheel in the emergency
spare wheel bag
Always observ eth einstruction sand safet y
note sin th e"Mounting awheel" section
(
Ypage 375). On Mercedes-AM
Gvehicles wit h aBan g & Oluf -
sen soun dsystem, th ecollapsible spar ewhee lis
packe din an emergenc yspar ewhee lbag. The
emergenc yspar ewhee lbag is secured to th e
cargo tie-down rings in th ecargo compartment.
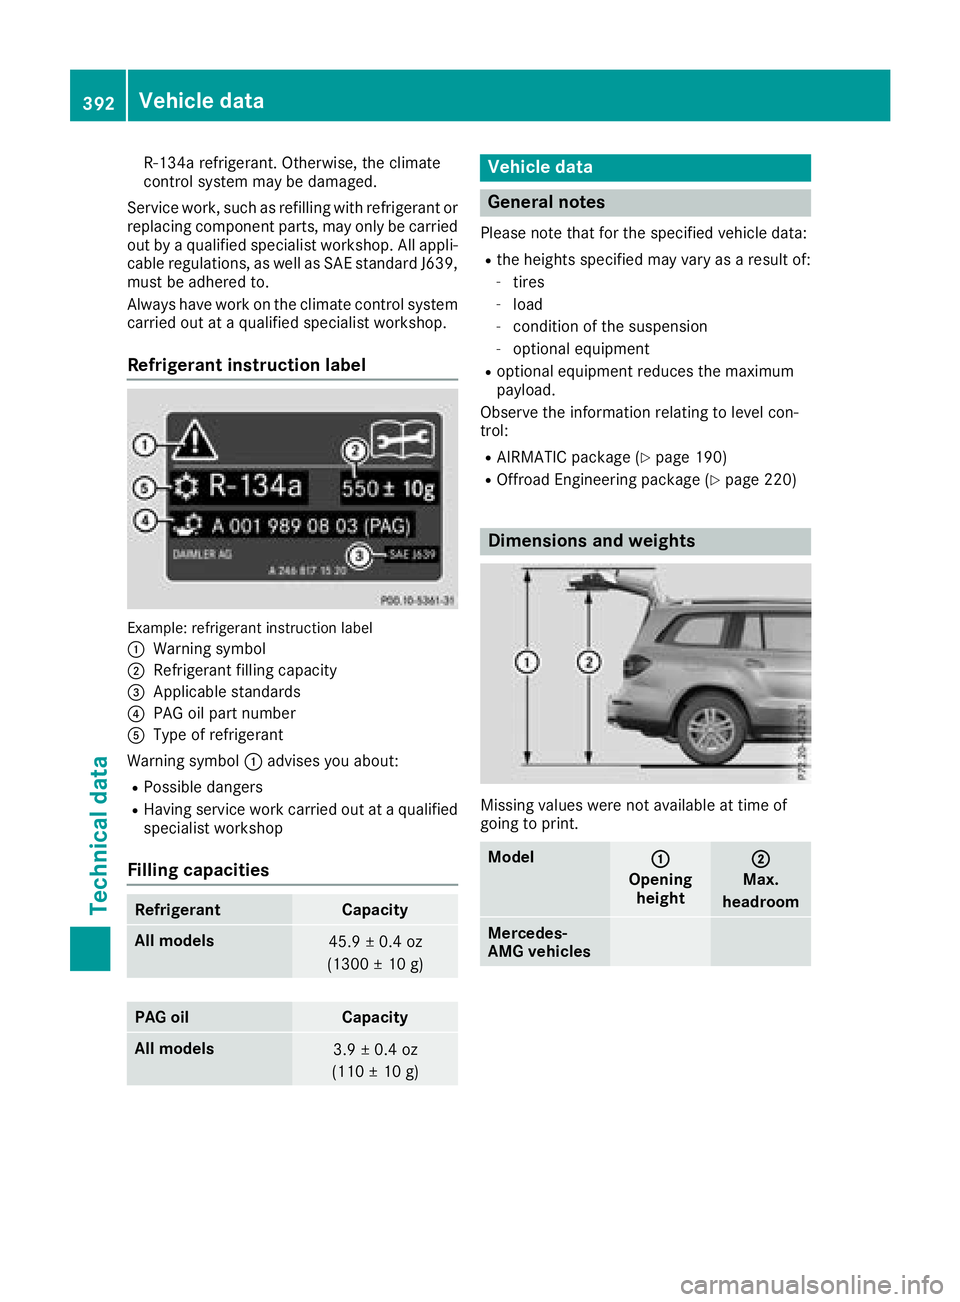
Removin gth eemergenc yspar ewhee l
XUnhoo kretaining spring hooks :of fasten-
ing strap ;from th ecargo tie-down rings.
XRemove th eemergenc yspar ewhee lbag wit h
th eemergenc ycollapsible spar ewheel.
XOpen th ebag and remove th eemergenc ycol-
lapsible spar ewheel.
Inflating th ecollapsible spar ewhee l
(
Ypage 382).
Stowin gth eemergenc yspar ewhee l
XPlaceth ecollapsible spar ewhee lint oth e
emergenc yspar ewhee lbag and close th e
emergenc yspar ewhee lbag.
XPlac eth eemergenc yspar ewhee lbag wit h
th ecollapsible spar ewhee lint oth ecargo
compartmen twit hth ecarryin gstrap at th e
back.
XHook retaining spring hooks :of fastenin g
strap ;intoth ecargo tie-down rings.
XTighte nfastenin gstrap ;.
Inflating the collapsible spare wheel
(Mercedes-AMG GLS 63 4MATIC)
!
Inflat eth ecollapsible spar ewhee lusin gth e
tire inflation compressor before lowering th e
vehicle. The whee lrim could otherwise be
damaged.
!Do no toperate th etire inflation compressor
for longer than eigh tminute sat atime without
a break. It may otherwise overheat.
382Emergency spare wheel
Wheels and tires
Page 385 of 398

The tire inflation compressor can be operated
again once it has cooled down.
Comply with the manufacturer's safety instruc-
tions on the tire inflation compressor label and
on the tire sealant bottle.
XMount the collapsible spare wheel as descri-
bed (Ypage 375).
The collapsible spare wheel must be mounted before it is inflated.
XRemove the tire inflation compressor from
the stowage space under the cargo compart-
ment floor (
Ypage 339).
XPull connector ?and hose Bout of the
housing.
XRemove the cap from the valve on the col-
lapsible spare wheel.
XScrew union nut ;of hose Bonto the valve.
XMake sure on/off switch Aof the tire infla-
tion compressor is set to 0.
XInsert connector?into a socket in your vehi-
cle.
Cigarette lighter socket: (
Ypage 312)
12 V sockets: (
Ypage 312)
Observe the notes on the cigarette lighter
(
Ypage 312). Observe the notes on sockets
(Ypage 312).
XTurn the SmartKey to position 1in the igni-
tion lock (Ypage 140).
XPress on and off switch Aon the tire inflation
compressor to I.
The tire inflation compressor is switched on.
The tire is inflated. The tire pressure is shown
on pressure gauge =.
XInflate the tire to the specified tire pressure.
The specified tire pressure is printed on the
yellow label of the emergency spare wheel.
XWhen the specified tire pressure has been
reached, press on and off switch Aon the
tire inflation compressor to 0.
The tire inflation compressor is switched off.
XTurn the SmartKey to position uin the igni-
tion lock.
XIf the tire pressure is higher than the specified
pressure, press pressure release valve but-
ton :until the correct tire pressure has been
reached.
XUnscrew union nut ;on hose Bfrom the
valve.
XScrew the cap onto the valve of the collapsi-
ble spare wheel again.
XStow connector ?and hose Bin the lower
section of the tire inflation compressor.
XStow the tire inflation compressor in the vehi-
cle.
Emergency spare wheel383
Wheels and tires
Z
Page 394 of 398

R-134arefrigerant. Otherwise, th eclimat e
control system may be damaged.
Service work, suc has refillin gwit hrefrigeran tor
replacing component parts, may only be carrie d
out by aqualified specialist workshop. All appli-
cable regulations, as well as SA Estandard J639,
mus tbe adhered to .
Always hav ewor kon th eclimat econtrol system
carrie dout at aqualified specialist workshop.
Refrigerant instruction label
Example: refrigeran tinstruction label
:
Warning symbol
;Refrigerant filling capacit y
=Applicable standards
?PAGoil part number
AType of refrigeran t
Warning symbol :advises you about :
RPossibledanger s
RHaving servic ewor kcarrie dout at aqualified
specialist workshop
Filling capacities
RefrigerantCapacit y
All models45.9±0. 4oz
(1300 ±10 g)
PAG oilCapacity
All models3.9 ± 0.4 oz
(110 ± 10 g)
Vehicle data
General notes
Please note that for the specified vehicle data:
Rthe heights specified may vary as a result of:
-tires
-load
-condition of the suspension
-optional equipment
Roptional equipment reduces the maximum
payload.
Observe the information relating to level con-
trol:
RAIRMATIC package (Ypage 190)
ROffroad Engineering package (Ypage 220)
Dimensions and weights
Missing values were not available at time of
going to print.
Model:
Opening height
;
Max.
headroom
Mercedes-
AMG vehicles
392Vehicle data
Technical data