2018 MERCEDES-BENZ GLE SUV stop start
[x] Cancel search: stop startPage 185 of 398
When the HOLD function is activated, the trans-
mission is automatically shifted to positionj
if:
Rthe driver's door is open and the driver's seat
belt is unfastened
Rthe engine is switched off, unless it is auto-
matically switched off by the ECO start/stop
function
The electric parking brake secures the vehicle
automatically if the HOLD function is activated
when the vehicle is stationary and:
Ra system malfunction occurs
Rthe power supply is insufficient
On steep uphill or downhill gradients or if there
is a malfunction, the transmission may also be
automatically shifted to position j.
AIRMATIC package
General notes
AIRMATIC is an air suspension system with var-
iable damping for improved driving comfort.
Level control ensures the best possible suspen-
sion and constant ground clearance, even with a
laden vehicle. When you drive fast, the vehicle is
lowered automatically to improve driving safety
and to reduce fuel consumption. There is also
the option to manually adjust the vehicle level.
AIRMATIC consists of:
Rlevel settings
Rlevel control and
RADS or ADS PLUS (Adaptive Damping Sys-
tem)
All vehicles (except Mercedes-AMG vehi-
cles): your vehicle may also be equipped with
the ACTIVE CURVE SYSTEM (
Ypage 184).
Mercedes-AMG vehicles: your vehicle is equip-
ped with the ACTIVE CURVE SYSTEM
(
Ypage 184).
Observe the notes on driving with a trailer
(
Ypage 220).
The vehicle level can be set using the DYNAMIC
SELECT controller (
Ypage 142) or the level but-
ton (Ypage 185). The setting always corre-
sponds to the last selected function.
Important safety notes
GWARNING
When the vehicle is being lowered, people
could become trapped if their limbs are
between the vehicle body and the wheels or
underneath the vehicle. There is a risk of
injury.
Make sure no one is underneath the vehicle or
in the immediate vicinity of the wheel arches
when the vehicle is being lowered.
If you unlock the vehicle or open a door, the
vehicle begins to compensate for load discrep-
ancies while still parked. However, for signifi-
cant level changes, such as after the vehicle has
been stationary for a long period, the engine
must be on. For safety reasons, the vehicle is
only lowered when the doors are closed. Low-
ering is interrupted if a door is opened, and it
continues once the door has been closed.
ADS and ADS PLUS (Adaptive Damping
System)
General notes
The Adaptive Damping System automatically
controls the calibration of the dampers. The
damping characteristics adapt to the current
operating and driving situation.
The damping is tuned individually to each wheel
and depends on:
Ryour driving style, e.g. sporty
Rthe road surface conditions
Rthe drive program selected
Rthe vehicle level setting
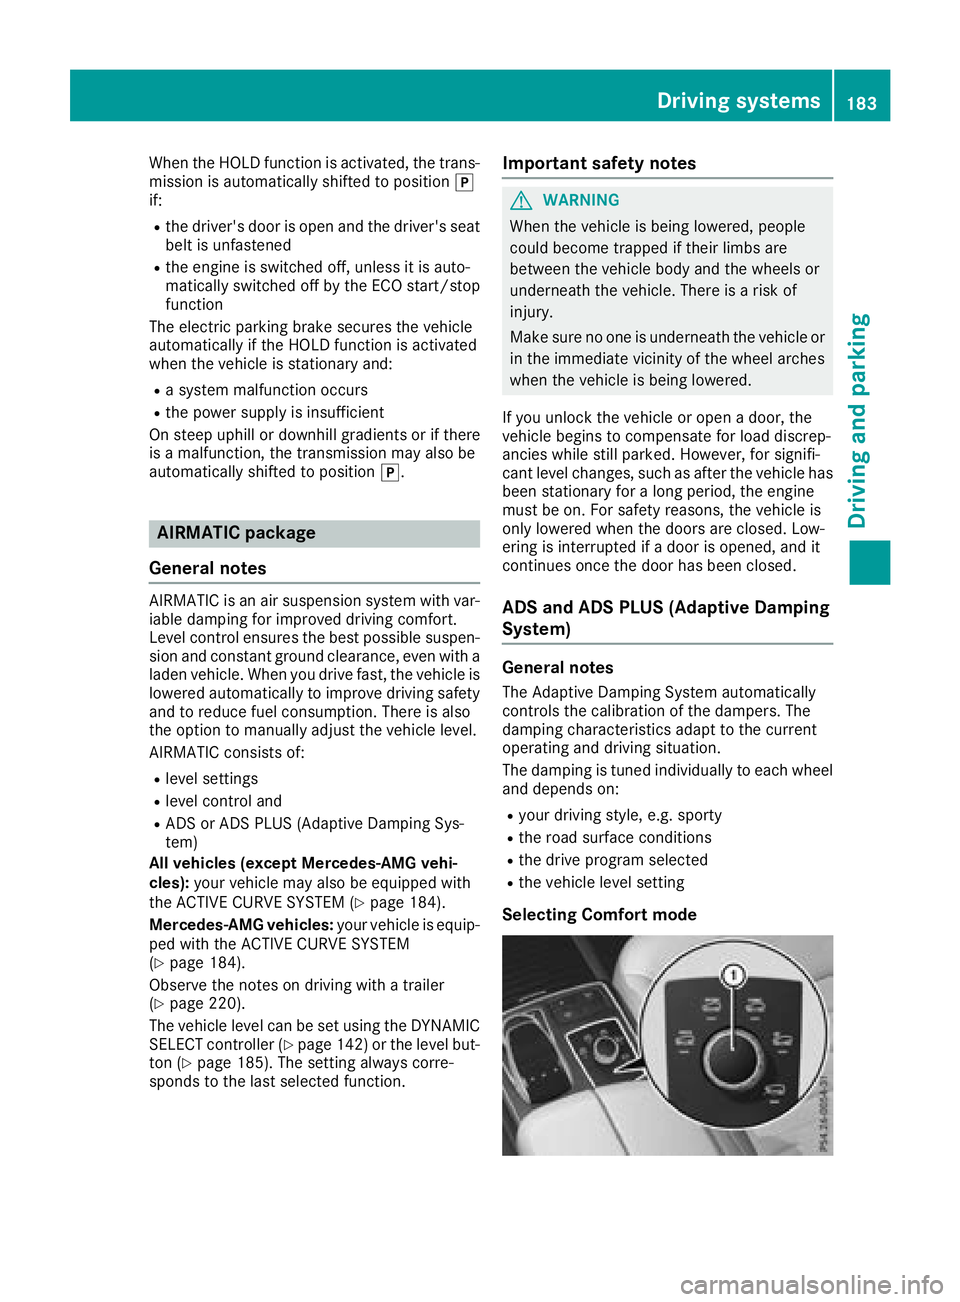
Selecting Comfort mode
Driving systems183
Driving and parking
Z
Page 189 of 398
The damping is tuned individually to each wheel
and depends on:
Ryour driving style, e.g. sporty
Rthe road surface condition, e.g. bumps
Ryour individual selection of Sport, Sport+ or
Comfort
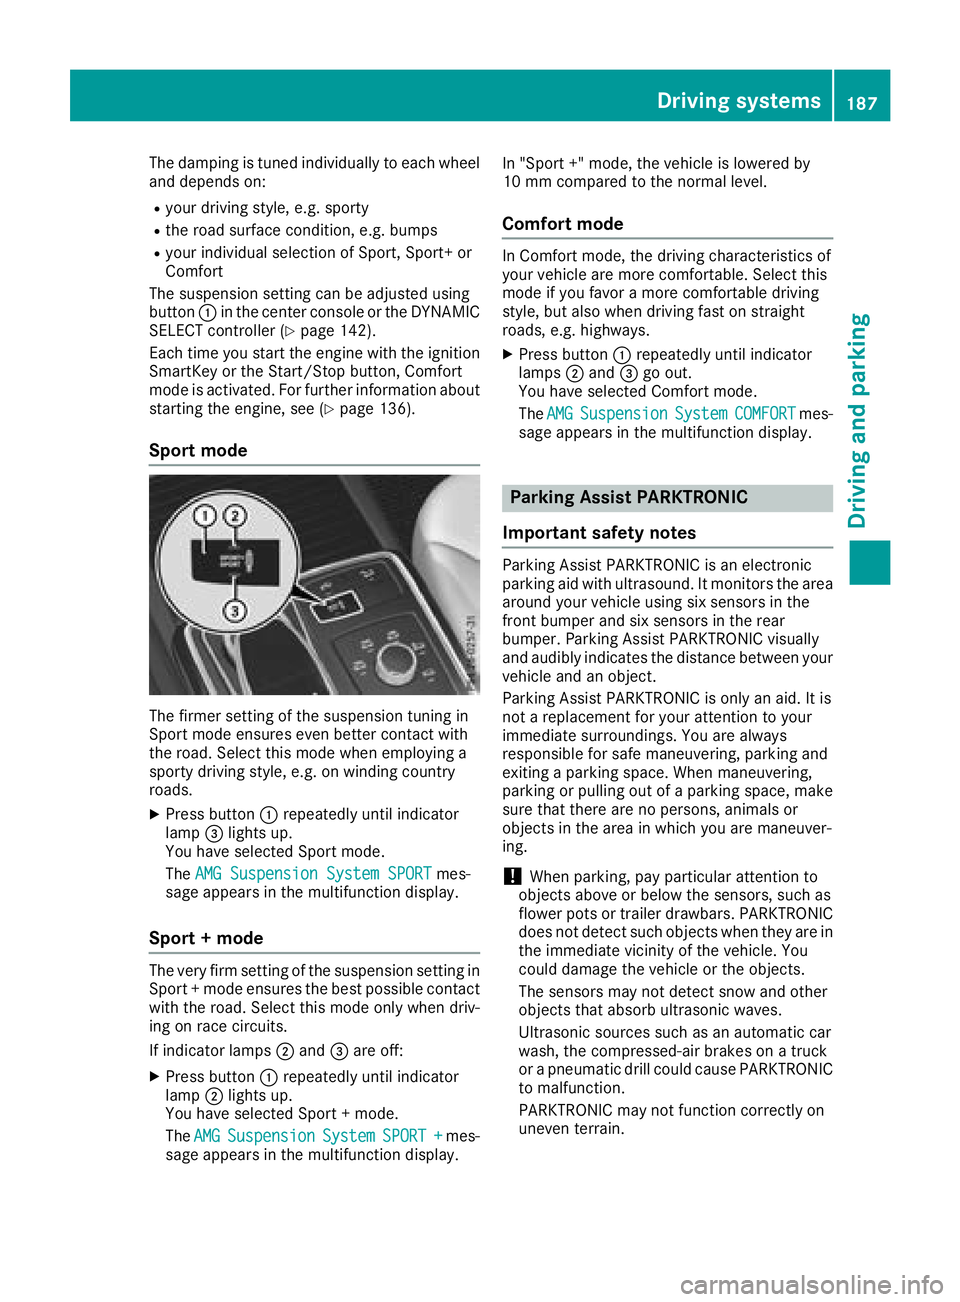
The suspension setting can be adjusted using
button :in the center console or the DYNAMIC
SELECT controller (
Ypage 142).
Each time you start the engine with the ignition
SmartKey or the Start/Stop button, Comfort
mode is activated. For further information about
starting the engine, see (
Ypage 136).
Sport mode
The firmer setting of the suspension tuning in
Sport mode ensures even better contact with
the road. Select this mode when employing a
sporty driving style, e.g. on winding country
roads.
XPress button :repeatedly until indicator
lamp =lights up.
You have selected Sport mode.
The AMG Suspension System SPORT
mes-
sage appears in the multifunction display.
Sport + mode
The very firm setting of the suspension setting in
Sport + mode ensures the best possible contact
with the road. Select this mode only when driv-
ing on race circuits.
If indicator lamps ;and =are off:
XPress button :repeatedly until indicator
lamp ;lights up.
You have selected Sport + mode.
The AMG
SuspensionSystemSPORT +mes-
sage appears in the multifunction display. In "Sport +" mode, the vehicle is lowered by
10 mm compared to the normal level.
Comfort mode
In Comfort mode, the driving characteristics of
your vehicle are more comfortable. Select this
mode if you favor a more comfortable driving
style, but also when driving fast on straight
roads, e.g. highways.
XPress button
:repeatedly until indicator
lamps ;and =go out.
You have selected Comfort mode.
The AMG
SuspensionSystemCOMFORTmes-
sage appears in the multifunction display.
Parking Assist PARKTRONIC
Important safety notes
Parking Assist PARKTRONIC is an electronic
parking aid with ultrasound. It monitors the area
around your vehicle using six sensors in the
front bumper and six sensors in the rear
bumper. Parking Assist PARKTRONIC visually
and audibly indicates the distance between your
vehicle and an object.
Parking Assist PARKTRONIC is only an aid. It is
not a replacement for your attention to your
immediate surroundings. You are always
responsible for safe maneuvering, parking and
exiting a parking space. When maneuvering,
parking or pulling out of a parking space, make
sure that there are no persons, animals or
objects in the area in which you are maneuver-
ing.
!When parking, pay particular attention to
objects above or below the sensors, such as
flower pots or trailer drawbars. PARKTRONIC
does not detect such objects when they are in
the immediate vicinity of the vehicle. You
could damage the vehicle or the objects.
The sensors may not detect snow and other
objects that absorb ultrasonic waves.
Ultrasonic sources such as an automatic car
wash, the compressed-air brakes on a truck
or a pneumatic drill could cause PARKTRONIC
to malfunction.
PARKTRONIC may not function correctly on
uneven terrain.
Driving systems187
Driving and parking
Z
Page 194 of 398
iNote that Parking Pilot PARKTRONIC cannot
measure the depth of parking spaces if they
are at right angles to the direction of travel.
You will need to judge whether your vehicle
will fit into the parking space.
When driving at speeds below 19 mph
(30 km/h), you will see parking symbol ;as a
status indicator in the instrument cluster. When
a parking space has been detected, an arrow
towards the right or the left also appears. Park-
ing Pilot only displays parking spaces on the
front-passenger side as standard. Parking
spaces on the driver's side are displayed as
soon as the turn signal on the driver's side is
activated. When parking on the driver's side,
this must remain activated until you confirm the
use of Parking Pilot by pressing the abutton
on the multifunction steering wheel. The system
automatically determines whether the parking
space is parallel or at right angles to the direc-
tion of travel.
A parking space is displayed while you are driv-
ing past it, and until you are approximately 50 ft
(15 m) away from it.
Parking
GWARNING
If you leave the vehicle when it is only being
braked by Active Parking Assist it could roll
away if:
Rthere is a malfunction in the system or in
the voltage supply.
Rthe electrical system in the engine com-
partment, the battery or the fuses have
been tampered with.
Rthe battery is disconnected.
Rthe accelerator pedal has been depressed,
e.g. by a vehicle occupant.
There is a risk of an accident.
Before leaving the vehicle, always secure it
against rolling away.
iIf Parking Assist PARKTRONIC detects
obstacles, Parking Pilot brakes automatically
whilst the vehicle is being parked. You are
responsible for braking in good time.
XStop the vehicle when the parking space sym-
bol shows the desired parking space in the
instrument cluster.
XShift the transmission to position R.
The Start Parking Pilot? Yes: OK No:
% message appears in the multifunction
display.
XTo cancel the procedure: press the%
button on the multifunction steering wheel or
pull away.
or
XTo park using Parking Pilot: press thea
button on the multifunction steering wheel.
The Parking Pilot Active Accelerate
and Brake Observe Surroundingsmes-
sage appears in the multifunction display.
XLet go of the multifunction steering wheel.
XBack up the vehicle, being ready to brake at all
times. When backing up, drive at a speed
below approximately 6 mph (10 km/h). Oth-
erwise, Parking Pilot is canceled immediately.
Parking Pilot brakes the vehicle to a standstill when the vehicle approaches the rear border
of the parking space.
Maneuvering may be required in tight parking spaces.
The Parking Pilot Active Select D
Observe Surroundingsmessage appears in
the multifunction display.
XShift the transmission to position Dwhile the
vehicle is stationary.
Parking Pilot immediately steers in the other
direction.
The Parking Pilot Active Accelerate
and Brake Observe Surroundingsmes-
sage appears in the multifunction display.
iYou will achieve the best results by waiting
for the steering procedure to complete before
pulling away.
XDrive forwards and be ready to brake at all
times.
Parking Pilot brakes the vehicle to a standstill.
The Parking Pilot Active Select R
Observe Surroundingsmessage appears in
the multifunction display.
As soon as the parking procedure is complete,
the Parking Pilot Finished
message
appears and a warning tone sounds. The vehicle
is now parked. The vehicle is kept stationary
without the driver having to depress the brake
192Driving systems
Driving and parking
Page 205 of 398

The attention level evaluation is deleted and
restarts when the journey is continued, if:
Ryou switch off the engine
Ryou take off your seat belt and open the driv-
er's door, e.g. for a change of drivers or to
take a break
Displaying the attention level
You can have current status information dis-
played in the assistance menu (Ypage 236) of
the on-board computer.
XSelect the Assistance display for ATTENTION
ASSIST using the on-board computer
(
Ypage 236).
The following information is displayed:
Rthe length of the journey since the last break.
Rthe attention level determined by ATTENTION
ASSIST, displayed in a bar display in five levels
from high to low.
RIf ATTENTION ASSIST is unable to calculate
the attention level and cannot output a warn-
ing, the System suspended
message
appears. The bar display then changes the
display, e.g. if you are driving at a speed below
37 mph (60 km/h) or above 125 mph
(200 km/h) .
Activating ATTENTION ASSIST
XActivateATTENTION ASSIST usin gth eon -
boar dcomputer (Ypage 237).
The system determine sth eattention level of
th edriver depending on th esetting selected:
Standar dselected: thesensitivit ywit hwhic h
th esystem determine sth eattention level is set
to normal.
Sensitive selected: thesensitivit yis set higher.
The attention level detecte dby Attention Assis tis adapted accordingly and th
edriver is warned
earlier .
When ATTENTION ASSIST is deactivated, th e
À symbol and OF Fappear in th emultifunc-
tion display in th eassistanc edisplay when th e
engin eis running.
When ATTENTION ASSIST has been deactivated,
it is automatically reactivated after th eengin e
has been stopped. The sensitivit yselected cor-
responds to th elast selection activated (stand -
ard/sensitive).
Warn ing in the multifunction display
If fatigue or increasing lapse sin concentration
are detected, awarning appear sin th emulti-
function display: Attention
Assist:TakeaBreak!
In addition to th emessage shown in th emulti-
function display, you will then hear awarning
tone .
XIf necessary, tak e abreak.
XConfir mthemessage by pressing th ea
butto non th esteering wheel.
On lon gjourneys, tak eregular breaks in goo d
time to allow yourself to rest. If you do no ttak e
a break, you will be warned again after
15 minute sat th eearliest .This will only happe n
if ATTENTION ASSIST still detects typical indi-
cators of fatigue or increasing lapse sin concen -
tration .
Vehicles wit hCOMAND: ifawarning is issued
in th emultifunction display, aservic estation
search is performed in COMAND .You can select
a servic estation and navigation to this servic e
station will then begin. This function can be acti-
vated and deactivated in COMAND .
Traffic Sign Assist
Genera l notes
Traffic Sig nAssis tdisplays th emaximum spee d
permitte dto th edriver in th einstrumen tcluster.
The dat astore din th enavigation system and
general traffic regulation sare used to determine
th ecurren tspee dlimit.
As Traffic Sig nAssis tis amap-base dsystem,
traffic sign sput up temporarily (e.g. near road -
works )are no tdetected.
Driving systems203
Driving and parking
Z
Page 224 of 398

XSlide boltAinto the hole in the ball coupling
recess and the ball coupling to the stop.
XSecure the bolt using spring cotter B.
XCheck the ball coupling, bolt and spring cotter
for correct installation.
If the ball coupling cannot be correctly mounted,
remove the ball coupling. Under these circum-
stances, the ball coupling must not be used for
trailer towing.
Have the entire trailer tow hitch checked at a
qualified specialist workshop.
Coupling up a trailer
!
Do not connect the trailer's brake system (if
featured) to the hydraulic brake system of the
towing vehicle, as the latter is equipped with
an anti-lock brake system. Doing so will result
in a loss of function of the brake systems of
both the vehicle and the trailer.
XShift the transmission to position P.
XApply the vehicle's electric parking brake.
XStart the engine.
XVehicles with AIRMATIC package: select
normal level and the Comfortdrive program.
XSwitch off the engine.
XClose the doors and tailgate.
XCouple up the trailer.
XEstablish the electrical connection between
the vehicle and the trailer.
XCheck that the trailer lighting system is work-
ing.
XPush the combination switch upwards/down-
wards and check whether the corresponding
turn signal on the trailer flashes.
A trailer that is connected is recognized only
when the electrical connection is established
correctly and when the lighting system is work-
ing properly. The function of other systems also
depends on this, for example:
RESP®
RParking Assist PARKTRONIC
RParking Pilot
RActive Blind Spot Assist
RActive Lane Keeping Assist
iVehicles with the AIRMATIC package: if you
couple up a trailer, the vehicle always remains
at normal level. When coupling up a trailer,
please observe the foll
owing:
RIf the normal level has not been set man-
ually, the vehicle is automatically lowered
to normal level. This is the case if a speed of
5 mph (8 km/h) is reached.
RThe
Sport drive program is not available.
These restrictions apply to all accessories
powered through a connection to the trailer
power socket of your vehicle, e.g. a bicycle
carrier.
Observe the maximum permissible trailer
dimensions (width and length).
222Towing a trailer
Driving and parking
Page 233 of 398

iSet the time using the multimedia system;
see the Digital Operator's Manual.
Possible displays in the multifunction dis-
play:
RZ Gearshift recommendation, when shifting
manually (Ypage 147)
Rj Parking Pilot (Ypage 190)
RCRUISECruise control (Ypage 169)
R_ Adaptive Highbeam Assist
(Ypage 114)
Rè ECO start/stop function (Ypage 139)
RëHOLD function (Ypage 182)
RaDistance Pilot DISTRONIC Steering Pilot
(Ypage 236)
RDSRDownhill Speed Regulation
(Ypage 213)
Menus and submenus
Menu overview
Press the =or; button on the steering
wheel to call up the menu bar and select a menu.
Operating the on-board computer (
Ypage 229).
Depending on the equipment installed in the
vehicle, you can call up the following menus:
RTripmenu (Ypage 231)
RNavimenu (navigation instructions)
(Ypage 232)
RAudiomenu (Ypage 234)
RTelmenu (telephone) (Ypage 235)
RDriveAssistmenu (assistance)
(Ypage 236)
RServ.menu (Ypage 237)
RSett.menu (settings) (Ypage 238)
RON&OFFROADmenu (Ypage 240)
RAMGmenu (Mercedes-AMG vehicles)
(Ypage 240)
Trip menu
Standard display
XPress and hold the %button on the steer-
ing wheel until the Tripmenu with trip odom-
eter :and odometer ;appears.
Trip computer "From Start" or "From
Reset"
:Distance
;Driving time
=Average speed
?Average fuel consumption
XPress the =or; button on the steering
wheel to select the Tripmenu.
XPress the9or: button to select
From startor From reset.
The values in the From
Startsubmenu are cal-
culated from the start of a journey, while the
values in the From Reset
submenu are calcu-
lated from the last time the submenu was reset
(
Ypage 232).
The From Start
trip computer is automatically
reset if:
Rthe ignition has been switched off for more
than four hours.
R999 hours have been exceeded.
R9,999 miles have been exceeded.
The From reset
trip computer is automatically
reset if the value exceeds 9,999 hours or
99,999 miles.
Menus and submenus231
On-board computer and displays
Z
Page 237 of 398
Telephone menu
Introduction
GWARNING
If you operate information systems and com-
munication equipment integrated in the vehi-
cle when driving, you may be distracted from
the traffic situation. You could also lose con-
trol of the vehicle. There is a risk of an acci-
dent.
Only operate this equipment when the traffic
situation permits. If you are not sure that this
is possible, park the vehicle paying attention
to traffic conditions and operate the equip-
ment when the vehicle is stationary.
When telephoning, you must observe the legal
requirements for the country in which you are
currently driving.
XSwitch on the mobile phone (see the manu-
facturer’s operating instructions).
XSwitch on the multimedia system (see the
Digital Operator's Manual)
XEstablish a Bluetooth®connection to the mul-
timedia system (see the Digital Operator's
Manual).
XPress the =or; button on the steering
wheel to select the Telmenu.
You will see one of the following display mes-
sages in the multifunction display:
RPhone READYor the name of the network
provider: the mobile phone has found a net-
work and is ready to receive.
RPhone No Service: there is no network
available or the mobile phone is searching for
a network.
Accepting a call
If someone calls you when you are in the Telmenu, a display message appears in the multi-
function display.
You can accept a call at any time regardless of
the menu selected.
XPress the6button on the steering wheel
to accept an incoming call.
Rejecting or ending a call
You can end or reject a call even if you are not in
the Telmenu.
XPress the ~button on the steering wheel
to reject or end a call.
Selecting an entry from the phone book
XPress the =or; button on the steering
wheel to select the Telmenu.
XPress the9,:ora button to
switch to the phone book.
XAuthorize access to the phone book on the
phone.
XPress the 9or: button to select the
desired name.
or
XTo start rapid scrolling: press and hold the
9 or: button for longer than one sec-
ond.
Rapid scrolling stops when you release the
button or reach the end of the list.
XIf only one telephone number is stored for
a name: press the 6ora button to
start dialing.
or
XIf there is more than one number for a
particular name: press the6ora
button to display the numbers.
XPress the 9or: button to select the
number you want to dial.
XPress the 6ora button to start dialing.
or
XTo exit the telephone book: press the~
or % button.
Redialing
The on-board computer saves the last names or
numbers dialed in the redial memory.
XPress the =or; button on the steering
wheel to select the Telmenu.
XPress the6button to switch to the redial
memory.
XPress the 9or: button to select the
desired name or number.
Menus and submenus235
On-board computer and displays
Z
Page 243 of 398
If the multifunction display shows oil temper-
ature?orB in blue, the engine or the
transmission are not yet at normal operating
temperature. Avoid driving at full engine out-
put during this time.
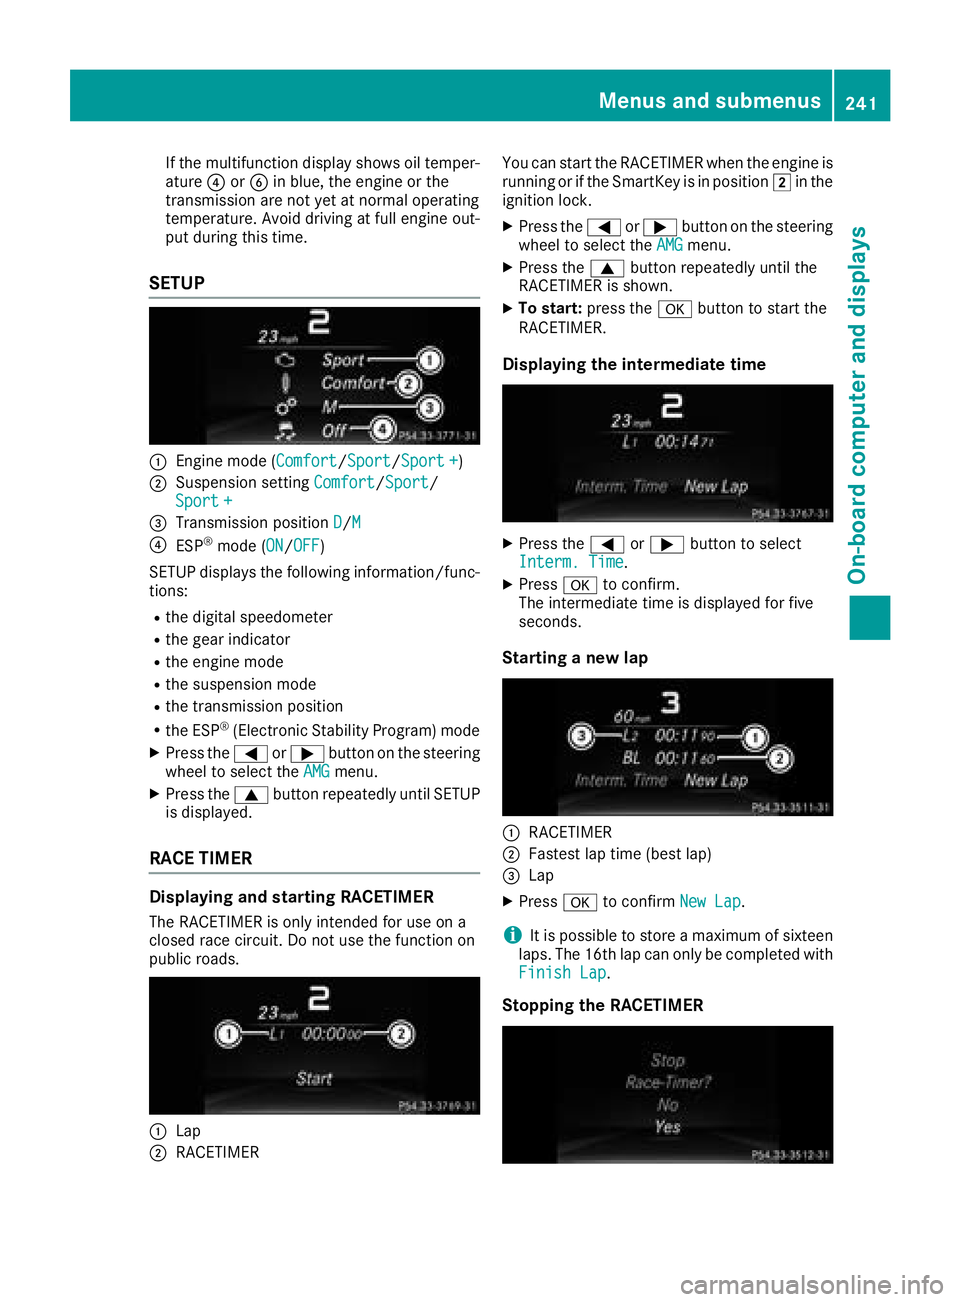
SETUP
:Engine mode (Comfort/ Sport/Sport +)
;Suspension setting Comfort/Sport/
Sport +
=Transmission position D/M
?ESP®mode (ON/OFF)
SETUP displays the following information/func- tions:
Rthe digital speedometer
Rthe gear indicator
Rthe engine mode
Rthe suspension mode
Rthe transmission position
Rthe ESP®(Electronic Stability Program) mode
XPress the =or; button on the steering
wheel to select the AMGmenu.
XPress the9button repeatedly until SETUP
is displayed.
RACE TIMER
Displaying and starting RACETIMER
The RACETIMER is only intended for use on a
closed race circuit. Do not use the function on
public roads.
:Lap
;RACETIMER You can start the RACETIMER when the engine is
running or if the SmartKey is in position
2in the
ignition lock.
XPress the =or; button on the steering
wheel to select the AMGmenu.
XPress the9button repeatedly until the
RACETIMER is shown.
XTo start: press the abutton to start the
RACETIMER.
Displaying the intermediate time
XPress the =or; button to select
Interm. Time.
XPress ato confirm.
The intermediate time is displayed for five
seconds.
Starting a new lap
:RACETIMER
;Fastest lap time (best lap)
=Lap
XPress ato confirm New Lap.
iIt is possible to store a maximum of sixteen
laps. The 16th lap can only be completed with
Finish Lap
.
Stopping the RACETIMER
Menus and submenus241
On-board computer and displays
Z