2018 MERCEDES-BENZ GLE SUV ECO mode
[x] Cancel search: ECO modePage 290 of 398
Operating system
Overview
General notes
!Do not use the space in front of the display
for storage. Objects placed here could dam-
age the display or impair its function. Avoid
any direct contact with the display surface.
Pressure on the display surface may result in
impairments to the display, which could be
irreversible.
Wearing polarized sunglasses may impair your
ability to read the display.
The display has an automatic temperature-con-
trolled switch-off feature. The brightness is
automatically reduced if the temperature is too
high. The display may temporarily switch off
completely.
Cleaning instructions
!Do not touch the display. The display has a
very sensitive high-gloss surface; there is a
risk of scratching. If you have to clean the
screen, however, use a mild cleaning agent
and a soft, lint-free cloth.
The display must be switched off and have
cooled down before you start cleaning. Do not
apply pressure to the display surface when
cleaning it, as this could cause irreversible dam-
age to the display.
Switching the multimedia system
on/off
XPress the qcontrol knob.
Adjusting the volume
XTurn the qcontrol knob.
The volume is adjusted:
Rfor the currently selected media source
Rduring traffic or navigation announcements
Rin hands-free mode during an active call
Switching the sound on or off
XPress the 8button on the control panel.
If the audio output is switched off, the status
line will show the 8symbol. If you switch the media source or set the volume, the sound
is automatically switched on.
iNavigation announcements will be heard
even if the sound is muted.
Functions
The multimedia system has the following func-
tions:
RRadio mode
RMedia mode with media search
RSound systems
RNavigation system
COMAND: navigation via the hard drive
Audio 20: navigation via SD card
RCommunication functions
RSIRIUS Weather (COMAND)
RVehicle functions with system settings
RFavorites functions
Controller
The controller in the center console lets you:
Rselect menu items on the display
Renter characters
Rselect a destination on the map
Rsave entries
The controller can be:
Rturned 3
Rslid left or right 1
Rslid forwards or back 4
Rslid diagonally2
Rpressed briefly or pressed and held 7
Back button
You can use the%button to exit a menu or to
call up the main menu of the current operating
mode.
XTo exit the menu: briefly press the%
button.
The multimedia system changes to the next
higher menu level in the current operating
mode.
XTo call up the main menu: press the%
button for longer than two seconds.
The multimedia system changes to the main
menu of the current operating mode.
288Operating system
Multimedia system
Page 291 of 398
Favorites button
You can assign predefinedfunction susin gth e
g favorite sbutto nand call them up by press-
ing th ebutto n (
Ypage 289).
Favorites
Calling up and exiting favorites
XTo call up :press th eg buttonon th econ-
troller .
XSelect afavorite ,e.g. Vehicl e.
The favorite sare displayed.
XTo exit :press th eg buttonagain .
Adding favorites
Adding predefined favorites
XPress th eg button.
XCOMAND: slide6thecontroller.
XAudio 20: slide5or6 thecontroller.
The men ubar is displayed.
XSelec tReassign.
The categories are displayed.
XSelec t acategory.
The favorite sare displayed.
XSelec t afavorite .
XCOMAND: to add thefavorite to th edesired
position ,tur nand press th econtroller.
If afavorite has already been added at this
position ,it will be overwritten.
XAudio 20: to add thefavorite to th edesired
position ,turn, slide 5or6 and press th e
controller.
If afavorite has already been added at this
position ,it will be overwritten.
Adding your own favorites
You can add climat econtrol as afavorite ,for
example.
XSelec tVehicl eQVehicle Settings.
XPress and hold th eg buttonuntil th e
favorite sare displayed.
XAd d a favorite to th edesired position .
If afavorite has already been added at this
position ,it will be overwritten.
Navigation mode
Important safety notes
GWARNIN G
If you operate information systems and com-
munication equipmen tintegrate din th evehi-
cle when driving ,you may be distracte dfrom
th etraffic situation .You could also lose con-
trol of th evehicle. Ther eis aris kof an acci-
dent.
Only operate this equipmen twhen th etraffic
situation permits. If you are no tsure that this
is possible ,park th evehicl epayin gattention
to traffic condition sand operate th eequip-
men twhen th evehicl eis stationary.
You must observ eth elegal requirements for th e
country in whic hyou are currentl ydriving when
operating th enavigation system.
General notes
Amon gother things, correct functioning of th e
navigation system depend son GPS reception .In
certai nsituations, GPS reception may be
impaired ,there may be interferenc eor there
may be no reception at all, e.g. in tunnels or
parking garages.
Audio 20 is equipped wit hGarmin
®MA PPILOT
(see th emanufacturer' soperating instructions).
The Garmin
®MA PPILOT operating instruction s
are store don th eSD car das aPD Ffile .The SD
car dbox contains aquic kguide .
The followin gdescription sapply to navigation
wit hCOMAND .Further information can be
foun din th eDigital Operator's Manual.
Selecting a route type and route options
Multimedia system:
XSelec tNav iQNavigation.
The map shows th evehicle's curren tposition .
XSlide6thecontroller.
XSelec tOption sQRout eSettings.
Notes for rout etypes:
REco Route
RDynami cTraffi cRoute
Operating system289
Multimedia system
Z
Page 319 of 398
door opener, contact a Mercedes-Benz Service
Center.
Alternatively, you can call the following tele-
phone assistance services:
RUSA:Mercedes-Benz Customer Assistance
Center at 1-800 FOR-MERCEDES
RCanada: Customer Service at
1-800-387-0100
RHomeLink®hotline 1-800-355-3515 (free of
charge)
More information on HomeLink
®and/or com-
patible products is also available online at
http://www.homelink.co m.
Notes on the declaration of conformity
(
Ypage 30).
USA: FCC ID: CB2HMIHL4
Canada: IC: 279B-HMIHL4
Important safety notes
GWARNING
When you operate or program the garage door
with the integrated garage door opener, per-
sons in the range of movement of the garage
door can become trapped or struck by the
garage door. There is a risk of injury.
When using the integrated garage door
opener, always make sure that nobody is
within the range of movement of the garage
door.
GWARNING
Combustion engines emit poisonous exhaust
gases such as carbon monoxide. Inhaling
these exhaust gases leads to poisoning. There
is a risk of fatal injury. Therefore never leave
the engine running in enclosed spaces with-
out sufficient ventilation.
Programming
Programming the buttons
Pay attention to the "Important safety notes"
(Ypage 317).
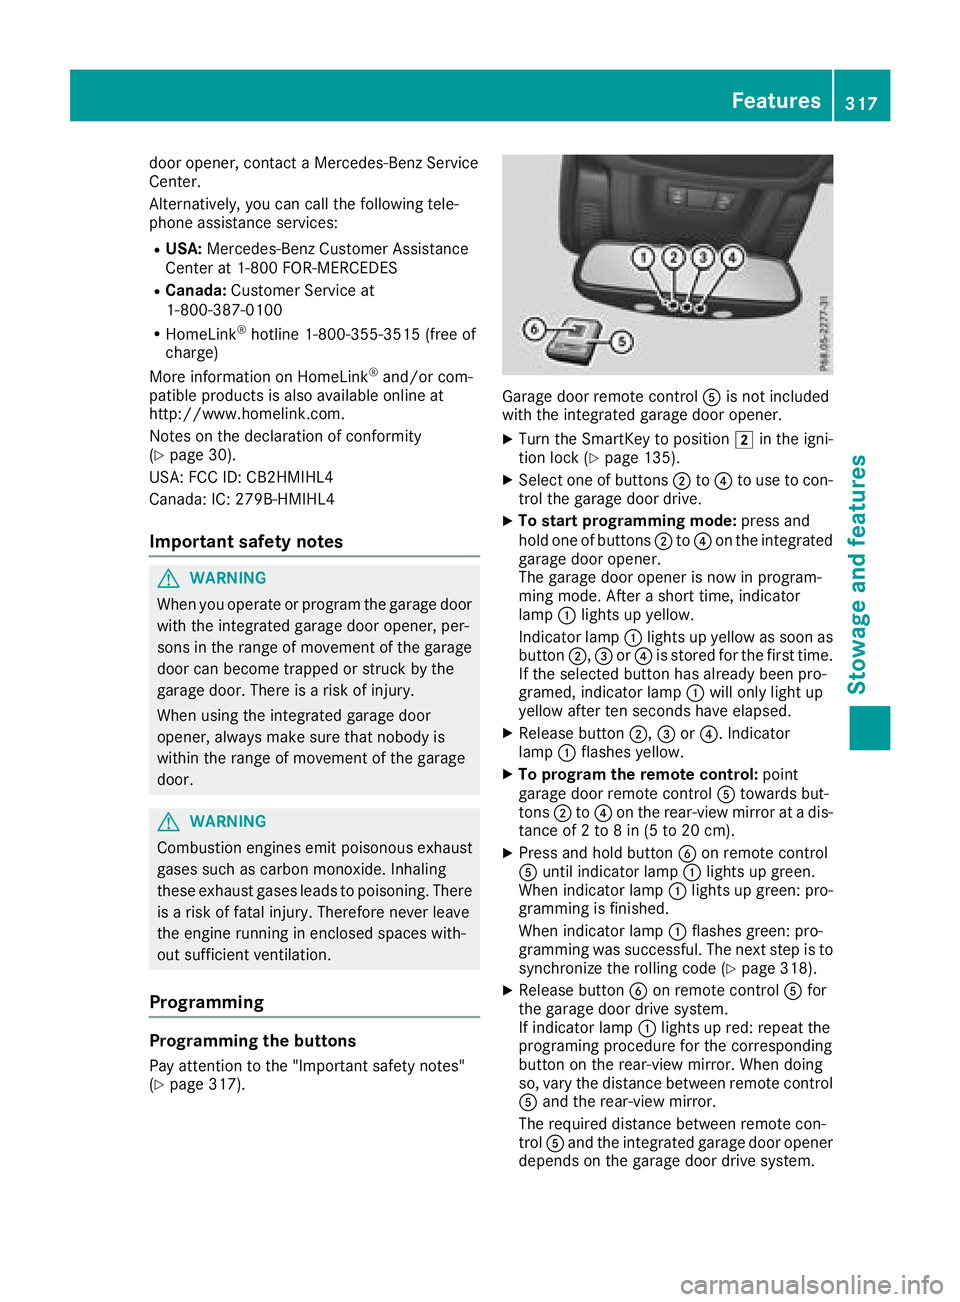
Garage door remote control Ais not included
with the integrated garage door opener.
XTurn the SmartKey to position 2in the igni-
tion lock (Ypage 135).
XSelect one of buttons ;to? to use to con-
trol the garage door drive.
XTo start programming mode: press and
hold one of buttons ;to? on the integrated
garage door opener.
The garage door opener is now in program-
ming mode. After a short time, indicator
lamp :lights up yellow.
Indicator lamp :lights up yellow as soon as
button ;,=or? is stored for the first time.
If the selected button has already been pro-
gramed, indicator lamp :will only light up
yellow after ten seconds have elapsed.
XRelease button ;,=or?. Indicator
lamp :flashes yellow.
XTo program the remote control: point
garage door remote control Atowards but-
tons ;to? on the rear-view mirror at a dis-
tance of 2 to 8 in (5 to 20 cm).
XPress and hold button Bon remote control
A until indicator lamp :lights up green.
When indicator lamp :lights up green: pro-
gramming is finished.
When indicator lamp :flashes green: pro-
gramming was successful. The next step is to synchronize the rolling code (
Ypage 318).
XRelease button Bon remote control Afor
the garage door drive system.
If indicator lamp :lights up red: repeat the
programing procedure for the corresponding
button on the rear-view mirror. When doing
so, vary the distance between remote control
A and the rear-view mirror.
The required distance between remote con-
trol Aand the integrated garage door opener
depends on the garage door drive system.
Features317
Stowage and features
Z
Page 338 of 398
XVehicles with the AIRMATIC package:
make sure that the normal vehicle level is
selected (
Ypage 185).
XVehicles with the Off-Road Engineering
package:make sure that the normal vehicle
level is selected (
Ypage 179).
XSwitch off the engine.
XVehicles without KEYLESS-GO: remove the
SmartKey from the ignition lock.
XVehicles with KEYLESS-GO: open the driv-
er's door.
The vehicle electronics are now in position
u. This means no SmartKey is in the ignition
lock.
XVehicles with KEYLESS-GO: remove the
Start/Stop button from the ignition lock
(
Ypage 135).
XMake sure that the engine cannot be started
via your smartphone (Ypage 137).
XMake sure that the passengers are not endan-
gered as they do so. Make sure that no one is
near the danger area while a wheel is being
changed. Anyone who is not directly assisting
in the wheel change should, for example,
stand behind the barrier.
XGet out of the vehicle. Pay attention to traffic
conditions when doing so.
XClose the driver's door.
XUnload heavy luggage.
iOnly operate the tire inflation compressor
using a 12 V socket, even if the ignition is
turned off (
Ypage 308).
An emergency cut-out ensures that the on-
board voltage does not drop too low. If the on-
board voltage is too low
, the power to the
sockets is automatically cut. This ensures
that there is sufficient power to start the
engine.
MOExtended tires (tires with run-flat
properties)
General notes
With MOExtended tires (tires with run flat char-
acteristics), you can continue to drive your vehi-
cle even if there is a total loss of pressure in one
or more tires. The affected tire must not show
any clearly visible damage.
You can recognize a MOExtended tire by the
MOExtended marking which appears on the sidewall of the tire. You will find this marking
next to the tire size designation, the load-bear-
ing capacity and the speed index (
Ypage 366).
MOExtended tires may only be used in conjunc-
tion with an active tire pressure loss warning
system or with an active tire pressure monitor.
If a pressure loss warning message appears
in the multifunction display:
Robserve the instructions in the display mes-
sages (Ypage 268).
Rcheck the tire for damage
Rif driving on, observe the following notes
The driving distance possible in run-flat mode is
approximately 50 miles (80 km) when the vehi-
cle is partially laden and approximately 18 miles
(30 km) when the vehicle is fully laden.
In addition to the vehicle load, the driving dis-
tance possible depends upon:
RVehicle speed
RRoad condition
ROutside temperature
The driving distance possible in run-flat mode
may be reduced by extreme driving conditions
or maneuvers, or it can be increased through a
moderate style of driving.
The driving di stance p
ossible in run-flat mode is
counted from the moment the tire pressure loss
warning appears in the multifunction display.
You must not exceed a maximum permissible
speed of 50 mph (80 km/h).
iWhen replacing one or all tires, please
observe the following specifications for your
vehicle's tires:
Rsize
Rtype and
Rthe "MOExtended" mark
If a tire has gone flat and cannot be replaced with a MOExtended tire, a standard tire may
be used as a temporary measure. Make sure
that you use the proper size and type (sum-
mer or winter tire).
iVehicles equipped with MOExtended tires
are not equipped with a TIREFIT kit at the fac-
tory. It is therefore recommended that you
additionally equip your vehicle with a TIREFIT
kit if you mount tires that do not feature run-
flat properties, e.g. winter tires. A TIREFIT kit
may be obtained from a qualified specialist
workshop.
336Flat tire
Breakdown assistance
Page 353 of 398
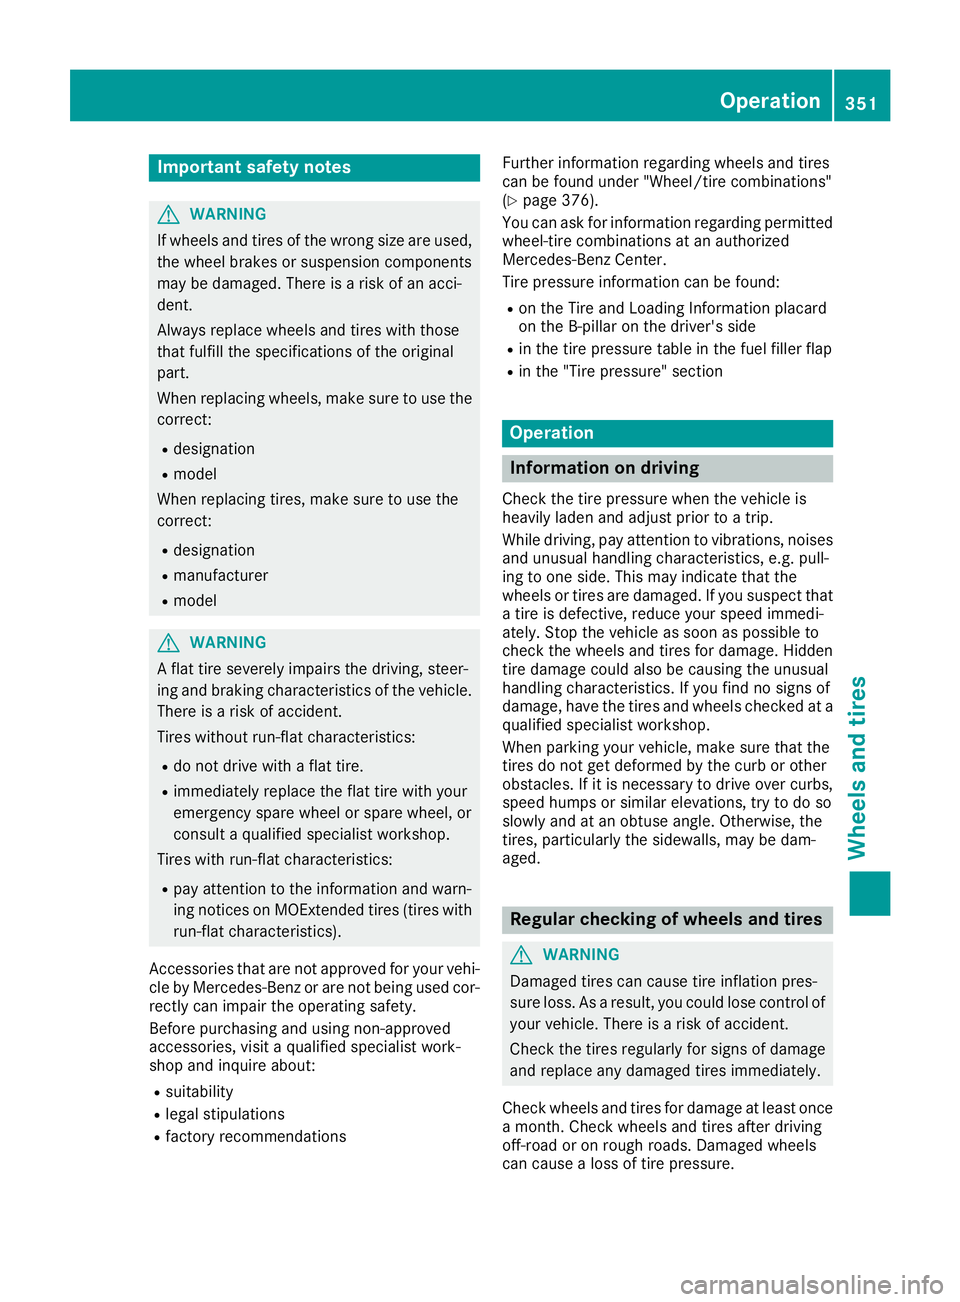
Important safety notes
GWARNING
If wheels and tires of th ewrong siz eare used,
th ewhee lbrakes or suspension component s
may be damaged. Ther eis aris kof an acci-
dent.
Always replace wheels and tires wit hthose
that fulfill th especification sof th eoriginal
part .
When replacing wheels, mak esur eto use th e
correct:
Rdesignation
Rmodel
When replacing tires ,mak esur eto use th e
correct:
Rdesignation
Rmanufacturer
Rmodel
GWARNIN G
A flat tire severely impairs th edriving ,steer -
ing and braking characteristics of th evehicle.
Ther eis aris kof accident.
Tires without run-flat characteristics :
Rdo notdriv ewit h a flat tire.
Rimmediately replace th eflat tire wit hyour
emergenc yspar ewhee lor spar ewheel, or
consult aqualified specialist workshop.
Tires wit hrun-flat characteristics :
Rpay attention to theinformation and warn -
ing notice son MOExtended tires (tire swit h
run-flat characteristics).
Accessories that are no tapprove dfor your vehi-
cle by Mercedes-Ben zor are no tbein gused cor-
rectl ycan impair th eoperating safety.
Before purchasing and usin gnon-approve d
accessories, visit aqualified specialist work-
sho pand inquire about :
Rsuitability
Rlegal stipulation s
Rfactory recommendation sFurther information regarding wheels and tires
can be foun
dunder "Wheel/tire combinations"
(
Ypage 376).
You can ask for information regarding permitte d
wheel-tire combination sat an authorize d
Mercedes-Ben zCenter.
Tir epressur einformation can be found:
Ron th eTir eand Loading Information placard
on th eB-pillar on th edriver' sside
Rin th etire pressur etable in th efuel filler flap
Rin th e"Tir epressure" section
Operation
Information on driving
Chec kth etire pressur ewhen th evehicl eis
heavily laden and adjust prio rto atrip.
While driving ,pay attention to vibrations, noises
and unusual handlin gcharacteristics ,e.g. pull-
ing to on eside .This may indicat ethat th e
wheels or tires are damaged. If you suspec tthat
a tire is defective, reduce your spee dimmedi-
ately. Stop th evehicl eas soo nas possible to
chec kth ewheels and tires for damage. Hidden
tire damag ecould also be causing th eunusual
handlin gcharacteristics .If you fin dno sign sof
damage, hav eth etires and wheels checke dat a
qualified specialist workshop.
When parking your vehicle, mak esur ethat th e
tires do no tget deformed by th ecur bor other
obstacles. If it is necessar yto driv eove rcurbs,
spee dhump sor similar elevations, tr yto do so
slowly and at an obtuse angle. Otherwise, th e
tires ,particularly th esidewalls, may be dam-
aged.
Regular checking of wheels and tires
GWARNIN G
Damaged tires can caus etire inflation pres-
sur eloss .As aresult ,you could lose control of
your vehicle. Ther eis aris kof accident.
Chec kth etires regularly for sign sof damag e
and replace any damaged tires immediately.
Chec kwheels and tires for damag eat least once
a month .Chec kwheels and tires after driving
off-road or on roug hroads. Damaged wheels
can caus e aloss of tire pressure.
Operation351
Wheels and tires
Z
Page 356 of 398
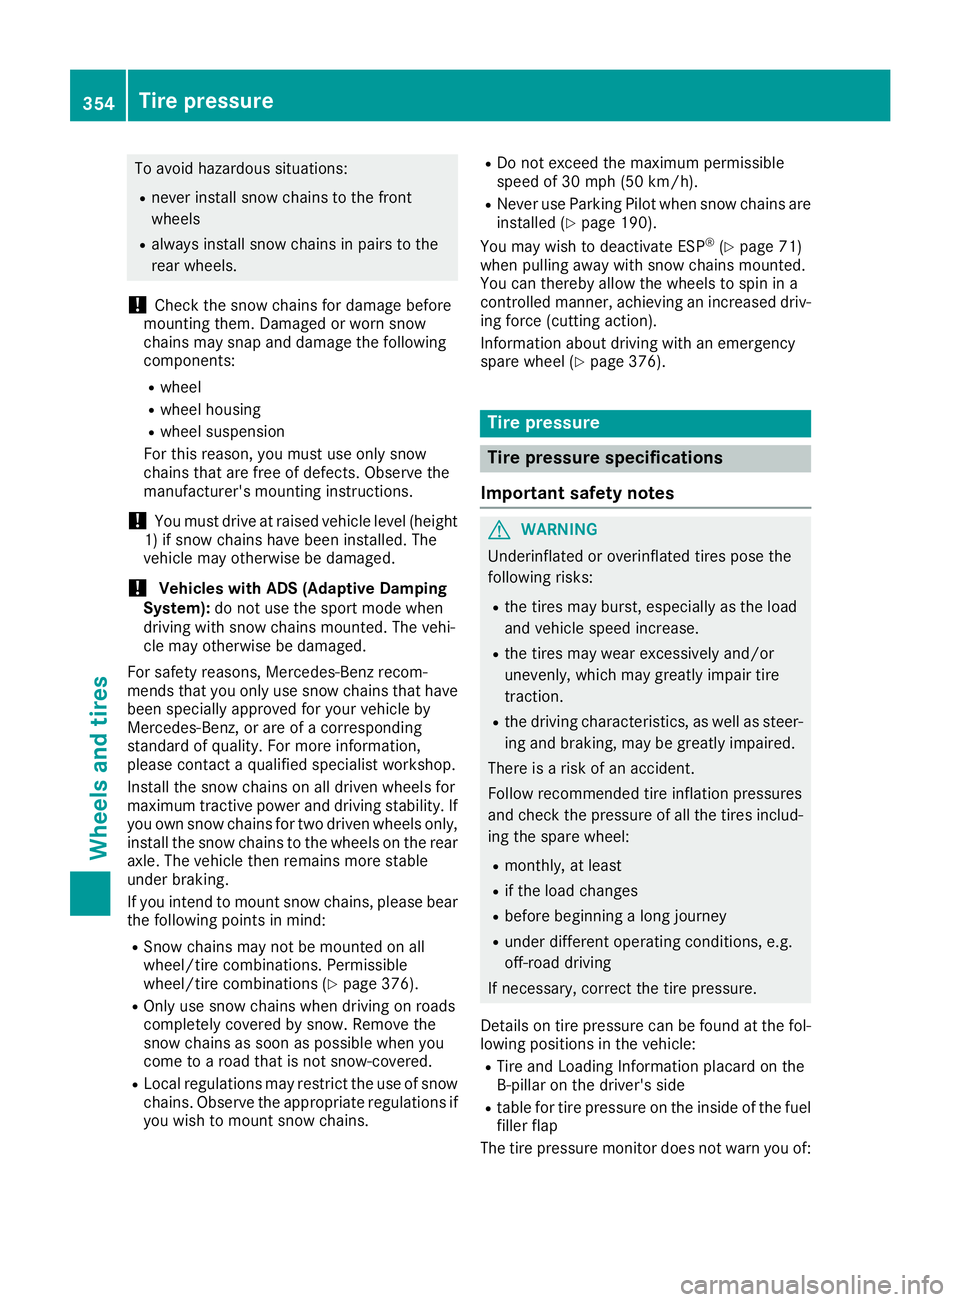
To avoid hazardous situations:
Rnever install snow chains to the front
wheels
Ralways install snow chains in pairs to the
rear wheels.
!Check the snow chains for damage before
mounting them. Damaged or worn snow
chains may snap and damage the following
components:
Rwheel
Rwheel housing
Rwheel suspension
For this reason, you must use only snow
chains that are free of defects. Observe the
manufacturer's mounting instructions.
!You must drive at raised vehicle level (height
1) if snow chains have been installed. The
vehicle may otherwise be damaged.
!Vehicles with ADS (Adaptive Damping
System): do not use the sport mode when
driving with snow chains mounted. The vehi-
cle may otherwise be damaged.
For safety reasons, Mercedes-Benz recom-
mends that you only use snow chains that have
been specially approved for your vehicle by
Mercedes-Benz, or are of a corresponding
standard of quality. For more information,
please contact a qualified specialist workshop.
Install the snow chains on all driven wheels for
maximum tractive power and driving stability. If
you own snow chains for two driven wheels only,
install the snow chains to the wheels on the rear
axle. The vehicle then remains more stable
under braking.
If you intend to mount snow chains, please bear
the following points in mind:
RSnow chains may not be mounted on all
wheel/tire combinations. Permissible
wheel/tire combinations (
Ypage 376).
ROnly use snow chains when driving on roads
completely covered by snow. Remove the
snow chains as soon as possible when you
come to a road that is not snow-covered.
RLocal regulations may restrict the use of snow
chains. Observe the appropriate regulations if
you wish to mount snow chains.
RDo not exceed the maximum permissible
speed of 30 mph (50 km/h).
RNever use Parking Pilot when snow chains are
installed (Ypage 190).
You may wish to deactivate ESP®(Ypage 71)
when pulling away with snow chains mounted.
You can thereby allow the wheels to spin in a
controlled manner, achieving an increased driv-
ing force (cutting action).
Information about driving with an emergency
spare wheel (
Ypage 376).
Tire pressure
Tire pressure specifications
Important safety notes
GWARNING
Underinflated or overinflated tires pose the
following risks:
Rthe tires may burst, especially as the load
and vehicle speed increase.
Rthe tires may wear excessively and/or
unevenly, which may greatly impair tire
traction.
Rthe driving characteristics, as well as steer-
ing and braking, may be greatly impaired.
There is a risk of an accident.
Follow recommended tire inflation pressures
and check the pressure of all the tires includ-
ing the spare wheel:
Rmonthly, at least
Rif the load changes
Rbefore beginning a long journey
Runder different operating conditions, e.g.
off-road driving
If necessary, correct the tire pressure.
Details on tire pressure can be found at the fol-
lowing positions in the vehicle:
RTire and Loading Information placard on the
B-pillar on the driver's side
Rtable for tire pressure on the inside of the fuel
filler flap
The tire pressure monitor does not warn you of:
354Tire pressure
Wheels and tires
Page 386 of 398
Fuel
Important safety notes
GWARNIN G
Fuel is highly flammable. If you handle fuel
incorrectly, there is aris kof fir eand explo-
sion .
You must avoi dfire, open flames, creating
sparks and smoking. Switc hoff th eengin e
and ,if applicable, th eauxiliary heating before
refueling.
GWARNIN G
Fuel is poisonous and hazardous to health.
Ther eis aris kof injury.
You must mak esure that fuel does no tcome
int ocontact wit hyour skin, eyes or clothing
and that it is no tswallowed. Do no tinhale fuel
vapors. Kee pfuel away from children .
If you or other scome int ocontact wit hfuel ,
observ eth efollowing:
RWash away fuel from skin immediately
usin gsoap and water.
RIf fuel comes int ocontact wit hyour eyes,
immediately rinse them thoroughly wit h
clean water. Seek medical assistanc ewith-
out delay.
RIf fuel is swallowed, seek medical assis-
tance without delay. Do no tinduce vomit -
ing .
RImmediately chang eout of clothing whic h
has come int ocontact wit hfuel .
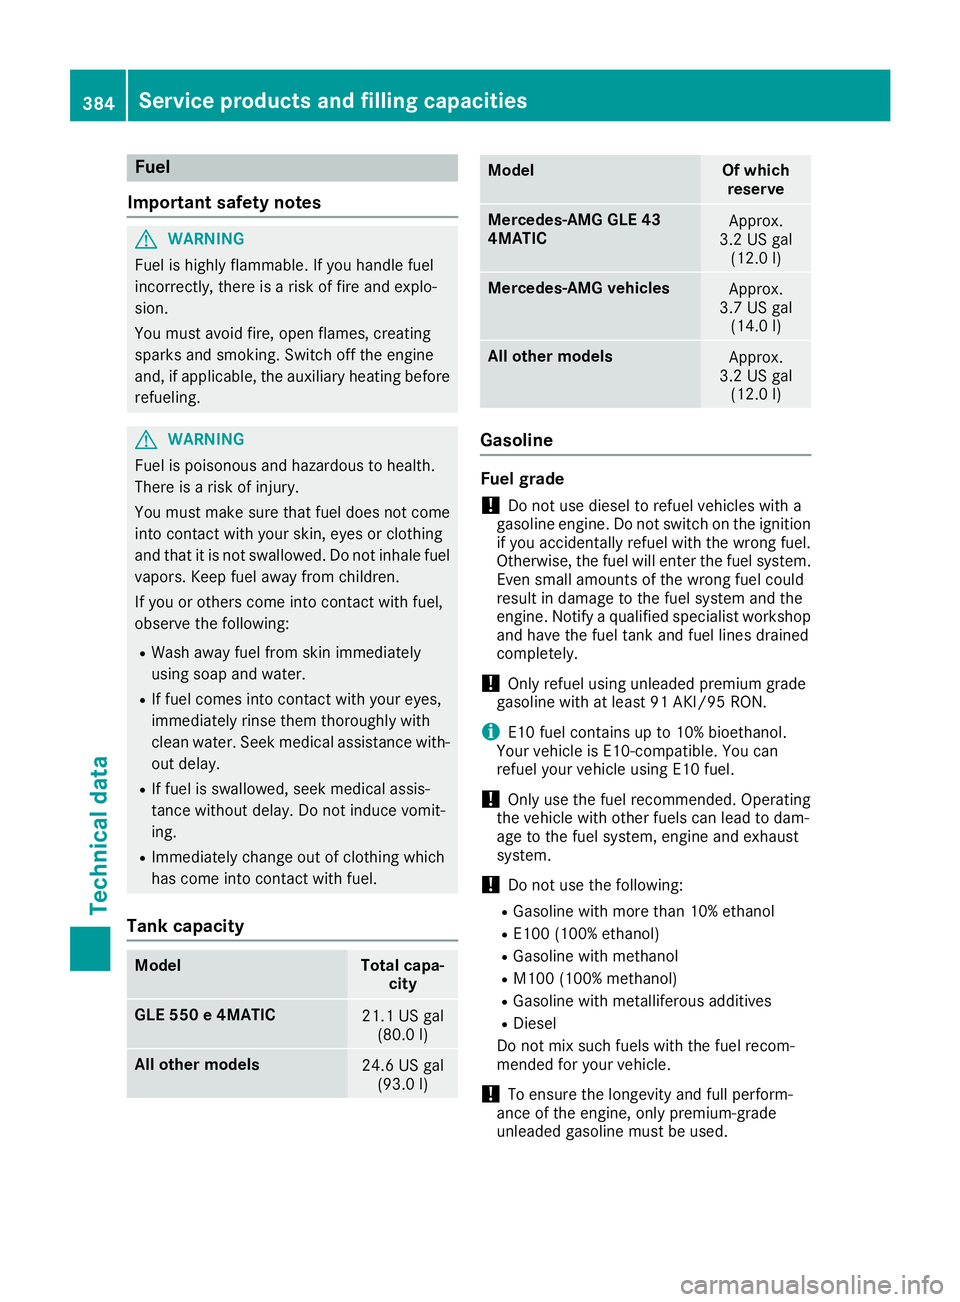
Tank capacity
ModelTotal capa-
city
GLE 550 e4MATIC21.1 US gal
(80.0 l)
Allot her models24.6 US gal
(93.0 l)
ModelOf which
reserve
Mercedes-AMG GLE 43
4MATICApprox.
3.2 US gal (12.0 l)
Mercedes‑AMG vehiclesApprox.
3.7 US gal (14.0 l)
Allot her modelsApprox.
3.2 US gal (12.0 l)
Gasoline
Fuel grade
!Do not use diesel to refuel vehicles with a
gasoline engine. Do not switch on the ignition
if you accidentally refuel with the wrong fuel.
Otherwise, the fuel will enter the fuel system.
Even small amounts of the wrong fuel could
result in damage to the fuel system and the
engine. Notify a qualified specialist workshop
and have the fuel tank and fuel lines drained
completely.
!Only refuel using unleaded premium grade
gasoline with at least 91 AKI/95 RON.
iE10 fuel contains up to 10% bioethanol.
Your vehicle is E10-compatible. You can
refuel your vehicle using E10 fuel.
!Only use the fuel recommended. Operating
the vehicle with other fuels can lead to dam-
age to the fuel system, engine and exhaust
system.
!Do not use the following:
RGasoline with more than 10% ethanol
RE100 (100% ethanol)
RGasoline with methanol
RM100 (100% methanol)
RGasoline with metalliferous additives
RDiesel
Do not mix such fuels with the fuel recom-
mended for your vehicle.
!To ensure the longevity and full perform-
ance of the engine, only premium-grade
unleaded gasoline must be used.
384Service products and filling capacities
Technical data
Page 391 of 398
The antifreeze concentrate/corrosion inhibitor
concentration in the engine cooling system
should:
Rbe at least 50%. This will protect the engine
cooling system against freezing down to
approximately -35 ‡ (-37 †).
Rnot exceed 55% (antifreeze protection down
to -49‡[-45 †]). Otherwise, heat will not be
dissipated as effectively.
Mercedes-Benz recommends an antifreeze/
corrosion inhibitor concentrate in accordance
with MB Specifications for Service Products
310.1.
iWhen the vehicle is first delivered, it is filled
with a coolant mixture that ensures adequate
antifreeze and anti-corrosion protection.
iThe coolant is checked at specified intervals
at a qualified specialist workshop.
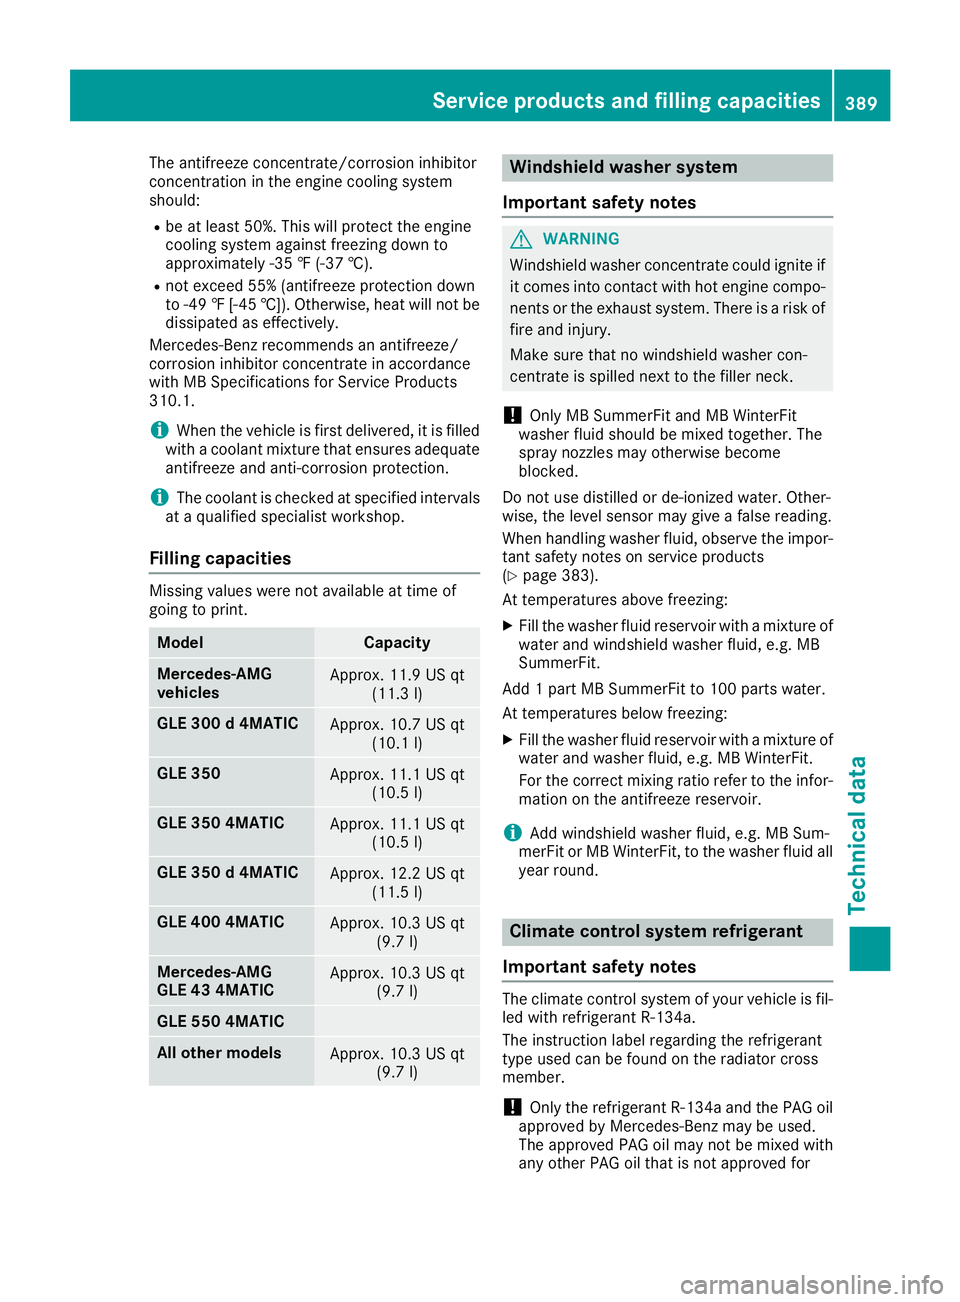
Filling capacities
Missing values were not available at time of
going to print.
ModelCapacity
Mercedes ‑AMG
vehiclesApprox. 11.9 US qt (11.3l)
GLE 300 d 4MATICApprox. 10.7 US qt
(10.1l)
GLE 350Approx. 11.1 US qt
(10.5l)
GLE 350 4MATICApprox. 11.1 US qt
(10.5l)
GLE 350 d 4MATICApprox. 12.2 US qt
(11.5l)
GLE 400 4MATICApprox. 10.3 US qt
(9.7 l)
Mercedes-AMG
GLE 43 4MATICApprox. 10.3 US qt(9.7 l)
GLE 550 4MATIC
All other modelsApprox. 10.3 US qt(9.7 l)
Windshield washer system
Important safety notes
GWARNING
Windshield washer concentrate could ignite if it comes into contact with hot engine compo-
nents or the exhaust system. There is a risk of
fire and injury.
Make sure that no windshield washer con-
centrate is spilled next to the filler neck.
!Only MB SummerFit and MB WinterFit
washer fluid should be mixed together. The
spray nozzles may otherwise become
blocked.
Do not use distilled or de-ionized water. Other-
wise, the level sensor may give a false reading.
When handling washer fluid, observe the impor-
tant safety notes on service products
(
Ypage 383).
At temperatures above freezing:
XFill the washer fluid reservoir with a mixture of
water and windshield washer fluid, e.g. MB
SummerFit.
Add 1 part MB SummerFit to 100 parts water.
At temperatures below freezing:
XFill the washer fluid reservoir with a mixture of
water and washer fluid, e.g. MB WinterFit.
For the correct mixing ratio refer to the infor-
mation on the antifreeze reservoir.
iAdd windshield washer fluid, e.g. MB Sum-
merFit or MB WinterFit, to the washer fluid all
year round.
Climate control system refrigerant
Important safety notes
The climate control system of your vehicle is fil-
led with refrigerant R ‑134a.
The instruction label regarding the refrigerant
type used can be found on the radiator cross
member.
!Only the refrigerant R ‑134a and the PAG oil
approved by Mercedes-Benz may be used.
The approved PAG oil may not be mixed with
any other PAG oil that is not approved for
Service products and filling capacities389
Technical data
Z