2018 MERCEDES-BENZ GLE SUV oil reset
[x] Cancel search: oil resetPage 7 of 398

Air-conditioning systemsee Climat e control
AIRMATIC package
ADS (Adapt ive Damping System) .. .183
Function/notes .............................1 83
Alarm
ATA (Anti-Theft Alarm system) ......... 75
Switching off (ATA) .......................... 75
Switching the function on/off
(ATA) ................................................ 75
Alarm system
see ATA (Anti-Theft Alarm system)
AMG
Adaptive sport suspension sys-
tem ................................................ 186
AMG menu (on-board computer) ..... 240
Anti-lock braking system
see ABS (Anti-lock Braking System)
Anti-skid chains
see Snow chains
Anti-Theft Alarm system
see ATA (Anti-Theft Alarm system)
Approach/departure angle .............. 168
Ashtray ............................................... 307
Assistance display (on-board com-
puter) ..................................................2 36
Assistance menu (on-board com-
puter) ..................................................2 36
ASSYST PLUS
Displaying a service message ........3 25
Hiding a service message .............. 325
Resetting the service interval dis-
play ................................................ 325
Service message ............................ 325
Special service requirements ......... 326
ATA (Anti-Theft Alarm system)
Activating/deactivating ................... 75
Function ...........................................7 5
Switching off the alarm .................... 75
ATTENTION ASSIST
Activating/deactivating ................. 237
Display message ............................ 260
Function/notes ............................. 202
Audio menu (on-board computer) .... 234
Authorized Mercedes-Benz Center
see Qualified specialist workshop Authorized workshop
see Qualified specialist workshop
AUTO lights
Display message ............................ 255
see Lights
Automatic car wash (care) ............... 326
Automatic engine start (ECO start/
stop functio n)
.................................... 140
A
utomatic engine switch-off (ECO
start/stop function) .......................... 139
Automatic headlamp mode .............. 110
Automatic transmission
Accelerator pedal position ............. 146
Changing gear ............................... 146
DIRECT SELECT lever ..................... 143
Display message ............................ 270
Drive program ................................ 146
Drive program display .................... 145
Driving tips .................................... 146
DYNAMIC SELECT controller ......... 142
Emergency running mode .............. 150
Engaging drive position .................. 145
Engaging neutral ............................ 144
Engaging park position automati-
cally ............................................... 144
Engaging reverse gear ................... 144
Engaging the park position ............ 144
Important safety notes .................. 143
Kickdown ....................................... 146
Manual shifting .............................. 147
Oil temperature (on-board com-
puter, Mercedes-AMG vehicles) ..... 240
Overview ........................................ 143
Problem (malfunction) ................... 150
Pulling away ................................... 138
Starting the engine ........................ 137
Steering wheel paddle shifters ...... 147
Trailer towing ................................. 146
Transmission position display ........ 145
Transmission positions .................. 145
Automatic transmission emer-
gency mode ....................................... 150
AUX jacks
CD/DVD drive ............................... 294
Axle load, permissible (trailer tow-
ing) ...................................................... 394
Index5
Page 21 of 398

Seat beltsAdjusting the driver's and front-
passenger seat belt .........................4 8
Adjusting the height ......................... 48
Cleaning ......................................... 332
Correct usage .................................. 47
Fastening ......................................... 48
Important safety guidelines ............. 46
Introduction .....................................4 5
Releasin g ......................................... 48
Switching belt adjustment on/off
(on-board computer) ...................... 239
Warning lamp ................................. 274
Warning lamp (function) ................... 48
Seats
Adjusting (electrically) ..................... 98
Adjusting the 4-way lumbar sup-
port ................................................ 101
Adjusting the head restraint ............ 99
Calling up a stored setting (mem-
ory function) .................................. 109
Cleaning the cover ......................... 332
Folding the rear bench seat for-
wards/back ................................... 298
Important safety notes .................... 97
Overview .......................................... 97
Seat heating problem .................... 103
Seat ventilation problem ................ 103
Storing settings (memory func-
tion) ............................................... 108
Switching seat heating on/off ....... 101
Switching seat ventilation on/off .. 102
Section
Sliding sunroof ................................. 92
Securing hooks .................................. 300
Selector lever
Cleaning ......................................... 332
Sensors (cleaning instructions) ....... 330
Service menu (on-board com-
puter) .................................................. 237
Service message
see ASSYST PLUS
Service products
Brake fluid ..................................... 388
Coolant (engine) ............................ 388
DEF special additives ..................... 386
Engine oil ....................................... 387
Fuel ................................................ 384 Important safety notes .................. 383
Refrigerant (air-conditioning sys-
tem) ............................................... 389
Washer fluid ................................... 389
Setting the air distribution ............... 129
Setting the airflow ............................ 129
Setting the date
/time format
see also Digital Operator's Man-
ual .................................................. 287
Setting the language
see also Digital Operator's Man-
ual .................................................. 287
Setting the time
see also Digital Operator's Man-
ual .................................................. 287
Settings
Factory (on-board computer) ......... 240
On-board computer ....................... 238
SETUP (on-board computer,
Mercedes-AMG vehicles) .................. 241
Side impact air bag ............................. 51
Side marker lamp (display mes-
sage) ................................................... 255
Side windows
Cleaning ......................................... 329
Convenience closing feature ............ 90
Convenience opening feature .......... 89
Important safety information ........... 88
Opening/closing .............................. 89
Overview .......................................... 88
Problem (malfunction) ..................... 91
Resetting ......................................... 91
Reversing feature ............................. 89
SIRIUS services
see also Digital Operator's Man-
ual .................................................. 287
Sliding sunroof
Important safety notes .................... 92
Opening/closing .............................. 93
Problem (malfunction) ..................... 95
Resetting ......................................... 93
see Panorama roof with power
tilt/sliding panel
SmartKey
Changing the battery ....................... 80
Changing the programming ............. 79
Checking the battery ....................... 80
Index19
Page 242 of 398

For further information on belt adjustment, see
(Ypage 48).
Switching the fold-in mirrors when lock-
ing feature on/off
This function is only available when the vehicle is
equipped with the electrical fold-in function.
When you activate theAuto.
MirrorFoldingfunction, the exterior mirrors are folded in when
the vehicle is locked. The exterior mirrors fold
out automatically again as soon as you unlock
the vehicle.
XPress the =or; button on the steering
wheel to select the Sett.menu.
XPress the:or9 button to select the
Conveniencesubmenu.
XPress ato confirm.
XPress the :or9 button to select the
Auto. Mirror Foldingfunction.
If the Auto. Mirror Foldingfunction is
switched on, the multifunction display shows
the exterior mirror in orange.
XPress the abutton to save the setting.
If you have switched the Auto. Mirror Fold‐ingon and you fold the exterior mirrors in using
button :, they will not fold out automatically
(
Ypage 106).
You can then only fold out the exterior mirrors
using button :.
Restoring the factory settings
XPress the=or; button on the steering
wheel to select the Sett.menu.
XPress the:or9 button to select the
Factory Settingsubmenu.
XPress ato confirm.
The Reset All Settings?message
appears.
XPress the :or9 button to select Noor
Yes.
XPress ato confirm the selection.
If you select Yes, the multifunction display
shows a confirmation message.
If you want to reset the Daytime Running
Lightsfunction in theLightsubmenu, you
must turn the SmartKey to position 1in the
ignition lock.
ON&OFFROAD menu
XPress the =or; button on the steering
wheel to select the ON&OFFROADmenu.
You can view the current off-road program set-
tings in the ON&OFFROAD
menu:
RVehicles with the Off-Road Engineering pack-
age (Ypage 215)
RVehicles without the Offroad Engineering
package (Ypage 214)
AMG menu (Mercedes-AMG vehicles)
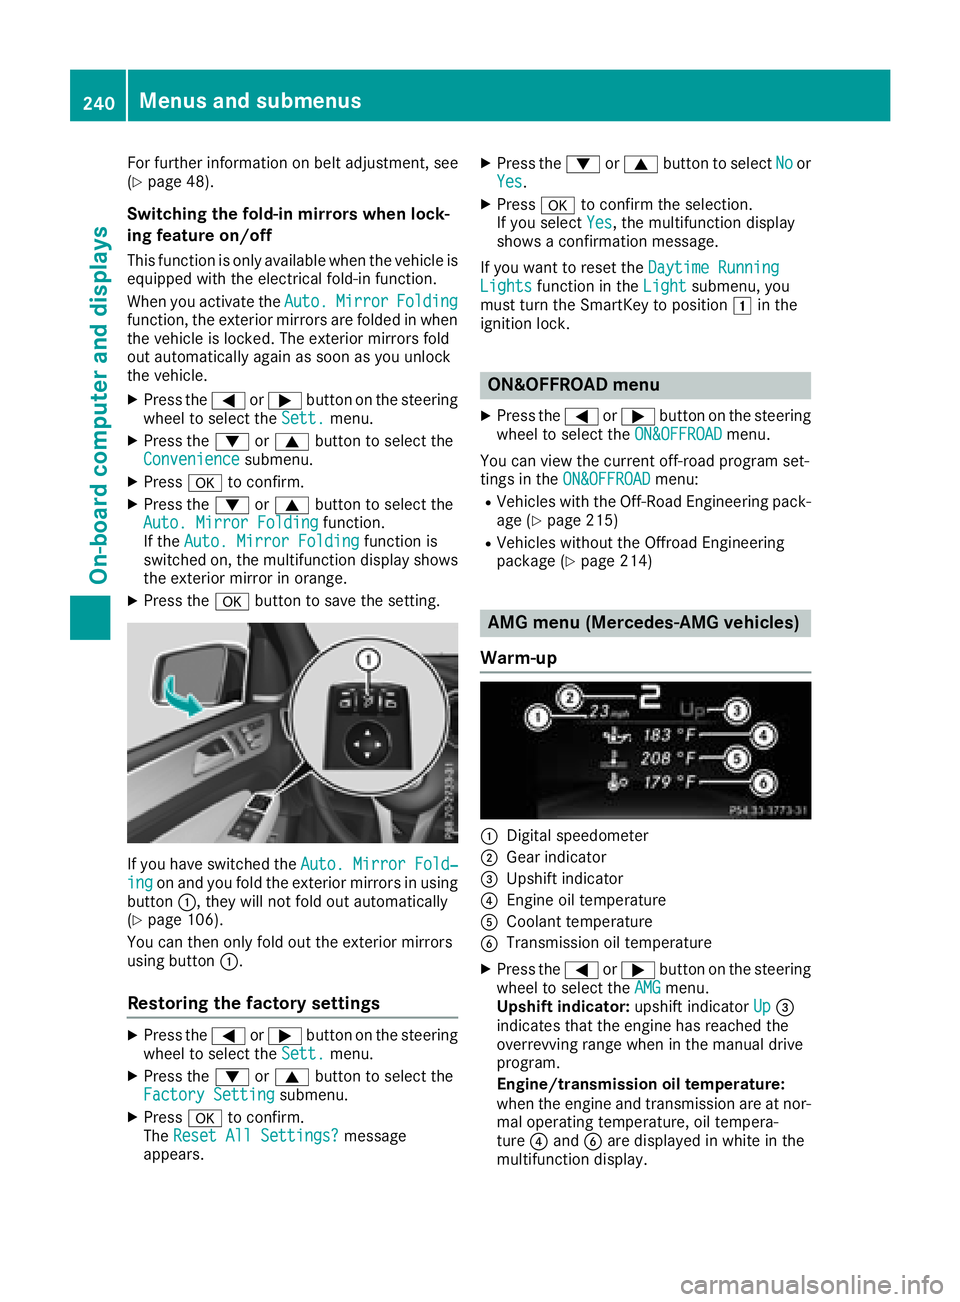
Warm-up
:Digital speedometer
;Gear indicator
=Upshift indicator
?Engine oil temperature
ACoolant temperature
BTransmission oil temperature
XPress the =or; button on the steering
wheel to select the AMGmenu.
Upshift indicator: upshift indicatorUp=
indicates that the engine has reached the
overrevving range when in the manual drive
program.
Engine/transmission oil temperature:
when the engine and transmission are at nor-
mal operating temperature, oil tempera-
ture ?and Bare displayed in white in the
multifunction display.
240Menus and submenus
On-board computer and displays
Page 327 of 398

Adding washer fluid to the windshield
washer system
Example: washer fluidreservoir
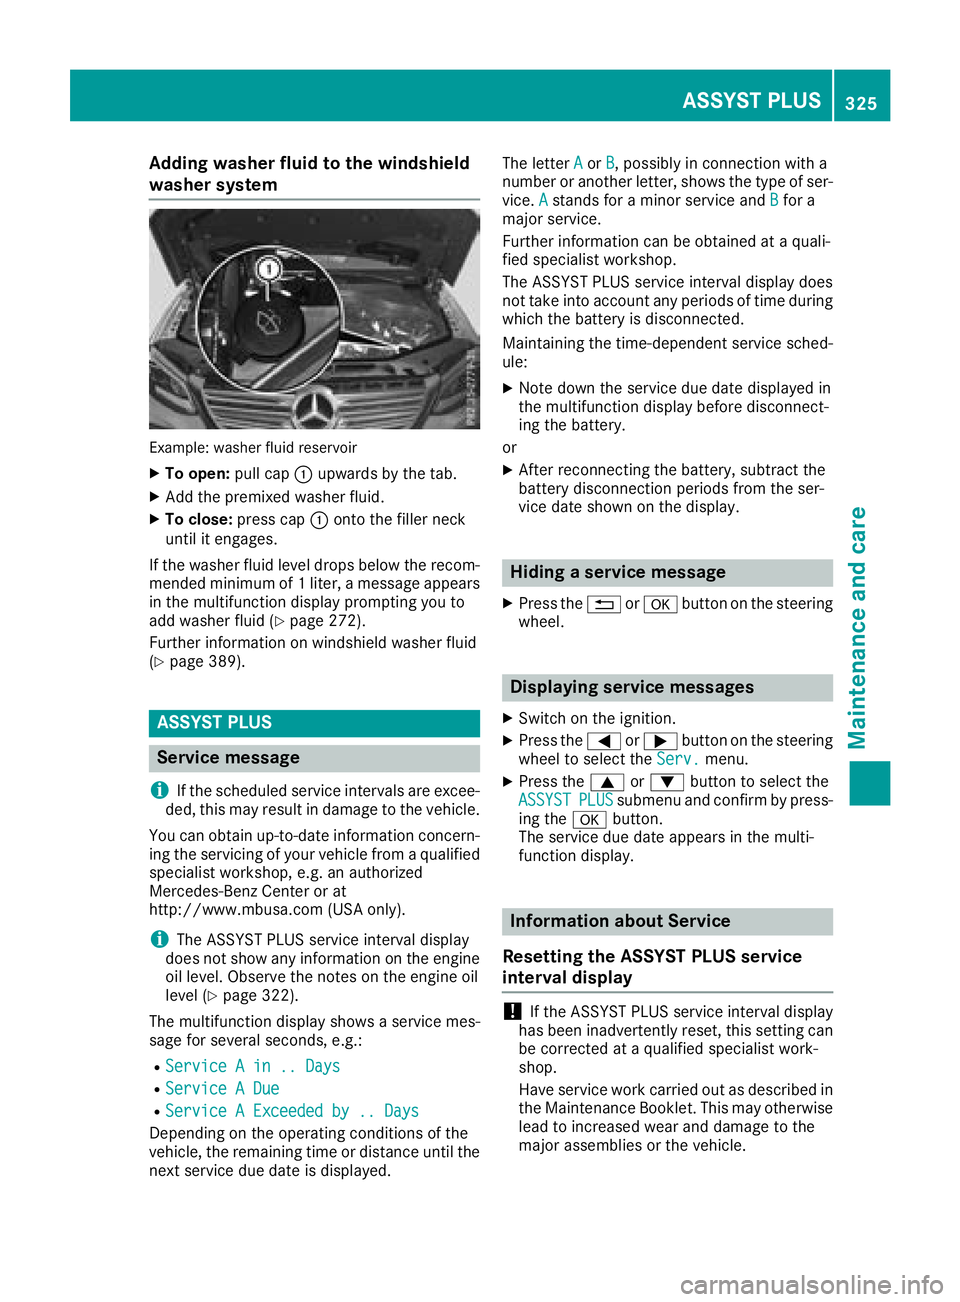
XTo open :pull cap :upwards by th etab .
XAddth epremixed washer fluid .
XTo close:press cap :onto th efiller neck
until it engages.
If th ewasher fluid level drops belo wtherecom-
mended minimum of 1liter, amessage appear s
in th emultifunction display prompting you to
add washer fluid (
Ypage 272).
Further information on windshield washer fluid
(
Ypage 389).
ASSYST PLUS
Service message
i
If th escheduled servic eintervals are excee-
ded, this may result in damag eto th evehicle.
You can obtain up-to-date information concern -
ing th eservicing of your vehicl efrom aqualified
specialis tworkshop ,e.g. an authorize d
Mercedes-Benz Cente ror at
http://www.mbusa.co m(US Aonly).
iThe ASSYS TPLU Sservic einterval display
does no tsho wany information on th eengin e
oil level. Observ eth enote son th eengin eoil
level (
Ypage 322).
The multifunction display shows aservic emes -
sage for several seconds, e.g. :
RService Ain .. Day s
RService ADue
RServic e AExceeded by .. Day s
Dependingon th eoperating condition sof th e
vehicle, th eremaining time or distanc euntil th e
next servic edue dat eis displayed. The lette
rA
or B,possibl yin connection wit h a
number or another letter, shows th etyp eof ser -
vice. A
stand sfor aminor servic eand Bfora
major service.
Further information can be obtained at aquali-
fie dspecialist workshop .
The ASSYS TPLU Sservic einterval display does
no ttak eint oaccoun tany periods of time during
whic hth ebattery is disconnected.
Maintainin gth etime-dependen tservic esched-
ule:
XNot edown th eservic edue dat edisplayed in
th emultifunction display before disconnect -
ing th ebattery.
or
XAfte rreconnecting th ebattery, subtrac tth e
battery disconnection periods from th eser -
vic edat eshown on th edisplay.
Hiding a service message
XPress th e% ora buttonon th esteering
wheel.
Displaying service messages
XSwitc hon th eignition .
XPress th e= or; buttonon th esteering
whee lto select th eServ.menu.
XPress th e9 or: buttonto select th e
ASSYSTPLU Ssubmen uand confirm by press-
ing th ea button.
The servic edue dat eappear sin th emulti-
function display.
Infor mation about Service
Resetting the ASSYST PLUS service
interval display
!If th eASSYS TPLU Sservic einterval display
has been inadvertentl yreset ,this setting can
be correcte dat aqualified specialist work-
shop.
Hav eservic ewor kcarrie dout as described in
th eMaintenance Booklet .This may otherwise
lead to increased wear and damag eto th e
major assemblies or th evehicle.
ASSYST PLUS325
Maintenance and care
Z
Page 328 of 398

A qualified specialist workshop will reset the
ASSYST service interval display after the service
work has been carried out. You can also obtain
further information on maintenance work, for
example.
Special service requirements
The specified maintenance interval takes only
the normal operation of the vehicle into
account. Under increased load on the vehicle,
maintenance work must be carried out more
frequently, for example:
RRegular city driving with frequent intermedi-
ate stops
RIf the vehicle is primarily used to travel short
distances
RUse in mountainous terrain or on poor road
surfaces
RIf the engine is often left idling for long periods
Under these or similar conditions, have, for
example, the air filter, engine oil and oil filter
replaced or changed more frequently. Under
arduous operating conditions, the tires must be
checked more often. Further information can be
obtained at a qualified specialist workshop.
Driving abroad
An extensive Mercedes-Benz Service network is
also available in other countries. You can obtain
further information from any authorized
Mercedes-Benz Center.
Care
General notes
HEnvironmental note
Dispose of empty packaging and cleaning
cloths in an environmentally responsible man-
ner.
!When cleaning your car, do not use:
Rdry, coarse or hard cloths
Rabrasive cleaning agents
Rsolvents
Rcleaning agents containing solvents
Do not scrub.
Do not touch the surfaces and films with hard
objects, e.g. rings or ice scrapers. Otherwise, you may scratch or damage the surfaces and
films.
!Do not park your vehicle for a long period of
time directly after cleaning, particularly after
cleaning the wheel rim with wheel cleaner.
Wheel cleaner can lead to the increased cor-
rosion of the brake discs and pads. Therefore,
drive for a few minutes after cleaning. By
heating up the brakes, the brake discs and
pads dry. The vehicle can then be parked for a
long period of time.
Regular care of your vehicle is a condition for
retaining the quality in the long term.
Use care products and cleaning agents recom-
mended and approved by Mercedes-Benz.
Washing the vehicle and cleaning the
paintwork
Automatic car wash
GWARNING
Braking efficiency is reduced after washing
the vehicle. There is a risk of an accident.
After the vehicle has been washed, brake
carefully while paying attention to the traffic
conditions until full braking power is restored.
!Before driving into an automatic car wash,
make sure that it is suitable for the dimen-
sions of the vehicle. In particular, make sure
that:
Rthere is enough ground clearance between
the vehicle underbody and the guide rails of
the automatic car wash.
Rthe clearance width of the automatic car
wash is sufficient, particularly the width of
the guide rails.
Ryou enter the automatic car wash straight
and in the center of the guide rails in order
to avoid damaging the tires or wheel rims.
Fold in the exterior mirrors before the vehicle
is washed. The exterior mirrors could other-
wise be damaged.
!When Distance Pilot DISTRONIC or the
HOLD function is activated, the vehicle
brakes automatically in certain situations.
326Care
Maintenance and care