2018 MERCEDES-BENZ GLC automatic transmission
[x] Cancel search: automatic transmissionPage 184 of 390
Off-road program Slippery off-road program You can select the Slippery off-road program
for snow or rain.
The Slippery off-road program has the following
characteristics: R
The steering, drive, transmission and suspen-
sion are adapted for comfort. R
Vehicles with AIR BODY CONTROL: the
vehicle is adjusted to normal level. R
The ECO start/stop function is available
( Y
page 140).
ESP ®
and 4ETS programs especially adapted to
slippery surfaces are also activated for maxi-
mum stability.
For more information on driving with snow
chains, see ( Y
page 351).
Off-road off-road program You can select the Off-road off-road program
for driving on easily negotiable terrain, e.g. dirt
roads, gravel and sand.
The Off-road program has the following char-
acteristics: R
The steering, drive and suspension are adap-
ted for comfort R
The transmission is adapted for off-road driv-
ing R
Vehicles with AIR BODY CONTROL: the
vehicle is raised by 0.6 in (1 5 mm) compared
with the normal level
The Off-road program assists you when driving
in easily negotiable off-road terrain. The
engine’s performance characteristics and the
gearshifting characteristics of the automatic
transmission are adapted for this purpose. ABS,
ESP ®
and 4ETS programs especially adapted to
off-road driving are also activated.
Rocking free off-road program
The Rocking free off-road program is available
only in vehicles with AIR BODY CONTROL.
You can select the Rocking free off-road pro-
gram to free the vehicle from especially difficult
off-road terrain at low speeds. The Rocking free off-road program has the fol-
lowing characteristics: R
The steering, drive and suspension are adap-
ted for comfort R
The transmission is adapted for off-road driv-
ing R
The vehicle is raised by 2.0 in (50 mm) com-
pared with the normal level
ABS, ESP ®
and 4ETS programs especially adap-
ted to off-road driving are also activated.
The Ro cking free off-roa
d program can be
selected up to a speed of 12 mph (20 km/h).
If you are driving in the Rocking free off-road
program at speeds above 12 mph (20 km/h): R
the vehicle switches to the off-road program
Off-road R
the vehicle is lowered by 1.4 in (35 mm)
Notes on driving off-road ( Y
page 165).
Gradient off-road program You can use the Gradient off-road program to
overcome steep terrain.
The Gradient off-road program has the follow-
ing characteristics: R
The steering, drive and suspension are adap-
ted for comfort R
The transmission is adapted for off-road driv-
ing R
Manual gearshifting is activated
( Y
page 152) R
Vehicles with AIR BODY CONTROL: the
vehicle is raised by 0.6 in (1 5 mm) compared
with the normal level R
DSR is activated ( Y
page 180)
ABS, ESP ®
and 4ETS programs especially adap-
ted to gradients are also activated.
Trailer off-road program
Select the Trailer off-road program when tow-
ing a trailer.
The Trailer off-road program has the following
characteristics: R
The steering, drive and suspension are adap-
ted for comfort R
The transmission is adapted for off-road driv-
ing182
Driving systems
Driving and parking
Page 188 of 390
Mercedes-AMG GLC 63 4MATIC+/GLC 63 S
4MATIC+: the "Raised level" setting is canceled
if you: R
drive at speeds greater than 44 mph
(70 km/h) R
drive for approximately three minutes at
speeds greater than 37 mph (60 km/h)
All other models: the "Raised level" setting is
canceled if you: R
drive faster than 75 mph (120 km/h) R
drive for approximately three minutes at a
speed above 50 mph (80 km/h)
The "Raised level" remains active when you are
not driving within these speed ranges.
Setting the normal vehicle level X
Start the engine.
If indicator lamp �D is lit:X
Press button �C .
Indicator lamp �D goes out. The vehicle is
adjusted to the height of the currently selec-
ted drive program ( Y
page 144).
Lowering the rear of the vehicle (except
Mercedes-AMG vehicles)
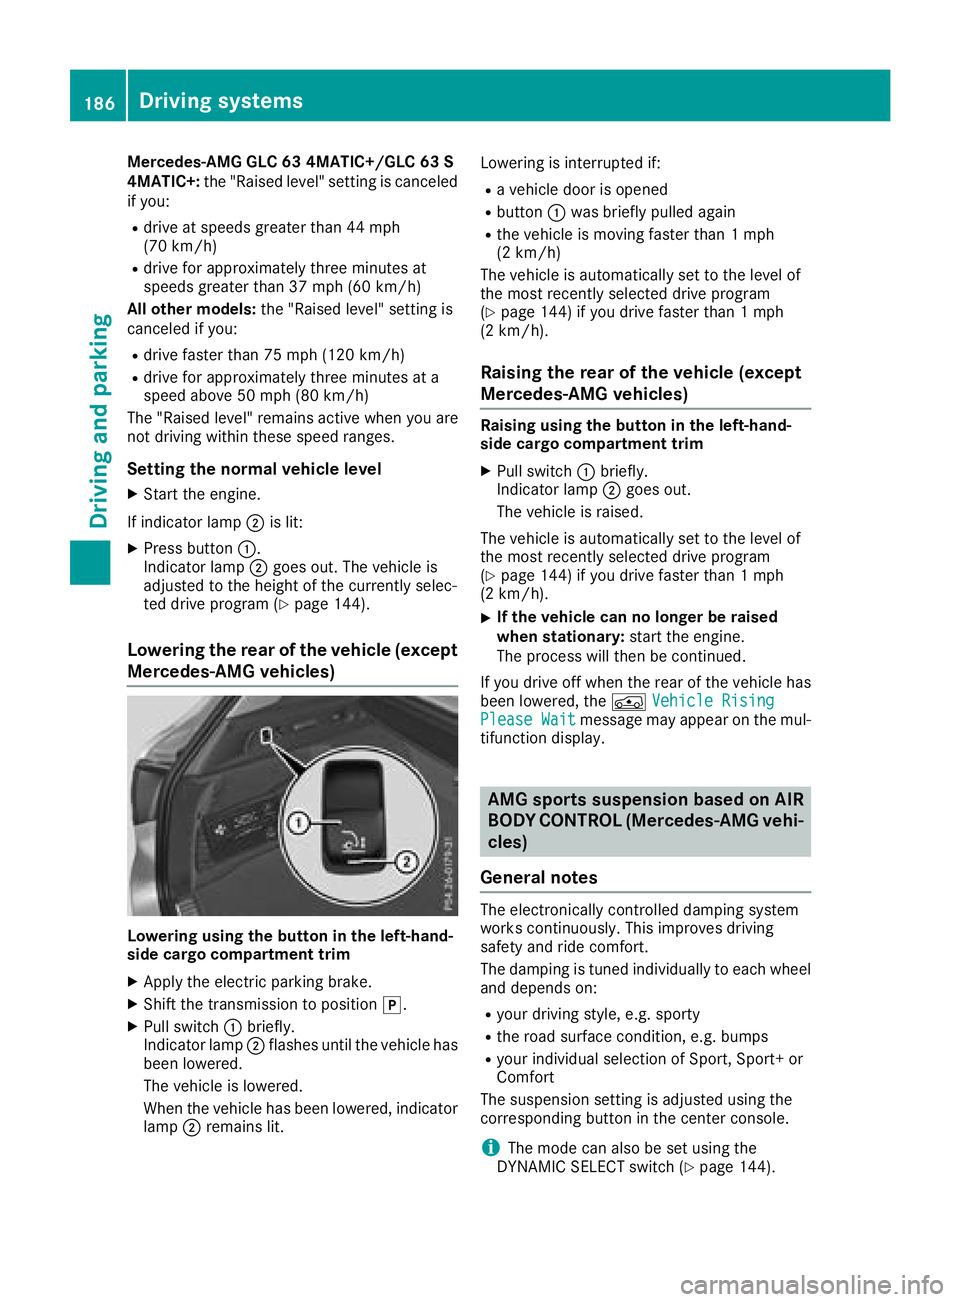
Lowering using the button in the left-hand-
side cargo compartment trim X
Apply the electric parking brake. X
Shift the transmission to position �] .X
Pull switch �C briefly.
Indicator lamp �D flashes until the vehicle has
been lowered.
The vehicle is lowered.
When the vehicle has been lowered, indicator
lamp �D remains lit. Lowering is interrupted if: R
a vehicle door is opened R
button �C was briefly pulled again R
the vehicle is moving faster than 1 mph
(2 km/h)
The vehicle is automatically set to the level of
the most recently selected drive program
( Y
page 144) if you drive faster than 1 mph
(2 km/h).
Raising the rear of the vehicle (except
Mercedes-AMG vehicles) Raising using the button in the left-hand-
side cargo compartment trim X
Pull switch �C briefly.
Indicator lamp �D goes out.
The vehicle is raised.
The vehicle is automatically set to the level of
the most recently selected drive program
( Y
page 144) if you drive faster than 1 mph
(2 km/h). X
If the vehicle can no longer be raised
when stationary: start the engine.
The process will then be continued.
If you drive off when the rear of the vehicle has
been lowered, the �
Page 192 of 390
whilst the vehicle is being parked. You are
responsible for braking in good time. X
Stop the vehicle when the parking space sym-
bol shows the desired parking space in the
instrument cluster. X
Shift the transmission to position �^ .
The Start Parking Pilot? Yes: OK No:
�8 message appears on the multifunction
display. X
To cancel the procedure: press the �8
button on the multifunction steering wheel or
pull away.
or X
Parking using Parking Pilot: press button
�v on the multifunction steering wheel.
The Parking Pilot Active Accelerate
and Brake Observe Surroundings mes-
sage appears on the multifunction display. X
Let go of the multifunction steering wheel. X
Back up the vehicle, being ready to brake at all
times. When backing up, drive at a speed
below approximately 6 mph (10 km/h). Oth-
erwise, Parking Pilot is canceled immediately.
Parking Pilot brakes the vehicle to a standstill
when the vehicle approaches the rear border
of the parking space.
Maneuvering may be required in tight parking
spaces.
The Parking Pilot Active Select D
Observe Surroundings message appears on
the multifunction display. X
Shift the transmission to position �[ when
the vehicle is stationary.
Parking Pilot immediately steers in the other
direction.
The Parking Pilot Active Accelerate
and Brake Observe Surroundings mes-
sage appears on the multifunction display.
i You will achieve the best results by waiting
for the steering procedure to complete before
pulling away. X
Drive forwards and be ready to brake at all
times.
Parking Pilot brakes the vehicle to a standstill
when the vehicle approaches the front border
of the parking space.
Maneuvering may be required in tight parking
spaces.
The Parking Pilot Active Select R
Observe Surroundings message appears on
the multifunction display. As soon as the parking procedure is complete,
the Parking Pilot Finished message
appears and a warning tone sounds. The vehicle
is now parked.
The vehicle is kept stationary without the driver
having to depress the brake pedal. The braking
effect is canceled when you depress the accel-
erator pedal.
Parking Pilot no longer supports you with steer-
ing interventions and brake applications. When
Parking Pilot is finished, you must steer and
brake again yourself. Parking Assist
PARKTRONIC is still available.
Parking tips: R
The way your vehicle is positioned in the park-
ing space after parking is dependent on vari-
ous factors. These include the position and
shape of the vehicles parked in front and
behind it and the conditions of the location. It
may be the case that Parking Pilot guides you
too far into a parking space, or not far enough
into it. In some cases, it may also lead you
across or onto the curb. Cancel the parking
procedure with Parking Pilot if necessary. R
You can also prematurely select transmission
position �[ . The vehicle redirects and does
not drive as far into the parking space. Should
the transmission change take place too early,
the parking procedure is canceled. A sensible
parking position can no longer be achieved
from this position.
Exiting a parking space In order for Parking Pilot to support you when
exiting the parking space: R
the border of the parking space must be high
enough at the front and the rear. A curb stone
is too small, for example. R
the border of the parking space must not be
too wide. Your vehicle can be maneuvered
into the parking space at a maximum angle of
45° to the starting position. R
a maneuvering distance of at least 3.3 ft
(1.0 m) must be available.
Parking Pilot can assist you with exiting a park-
ing space only if you have parked the vehicle
parallel to the direction of travel using Parking
Pilot.
i If Parking Assist PARKTRONIC detects
obstacles, Parking Pilot brakes automatically190
Driving systems
Driving and parking
Page 193 of 390
while the vehicle is exiting the parking space.
You are responsible for braking in good time. X
Start the engine. X
Release the electric parking brake. X
Switch on the turn signal in the direction you
are pulling away. X
Shift the transmission to position �[ or �^ .
The Start Parking Pilot? Yes: OK No:
�8 message appears in the multifunction
display. X
To cancel the procedure: press the �8
button on the multifunction steering wheel or
pull away.
or X
To exit a parking space using Parking
Pilot: press the �v button on the multi-
function steering wheel.
The Parking Pilot Active Accelerate
and Brake Observe Surroundings mes-
sage appears in the multifunction display. X
Let go of the multifunction steering wheel. X
Pull away, being ready to brake at all times. Do
not exceed a maximum speed of approx-
imately 6 mph (10 km/h) when exiting a park-
ing space. Otherwise, Parking Pilot is can-
celed immediately. X
Depending on the message or as required,
shift the transmission to position �[ or �^ .
Parking Pilot immediately steers in the other
direction. The Parking Pilot Active
Accelerate and Brake Observe Sur‐
roundings message appears in the multi-
function display.
i You will achieve the best results by waiting
for the steering procedure to complete before
pulling away.
If you back up after activation, the steering
wheel is moved to the straight-ahead posi-
tion. X
Drive forwards and reverse as prompted by
Parking Assist PARKTRONIC warning dis-
plays, several times if necessary.
Once you have exited the parking space com-
pletely, the steering wheel is moved to the
straight-ahead position. You hear a tone and the
Parking Pilot Finished message appears in
the multifunction display. You will then have to
steer and merge into traffic on your own. Park-
ing Assist PARKTRONIC is still available. You can
take over the steering before the vehicle has
exited the parking space completely. This is useful if you recognize that it is already possible
to pull out of the parking space.
Canceling Active Parking Pilot X
Stop the movement of the multifunction
steering wheel or steer yourself.
Parking Pilot is canceled immediately. The
Parking Pilot Canceled message appears
on the multifunction display.
or X
Press the Parking Assist PARKTRONIC button
( Y
page 193).
Parking Assist PARKTRONIC is switched off
and Parking Pilot is immediately canceled.
The Parking Pilot Canceled message
appears on the multifunction display.
Parking Pilot is canceled automatically when: R
the electric parking brake is engaged R
transmission position �] is selectedR
parking using Parking Pilot is no longer pos-
sible R
you are driving faster than 6 mph (10 km/ h)R
a wheel spins, ESP ®
intervenes or fails. In
such cases the �
Page 194 of 390
are no persons, animals or objects in the maneu-
vering area while maneuvering and parking in/
leaving parking spaces.
! When parking, pay particular attention to
objects above or below the sensors, such as
flower pots or trailer drawbars. Parking Assist
PARKTRONIC does not detect such objects
when they are in the immediate vicinity of the
vehicle. You could damage the vehicle or the
objects.
The sensors may not detect snow and other
objects that absorb ultrasonic waves.
Ultrasonic sources such as an automatic car
wash, the compressed-air brakes of a truck or
a pneumatic drill could cause Parking Assist
PARKTRONIC to malfunction.
Parking Assist PARKTRONIC may not function
correctly on uneven terrain.
! If you do not need the trailer tow hitch,
remove the detachable ball coupling. Parking
Assist PARKTRONIC measures the minimum
detection range to an obstacle from the
bumper, not the ball coupling.
Parking Assist PARKTRONIC is activated auto-
matically when you: R
switch on the ignition R
shift the transmission to position �[ , �^ or
�\\
Parking Assist PARKTRONIC is deactivated at
speeds above 11 mph (18 km/ h) . It is reactiva-
ted at lower speeds.
Parking Assist PARKTRONIC is deactivated for
the rear area when you establish an electrical
connection between your vehicle and a trailer.
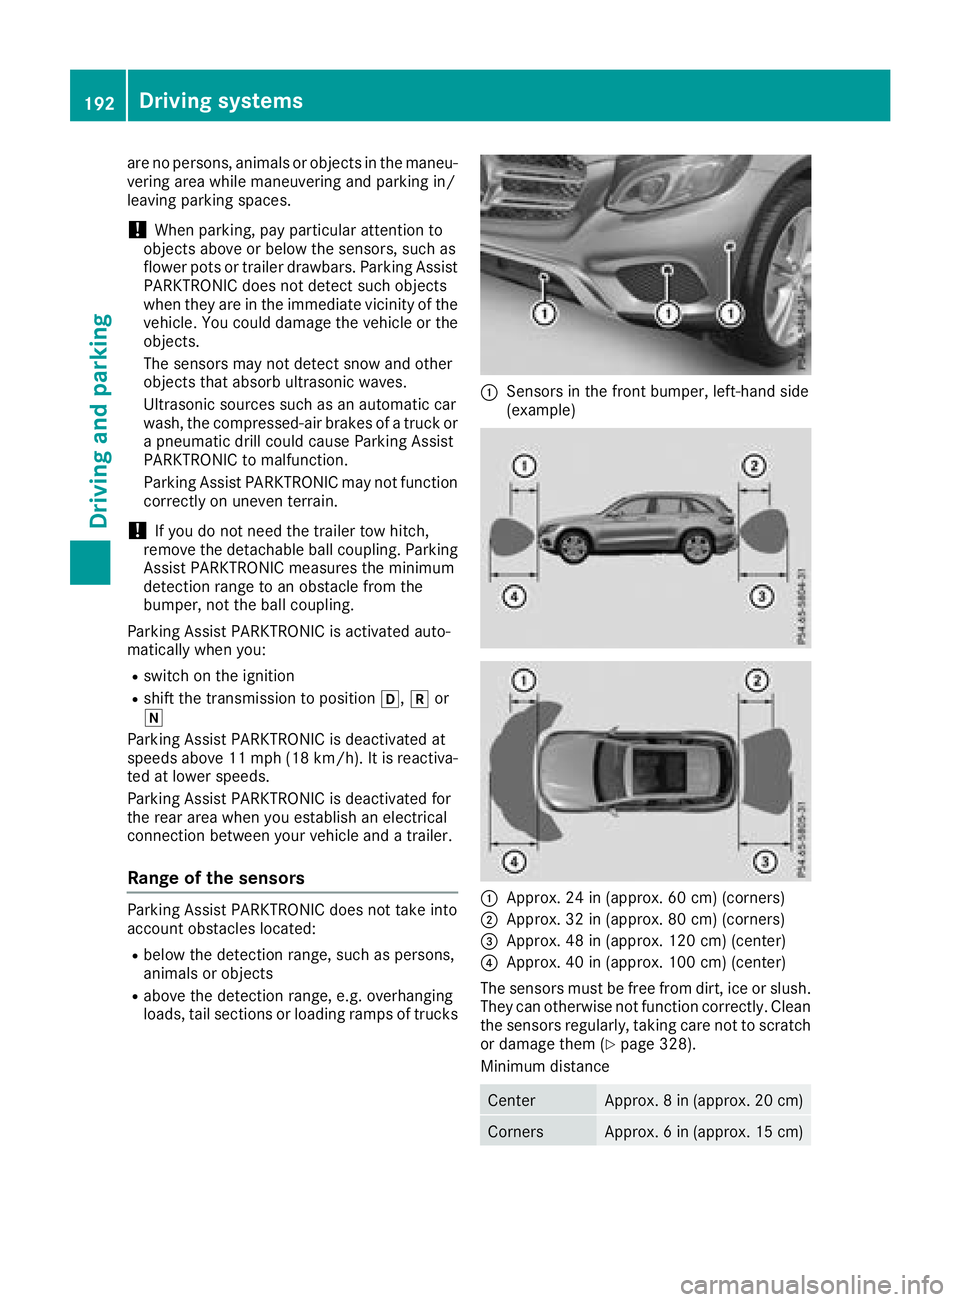
Range of the sensors Parking Assist PARKTRONIC does not take into
account obstacles located: R
below the detection range, such as persons,
animals or objects R
above the detection range, e.g. overhanging
loads, tail sections or loading ramps of trucks �C
Sensors in the front bumper, left-hand side
(example)
�C
Approx. 24 in (approx. 60 cm) (corners) �D
Approx. 32 in (approx. 80 cm) (corners)
�
Page 202 of 390
Do not use the 360° camera in this case. You
can otherwise injure others or cause damage to
objects or the vehicle.
The guide lines in the multimedia system display
show the distances to your vehicle. The distan-
ces only apply to road level.
In trailer mode, the guide lines are shown at the
level of the trailer tow hitch.
The camera in the rear area is protected by
means of a flap. This flap opens when the 360°
camera is activated. Observe the notes on
cleaning ( Y
page 328). For technical reasons,
the flap may remain open briefly after the 360°
camera has been deactivated.
The field of vision and other functions of the
camera system may be restricted due to addi-
tional attachments (e.g. license plate holder,
rear bicycle carrier).
On vehicles with height-adjustable chassis,
depending on technical conditions, leaving the
standard height can result in: R
inaccuracies in the guide lines R
inaccuracies in the display of generated
images (top view)
Activation conditions The image from the 360° camera appears if: R
the multimedia system is switched on R
the 360° Camera function is switched on
If you are driving faster than at a moderate
speed and you turn on the 360° camera, a warn-
ing message appears.
The warning message disappears if: R
you are again driving at a moderate speed The
360° camera is then activated R
the message is confirmed with the �8 but-
ton Switching the 360° camera on and off
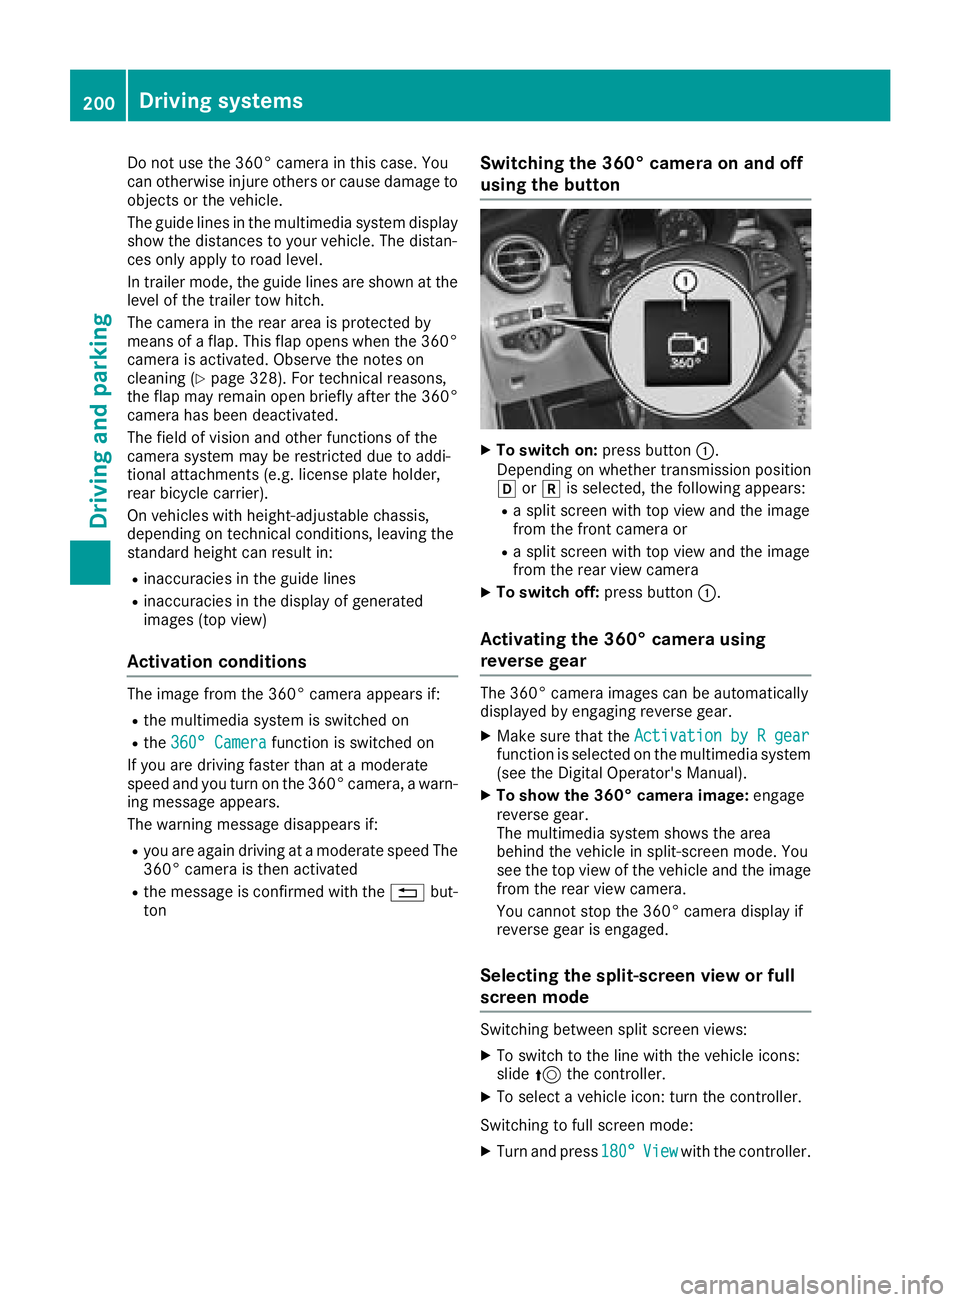
using the button X
To switch on: press button �C .
Depending on whether transmission position
�[ or �^ is selected, the following appears: R
a split screen with top view and the image
from the front camera or R
a split screen with top view and the image
from the rear view camera X
To switch off: press button �C .
Activating the 360° camera using
reverse gear The 360° camera images can be automatically
displayed by engaging reverse gear. X
Make sure that the Activation by R gear
function is selected on the multimedia system
(see the Digital Operator's Manual). X
To show the 360° camera image: engage
reverse gear.
The multimedia system shows the area
behind the vehicle in split-screen mode. You
see the top view of the vehicle and the image
from the rear view camera.
You cannot stop the 360° camera display if
reverse gear is engaged.
Selecting the split-screen view or full
screen mode
Switching between split screen views: X
To switch to the line with the vehicle icons:
slide 5 the controller. X
To select a vehicle icon: turn the controller.
Switching to full screen mode: X
Turn and press 180° View with the controller.200
Driving system s
Dr ivi ng an d parking
Page 215 of 390
Lane-correcting brake application If you leave your lane, under certain circumstan-
ces the vehicle will brake briefly on one side.
This is meant to assist you in bringing the vehicle
back to the original lane.
G WARNING
A lane-correcting brake application cannot
always bring the vehicle back into the original
lane. There is a risk of an accident.
Always steer, brake or accelerate yourself,
especially if Active Lane Keeping Assist warns
you or makes a lane-correcting brake appli-
cation.
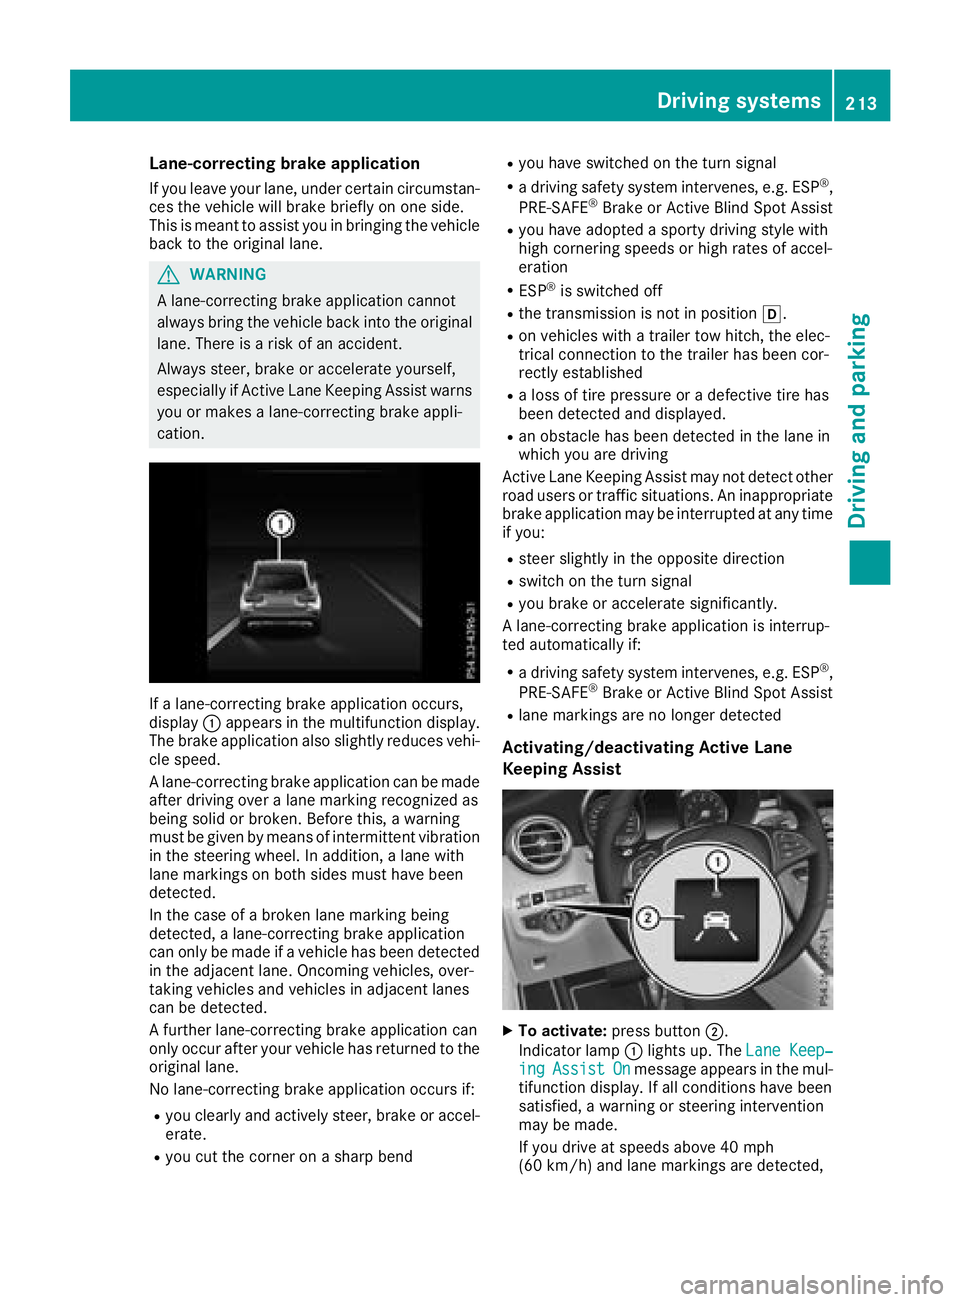
If a lane-correcting brake application occurs,
display �C appears in the multifunction display.
The brake application also slightly reduces vehi-
cle speed.
A lane-correcting brake application can be made
after driving over a lane marking recognized as
being solid or broken. Before this, a warning
must be given by means of intermittent vibration
in the steering wheel. In addition, a lane with
lane markings on both sides must have been
detected.
In the case of a broken lane marking being
detected, a lane-correcting brake application
can only be made if a vehicle has been detected
in the adjacent lane. Oncoming vehicles, over-
taking vehicles and vehicles in adjacent lanes
can be detected.
A further lane-correcting brake application can
only occur after your vehicle has returned to the
original lane.
No lane-correcting brake application occurs if: R
you clearly and actively steer, brake or accel-
erate. R
you cut the corner on a sharp bend R
you have switched on the turn signal R
a driving safety system intervenes, e.g. ESP ®
,
PRE-SAFE ®
Brake or Active Blind Spot Assist R
you have adopted a sporty driving style with
high cornering speeds or high rates of accel-
eration R
ESP ®
is switched off R
the transmission is not in position �[ .R
on vehicles with a trailer tow hitch, the elec-
trical connection to the trailer has been cor-
rect ly established R
a loss of tire pressure or a defective tire has
been detected and displayed. R
an obstacle has been detected in the lane in
which you are driving
Active Lane Keeping Assist may not detect other
road users or traffic situations. An inappropriate
brake application may be interrupted at any time
if you: R
steer slightly in the opposite direction R
switch on the turn signal R
you brake or accelerate significantly.
A lane-correcting brake application is interrup-
ted automatically if: R
a driving safety system intervenes, e.g. ESP ®
,
PRE-SAFE ®
Brake or Active Blind Spot Assist R
lane markings are no longer detected
Activating/deactivating Active Lane
Keeping Assist
X
To activate: press button �D .
Indicator lamp �C lights up. The Lane Keep‐
ing Assist On message appears in the mul-
tifunction display. If all conditions have been
satisfied, a warning or steering intervention
may be made.
If you drive at speeds above 40 mph
(60 km/h) and lane markings are detected,Driving systems 213
Driving and parking Z
Page 220 of 390
When overtaking, pay particular attention to the
extended length of your vehicle/trailer combi-
nation.
Due to the length of the vehicle/trailer combi-
nation, you require additional road space when
overtaking before you can change back to the
original lane.
If the automatic transmission repeatedly shifts
between gears on uphill or downhill gradients,
shift to a lower gear.
Driving in a lower gear and at a reduced speed
decreases the risk of engine damage.
If the coolant temperature increases signifi-
cantly when climate control is switched on,
switch climate control off.
Coolant heat can also be dissipated by opening
the windows and switching the ventilation
blower and the interior temperature to the high-
est level.
Decoupling a trailer
G WARNING
If you uncouple a trailer with the overrun
brake engaged, you could trap your hand
between the vehicle and the trailer drawbar.
There is a risk of injury.
Do not uncouple a trailer if the overrun brake
is engaged.
G WARNING
Vehicles with level control:
The vehicle is lowered as soon as you discon-
nect the trailer cable. This could result in your
limbs or those of other people that are
between the vehicle body and tires or under-
neath the vehicle being trapped. There is a
risk of injury.
Make sure that nobody is in the immediate
vicinity of the wheel housings or under the
vehicle when you disconnect the trailer cable.
! Do not disconnect a trailer with an engaged
overrun brake. Otherwise, your vehicle could
be damaged by the rebounding of the overrun
brake. X
Apply the vehicle's parking brake manually. X
Shift the transmission to position �] . X
Close all doors and the tailgate. X
Switch off the engine. X
Secure the vehicle and trailer against rolling
away. X
Remove the trailer cable. X
Remove the safety chains, if there are any. X
Uncouple the trailer.
Removing the ball coupling X
Observe the manufacturer's installation
instructions. X
Press the protective cap into the ball coupling
recess. X
Make sure that the protective cap is firmly in
place.
Observe the loading guidelines ( Y
page 290)
and the safety notes regarding stowage spaces
( Y
page 290).
Information on cleaning and care of the trailer
tow hitch ( Y
page 329).
Trailer power supply
! Accessories with a maximum power con-
sumption of 180 W can be connected to the
permanent power supply.
You must not charge a trailer battery using the
power supply.
The trailer socket of your vehicle is equipped at
the factory with a permanent power supply.
The permanent power supply is supplied via
trailer socket pin 4.
The trailer's permanent power supply is
switched off in the event of low vehicle supply
voltage and after six hours at the latest.
A qualified specialist workshop can provide
more information about installing the trailer
electrics.
Permissible trailer loads and trailer
drawbar noseweights
Weight specifications
The gross trailer weight is calculated as the
weight of the trailer plus the weight of the load
and the trailer's equipment.218
Towing a trailer
Driving and parking