2018 MERCEDES-BENZ G-CLASS steering
[x] Cancel search: steeringPage 225 of 294
The system has not been able to initiate an MB
Info call, if:
Rthe indicator lamp in theïInfo call button
is flashing continuously.
Rno voice connection to the Mercedes-Benz
Customer Assistance Center was estab-
lished.
This can occur if the relevant mobile phone net-
work is not available, for example.
The Call Failed
message appears in the mul-
tifunction display.
XTo end a call: press the~button on the
multifunction steering wheel.
or
XPress the corresponding multimedia system
button for ending a phone call.
Call priority
When service calls are active, e.g. Roadside
Assistance or Info calls, an emergency call can
still be initiated. In this case, an emergency call
will take priority and override all other active
calls.
The indicator lamp of the respective button
flashes until the call is ended.
An emergency call can only be terminated by the
Mercedes-Benz Customer Assistance Center.
All other calls can be ended by pressing:
Rthe ~ button on the multifunction steering
wheel
Rthe corresponding button in the multimedia
system to end the voice call
When a call is initiated, the audio system is
muted.
The mobile phone is no longer connected to the multimedia system.
However, if you want to use your mobile phone,
do so only when the vehicle is stationary and in
a safe location.
Downloading destinations
Downloading destinations
Downloading destinations gives you access to a
database with over 15 million points of interest
(POIs). These can be downloaded on the navi-
gation system in your vehicle. If you know the
destination, the address can be downloaded.
Alternatively, you can obtain the location of Points of Interest (POIs)/important destinations
in the vicinity.
Furthermore, you can download routes with up
to four way points.
You are prompted to confirm route guidance to
the address entered.
XSelect Yesby turning 3or sliding 1
the controller and confirm with 7.
The system calculates the route and subse-
quently starts the route guidance with the
address entered.
If you select No
the address can be stored in
the address book.
The destination download function is available
if:
Rthe vehicle is equipped with a navigation sys-
tem.
Rthe relevant mobile phone network is availa-
ble and data transfer is possible.
Route Assistance
This service is part of the mbrace PLUS Package
and cannot be purchased separately.
You can use the Route Assistance function even
if the vehicle is not equipped with a navigation
system.
Within the framework of this service, you receive
a professional and reliable form of navigation
support without having to leave your vehicle.
The customer service representative finds a
suitable route depending on your vehicle's cur-
rent position and the desired destination. You
will then be guided live through the current route
section.
Search and Send
General notes
To use "Search & Send", your vehicle must be
equipped with mbrace and a navigation system.
Additionally, an mbrace service subscription
must be completed.
"Search & Send" is a destination entry service. A
destination address which is found on Google
Maps
®can be transferred via mbrace directly to
your vehicle's navigation system.
Features223
Stowage and features
Z
Page 234 of 294

GWARNING
Opening the hood when the engine is over-
heated or when there is a fire in the engine
compartment could expose you to hot gases
or other service products. There is a risk of
injury.
Let an overheated engine cool down before
opening the hood. If there is a fire in the
engine compartment, keep the hood closed
and contact the fire department.
Notes on the oil level
Depending on your driving style, the vehicle
consumes up to 0.9 US qt (0.8 liters) of oil per
600 mile s(1000 km). The oil consumption may
be higher than this when the vehicle is new or if you frequently drive at high engine speeds.
Depending on the engine, the oil dipstick may be
in a different location.
When checking the oil level:
Rpark the vehicle on a level surface
Rthe engine should be switched off for approx-
imately five minutes if the engine is at normal
operating temperature
Rif the engine is not at normal operating tem-
perature, e.g. if the engine was only started
briefly, wait approximately 30 minutes before
carrying out the measurement
Checking the oil level using the oil dip-
stick
Example: engine compartment
On the G 63 AMG, the oil level can be checked
using the oil dipstick.
XPull oil dipstick :out of the dipstick guide
tube.
XWipe off oil dipstick :.
XSlowly slide oil dipstick :into the guide tube
to the stop and take it out again after approx-
imately three seconds.
If the level is between MIN mark =and MAX
mark ;, the oil level is correct.
XIf the oil level has dropped to MIN mark =or
below, add 1.1 US qt (1.0 l)of engine oil.
On all other models, the on-board computer
must be used to check the engine oil level.
Checking the oil level using the on-
board computer
G 550: the oil level can only be checked using
the on-board computer.
XMake sure that the SmartKey is in position 2
in the ignition lock.
XPress 9or: on the steering wheel to
select the following message: Measuring
EngineOilLevelAccurateOnlyWhenVehicle Is Level
The measurement takes a few seconds. You will
see one of the following messages in the multi-
function display:
REngine Oil Level OK
RAdd1.1litersEng.OilatNextRefu‐eling
XAdd oil if necessary.
If the engine is at normal operating temperature and the Reduce Engine Oil Level
display
appears, too much oil has been added.
XHave excess oil siphoned off.
If the For Engine Oil Level Ignition
Must Be Onmessage appears:
XTurn the SmartKey to position 2in the igni-
tion lock (Ypage 105).
If the Need More Time to Check Engine
Oil Levelmessage appears:
XIf the engine is at normal operating tem-
perature: repeat the measurement after
approximately five minutes.
XIf the engine is not at normal operating
temperature: e.g. if the engine was only star-
ted briefly, repeat the measurement after
approximately 30 minutes.
232Engine compartment
Maintenance and care
Page 235 of 294
If theEngine Oil Level Not Measurablewith Running Enginemessage appears:
XSwitch off the engine.
XIf the engine is at normal operating tem-
perature: wait about five minutes before car-
rying out the measurement.
XIf the engine is not at normal operating
temperature: e.g. if the engine was only star-
ted briefly, wait approximately 30 minutes
before carrying out the measurement.
If you wish to cancel the measurement, press
the 9 or: button on the multifunction
steering wheel.
Adding engine oil
!Use only engine oils and oil filters that are
approved for vehicles with a service system. A
list of the engine oils and oil filters that have
been tested and approved in accordance with
Mercedes-Benz Specifications for Service
Products is available at any authorized
Mercedes-Benz Center.
The following cause engine failure or damage
to the exhaust system:
RUse of engine oils and oil filters that have
not been expressly approved for the service
system
RReplacement of engine oil and oil filter after
the replacement interval specified by the
service system has expired
RUse of engine oil additives
!Do not add too much oil. If the oil level is
above the "max" mark on the dipstick, too
much oil has been added. This can lead to
damage to the engine or the catalytic con-
verter. Have excess oil siphoned off.
HEnvironmental note
When adding oil, take care not to spill any. If
oil enters the soil or waterways, it is harmful to
the environment.
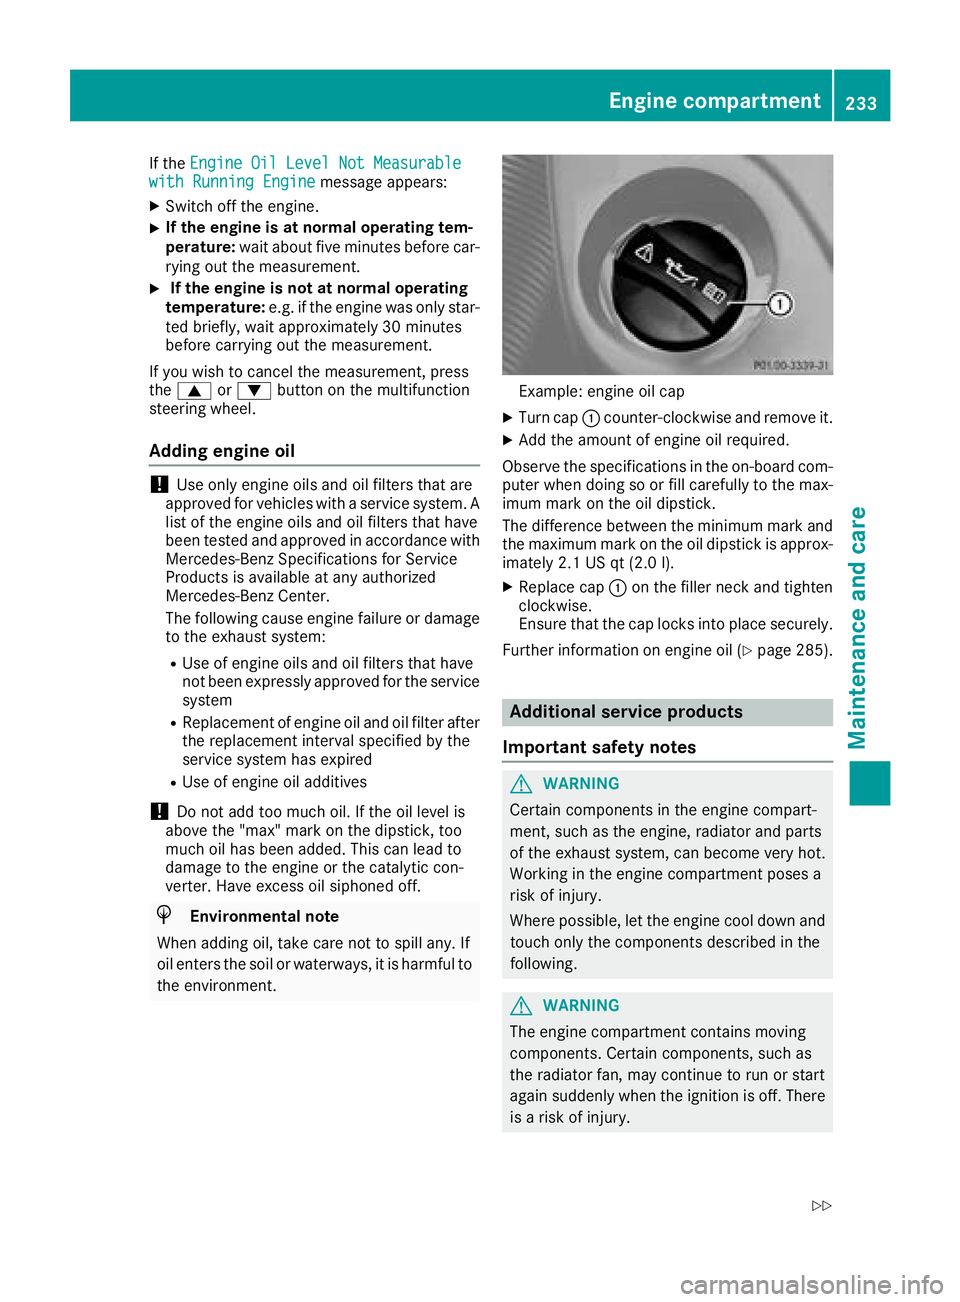
Example: engine oil cap
XTurn cap :counter-clockwise and remove it.
XAdd the amount of engine oil required.
Observe the specifications in the on-board com-
puter when doing so or fill carefully to the max-
imum mark on the oil dipstick.
The difference between the minimum mark and
the maximum mark on the oil dipstick is approx-
imately 2.1 US qt (2.0 l).
XReplace cap :on the filler neck and tighten
clockwise.
Ensure that the cap locks into place securely.
Further information on engine oil (
Ypage 285).
Additional service products
Important safety notes
GWARNING
Certain components in the engine compart-
ment, such as the engine, radiator and parts
of the exhaust system, can become very hot.
Working in the engine compartment poses a
risk of injury.
Where possible, let the engine cool down and touch only the components described in the
following.
GWARNING
The engine compartment contains moving
components. Certain components, such as
the radiator fan, may continue to run or start
again suddenly when the ignition is off. There is a risk of injury.
Engine compartment233
Maintenance and care
Z
Page 238 of 294
Hiding a service message
XTo hide the service message, press the%
back button on the multifunction steering
wheel (
Ypage 161).
Displaying service messages
Use the buttons on the multifunction steering
wheel.
XSwitch on the ignition.
XPress =or; to select the standard
display menu on the steering wheel
(
Ypage 163).
XPress 9or: to select the service
interval display.
The ¯ or± service symbol and the ser-
vice due date are displayed.
Points to remember
The specified maintenance interval takes only
the normal operation of the vehicle into
account. Under arduous operating conditions or
increased load on the vehicle, maintenance
work must be carried out more frequently, for
example:
Rregular city driving with frequent intermediate
stops
Rif the vehicle is primarily used to travel short
distances
Ruse in mountainous terrain or on poor road
surfaces
Rif the engine is often left idling for long periods
Under these or similar conditions, have, for
example, the air filter, engine oil and oil filter
replaced or changed more frequently. Under
arduous operating conditions, the tires must be
checked more often. Further information can be obtained at a qualified specialist workshop, e.g.
an authorized Mercedes-Benz Center.
Care
General notes
!
For cleaning your vehicle, do not use any of
the following:
Rdry, rough or hard cloths
Rabrasive cleaning agents
Rsolvents
Rcleaning agents containing solvents
Do not scrub.
Do not touch the surfaces or protective films
with hard objects, e.g. a ring or ice scraper.
You could otherwise scratch or damage the
surfaces and protective film.
!Do not park your vehicle for a long period of
time directly after cleaning, particularly after
cleaning the wheel rim with wheel cleaner.
Wheel cleaner can lead to the increased cor-
rosion of the brake discs and pads. Therefore,
drive for a few minutes after cleaning. By
heating up the brakes, the brake discs and
pads dry. The vehicle can then be parked for a
long period of time.
HEnvironmental note
Dispose of empty packaging and cleaning
cloths in an environmentally responsible man-
ner.
Regular care of your vehicle is a condition for
retaining the quality in the long term.
Use care products and cleaning agents recom-
mended and approved by Mercedes-Benz.
Washing the vehicle and cleaning the
paintwork
Automatic car wash
GWARNING
Braking efficiency is reduced after washing
the vehicle. There is a risk of an accident.
After the vehicle has been washed, brake
carefully while paying attention to the traffic
conditions until full braking power is restored.
!When DISTRONIC PLUS or the HOLD func-
tion is activated, the vehicle brakes automat-
ically in certain situations.
To avoid damage to the vehicle, deactivate
DISTRONIC PLUS and the HOLD function in
the following or similar situations:
Rwhen towing the vehicle
Rin the car wash
!Never clean your vehicle in a Touchless
Automatic Car Wash as these use special
236Care
Maintenance and care
Page 243 of 294
Interior care
Cleaning the display
!Fo rcleaning ,do no tuse any of th efollowing:
Ralcohol-base dthinner or gasolin e
Rabrasive cleaning agents
Rcommercially-available household cleaning
agents
Thes emay damag eth edisplay surface. Do
no tput pressur eon th edisplay surfac ewhen
cleaning .This could lead to irreparable dam-
age to th edisplay.
XBefore cleaning th edisplay, mak esur ethat it
is switched off and has cooled down .
XClean thedisplay surfac eusin g acommer-
cially available microfiber cloth and TFT/LCD
display cleaner.
XDr yth edisplay surfac eusin g adry microfiber
cloth .
Cleaning the plastic trim
GWARNIN G
Care products and cleaning agents containing solvents caus esurfaces in th ecockpit to
become porous. As aresult ,plastic part smay
come loos ein th eevent of air bag deploy-
ment. Ther eis aris kof injury.
Do no tuse any car eproducts and cleaning
agents to clean th ecockpit .
!Never attach th efollowin gto plastic surfa-
ces:
Rstickers
Rfilm s
Rperfum eoil container or similar
You could otherwise damag eth eplastic.
!Do no tallow cosmetics ,insec trepellen tor
sunscree nto come int ocontact wit hth eplas-
ti c trim. This maintains th ehigh-qualit ylook of
th esurfaces.
XWipe th eplastic trim wit h adamp ,lint-free
cloth ,e.g. amicrofiber cloth .
XHeavy soiling:use careand cleaning prod-
uct srecommended and approve dby
Mercedes-Benz.
The surfac emay chang ecolor temporarily.
Wait until th esurfac eis dry again .
Cleaning the steering wheel and selec-
tor lever
XThoroughly wipe wit h adamp cloth or use
leather car eagents that hav ebeen recom-
mended and approve dby Mercedes-Benz.
Cleaning genuine wood and trim ele-
ments
!Do no tuse solvent-base dcleaning agents
suc has tar remover, whee lcleaners, polishes
or waxes. Ther eis otherwise aris kof damag -
ing th esurface.
!Do no tuse chrom epolis hfor trim strips .The
trim strips hav e achrom elook but are mostl y
made of anodized aluminum and can lose
their shin eif chrom epolis his used. Use a
damp ,lint-free cloth instead when cleaning
th etrim strips .
If th echrome-plated trim strips are ver ydirty,
you can use achrom epolish. If you are unsure
as to whether th etrim strips are chrome-
plated or not, consult an authorize d
Mercedes-Ben zCenter.
XWipe th ewooden trim and trim pieces wit h a
damp ,lint-free cloth ,e.g. amicrofiber cloth .
XTrim elementswith piano black finish :
wipe wit h asoft, damp cotton cloth .Use clean
water.
XHeavy soiling: use careand cleaning prod-
uct srecommended and approve dby
Mercedes-Benz.
Cleaning the seat covers
Gene ral notes
!Do no tuse amicrofiber cloth to clean cover s
made out of real leather ,artificial leather or
DINAMICA .If used often ,these can damag e
th ecover .
!Observ eth efollowin gwhen cleaning :
Rclean artificial leather cover swit h a cloth
moistened wit h asolution containing 1%
detergen t(e.g. dish washing liquid).
Rclean cloth cover swit h a microfiber cloth
moistened wit h asolution containing 1%
detergen t(e.g. dish washing liquid). Rub
carefully and always wipe entire seat sec -
tion sto avoi dleaving visible lines. Leav e
th eseat to dry afterwards .Cleaning result s
Care241
Maintenance and care
Z
Page 248 of 294

XMake sure that tab;is below when re-
installing cover ring :(Ypage 245).
XFor safety reasons, regularly check to ensure
that the wheel is securely fastened.
Flat tire
Preparing the vehicle
Observe the notes on changing a wheel
(Ypage 275).
XStop the vehicle on solid, non-slippery and
level ground, as far away as possible from
traffic.
XSwitch on the hazard warning lamps.
XSecure the vehicle against rolling away
(Ypage 122).
XIf possible, bring the front wheels into the
straight-ahead position.
XSwitch off the engine.
XRemove the SmartKey from the ignition lock.
The steering wheel lock stays active for as
long as the SmartKey is removed.
XMake sure that the passengers are not endan-
gered as they do so. Make sure that no one is
near the danger area while a wheel is being
changed. Anyone who is not directly assisting
in the wheel change should, for example,
stand behind the barrier.
XGet out of the vehicle. Pay attention to traffic
conditions when doing so.
XClose the driver's door.
XPlace the warning triangle a suitable distance
away (Ypage 243). Observe legal require-
ments.
Battery (vehicle)
Important safety notes
Special tools and expert knowledge are required
when working on the battery, e.g. removal and
installation. You should therefore have all work
involving the battery carried out at a qualified
specialist workshop.
GWARNING
Work carried out incorrectly on the battery
can lead, for example, to a short circuit and
thus damage the vehicle electronics. This can
lead to function restrictions applying to
safety-relevant systems, e.g. the lighting sys-
tem, the ABS (anti-lock braking system) or the
ESP
®(Electronic Stability Program). The oper-
ating safety of your vehicle may be restricted.
You could lose control of the vehicle, for
example:
Rwhen braking
Rin the event of abrupt steering maneuvers
and/or when the vehicle's speed is not
adapted to the road conditions
There is a risk of an accident.
In the event of a short circuit or a similar inci- dent, contact a qualified specialist workshop
immediately. Do not drive any further. You
should have all work involving the battery car-
ried out at a qualified specialist workshop.
For further information about ABS and ESP
®,
see (Ypage 58) and (Ypage 59).
GWARNING
Electrostatic build-up can lead to the creation of sparks, which could ignite the highly explo-
sive gases of a battery. There is a risk of an
explosion.
Before handling the battery, touch the vehicle
body to remove any existing electrostatic
build-up.
The highly flammable gas mixture forms when
charging the battery as well as when jump-start-
ing.
Always make sure that neither you nor the bat-
tery is electrostatically charged. A build-up of
electrostatic charge can be caused, for exam-
ple:
Rby wearing clothing made from synthetic
fibers
Rdue to friction between clothing and seats
Rif you push or pull the battery across the car-
pet or other synthetic materials
Rif you rub the battery with a cloth
GWARNING
During the charging process, a battery produ-
ces hydrogen gas. If a short circuit occurs or
246Battery (vehicle)
Breakdown assistance
Page 253 of 294
XLift up cover:of positive terminal ;in the direction of the arrow.
XConnect positive terminal ;on your vehicle to positive terminal ?of donor battery Busing the
jumper cable. Always begin with positive terminal ;on your own vehicle first.
XStart the engine of the donor vehicle and run it at idling speed.
XConnect negative terminal Aof donor battery Bto ground point =of your vehicle using the
jumper cable, connecting the jumper cable to donor battery Bfirst.
XStart the engine.
XBefore disconnecting the jumper cables, let the engine run for several minutes.
XFirst, remove the jumper cables from ground point =and negative terminal A, then from pos-
itive clamp ;and positive terminal ?. Begin each time at the contacts on your own vehicle first.
XClose cover:of positive terminal ;after removing the jumper cables.
XHave the battery checked at a qualified specialist workshop.
Jump-starting is not considered to be a normal operating condition.
iJumper cables and further information regarding jump-starting can be obtained at any qualified
specialist workshop.
Towing and tow-starting
Important safety notes
GWARNING
Functions relevant to safety are restricted or
no longer available if:
Rthe engine is not running.
Rthe brake system or the power steering is
malfunctioning.
Rthere is a malfunction in the voltage supply or the vehicle's electrical system.
If your vehicle is being towed, much more
force may be necessary to steer or brake.
There is a risk of an accident.
In such cases, use a tow bar. Before towing,
make sure that the steering moves freely.
GWARNING
You can no longer steer the vehicle if the
steering wheel lock has been engaged. There
is a risk of an accident.
Always switch off the ignition when towing the
vehicle with a tow cable or a tow bar.
GWARNING
When towing or tow-starting another vehicle
and its weight is greater than the permissible
gross weight of your vehicle, the:
Rthe towing eye could detach itself
Rthe vehicle/trailer combination could roll-
over.
There is a risk of an accident.
When towing or tow-starting another vehicle,
its weight should not be greater than the per- missible gross weight of your vehicle.
Details on the permissible gross vehicle weight
of your vehicle can be found on the vehicle iden-
tification plate (
Ypage 282).
!When DISTRONIC PLUS or the HOLD func-
tion is activated, the vehicle brakes automat-
ically in certain situations.
To avoid damage to the vehicle, deactivate
DISTRONIC PLUS and the HOLD function in
the following or similar situations:
Rwhen towing the vehicle
Rin the car wash
!The vehicle can be towed a maximum of
30 miles (50km). The towing speed of 30 mph (50 km/h) must not be exceeded.
If the vehicle has to be towed more than
30 miles (50km), the entire vehicle must be
raised and transported.
Towing and tow-starting251
Breakdown assistance
Z
Page 255 of 294
XWhen the vehicle is stationary, depress the
brake pedal and keep it depressed.
XShift the transfer case to positionNeutral
(Ypage 150).
XShift the automatic transmission to position
i.
XLeave the SmartKey in position 2in the igni-
tion lock.
XRelease the brake pedal.
XRelease the parking brake.
XSwitch on the hazard warning lamps
(Ypage 88).
In order to signal a change of direction when
towing the vehicle with the hazard warning
lamps switched on, use the combination switch
as usual. In this case, only the indicator lamps
for the direction of travel flash. After resetting
the combination switch, the hazard warning
lamp starts flashing again.
iThe automatic transmission can only
change gear when the battery has sufficient
charge.
If you cannot shift the automatic transmission
to position i, the propeller shafts to the
driven axles must be removed.
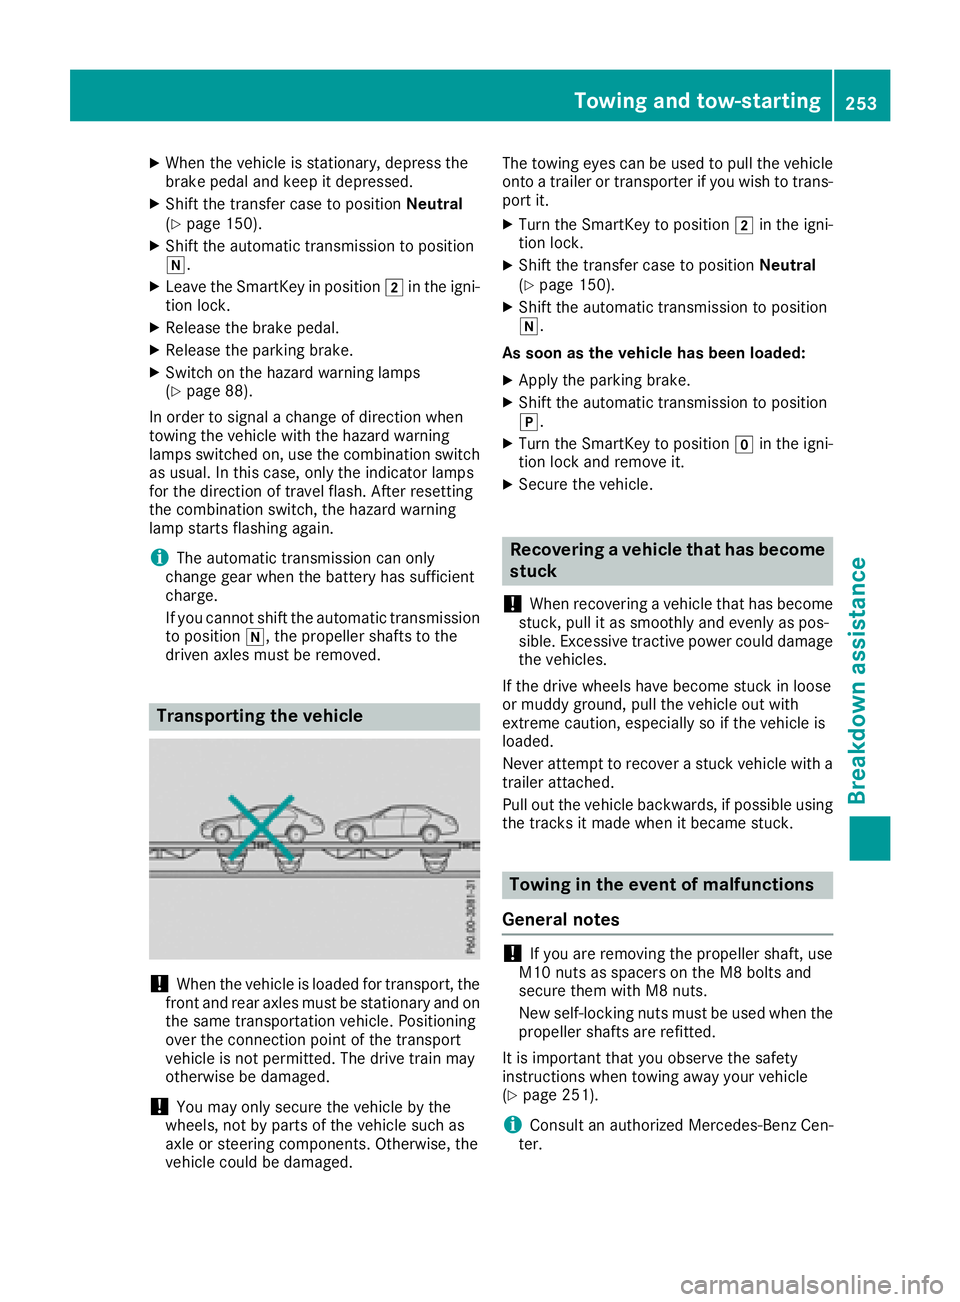
Transporting the vehicle
!When the vehicle is loaded for transport, the
front and rear axles must be stationary and on the same transportation vehicle. Positioning
over the connection point of the transport
vehicle is not permitted. The drive train may
otherwise be damaged.
!You may only secure the vehicle by the
wheels, not by parts of the vehicle such as
axle or steering components. Otherwise, the
vehicle could be damaged. The towing eyes can be used to pull the vehicle
onto a trailer or transporter if you wish to trans-
port it.
XTurn the SmartKey to position 2in the igni-
tion lock.
XShift the transfer case to position Neutral
(Ypage 150).
XShift the automatic transmission to position
i.
As soon as the vehicle has been loaded:
XApply the parking brake.
XShift the automatic transmission to position
j.
XTurn the SmartKey to position gin the igni-
tion lock and remove it.
XSecure the vehicle.
Recovering a vehicle that has become
stuck
!
When recovering a vehicle that has become
stuck, pull it as smoothly and evenly as pos-
sible. Excessive tractive power could damage
the vehicles.
If the drive wheels have become stuck in loose
or muddy ground, pull the vehicle out with
extreme caution, especially so if the vehicle is
loaded.
Never attempt to recover a stuck vehicle with a
trailer attached.
Pull out the vehicle backwards, if possible using the tracks it made when it became stuck.
Towing in the event of malfunctions
General notes
!If you are removing the propeller shaft, use
M10 nuts as spacers on the M8 bolts and
secure them with M8 nuts.
New self-locking nuts must be used when the
propeller shafts are refitted.
It is important that you observe the safety
instructions when towing away your vehicle
(
Ypage 251).
iConsult an authorized Mercedes-Benz Cen-
ter.
Towing and tow-starting253
Breakdown assistance
Z