2018 MERCEDES-BENZ CLA set clock
[x] Cancel search: set clockPage 79 of 326

Meanwhile, the fuel filler flap will not be locked
or unlocked.
You cannot unlock the vehicle centrally from the
inside if the vehicle has been locked with the
SmartKey or KEYLESS-GO.
You can open ad oor from inside the vehicle
even if it has been locked. You can open the rear
doors from inside the vehicle unless they are
secured by the child-proof lock ( Y
page 60).
If the vehicle has previously been locked with
the SmartKey from the outside, opening ad oor
from the inside will trigger the anti-theft alarm
system. Switch off the alarm ( Y
page 68).
If al ocked door is opened from the inside, the
previous unlock status of the vehicle will be
taken into consideration if: R
the vehicle was locked using the locking but-
ton for the central locking, or R
if the vehicle was locked automatically
The vehicle will be fully unlocked if it had previ-
ously been fully unlocked. If only the driver's
door had been previously unlocked, only the
door which has been opened from the inside is
unlocked.
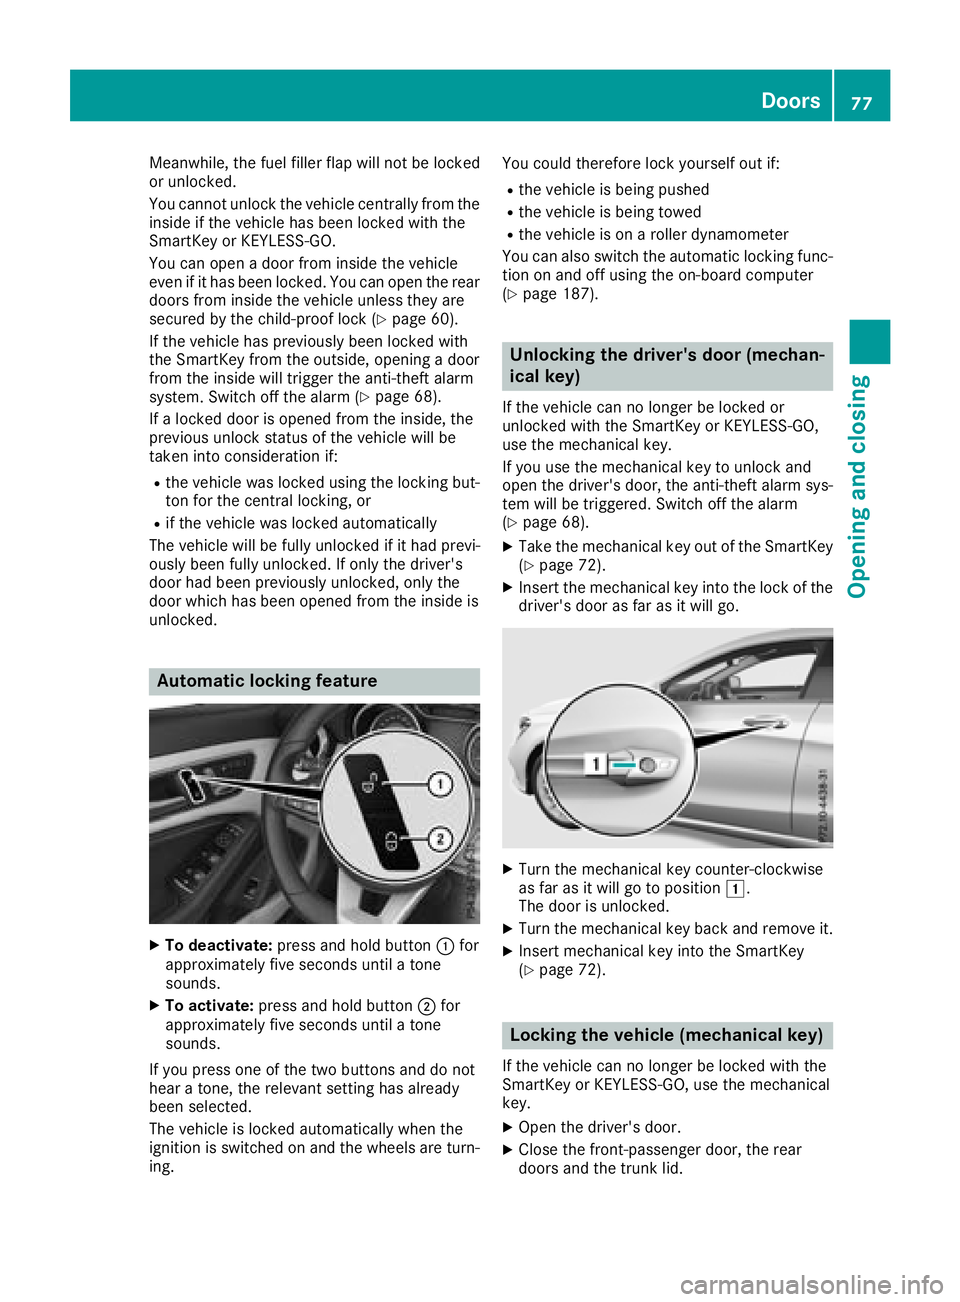
Automatic lockin gf eature
X
To deactivate: press and hold button �C for
approximately five seconds until at one
sounds. X
To activate: press and hold button �D for
approximately five seconds until at one
sounds.
If you press one of the two buttons and do not
hear at one, the relevant settin gh as already
been selected.
The vehicle is locked automatically when the
ignition is switched on and the wheels are turn-
ing. You could therefore lock yourself out if: R
the vehicle is being pushed R
the vehicle is being towed R
the vehicle is on ar oller dynamometer
You can also switch the automatic locking func-
tion on and off using the on-board computer
( Y
page 187).
Unlocking the driver's door (mechan-
ical key) If the vehicle can no longer be locked or
unlocked with the SmartKey or KEYLESS-GO,
use the mechanical key.
If you use the mechanical key to unlock and
open the driver's door, the anti-theft alarm sys-
tem will be triggered. Switch off the alarm
( Y
page 68). X
Take the mechanical key out of the SmartKey
( Y
page 72). X
Insert the mechanical key into the lock of the
driver's door as far as it will go.
X
Turn the mechanical key counter-clockwise
as far as it will go to position �G .
The door is unlocked. X
Turn the mechanical key back and remove it. X
Insert mechanical key into the SmartKey
( Y
page 72).
Locking the vehicle (mechanical key)
If the vehicle can no longer be locked with the
SmartKey or KEYLESS-GO, use the mechanical
key. X
Open the driver's door. X
Close the front-passenger door, the rear
doors and the trunk lid. Doors 77
Opening and closing Z
Page 119 of 326

i You can also activate several air distribution
settings simultaneously. To do this ,p ress
multiple air distribution buttons .T he air is
the nd irected through various vents.
i Regardless of the air distribution setting,
airflow is always directed through the side air
vents. The side air vents can only be close di f
the adjusters are turned clockwise until they
engage.
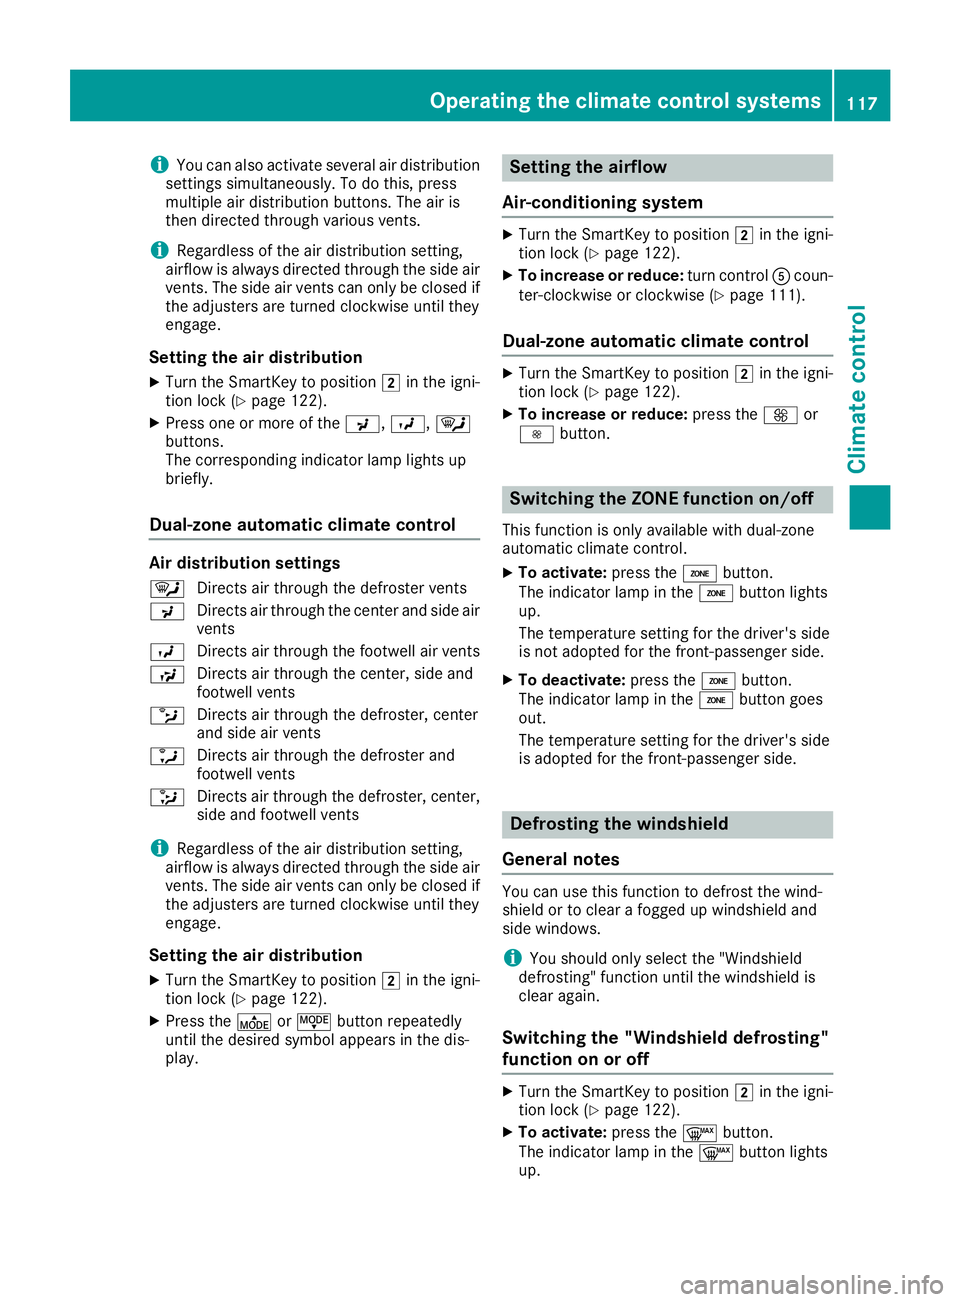
Setting th ea ir distributionX
Turn the SmartKey to position �H in the igni-
tion lock ( Y
page 122).X
Press one or more of the �
Page 122 of 326

i If you activate the residual heat function at
high temperatures, only the ventilation wil lb e
activated. The blower runs at mediu ms peed.
i You cannot use the ventilation to cool the
vehicle interior to at emperature lowe rt han
the outsid et emperature.
Activating/deactivating X
Turn the SmartKey to position �Z in the igni-
tion lock or remove it ( Y
page 122).X
Press the �K button.
The indicator lamp in the �K button lights
up or goes out.
The indicator lamp in the button indicates that
the respective function is activated.
i Residua lh eat is deactivated automatically:R
after approximately 30 minutes R
when the ignition is switched on R
if the battery voltage drops
Air vents
Important safety notes
G WARNING
Very hot or very cold air can flow from the air
vents. This could resul tinb urns or frostbite in
the immediate vicinity of the air vents. There
is ar isk of injury.
Make sure that all vehicle occupants always
maintain as ufficient distance to the air out-
lets. If necessary ,r edirect the airflow to
another area of the vehicle interior.
In order to ensure the direct flow of fresh air
through the air vents into the vehicle interior,
please observe the following notes: R
keep the air inlet between the windshield and
the hood free of blockages, such as ice, snow
or leaves. R
never cover the air vents or air intake grilles in
the vehicle interior.
i For optimal climate control in the vehicle,
open the air vents completely and set the
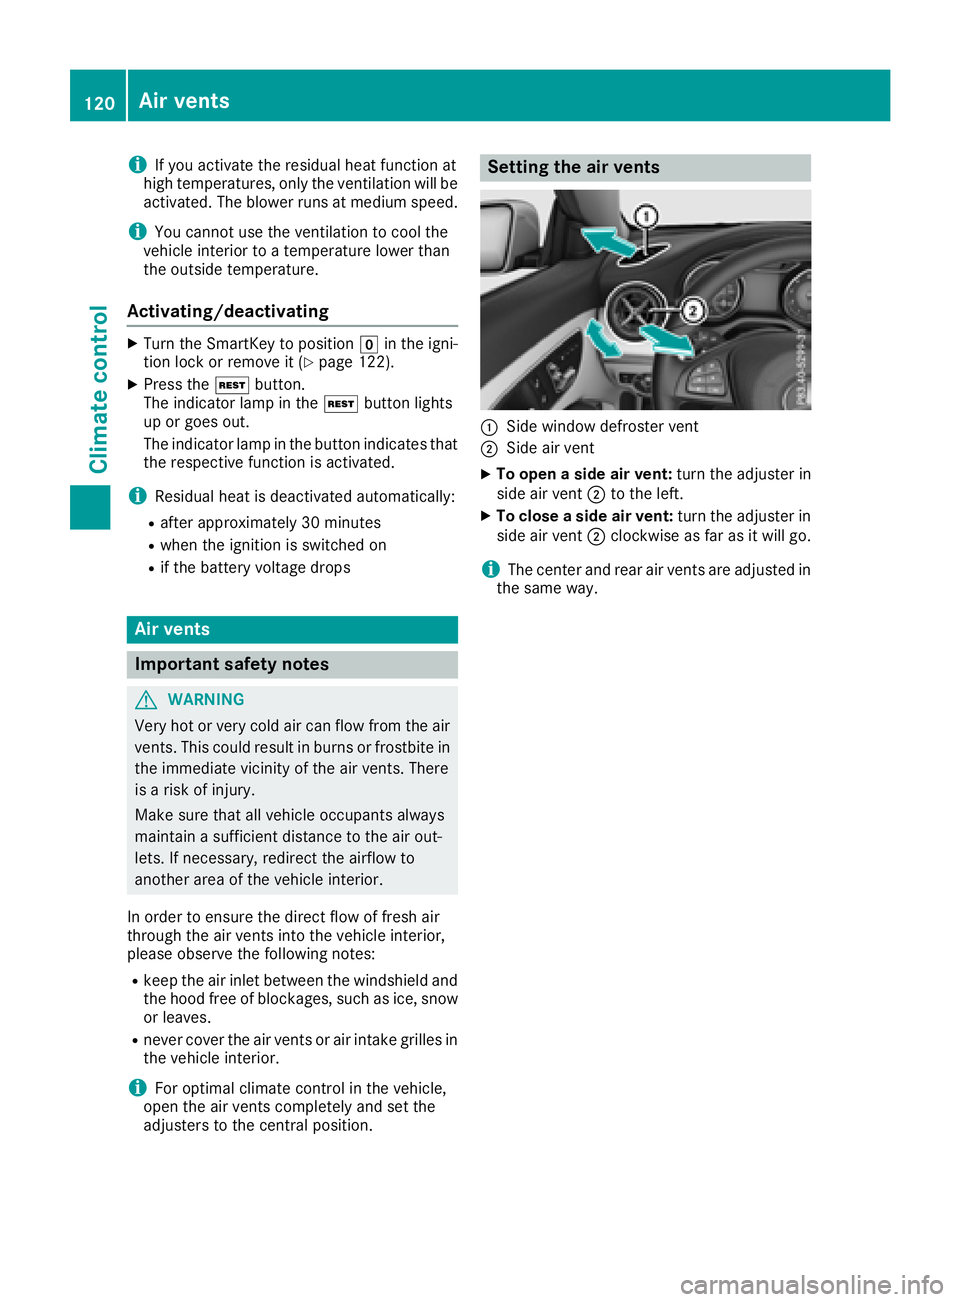
adjusters to the central position. Setting the air vents
�C
Side window defroster vent �D
Side air vent X
To open as ide air vent: turn the adjuster in
side air vent �D to the left. X
To close as ide air vent: turn the adjuster in
side air vent �D clockwise as far as it wil lg o.
i The center and rear air vents are adjusted in
the same way.120
Ai rv ents
Climate control
Page 178 of 326

Important safety notes
G WARNIN G
If you operate information systems and com-
munication equipmen ti ntegrate dint he vehi-
cle when driving ,y ou may be distracte df ro m
th et ra ffic situation .Y ou could also lose con-
trol of th ev ehicle. Ther eisar is kofana cci-
dent.
Only operate this equipmen tw hen th et ra ffic
situation permits. If you are no ts ur et ha tt hi s
is possible ,p ark th ev ehicl ep ayin ga ttention
to traffic condition sa nd operate th ee quip-
men tw hen th ev ehicl eiss ta tionary.
You must observ et he legal requirements for th e
country in whic hy ou are currentl yd riving when
operating th eo n-bo ard computer.
G WARNIN G
If th ei nstrumen tc luste rh as faile dorm al-
functioned, you may no tr ecognize function
restriction sins ystems relevan ttos afety. The
operating safet yofy our vehicl em ay be
impaired .T her eisar is kofana ccident.
Drive on carefully. Hav et he vehicl ec hecked
at aq ualified specialist workshop immedi-
ately.
The on-board computer only shows message so r
warning sf ro mc ertai ns ystems in th em ultifunc-
tion display. You should therefor em ak es ur e
your vehicl eiso perating safely at all times .
If th eo perating safet yofy our vehicl ei s
impaired ,p ull ove rass oo nasitiss af etodos o.
Contac taq ualified specialist workshop.
Fo rano verview, see th ei nstrumen tp anel illus-
tration ( Y
page 33).
Display sa nd operation
Instrumen tc luster lighting
The ligh ts ensor in th ei nstrumen tc luste ra uto -
matically control st he brightness of th em ulti-
function display. In daylight, th ed isplays in th e
instrumen tc luste ra re no ti lluminated. The lighting in th ei nstrumen tc luster, in th ed is-
plays and th ec ontrols in th ev ehicl ei nterior can
be adjusted usin gt he brightness control knob.
The brightness control knob is locate dont he
botto ml ef toft he instrumen tc luste r
( Y
page 33). X
Turn th eb rightness control knob clockwise or
counter-clockwise.
If th el igh ts witch is set to th e �X , �` or
�X position ,t he brightness is dependen t
upon th eb rightness of th ea mbien tl ight.
Speedometer with segments The speedometer is divided int os egments on
vehicles wit hD istance Pilot DISTRONIC.
The segments in th es peedometer indicat e
whic hs pee dr ange is available. R
Distanc eP ilot DISTRONI Cisa ctivated
( Y
page 151):
On eort wo segments in th es et spee dr ange
ligh tu p. R
Distanc eP ilot DISTRONI Cd etects av ehicl ei n
fron tm oving mor es lowly than th es to re d
speed:
The segments between th es pee doft he vehi-
cle in fron ta nd th es to re ds pee dl igh tu p.
Tachometer
! Do no td riv eint he overrevving range, as this
could damag et he engine.
The red ban dint he tachometer indicates th e
engine's overrevving range.
The engin eisl imite dw ithin ar ange to protect
th ee ng in ew hen th er ed ban disr eached.
Outsid et emperatur ed isplayYou should pay special attention to road condi-
tion sw hen temperatures are aroun df re ezing
point.
Bea rinm in dt ha tt he outside temperature dis-
play indicates th et em perature measured and
does no tr ecord th er oad temperature.
The outside temperature display is in th em ulti-
function display ( Y
page 179).176
Display sa nd operation
On-boar dc omputer and displays