2018 MERCEDES-BENZ CLA COUPE phone
[x] Cancel search: phonePage 236 of 326
Authorization by enteringapasskey( passcode):
XSelect the Bluetooth®nameoft he mobile
phone.
The input menu for the passkeyisd isplayed.
XChoos eaone to sixteen-digitn umbercombi-
nation as apasskey.
XEnter the passkeyont he multimedia system.
XPress¬to confirm.
XEnter and confirm the passkeyont he mobile
phone. Depending on the mobil ephone used,
confirm the connectio ntothe multimedia sys-
tem and for the PBAP and MAP Bluetooth
®
profiles. The prompt to confirm mayt ake up
to two minutes to be displayed (se ethe man-
ufacturer's operating instructions).
Connectin gamobilephon e(Au dio 20)
Requirements
For telephony via the Bluetooth®interface, you
require at leas tone Bluetooth®-capable mobile
phone depending on us eofone-telephone
mode ortwo-telephon emode.The mobile
phone must support Hands-FreeP rofile1.0 or
above.
In two-telephon emode youc an us eallthe
functions of the multimedia system with the
main telephone .Witht he additional tele-
phone ,you can receive incoming calls.
Multimedia system:
XSelect VehicleQSystem Set‐tingsQActivate Bluetooth.
XActivate Bluetooth®O.
Mobil ephone:
XActivate Bluetooth®and ,ifn ecessary,B lue-
tooth®visibility for othe rdevice s(seet he
manufacturer's operating instructions).
The Bluetooth
®device names for al lofone man-
ufacturer's products might be identical .To
make it possibl etoclearly identify your mobile
phone, change the device nam e(seet he man-
ufacturer's operating instructions). If the mobil
ephone supports the PBAP ( Phone
Book Access Profile )and MAP ( Message
A ccess Profile) Bluetooth
®profiles, the follow-
ing informatio nist ransmitte dafteryou connect
the main telephone:
RPhone book
RCall lists
RText messages and e-mail
iFurther informatio nonsuitabl emobile
phones can be found at: http://
www.mercedes-benz.com/connect
iIn the USA, yo ucan getint ouch with the
Mercedes-Benz Customer Assistance Center
on 1-800-FOR-MERCedes (1-800-367-6372).
In Canada, yo ucan getint ouch with the Cus-
tomerR elations Center on 1-800-387-0100.
Searching for and authorizing (connect-
ing) amobile phone
Before using your mobile phone with the multi-
media system for the first time, you will need to
search for the phone and then authorize (con-
nect)i t. Depending on the mobile phone, author-
ization either takes place by means of Secure
Simple Pairing or by enteringap asskey. The
multimedia system automatically makes the
procedure that is relevant for your mobile phone
available. The mobile phone is always connec-
ted automatically after authorization. Further
information on using amobile phone with the
multimedia system (see the Digital Operator's
Manual).
If the multimedia system does not detect your
mobile phone, this may be due to particular
security settings on your mobile phone (see the
manufacturer's operating instructions).
Searching for amobile phone
Multimedia system:
XSelect Tel/®QConn. DeviceQCon‐nect New Device.
XSelectConnect via vehicle.
XSelect mobile phone.
Connecting amobile phone
XOne-telephone mode :select Main Phone.
XTwo telephone mode: selectAdditional
Phone (Incoming Calls Only)when a
mobile phone is already connected.
234Operating system
Multimedia system
Page 237 of 326
XAuthorizationusingS ecur eSimple Pai r-
ing:
Ac odeisd isplayed inthem ultimedia system
and on th emobile phone.
XConfir mcodeont hemob ilephone. Depend-
ing on th emobile phoneu sed, confirm the
connection to th emultimedia system and for
th eP BAPa nd MAPB luetooth
®profiles. The
prompt to confirm may tak euptotwo
minute stobed isplayed (see th emanufactur-
er' so peratin ginstructions).
XIfth ec odes are different :select Noon the
multimedia system.
The proces siscanceled.
Repeat authorization.
or
XAuthorizatio nbyentering apasskey
(passcode): enterany one- to sixteen-digit
number sequenc ewhichy ou have chosen
yourself int othe passke yinput menu.
XPress ¬to confirm.
XEnterand confirm th epasske yonthe mob ile
phone. Dependin gonthemob ilephoneu sed,
confirm th econnectio ntothemultimedia sys-
te ma nd for th ePBAPa nd MAPB luetooth
®
profiles. The prompt to confirm may tak eup
to two minute stobedisplayed (see th eman-
ufacturer' soperatin ginstructions).
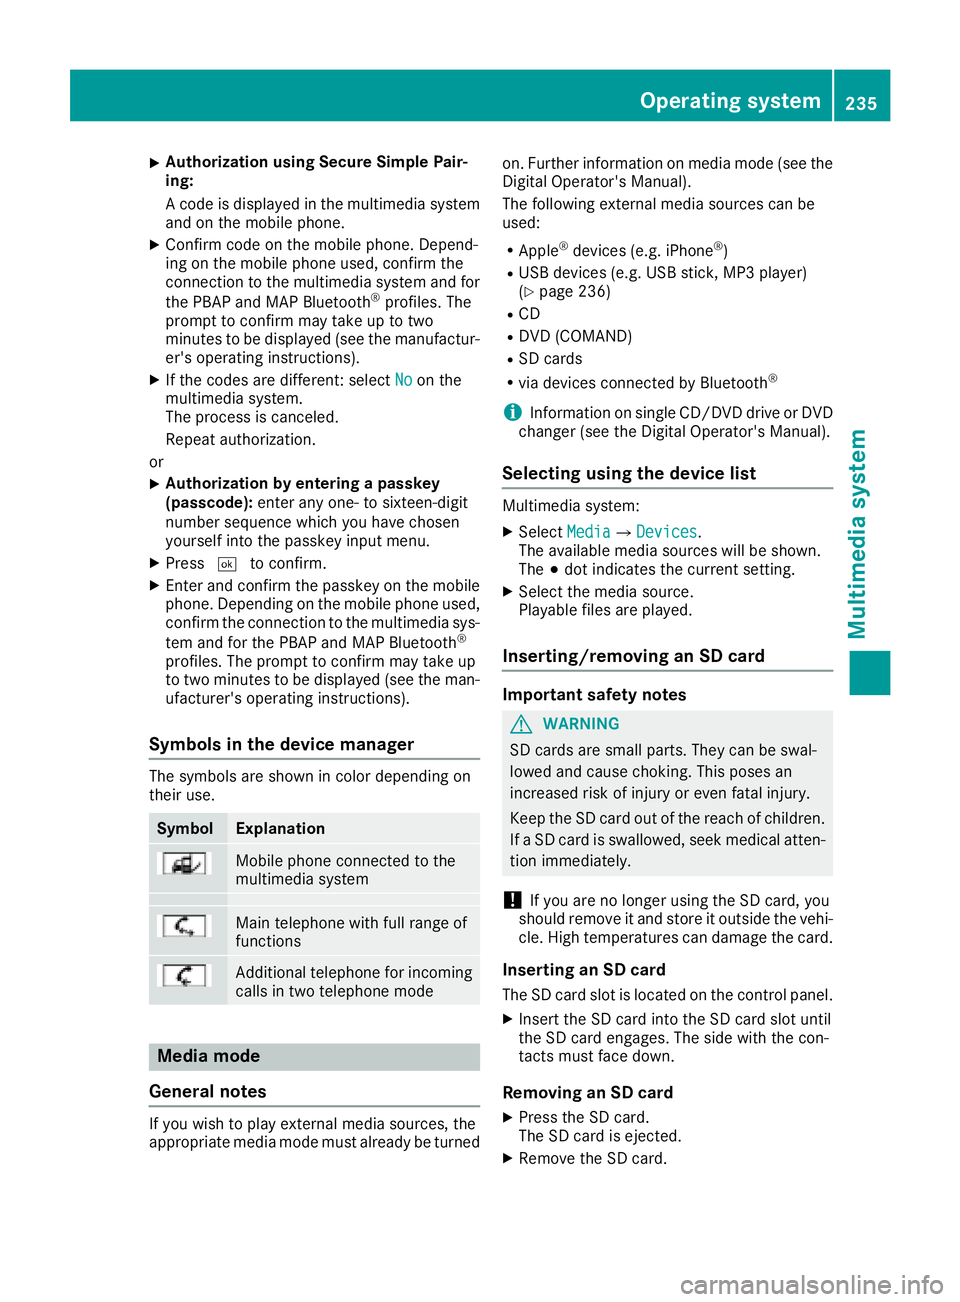
Symbols in th edevice manager
The symbols are shown in color dependingon
their use.
SymbolExplanation
Mobile phonec onnected to the
multimedia system
Main telephone withfull range of
functions
Ad ditional telephone for incoming
calls intwo telephone mode
Media mode
General notes
If you wish toplay external medi asources ,the
appropriat emediam odem ust alread ybeturned on.F
urther informatio nonmediam ode(see the
Digital Operator's Manual).
The followinge xternalmediasources can be
used:
RApple®device s(e.g. iPhone®)
RUSBd evices(e.g. USBs tick ,M P3 player)
(Ypage 236)
RCD
RDV D(COMAND)
RSD cards
Rvia device sconnected by Bluetooth®
iInformation on single CD/DV DdriveorD VD
changer (see th eDigital Operator's Manual).
Selecting usin gthe device list
Multimedia system:
XSelectMediaQDevices.
The available medi asources willbe shown.
The #dot indicates th ecurren tsetting.
XSelect th emediasource.
Playable filesare played.
Inserting/removing an SD card
Important safety notes
GWARNING
SD cardsare smal lparts. They can beswal-
lowed and caus echoking. This posesa n
increased ris kofinjury or eve nfatal injury.
Keep th eSDc ardo ut of th ereac hofc hildren.
If aS Dc ardiss wallowed, seek medical atten-
tio nimmediately.
!If you are no longer usingt heSD card,you
should remove it and store itoutside thev ehi-
cle .Hight em peratures can damag ethe card.
Insertin ganSDc ard
TheSDcardslot islocate donthecontrol panel.
XInsertt heSD cardintot he SD cardslot until
th eS Dc arde ngages.T he side withthe con-
tacts must fac edown.
Removing an SD card
XPress th eSDc ard.
The SD car disejected.
XRemo vetheS Dc ard.
Operatin gsystem235
Multimedia system
Z
Page 239 of 326
Loading guidelines
GWARNING
If objects, luggage or loads are not secured or
not secured sufficiently, they could slip, tip
over or be flun garounda nd thereb yhit vehicle
occupants. Thereisar isk of injury, particu-
larly in th eeventofs udden braking or asud-
den change in direction.
Always store object ssothatthe yc annot be
flun garound. Secure objects, luggage or
loads against slippingort ipping before the
journey.
GWARNING
Combustio nengine semit poisonous exhaust
gases such as carbon monoxide. Exhaust
gases can enter th evehicle interio rifthe
trunk lid is open when th eengine is running,
especially if th evehicle is in motion.T hereisa
risk of poisoning.
Always switch off th eengine before opening
th et runk lid. Never drivew ith thetrunk lid
open.
GWARNING
The exhaust tail pipe and tail pipe trim can
become veryh ot.Ifyou com eintoc ontact
with these partsoft hevehicle ,you could burn
yourself. Thereisar isk of injury.
Always be particularly careful aroundt he
exhaust tail pipe and th etail pipe trim. Allow
these component stocooldown before touch-
ing them.
The handlingc haracteristicsofaladen vehicle
are dependentont hedistribution of th eload
within th evehicle.
Observe th efollowing notes when loadinga nd
transporting aload:
RNever exceed th emaximum permissible
gross vehicle mass or th egross axle weight
rating for th evehicle (includingo ccupants).
The values are specified on th evehicle iden- tification plateont
heB-pillar of th edriver's
door.
RThe trunk is th epreferred place to carry
objects.
RPosition heavy loads as far forwards as pos-
sible and as low down in th etrunk as possible.
RThe load must not protrude above th eupper
edge of th eseat backrests.
RAlways place th eload against th erear or front
seat backrests .Makes ure that th eseat
backrests are securely locked int oplace.
RAlways place th eload behindu noccupied
seatsifp ossible.
RUse thecargo tie-down rings and th eparcel
net stot ransport loads and luggage.
RUse cargo tie-down rings and fastening mate-
rials appropriatef or theweight and sizeoft he
load.
RSecure th eload with sufficiently stronga nd
wear-resistant tie -downs.Pad sharpe dges for
protection.
Stowage areas
Stowage spaces
Important safety notes
GWARNING
If object sinthepassenge rcompartmenta re
stowed incorrectly, they can slide or be
thrown arounda nd hit vehicle occupants. In
addition,c upholders, open stowage spaces
and mobile phoneb racketscannot always
retain all object stheyc ontain .Thereisar isk
of injury, particularly in th eeventofs udden
braking or asudden change in direction.
RAlways stow object ssothatthe yc annot be
thrown aroundins uch situations.
RAlways makesure that objectsdonot pro-
trude fro mstowage spaces, parcel net sor
stowage nets.
RClose th elockable stowage spaces before
starting ajou rney.
RAlways stow and secure heavy, hard, poin-
ted ,sharp-edged, fragile or bulky object sin
th et runk.
Observe th eloadingg uidelines (
Ypage 237).
Stowage areas237
Stowage and features
Z
Page 241 of 326
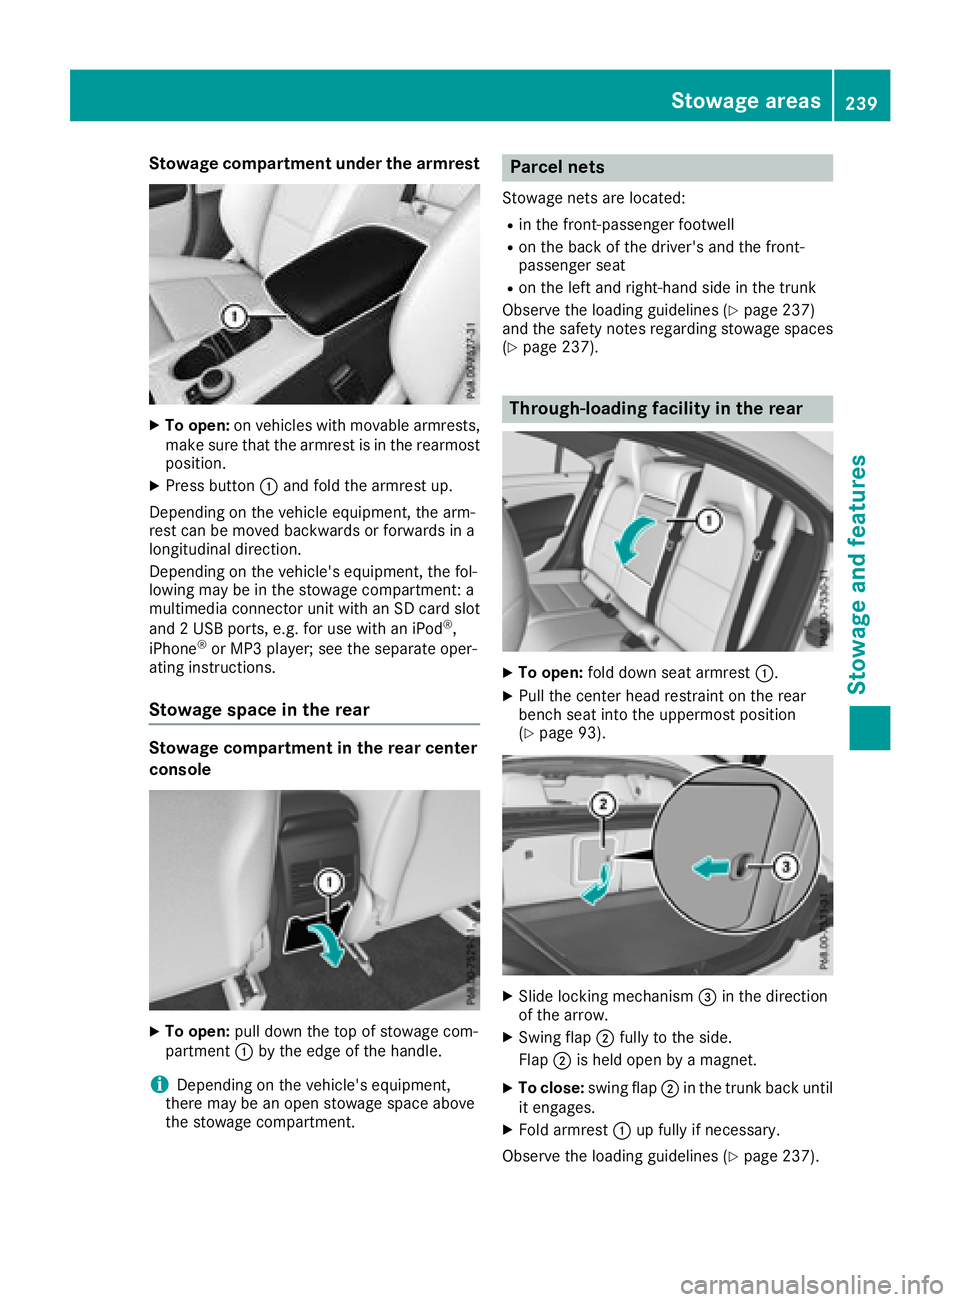
Stowage compartment under the armrest
XTo open:on vehicles with movable armrests,
make sure that the armrest is in the rearmost
position.
XPress button :and fold the armrest up.
Depending on the vehicle equipment, the arm-
rest can be moved backwards or forwards in a
longitudinal direction.
Depending on the vehicle's equipment, the fol-
lowing may be in the stowage compartment: a
multimedia connector unit with an SD card slot
and 2USB ports, e.g. for use with an iPod
®,
iPhone®or MP3 player; see the separate oper-
ating instructions.
Stowage space in the rear
Stowage compartment in the rear center
console
XTo open: pull down the top of stowage com-
partment :by the edge of the handle.
iDepending on the vehicle's equipment,
there may be an open stowage space above
the stowage compartment.
Parcel nets
Stowage nets are located:
Rin the front-passenger footwell
Ron the back of the driver's and the front-
passenger seat
Ron the left and right-hand side in the trunk
Observe the loading guidelines (
Ypage 237)
and the safety notes regarding stowage spaces
(
Ypage 237).
Through-loading facility in the rear
XTo open: fold down seat armrest :.
XPull the center head restraint on the rear
bench seat into the uppermost position
(
Ypage 93).
XSlide locking mechanism =in the direction
of the arrow.
XSwing flap ;fully to the side.
Flap ;is held open by amagnet.
XTo close: swing flap ;in the trunk back until
it engages.
XFold armrest :up fully if necessary.
Observe the loading guidelines (
Ypage 237).
Stowage areas239
Stowage and features
Z
Page 244 of 326

!Mercedes-Benz recommends that you only
use roof carriers that have been tested and
approved for Mercedes-Benz vehicles. This
helps to prevent damage to the vehicle.
Position the load on the roof rack in such a
way that the vehicle will not sustain damage
even when it is in motion.
Depending on the vehicle equipment, ensure
that when the roof carrier is installed you can:
Ropen the panorama roof with power tilt/
sliding panel fully
Ropen the trunk lid fully
You will find information on the maximum roof
load in the "Technical data" section
(
Ypage 320).
An incorrectly secured roof carrier or roof load
may become detached from the vehicle. You
must therefore ensure that you observe the roof
carrier manufacturer's installation instructions.
Attaching the roof carrier
XOpen and fold the covers :upwards care-
fully in the direction of the arrow.
XOnly secure the roof carrier to the anchorage
points under covers :.
XObserve the manufacturer's installation
instructions.
Features
Cup holder
Important safety notes
GWARNING
The cup holder cannot hold acontainer secure
whilst traveling. If you use acup holder whilst
traveling, the container may be flung around
and liquid may be spilled. The vehicle occu-
pants may come into contact with the liquid
and if it is hot, they may be scalded. You may
be distracted from the traffic conditions and
you could lose control of the vehicle. There is
ar isk of an accident and injury.
Only use the cup holder when the vehicle is
stationary. Only use the cup holder for con-
tainers of the right size. Alwaysc lose the con-
tainer, particularlyift he liquid is hot.
GWARNING
If objects in the passenger compartment are
stowed incorrectly, they can slide or be
thrown around and hit vehicle occupants. In
addition, cupholders, open stowage spaces
and mobile phone brackets cannot always
retain all objects they contain. There is arisk
of injury, particularlyint he event of sudden
braking or asudden change in direction.
RAlwayss tow objects so that they cannot be
thrown around in such situations.
RAlwaysm ake sure that objects do not pro-
trude from stowage spaces, parcel nets or
stowage nets.
RClose the lockable stowage spaces before
starting ajourney.
RAlwayss tow and secure heavy, hard, poin-
ted, sharp-edged, fragile or bulky objects in
the trunk.
!Only use the cup holders for containers of
the right size and which have lids. The drinks
could otherwise spill.
Observe the loading guidelines (
Ypage 237).
The stowage compartmentsint he doors provide
space for bottles:
Rfront:c apacity up to 34 fl. oz. (1.0 l)
Rrear: capacity up to 17 fl. oz. (0.5 l)
242Features
Stowage and features
Page 247 of 326
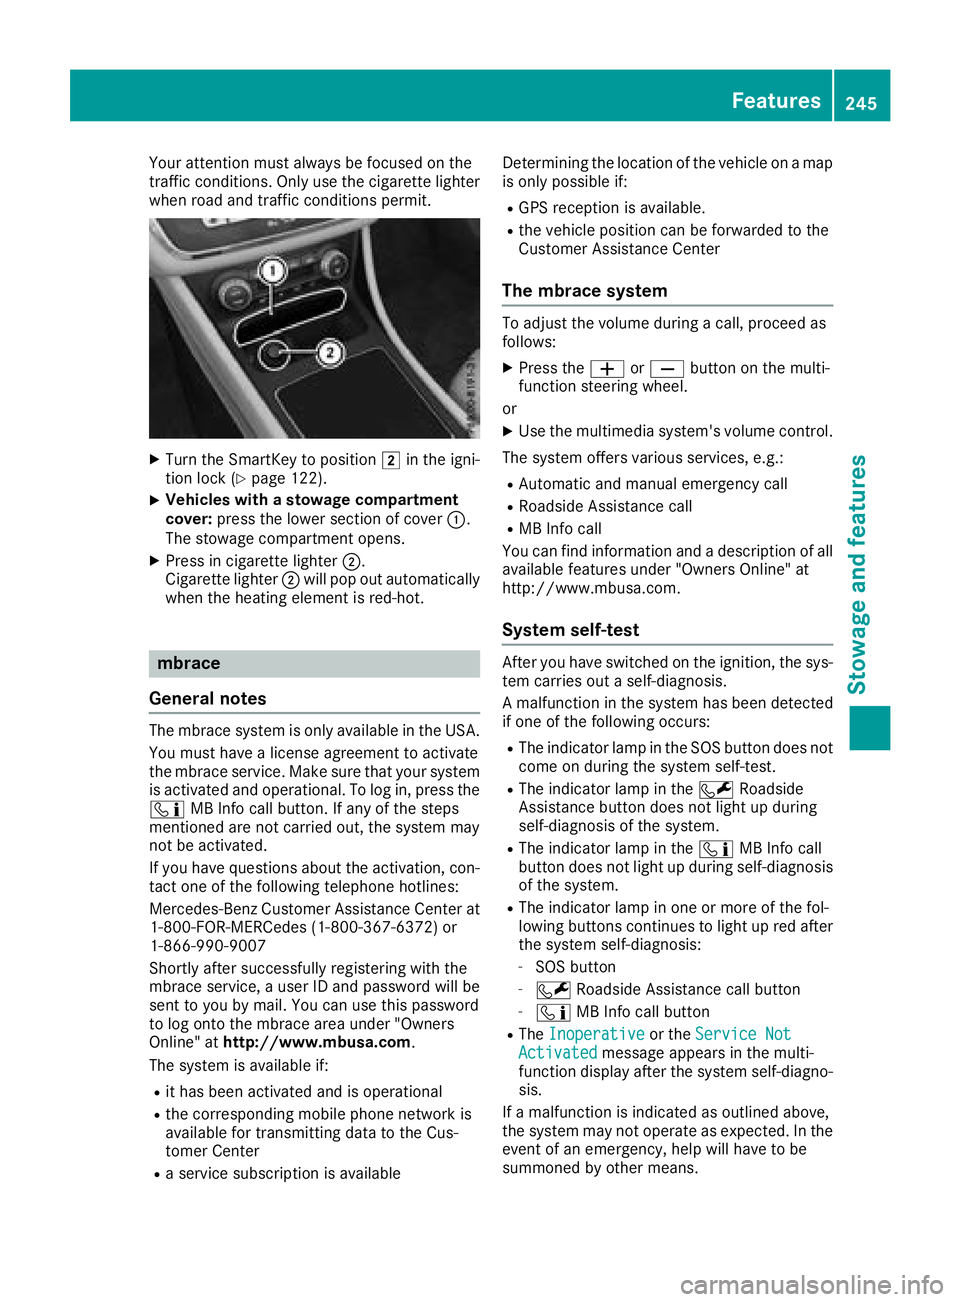
Your attention must always be focused on the
traffic conditions. Only use the cigarettelighter
when road and traffic condition spermit.
XTurn the SmartKey to position 2in the igni-
tion lock (Ypage 122).
XVehicles with astowag ecompartment
cover: press the lower section of cover :.
The stowage compartmento pens.
XPress in cigarettelighter ;.
Cigarette lighter ;will pop out automatically
when the heatin gelementisr ed-hot.
mbrace
Genera lnotes
The mbraces ystemiso nly available in the USA.
You must have alicense agreement to activate
the mbraces ervice. Make sure that your system
is activate dand operational. To log in, press the
ï MB Inf ocall button. If any of the steps
mentioned are not carried out, the syste mmay
not be activated.
If you have questions about the activation, con-
tac tone of the followingt elephone hotlines:
Mercedes-Ben zCustomer Assistance Center at
1-800-FOR-MERCedes (1-800-367-6372) or
1-866-990-9007
Shortly afte rsuccessfully registeringw ith the
mbraces ervice,auser ID and password will be
sent to you by mail. You can use this password
to log ont othe mbracea rea under "Owners
Online" at http://www.mbusa.com.
The syste misavailable if:
Rit has been activate dand is operational
Rthe corresponding mobile phonen etwork is
available for transmitting data to the Cus-
tomer Center
Ras ervice subscription is available Determining the location of the vehicle on
amap
is only possible if:
RGPS receptio nisavailable.
Rthe vehicle position can be forwarded to the
Customer Assistance Center
Them brace system
To adjust the volume during acall, proceed as
follows:
XPress the WorX button on the multi-
function steeringw heel.
or
XUse the multimedia system's volume control.
The syste moffers various services, e.g.:
RAutomatic and manual emergenc ycall
RRoadside Assistance call
RMB Inf ocall
You can findi nformation and adescription of all
available features under "Owner sOnline" at
http://www.mbusa.com.
System self-test
After you have switched on the ignition, the sys-
tem carries out aself-diagnosis.
Am alfunction in the syste mhas been detected
if one of the followingo ccurs:
RThe indicator lamp in the SOS button does not
com eond uring the syste mself-test.
RThe indicator lamp in the FRoadside
Assistance button does not light up during
self-diagnosis of the system.
RThe indicator lamp in the ïMB Inf ocall
button does not light up during self-diagnosis
of the system.
RThe indicator lamp in one or more of the fol-
lowing buttons continues to light up red after
the syste mself-diagnosis:
-SOS button
-F Roadside Assistance call button
-ïMB Inf ocall button
RThe Inoperativeor the Service NotActivatedmessagea ppears in the multi-
function display afte rthe syste mself-diagno-
sis.
If am alfunction is indicated as outlined above,
the syste mmay not operatease xpected. In the
eventofane mergency, help will have to be
summoned by other means.
Features245
Stowage and features
Z
Page 248 of 326
Have the system checked at the nearest
Mercedes-Benz Service Center or contact the
following service hotlines:
Mercedes-Benz Customer Assistance Center at
1-800-FOR-MERCedes(1-800-367-6372) or
1-866-990-9007
Em ergencyc all
Important safety notes
GWARNING
It can be dangeroustor emainint he vehicle,
eve nify ouhave pressedt he SOS button in an
emergency if:
Ryo us ee smoke insid eoroutsid eoft he vehi-
cle ,e.g.ift hereisaf irea fterana ccident
Rthe vehicl eisonad angerouss ection of
road
Rthe vehicl eisnot visible or canno teasil ybe
see nbyothe rroadu sers,p articularly when
dark or in poo rvisibility conditions
There is ariskofana ccident and injury.
Leave the vehicl eimmediatelyint his or simi-
la rs ituations as soona sitissafetodos o.
Mov etoas afel oc ation along with othe rvehi-
cle occupants. In such situations, secure the
vehicl einaccordance with nationalr egula-
tions, e. g. with awarning triangle.
General notes
Observe the notes on system activation
(Ypage 245).
An emergency cal lisdialed automaticall yifan
ai rb ag or Emergency Tensioning Device is trig-
gered .You canno tend an automaticall ytrig-
gered emergency cal lyours elf.
An emergency cal lcan also be initiated man-
ually.
As soona sthe emergency cal lhas been initi-
ated, the indicator lamp in the SOS button
flashes. The ConnectingC all
message
appears in the multifunctio ndisplay.
The audi ooutputi smuted.
Once the connectio nhasbeen made, the Call
Connectedmessage appears in the multifunc-
tio nd isplay. All important informatio
nonthe emergency is
transmitted, for example:
Rcurrent location of the vehicl e(as determined
by the GP Ssystem)
Rvehicl eide ntificatio nnumber
Rinformatio nonthe severity of the accident
Shortly afte rthe emergency cal lhas been initi-
ated, avoice connectio nisa utomaticall yestab-
lishedb etween the Customer Assistance Center
and the vehicl eoccupants.
RIf the vehicl eoccupants respond ,the
Mercedes-Benz Customer Assistance Center
attempts to get more informatio nonthe
emergency.
RIf ther eisnor esponsefrom the vehicl eoccu-
pants, an ambulance is immediatelys ent to
the vehicle.
If no voice connectio ncan be established to the
Mercedes-Benz Customer Assistance Center,
the system hasb eenu nabl etoi nitiate an emer-
genc ycall.
Thi scan occur, for example, if the relevant
mobil ephone network is not available .The indi-
cato rlam pint he SOS button flashesc ontinu-
ously.
The CallF ailed
message appears in the mul-
tifunctio ndisplay and must be confirmed.
In this case, summon assistance by other
means.
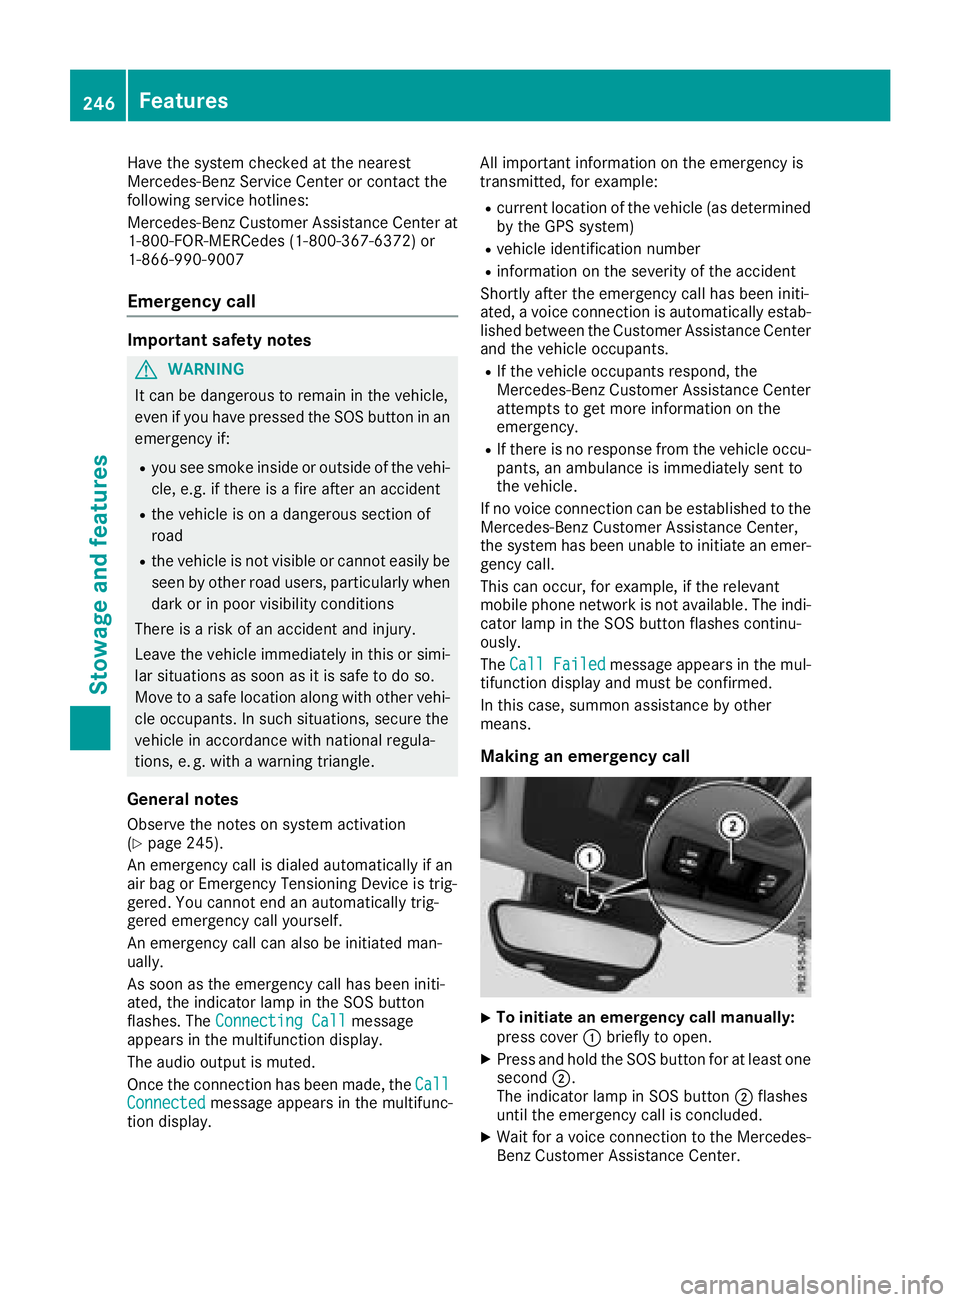
Making an emergenc ycall
XTo initiate an emergenc ycallm anually:
press cover :briefl ytoo pen.
XPress and hol dthe SOS button for at leas tone
second ;.
The indicator lamp in SOS button ;flashes
unti lthe emergency cal lisconcluded.
XWait for avoice connectio ntothe Mercedes-
Benz Customer Assistance Center.
246Features
Stowag eand featur es
Page 249 of 326
XTo endacall:press the ~button on the
multifunctio nsteering wheel.
or
XPress the corresponding multimedia system
button for ending aphone call.
XAfter the emergency call, close cover :.
If the mobil ephone network is unavailable,
mbrace will not be able to make the emergency
call. If yo uleave the vehicl eimmediatelya fter
pressing SOS button ;,youdo not know if
mbrace hass uccessfull ymade th eemergency
call. In thisc ase, always summon assistance by
othe rmeans.
Breakdow nassistanc ebutton
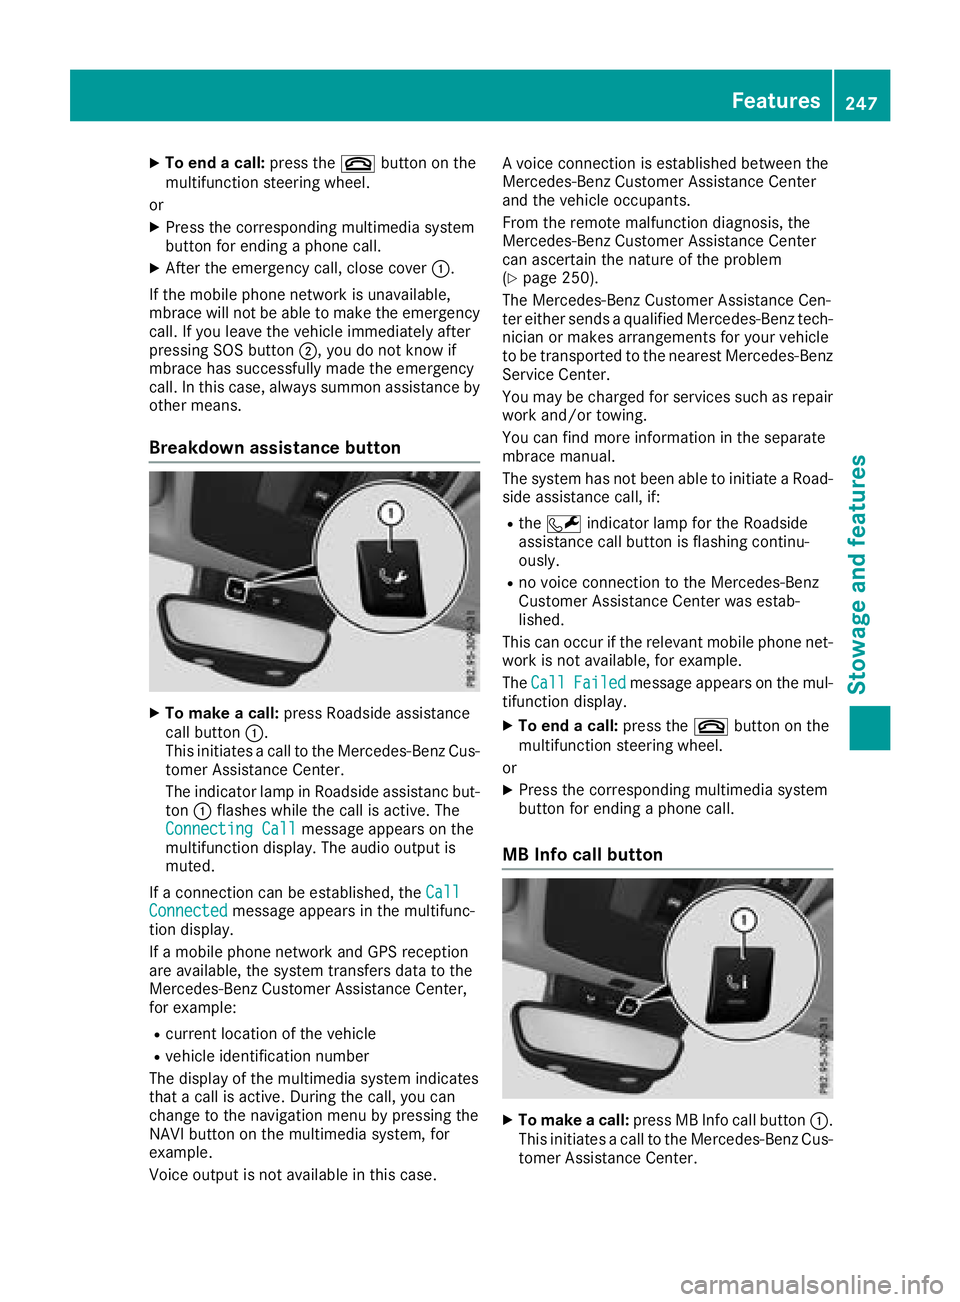
XTo make acall: press Roadside assistance
cal lbutton :.
Thi sinitiates acalltot he Mercedes-Benz Cus-
tomerA ssistance Center.
The indicator lamp in Roadside assistanc but-
ton :flashesw hilethe cal lisactive. The
ConnectingC all
message appears on the
multifunctio ndisplay .The audi ooutputi s
muted.
If ac onnectio ncan be established ,the Call
Connectedmessage appears in the multifunc-
tio nd isplay.
If am obilephone network and GP Sreception
are available ,the system transfers data to the
Mercedes-Benz Customer Assistance Center,
for example:
Rcurrent location of the vehicle
Rvehicl eide ntificatio nnumber
The display of the multimedia system indicates
thatac allisa ctive. During the call, yo ucan
change to the navigatio nmenu by pressing the
NAVI button on the multimedia system,f or
example.
Voice outputi snot available in thisc ase.Av
oice connectio nise stablished between the
Mercedes-Benz Customer Assistance Center
and the vehicl eoccupants.
From the remote malfunctio ndiagn osis, the
Mercedes-Benz Customer Assistance Center
can ascertain the nature of the problem
(
Ypage 250).
The Mercedes-Benz Customer Assistance Cen-
ter either send saqualified Mercedes-Benz tech-
nician or makes arrangements for your vehicle
to be transported to the nearestM ercedes-Benz
Service Center.
Yo um aybe chargedf or servicessuchasr epair
work and/or towing.
Yo uc an find more informatio ninthe separate
mbrace manual.
The system hasn ot been able to initiate aRoad-
side assistance call, if:
Rthe F indicator lamp for the Roadside
assistance cal lbutton is flashing continu-
ously.
Rno voice connectio ntothe Mercedes-Benz
Customer Assistance Center wa sestab-
lished.
Thi scan occurift he relevant mobil ephone net-
work is not available ,for example.
The Call
Failedmessage appears on the mul-
tifunctio ndisplay.
XTo en dacall:press the ~button on the
multifunctio nsteering wheel.
or
XPress the corresponding multimedia system
button for ending aphone call.
MB Info cal lbutton
XTo make acall: press MB Info cal lbutton :.
Thi sinitiates acalltot he Mercedes-Benz Cus-
tomerA ssistance Center.
Features247
Stowag eand featur es
Z