2018 MERCEDES-BENZ CLA COUPE tire type
[x] Cancel search: tire typePage 14 of 326

Instrumentcluster
Overview .......................................... 33
Setting s......................................... 18 6
Warn inga nd indicator lamps ........... 33
Instrument cluster lighting .............. 176
Interior lighting
Control ...........................................1 04
Overview ........................................ 103
Reading lamp ................................. 103
iPod
®
see also Digita lOperator's Man-
ua l..................................................2 29
J
Jack
Storage location ............................ 270
Using ............................................. 309
Jump starting (engine) ......................278
K
Keyp ositions
Start/Stop button .......................... 122
KEYLESS-GO
Convenience closing feature ............ 83
Deactivation ..................................... 71
Locking ............................................ 71
Unlocking ......................................... 71
Kickdown
Driving tips ....................................1 34
Manual gearshifting ....................... 138
Kne ebag.............................................. 46
L
Lamps
see Warning and indicator lamps
Lane Keepin gAssist
Activating/deactivating (on-
board computer) ............................ 186
Display message ............................ 208
Function/informatio n.................... 174
Lan eTracking package ..................... 172
Lap time (RACETIMER) ...................... 189
LATCH-type (ISOFIX )child seat
anchors ................................................ 57
License plate lamp (display mes-
sage) ................................................... 203 Light senso
r(display message) ....... 204
Lights
Adaptive Highbeam Assist ............. 102
Automati cheadlamp mode. ........... 100
Fogged up headlamp s.................... 103
Hazard warning lamps ................... 102
Hig hbeamf lasher. ......................... 101
High-beam headlamp s................... 101
Light switch ................................... 100
Low-bea mheadlamp s.................... 101
Parking lamps ................................ 101
Rear fog lamp ................................ 101
Setting exterio rlighting ................. 100
Standing lamps .............................. 101
Switching the daytime running
lamps on/off( on-board com-
puter) ............................................. 187
Turn signal s................................... 101
Loadin gguidelines ............................ 237
Locking
see Central locking
Locking (doors)
Automati c........................................ 77
Emergency locking ........................... 77
From inside (central locking but-
ton) .................................................. 76
Locking centrally
see Central locking
Locking verification signal (on-
board computer) ............................... 187
Low-beam headlamps
Displa ymessage ............................ 202
Replacing bulb s............................. 105
Switching on/off. .......................... 101
Lumbar support
Adjusting the 4-wa ylum bars up-
por t.................................................. 93
M
M+S tires ............................................ 289
Malfunctio nmessage
see Displa ymessages
Matte finis h(clea ning instruc-
tions) .................................................. 264
mbrace
Call priority .................................... 248
Displa ymessage ............................ 197
12Index
Page 21 of 326
Checkingmanually ........................ 293
Dis play message ............................ 211
Maximum ...................................... .293
Not reached (TIREFIT) .................... 274
Notes ............................................. 292
Reached (TIREFIT) .......................... 274
Recommended ............................... 290
Tire pressure los swarning system
General notes ................................ 293
Important safety notes .................. 294
Restarting ...................................... 294
Tire pressure monitor
Checking the tire pressure elec-
tronically ........................................ 296
Function/notes .............................2 94
General notes ................................ 294
Important safety notes .................. 295
Radio type approval for the tire
pressure monitor ........................... 297
Restarting ...................................... 297
Warning lamp ................................. 228
Warning message .......................... 296
TIREFIT kit .......................................... 272
Important safety notes .................. 272
Storage location ............................ 271
Tire pressure not reached .............. 274
Tire pressure reached .................... 274
Tires
Aspect ratio (definition) ................. 307
Averag eweight of the vehicle
occupants (definition) .................... 305
Bar (definition) ............................... 305
Changing awheel .......................... 307
Characteristics .............................. 305
Checking ........................................ 287
Curb weight (definition) ................. 306
Definition of terms ......................... 305
Direction of rotatio n...................... 308
Displa ymessage ............................ 211
Distribution of the vehicl eoccu-
pants (definition) ............................ 307
DOT (Department of Transporta-
tion) (definition) ............................. 305
DOT, T
ire Identification Number
(TIN) ............................................... 305
GAW R(GrossA xle Weight Rating)
(definition) ..................................... 306
Generaln otes ................................ 312 GV
W( GrossV ehicleWeight) (def-
inition) ........................................... 306
GVWR (GrossV ehicleWeight Rat-
ing )(de finition) .............................. 306
Important safety notes .................. 287
Increased vehicl eweigh tdue to
optionale quipment (definition) ...... 306
Information on driving .................... 287
Kilopascal( kPa)(de finition) ........... 306
Labeling (overview) ........................ 302
Loadb earing index (definition) ...... 307
Loadi ndex ..................................... 304
Loadi ndex (definition) ................... 306
M+S tire s....................................... 289
Maximu mloadona tire (defini-
tion) ............................................... 306
Maximu mloaded vehicleweigh t
(definition) ..................................... 306
Maximu mpermissibl etire pres-
sure (definition) ............................. 306
Maximu mtire load ......................... 304
Maximu mtire load (definition) ....... 306
MOExtended tire s.......................... 289
Optionale quipmentweight (defi-
nition) ............................................ 307
PSI (pounds pe rsquare inch )(de f-
inition) ........................................... 307
Replacing ....................................... 307
Service life ..................................... 288
Sidewal l(de finition) ....................... 307
Speed rating (definition) ................ 306
Storing ........................................... 308
Structure and characteristics
(definition) ..................................... 305
Summer tire s................................. 289
Temperature .................................. 302
TIN (Tire Identification Number)
(definition) ..................................... 307
Tire bead (definition) ...................... 307
Tire pressure (definition) ................ 307
Tire pressures (recommended )...... 306
Tire size (data )............................... 312
Tire size designation, load-beari ng
ca
pacity, speed rating .................... 302
Tire tread. ...................................... 288
Tire tread( definition) ..................... 307
Totall oadlim it (definition) ............. 307
Tractio n......................................... 301
Index19
Page 22 of 326
Traction (definition)....................... 307
Tread wear .....................................3 01
Uniform Tire Quality Grading
Standard s...................................... 301
Uniform Tire Quality Grading
Standard s(definition) .................... 306
Weari ndicator (definition) ............. 307
Wheelr im (definition) .................... 306
see Flat tire
Top Tether ............................................ 57
Tow-starting
Emergency engine starting ............ 284
Important safety notes .................. 281
Installing the towing eye. ............... 282
Removing the towing eye. ..............282
Towing atrailer
ESP
®(ElectronicS tability Pro-
gram) ............................................... 67
Towing away
Important safety guidelines ........... 281
Installing the towing eye. ............... 282
Notes for 4MATIC vehicles ............ 284
Removing the towing eye. ..............282
Transporting the vehicle ................ 283
With both axle sonthe ground ....... 283
With front axle raised ..................... 282
Towing eye ......................................... 270
Traffic reports
see also Digita lOperator's Man-
ua l..................................................2 29
Transmission
see Automatic transmission
Transmission position display
(DIRECT SELEC Tlever) ......................1 30
Transporting the vehicle .................. 283
Trim pieces (cleaning instruc-
tions) ..................................................2 67
Trip computer (on-board com-
puter) ..................................................1 80
Trip odometer
Calling up ....................................... 180
Resetting (on-board computer) ...... 181
Trunk
Emergency release .......................... 81
Emergency release button ...............8 1
Important safety notes .................... 78 Opening (automaticall
yfrom out-
side) .................................................7 9
Opening (from outside the vehi-
cle, HANDS-F REE ACCESS) ...
........... 79
Opening automaticallyf rom
inside ............................................... 80
Opening/closing (manually from
outside) ............................................ 78
Trunk lid
Display message ............................2 15
Opening dimensions ......................3 20
Trunk load (maximum) ......................320
Turn signals
Display message ............................ 202
Replacing bulbs (front) ................... 106
Switching on/off ........................... 101
Two-way radio
Frequencies ................................... 313
Installatio n..................................... 313
Transmissiono utput (maximum ).... 313
Type identification plate
see Vehicle identification plate
U
UnlockingEmergency unlocking ....................... 77
From insid ethe vehicle (central
unlocking button) .............................7 6
Upshifti ndicator (on-boardc om-
puter, Mercedes-AMG vehicles) .......188
USB devices
Connecting to the MediaI nter-
face ............................................... 236
V
Vanity mirror (in the sun visor) ........244
Vehicle
Correct use ...................................... 28
Data acquisition ............................... 29
Display message ............................ 213
Equipment ....................................... 25
Individua lsettings .......................... 186
Limited Warranty .............................2 9
Loading .......................................... 298
Locking (in an emergency) ............... 77
Locking (SmartKey) .......................... 70
20Index
Page 23 of 326

Lowering ........................................ 311
Maintenance .................................... 26
Parking foralong period. ............... 143
Pulling awa y................................... 125
Raising ........................................... 309
Reporting problems ......................... 28
Securing from rolling away ............ 309
Transporting .................................. 283
Unlocking (i nanemergency) ........... 77
Unlocking (SmartKey). ..................... 70
Vehicl edata. .................................. 320
Vehicl edata
Roof load (maximum) ..................... 320
Trunk load (maximum) ................... 320
Vehicl edimensions ........................... 320
Vehicl eemergencyl ocking ................ 77
Vehicl eidentificatio nnumber
see VIN
Vehicl eidentificatio nplate .............. 314
Vehicl etoolkit.................................. 270
Ventilation
Setting the vents ........................... 120
Video
Operating the DVD ......................... 183
see also Digital Operator's Man-
ual.................................................. 229
VIN
Seat. .............................................. 315
Type plate ...................................... 314
W
Warning and indicator lamps
ABS ................................................ 220
Active Brake Assist ........................ 227
Brakes ........................................... 219
Check Engine ................................. 224
Coolant .......................................... 225
Distance warning ........................... 227
ESP
®.............................................. 221
ESP®OFF ....................................... 222
Fue ltank ........................................ 224
Overview .......................................... 33
PASSENGER AIR BAG ...................... 41
Reserve fue l................................... 224
Restraint system ............................ 224
Seatb elt. ....................................... 218
SPORTh andling mode. .................. 222 Tire pressure monitor .................... 228
Warning triangle ................................ 270
Warranty .............................................. 25
Washer fluid
Displa ymessage ............................ 216
Weather display (COMAND)
see also Digital Operator's Man-
ual.................................................. 229
Wheel and tire combinations
Tires ............................................... 312
Wheel bolt tightenin gtorque ........... 311
Wheel chock ...................................... 309
Wheels
Changing awheel .......................... 307
Checking ........................................ 287
Cleaning ......................................... 264
Important safety notes .................. 287
Information on driving .................... 287
Interchanging/changing ................ 307
Mounting anew wheel. .................. 310
Removing awheel .......................... 310
Storing ........................................... 308
Tightening torque ........................... 311
Wheel size/tire size ....................... 312
Wheel sand tires
Changing awheel .......................... 308
Window curtai nair bag
Displa ymessage ............................ 199
Operation ......................................... 47
Windows
see Sid ewindows
Windshield
Defrosting ...................................... 117
Windshiel dwasher system
Adding washerf luid ....................... 260
Important safety notes .................. 319
Windshiel dwipers
Displa ymessage ............................ 216
Problem (malfunction) ................... 109
Replacing the wipe rblade s............ 108
Switching on/off. .......................... 107
Winter driving
Slippery roads urfaces ................... 148
Snow chains .................................. 290
Winter operation
Genera lnotes ................................ 289
Wi
nter tires
M+S tire s....................................... 289
Index21
Page 141 of 326
You must make sure that fuel does not comeint oc ontac twith your skin ,eyes or clothing
and that it is not swallowed. Do not inhale fuel
vapors.K eep fuel away from children.
If you or others com eintoc ontac twith fuel,
observet he following:
RWash away fuel from skin immediately
using soap and water.
RIf fuel comes int ocontac twith your eyes,
immediately rinse the mthoroughly with
clean water. Seek medical assistanc ewith-
out delay.
RIf fuel is swallowed, seek medical assis-
tance without delay. Do not induc evomit-
ing.
RImmediately change out of clothing which
has com eintoc ontac twith fuel.
GWARNING
Electrostatic buildup can create sparksa nd
ignit efuel vapors.T here isarisk of fire and
explosion.
Always touc hthe vehicle body beforeo pening
the fuel filler flap or touching the fuel pump
nozzle. An yexisting electrostatic buildup is
thereby discharged.
!Do not use diesel to refuel vehicles with a
gasolinee ngine. Do not switc honthe ignition
if you accidentally refuel with the wrongf uel.
Otherwise, the fuel will enter the fuel system. Even small amount softhe wrongf uel could
result in damage to the fuel syste mand the
engine. Notify aqualified specialis tworkshop
and have the fuel tan kand fuel lines drained
completely.
!Overfilling the fuel tan kcould damage the
fuel system.
!Take care not to spill any fuel on painted
surfaces. You could otherwise damage the
paintwork.
!Use afilter when adding fuel from afuel can.
The fuel lines and/or the fuel injection system
could otherwise be blocked by particles from
the fuel can. Do not get int
othe vehicle again during the refu-
eling process. Otherwise, electrostatic charge
could build up again.
If you overfill the fuel tank, fuel could spray out
when the fuel pump nozzle is removed.
For further information on fuel and fuel quality
(
Ypage 315).
Refueling
Genera linformation
Pay attention to the importan tsafetyn otes
(Ypage 138).
The fuel filler flap is unlocked/locked automat-
ically when you unlock/lock the vehicle with the
SmartKey.
The position of the fuel filler cap is displayed
æ in the instrumentc luster. The arrow on the
filling pump indicates the side of the vehicle.
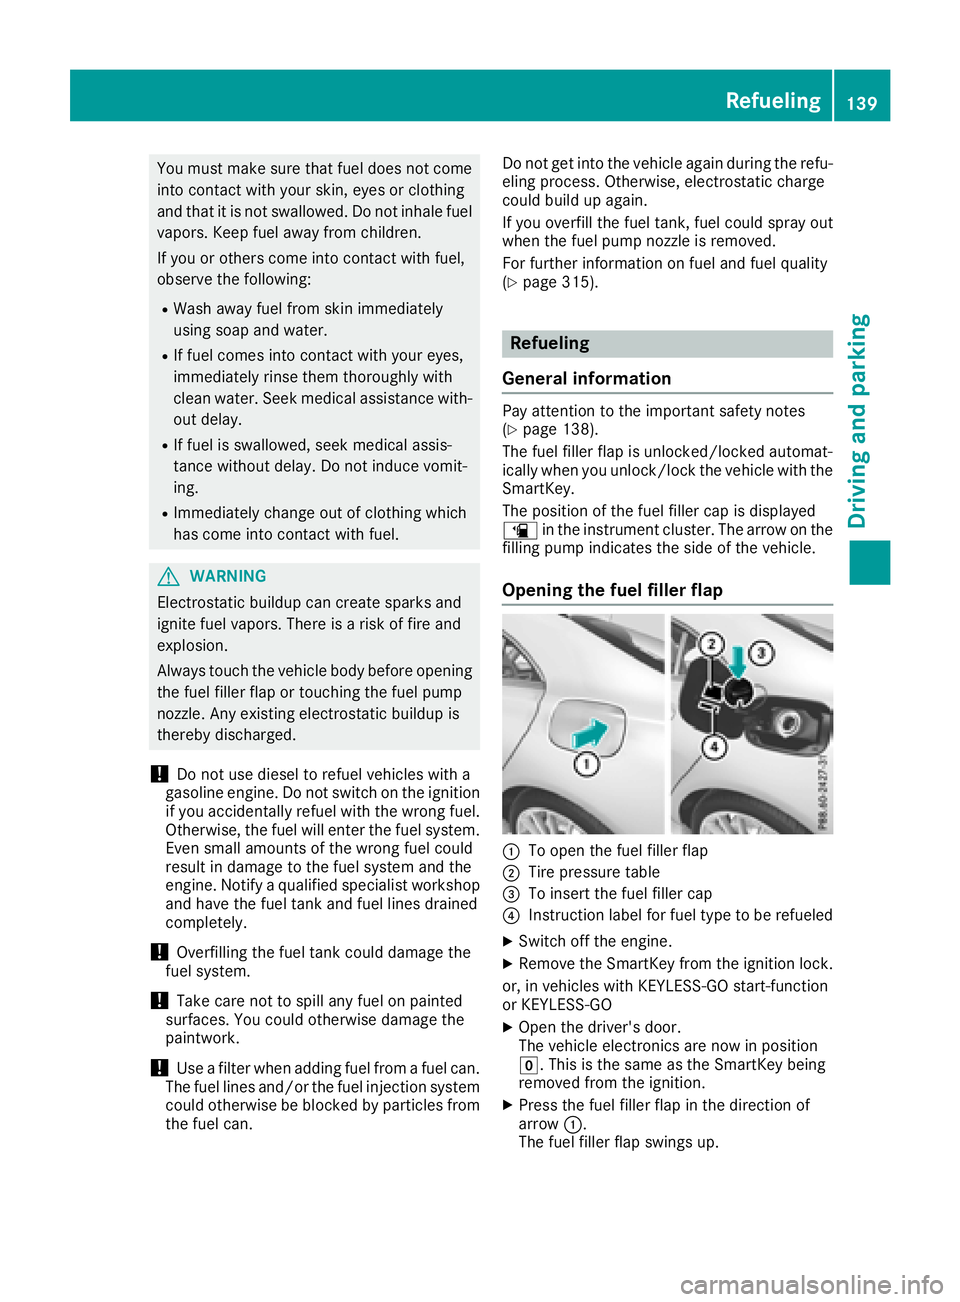
Opening th efuel filler flap
:To open the fuel filler flap
;Tire pressure table
=To inser tthe fuel filler cap
?Instruction label for fuel type to be refueled
XSwitch off the engine.
XRemove the SmartKey from the ignition lock.
or, in vehicles with KEYLESS-GO start-function
or KEYLESS‑ GO
XOpen the driver's door.
The vehicle electronics are now in position
g.This is the same as the SmartKey being
removed from the ignition.
XPress the fuel filler flap in the direction of
arrow :.
The fuel filler flap swings up.
Refueling139
Driving and parking
Z
Page 148 of 326
In addition to driving style, the actual consump-
tion is affected by other factors, such as:
RLoad
RTire pressure
RCold start
RChoice of route
RActive electrical consumers
These factors are not includedint he ECO dis-
play.
An economical driving style specially requires
driving at moderate engine speeds.
Achieving ahigher valu einthe categories
"Acceleration" and "Constant":
Robserve the gearshift recommendations.
Rdrive the vehicle in drive program Cor E
(vehicles with aDYNAMIC SELECT button).
On long journeys at aconstant speed,e .g. on the
highway, only the outer area for "constant" will
change.
The ECO display summarizes the driving style
from the start of the journey to its completion.
Therefore, there are more marked changes in
the outer areasatt he start ofajourney. On lon-
ger journeys, there are fewer changes. For more
marked changes, perform amanua lrest
(
Ypage 181).
For more information on the ECO display, see
(
Ypage 180).
Braking
Important safety notes
GWARNING
If you shift down on aslippery road surface in
an attempt to increase the engine's braking
effect, the drive wheelsc ould lose their grip.
There is an increased danger of skidding and
accidents.
Do not shift down for additional engine brak-
ing on aslippery road surface.
Downhill gradients
!On long and steep gradients, you must
reduce the load on the brakes by shifting to a
lowerg ear in good time. This allows you to
take advantage of engine braking. For this you
must first activate manua lgearshifting. This helps you to avoid overheating the brakes and
wearing them out excessively.
When you take advantage of engine braking, it
is possible that
adrive wheel willn ot rotate for
some time, e.g. on aslippery road surface.
This could cause damage to the drive train.
This type of damage is not covered by the
Mercedes-Benz warranty.
Briefly depressing the accelerator pedalo n
downhill gradients whilet he manualdrive pro-
gram Mis temporarilya ctivated: the automatic
transmission may switch to the last active auto-
matic drive program Eor S.T he automatic trans-
missionm ay shift to ahigherg ear. This can
reduce the engine's braking effect.
Heavy and light loads
GWARNING
If you rest you rfoot on the brake pedalw hile
driving, the braking system can overheat. This increases the stopping distance and can even
cause the braking system to fail.T here is a
risk of an accident.
Never use the brake pedalasaf ootrest. Never
depresst he brake pedala nd the accelerator
pedalatt he same time.
!Depressing the brake pedalc onstantly
results in excessive and premature weart o
the brake pads.
If the brakes have been subjected to aheavy
load,don ot stop the vehicle immediately.D rive
on for ashort while. This allows the airflow to
cool the brakes more quickly.
Wet roads
If you have driven for along time in heavy rain
withoutb raking, there may be adelayed reac-
tion from the brakes when braking for the first
time. This may also occur after the vehicle has
been washed or driven through deep water.
You have to depresst he brake pedalmore
firmly.M aintainagreater distance from the
vehicle in front.
After driving on awet road or having the vehicle
washed, brake firmly whilep aying attention to
the traffic conditions. This willw arm up the
brake discs, thereby drying them more quickly
and protecting them against corrosion.
146Driving tips
Driving and parking
Page 230 of 326
Tires
Warning/
indicator
lampNSignal type
Possible causes/consequence sand M
Solutions
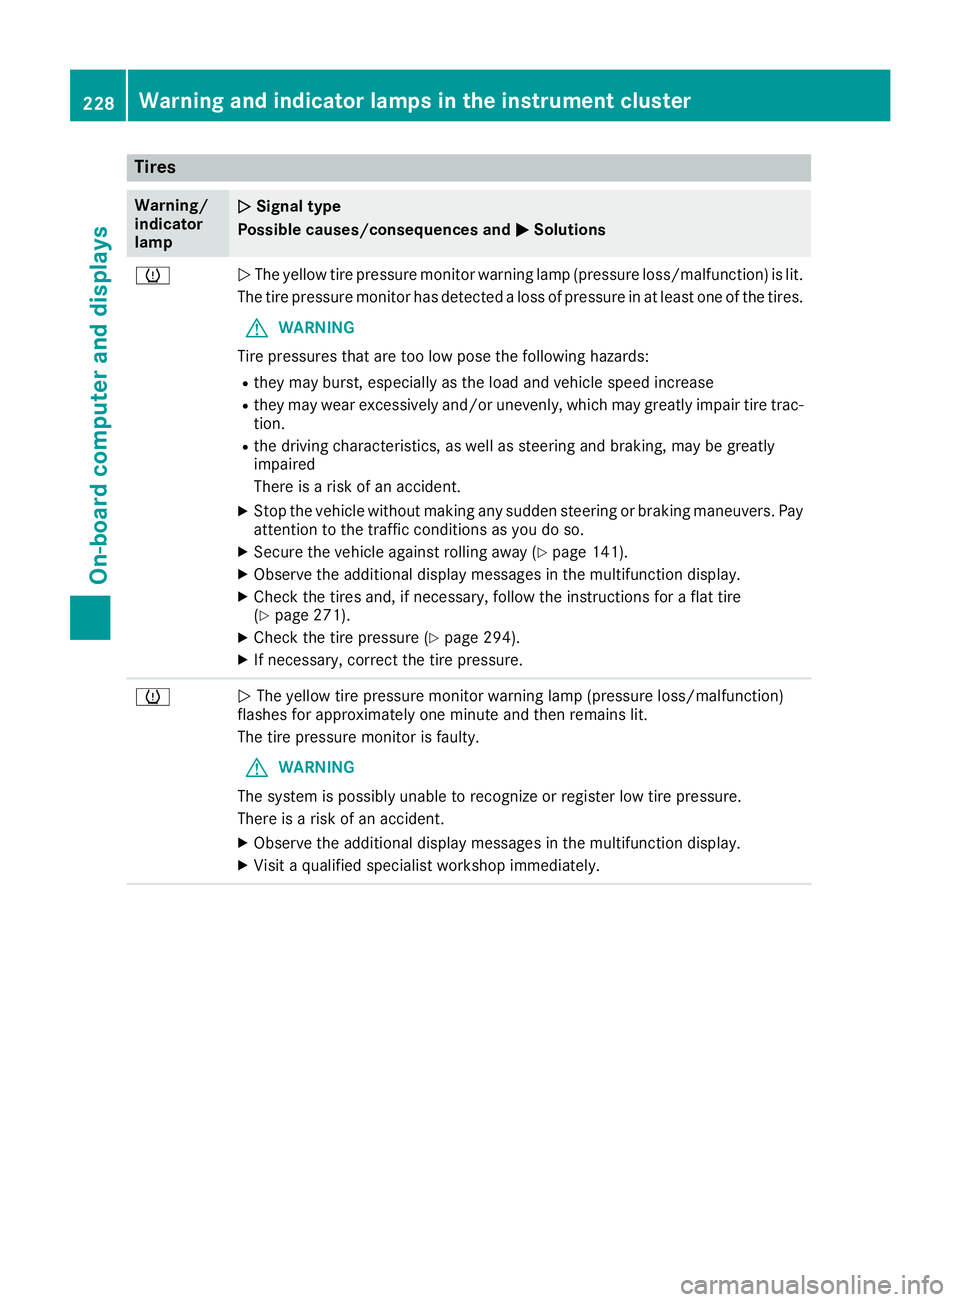
hNThe yellow tire pressure monitor warning lamp (pressure loss/malfunction) is lit.
The tire pressure monitor hasd etecte dalossofp ressure in at leas tone of the tires.
GWARNING
Tire pressures thata retoo lo wposet he following hazards:
Rtheym ayburst, especially as the load and vehicl espeed increase
Rtheym aywear excessivel yand/or unevenly, which mayg reatlyimpai rtire trac-
tion.
Rthe drivin gcharacteristics, as well as steerin gand braking ,maybe greatly
impaired
There is ariskofana ccident.
XStop the vehicl ewithou tmaking any sudden steerin gorbraking maneuvers. Pay
attentio ntothe trafficc onditions as yo udoso.
XSecure the vehicl eagain st rolling away (Ypage 141).
XObserve the additional displa ymessage sinthe multifunctio ndisplay .
XCheck the tire sand,ifn ecessary,f ollowthe instructions for aflatt ire
(Ypage 271).
XCheck the tire pressure (Ypage 294).
XIf necessary,c orrect the tire pressure.
hNThe yellow tire pressure monitor warning lamp (pressure loss/malfunction)
flashe sfor approximately one minute and thenr emains lit.
The tire pressure monitor is faulty.
GWARNING
The system is possibl yunabl etor ecognize or register lo wtire pressure.
There is ariskofana ccident.
XObserve the additional displa ymessage sinthe multifunctio ndisplay .
XVisitaq ualified specialis tworkshop immediately.
228Warning and indicator lamps in the instrument cluster
On-board computer and displays
Page 274 of 326
system (Canadaonly) or tire pressure monitor
(USA only).
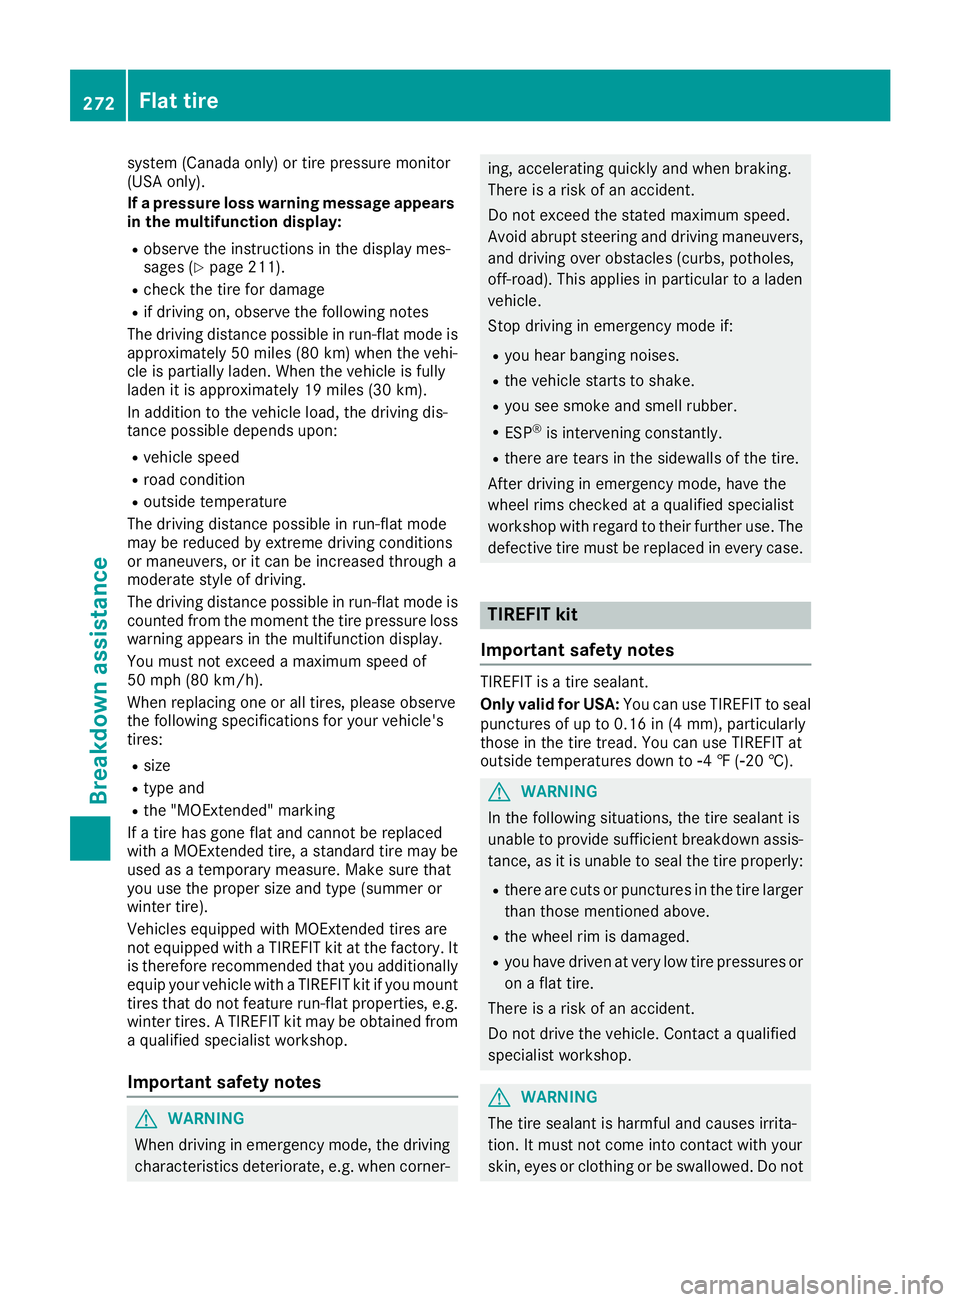
If ap ressure loss warning message appears
in the multifunction display:
Robserve the instructions in the displaym es-
sages (Ypage 211).
Rcheck the tire for damage
Rif driving on, observe the following notes
The driving distance possible in run-flat mode is
approximately 50 miles (80 km) when the vehi-
cle is partiallyl aden. When the vehicle is fully
laden it is approximately 19 miles (30 km).
In addition to the vehicle load, the driving dis-
tance possible depends upon:
Rvehicle speed
Rroad condition
Routside temperature
The driving distance possible in run-flat mode
may be reduced by extreme driving conditions
or maneuvers, or it can be increased through a
moderate style of driving.
The driving distance possible in run-flat mode is
counted from the moment the tire pressure loss
warning appears in the multifunction display.
You must not exceed amaximum speed of
50 mph (80 km/h).
When replacing one or all tires, please observe
the following specifications for your vehicle's
tires:
Rsize
Rtype and
Rthe "MOExtended" marking
If at ire has gone flat and cannot be replaced
with aMOExtended tire, astandard tire may be
used as atemporary measure. Make sure that
you use the proper size and type (summer or
winter tire).
Vehicles equipped with MOExtended tires are
not equipped with aTIREFIT kit at the factory. It
is therefore recommended that you additionally
equip your vehicle with aTIREFIT kit if you mount
tires that do not feature run-flat properties, e.g.
winter tires. ATIREFIT kit may be obtained from
aq ualified specialist workshop.
Important safety notes
GWARNING
When driving in emergency mode, the driving
characteristics deteriorate, e.g. when corner-
ing, accelerating quickly and when braking.
There is arisk of an accident.
Do not exceed the stated maximum speed.
Avoid abrupt steering and driving maneuvers, and driving over obstacles (curbs, potholes,
off-road). This applies in particular to aladen
vehicle.
Stop driving in emergency mode if:
Ryou hear banging noises.
Rthe vehicle starts to shake.
Ryou see smoke and smell rubber.
RESP®is intervenin gconstantly.
Rthere are tears in the sidewalls of the tire.
After driving in emergency mode, have the
wheel rims checked at aqualified specialist
workshop with regard to their further use. The
defective tire must be replaced in every case.
TIREFIT kit
Important safety notes
TIREFIT is atire sealant.
Only valid for USA: You can use TIREFIT to seal
punctures of up to 0.16 in (4 mm), particularly
those in the tire tread. You can use TIREFIT at
outside temperatures down to Ò4‡(Ò20 †).
GWARNING
In the following situations, the tire sealant is
unable to provide sufficient breakdown assis-
tance, as it is unable to seal the tire properly:
Rthere are cuts or punctures in the tire larger
than those mentioned above.
Rthe wheel rim is damaged.
Ryou have driven at very low tire pressures or on aflat tire.
There is arisk of an accident.
Do not drive the vehicle. Contact aqualified
specialist workshop.
GWARNING
The tire sealant is harmful and causes irrita-
tion. It must not come into contact with your
skin, eyes or clothing or be swallowed. Do not
272Flat tire
Breakdown assistance