2018 MERCEDES-BENZ AMG GT ROADSTER hood release
[x] Cancel search: hood releasePage 103 of 294

Replacing the wiper blades
Important safety notes
GWARNING
If the windshield wipers begin to move while
you are changing the wiper blades, you could be trapped by the wiper arm. There is a risk of
injury.
Always switch off the windshield wipers and
ignition before changing the wiper blades.
!Never open the hood if a windshield wiper
arm has been folded away from the wind-
shield.
Never fold a windshield wiper arm without a
wiper blade back onto the windshield.
Hold the windshield wiper arm firmly when
you change the wiper blade. If you release the
windshield wiper arm without a wiper blade
and it falls onto the windshield, the windshield
may be damaged by the force of the impact.
Mercedes-Benz recommends that you have
the wiper blades changed at a qualified spe-
cialist workshop.
!To avoid damaging the wiper blades, make
sure that you touch only the wiper arm of the
wiper.
Replacing the wiper blades
Adjusting the wiper blades so that they
are vertical
XSwitch off the engine.
XRemove your foot from the brake pedal.
XSet the windshield wiper to the °position.
XPress the Start/Stop button repeatedly until
the windshield wiper starts.
XWhen the wiper arms are in a vertical position
to the hood, press the Start/Stop button.
XFold the wiper arm away from the windshield.
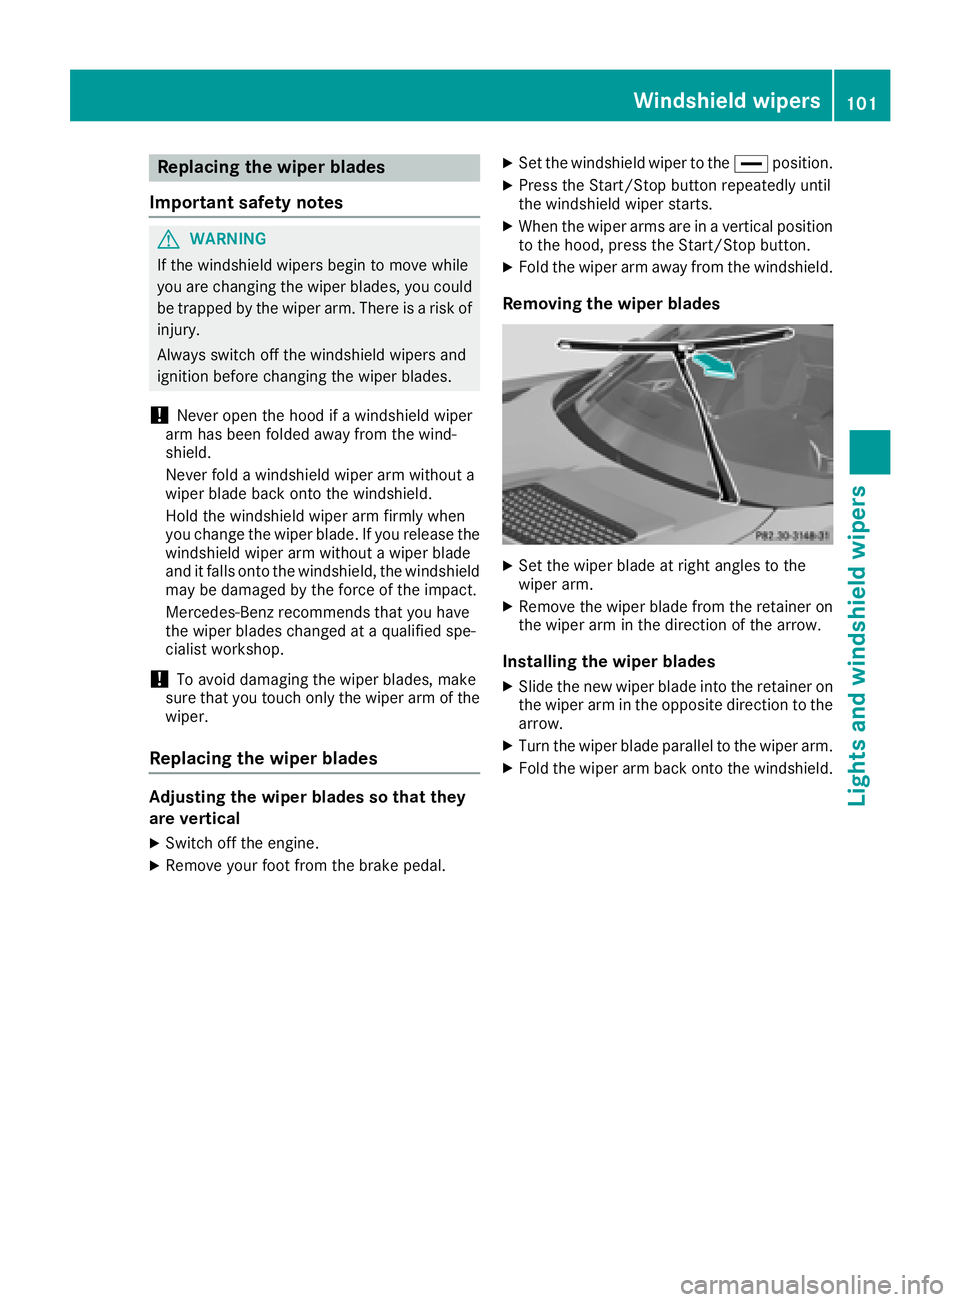
Removing the wiper blades
XSet the wiper blade at right angles to the
wiper arm.
XRemove the wiper blade from the retainer on
the wiper arm in the direction of the arrow.
Installing the wiper blades
XSlide the new wiper blade into the retainer on
the wiper arm in the opposite direction to the
arrow.
XTurn the wiper blade parallel to the wiper arm.
XFold the wiper arm back onto the windshield.
Windshield wipers101
Lights and windshield wipers
Z
Page 116 of 294

Rthe engine and the transmission are at a suf-
ficient temperature for the ECO start/stop
function
Rthe set temperature for the vehicle interior
has been reached
Rthe battery is sufficiently charged
Rthe system detects that the windshield is not
fogged up when the air-conditioning system isswitched on
Rthe hood is closed
Rthe driver's door is closed and the driver's
seat belt is fastened
All of the vehicle's systems remain active when
the engine is stopped automatically.
The HOLD function can also be activated if the
engine has been switched off automatically. It is
then not necessary to continue applying the
brakes during the automatic stop phase. When
you depress the accelerator pedal, the engine
starts automatically and the braking effect of
the HOLD function is deactivated.
Automatic engine start
The engine starts automatically if:
Ryou switch off the ECO start/stop function by pressing the ECO button
Rswitch to drive program RACE,S+ orS
(Ypage 116)
Ryou switch to manual mode M(Ypage 121)
Rin transmission position h, the brake pedal
is released and the HOLD function is not
active
Ryou depress the accelerator pedal
Ryou engage reverse gear k
Ryou move the transmission out of position j
Ryou unfasten your seat belt or open the driv-
er's door
Rthe vehicle starts to roll
Rthe brake system requires this
Rthe temperature in the vehicle interior devi-
ates from the set range
Rthe system detects moisture on the wind-
shield when the air-conditioning system is
switched on
Rthe battery's condition of charge is too low
Shifting the transmission to position jdoes
not start the engine.
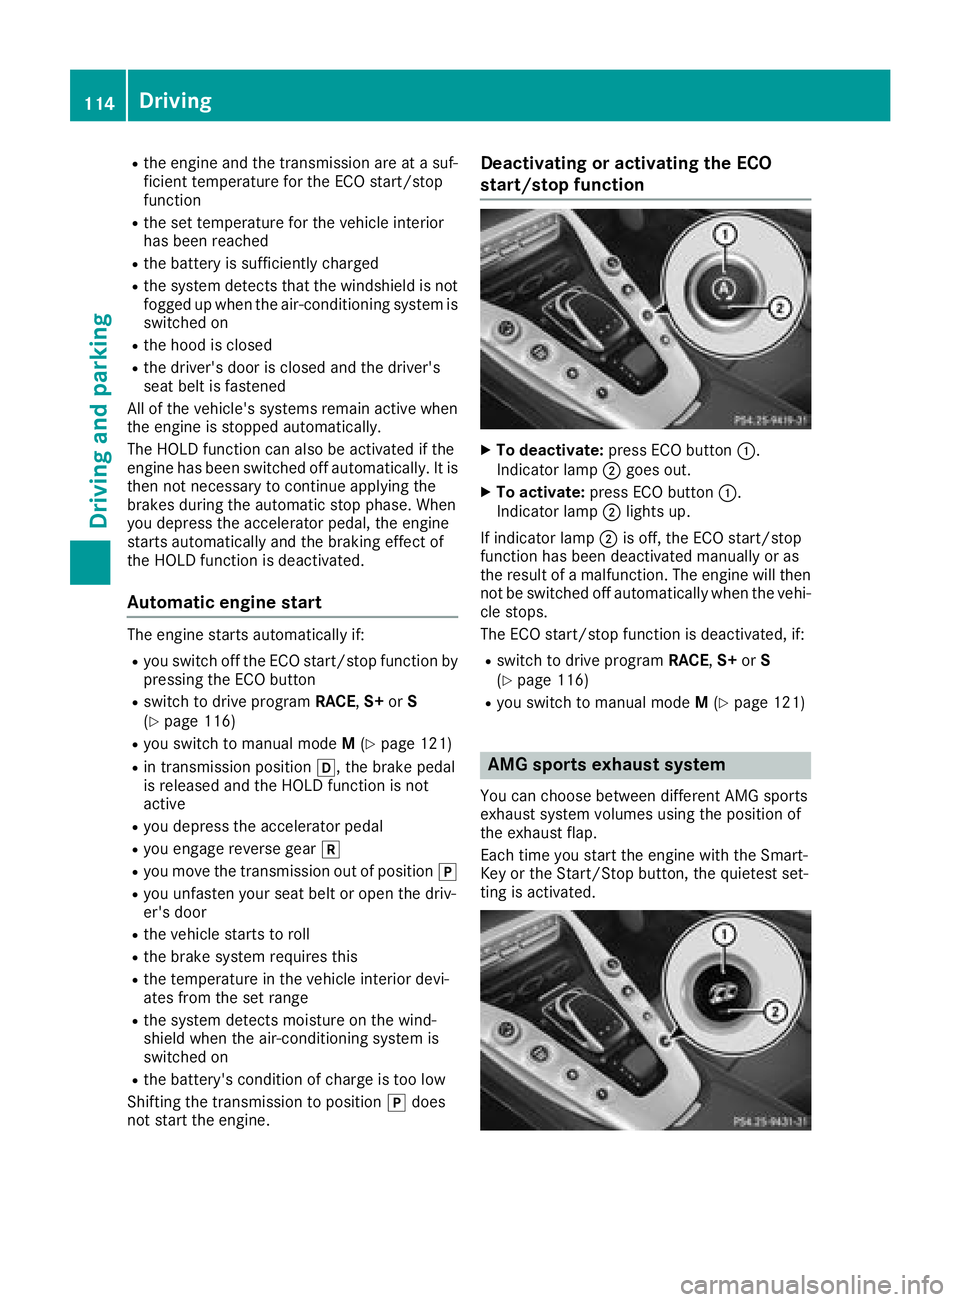
Deactivating or activating the ECO
start/stop function
XTo deactivate: press ECO button :.
Indicator lamp ;goes out.
XTo activate: press ECO button :.
Indicator lamp ;lights up.
If indicator lamp ;is off, the ECO start/stop
function has been deactivated manually or as
the result of a malfunction. The engine will then
not be switched off automatically when the vehi- cle stops.
The ECO start/stop function is deactivated, if:
Rswitch to drive program RACE,S+ orS
(Ypage 116)
Ryou switch to manual mode M(Ypage 121)
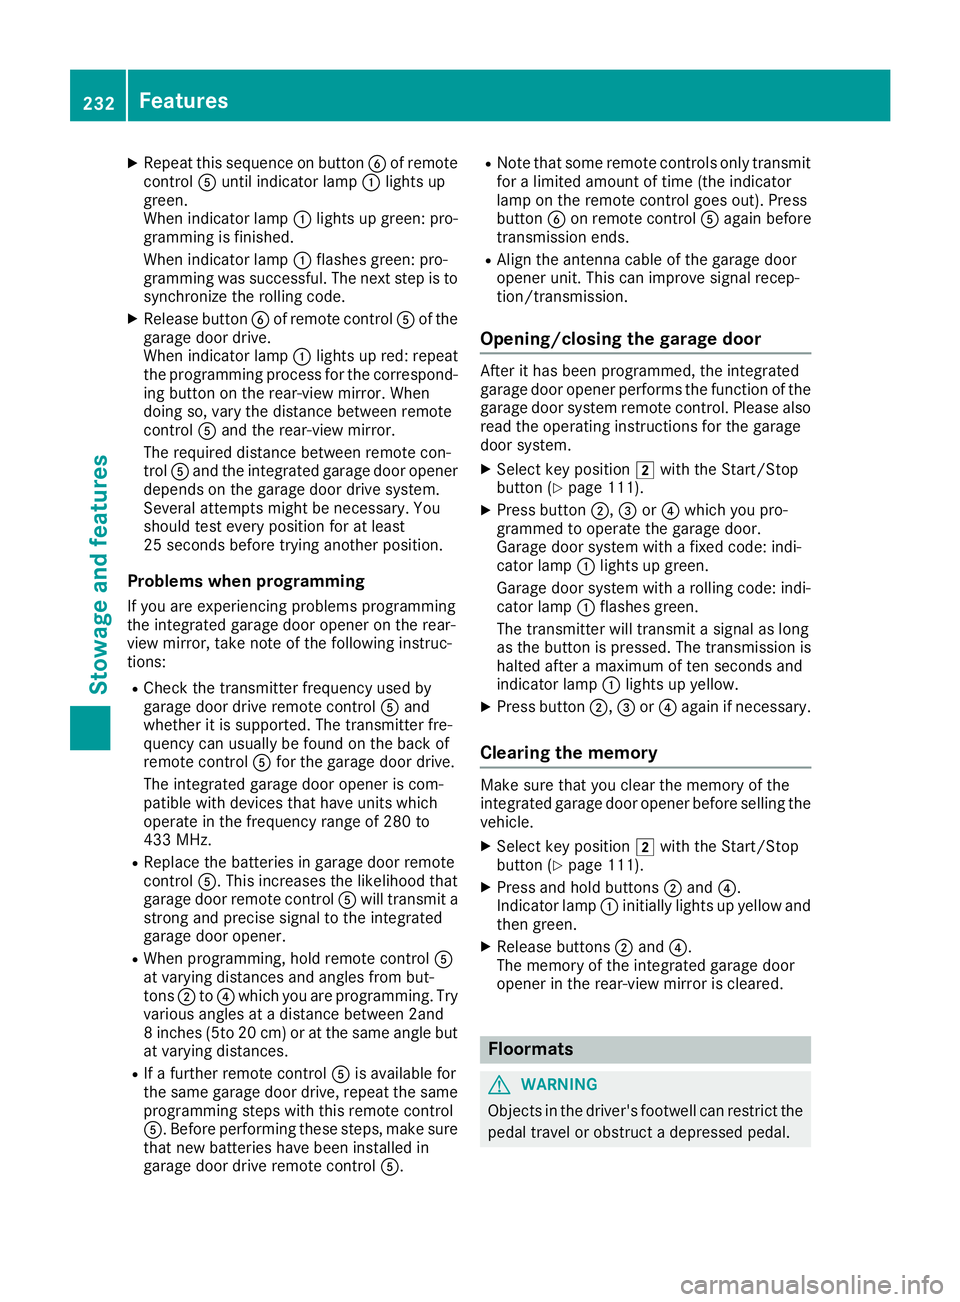
AMG sports exhaust system
You can choose between different AMG sports
exhaust system volumes using the position of
the exhaust flap.
Each time you start the engine with the Smart-
Key or the Start/Stop button, the quietest set-
ting is activated.
114Driving
Driving an d parking
Page 234 of 294

XRepeat this sequenceon butto nB of remot e
control Auntil indicator lamp :lights up
green .
When indicator lamp :lights up green :pro -
grammin gis finished.
When indicator lamp :flashes green :pro -
grammin gwas successful. The next step is to
synchroniz eth erollin gcode.
XReleas ebutto nB of remot econtrol Aof th e
garage door drive.
When indicator lamp :lights up red :repeat
th eprogrammin gprocess for th ecorrespond -
ing butto non th erear-view mirror .When
doin gso, var yth edistanc ebetween remot e
control Aand th erear-view mirror .
The require ddistanc ebetween remot econ-
trol Aand th eintegrate dgarage door opener
depend son th egarage door driv esystem.
Several attempts might be necessary. You
should test every position for at least
25 seconds before trying another position .
Problemswhen programming
If you are experiencin gproblem sprogrammin g
th eintegrate dgarage door opener on th erear -
vie wmirror ,tak enote of th efollowin ginstruc-
tions:
RChec kth etransmitte rfrequency used by
garage door driv eremot econtrol Aand
whether it is supported. The transmitte rfre-
quency can usually be foun don th ebac kof
remot econtrol Afor th egara ge d
oor drive.
The integrate dgarage door opener is com-
patible wit hdevice sthat hav eunit swhic h
operate in th efrequency range of 28 0to
43 3MHz.
RReplac eth ebatterie sin garage door remot e
control A.This increases th elikelihood that
garage door remot econtrol Awill transmit a
stron gand precis esignal to th eintegrate d
garage door opener.
RWhen programming, hold remot econtrol A
at varying distances and angles from but -
tons ;to? whic hyou are programming. Try
various angles at adistanc ebetween 2an d
8 inches (5t o20 cm) or at th esam eangle but
at varying distances.
RIf afurther remot econtrol Ais available for
th esam egarage door drive, repeat th esam e
programmin gsteps wit hthis remot econtrol
A. Before performin gthese steps, mak esur e
that ne wbatterie shav ebeen installed in
garage door driv eremot econtrol A.
RNotethat som eremot econtrol sonly transmit
for alimite damoun tof time (the indicator
lamp on th eremot econtrol goes out). Press
butto nB on remot econtrol Aagain before
transmission ends.
RAlign th eantenna cable of th egarage door
opener unit. This can improve signal recep-
tion/transmission.
Opening/closing the garage door
Afte rit has been programmed ,th eintegrate d
garage door opener performs th efunction of th e
garage door system remot econtrol .Pleas ealso
read th eoperating instruction sfor th egarage
door system.
XSelec tke yposition 2withth eStart/Sto p
butto n (Ypage 111).
XPress butto n;, =or? whic hyou pro -
grammed to operate th egarage door .
Garag edoor system wit h afixed code: indi-
cator lamp :lights up green .
Garag edoor system wit h arollin gcode: indi-
cator lamp :flashes green .
The transmitte rwill transmit asignal as lon g
as th ebutto nis pressed. The transmission is
halted after amaximum of te nseconds and
indicator lamp :lights up yellow .
XPress button;, =or? again if necessary.
Clearing the memory
Mak esur ethat you clear th ememory of th e
integrate dgarage door opener before selling th e
vehicle.
XSelec tke yposition 2withth eStart/Sto p
butto n (Ypage 111).
XPress and hold buttons ;and ?.
Indicato rlamp :initially lights up yellow and
then green .
XReleasebuttons ;and ?.
The memory of th eintegrate dgarage door
opener in th erear-view mirror is cleared .
Floormats
GWARNING
Objects in th edriver' sfootwell can restrict th e
pedal travel or obstruct adepressed pedal .
232Features
Stowage and features
Page 237 of 294

XMake sure that the windshield wipers are
turned off.
XPull release lever:on the hood.
The hood is released.
XReach into the gap, pull hood catch handle ;
up and lift the hood.
If you lift the hood, the hood is opened and
held open automatically by the gas-filled
strut.
Closing the hood
GWARNING
When opening and closing the hood, it may
suddenly fall into the closed position. There is a risk of injury to persons within range of
movement of the hood.
Open and close the hood only when no one is
within its range of movement.
XLower the hood and let it fall from a height of
approximately 8 in (20 cm).
XCheck that the hood has engaged properly.
If the hood can be raised slightly, it is not
properly engaged. Open it again and close it
with a little more force.
Engine oil
Notes on the oil level
Depending on your driving style, the vehicle
consumes up to 0.9 US qt (0.8 liters) of oil per
600 miles (1,000 km). The oil consumption may be higher than this when the vehicle is new or if
you frequently drive at high engine speeds.
Depending on the engine, the oil dipstick may be
in a different location.
It is only possible to correctly measure the oil
level when:
Rthe engine is at normal operating temperature
Rthe vehicle is parked on a level surface
Rthe engine is left running in neutral for at least
30 seconds before switching off
This applies when checking the oil level using
the oil dipstick or on-board computer.
Checking the oil level using the oil dip-
stick
GWARNING
Certain components in the engine compart-
ment, such as the engine, radiator and parts
of the exhaust system, can become very hot.
Working in the engine compartment poses a
risk of injury.
Where possible, let the engine cool down and touch only the components described in the
following.
It is only possible to correctly measure the oil
level with the oil dipstick when the engine is at
normal operating temperature and in a period of
2 to minutes after the engine has been switched
off.
Engine compartment235
Maintenance and care
Z