2018 MERCEDES-BENZ AMG GT ROADSTER phone
[x] Cancel search: phonePage 61 of 174
SelectionInstructions
Near Destination
The search is performed
in the vicinity of the desti-
nation.
XSelect a category orSearch By Name(Ypage 57).
XSelectNear Destination.
The search for POIs starts.
Current Position
Searches in the vicinity of
the current vehicle posi-
tion.
XSelect a category or Search By Name(Ypage 57).
XSelectCurrent Position.
The search for POIs starts.
Other City
After entering a city, the
search is performed
within the city's bounda-
ries
Option 1
XCall up the POI menu (Ypage 57).
XTo select Other City: turn and press the controller.
XSelect the state/province (Ypage 53), if desired.
XEnter the city (Ypage 53).
XSelect a POI category (Ypage 57).
Option 2
XEnter a city in the address entry menu (Ypage 53).
XTo select POIs: slide6, turn and press the controller.
XSelect a POI category (Ypage 57).
Selecting a POI
Requirement for "Calling up a POI": a mobile
phone must be connected to the multimedia
system (
Ypage 90).
Requirements for "Viewing the vicinity of the
destination" and "Loading data from the Inter-
net" (USA): mbrace must be activated for Inter-
net access (
Ypage 118).
Requirements for "Viewing the vicinity of the
destination" and "Loading data from the Inter-
net" (Canada): a mobile phone must be connec-
ted to the multimedia system via Bluetooth
®
(Ypage 90) or USB (Ypage 151).
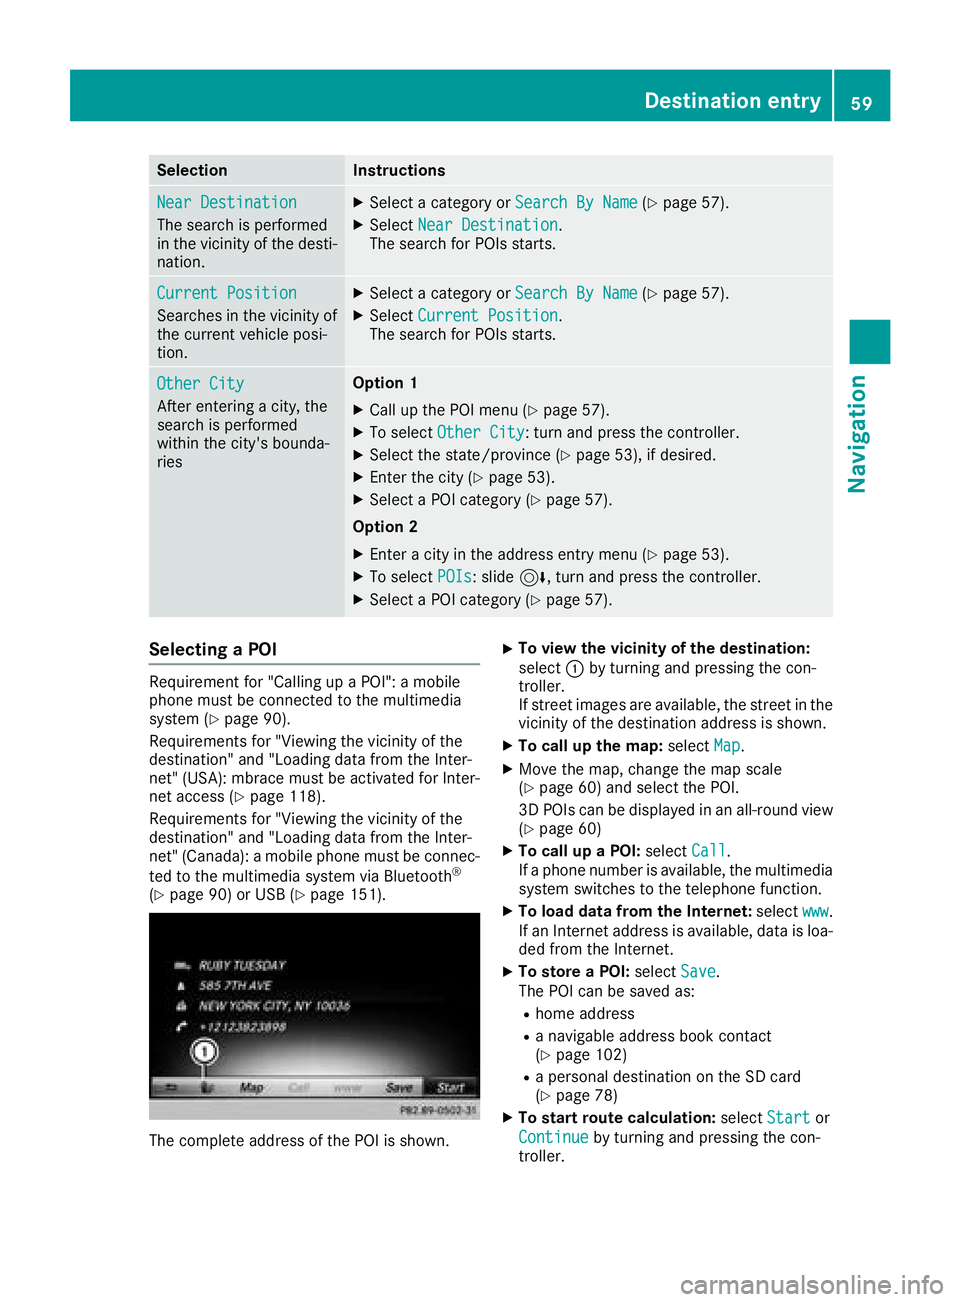
The complete address of the POI is shown.
XTo view the vicinity of the destination:
select :by turning and pressing the con-
troller.
If street images are available, the street in the
vicinity of the destination address is shown.
XTo call up the map: selectMap.
XMove the map, change the map scale
(Ypage 60) and select the POI.
3D POIs can be displayed in an all-round view
(
Ypage 60)
XTo call up a POI: selectCall.
If a phone number is available, the multimedia
system switches to the telephone function.
XTo load data from the Internet: selectwww.
If an Internet address is available, data is loa-
ded from the Internet.
XTo store a POI: selectSave.
The POI can be saved as:
Rhome address
Ra navigable address book contact
(Ypage 102)
Ra personal destination on the SD card
(Ypage 78)
XTo start route calculation: selectStartor
Continue
by turning and pressing the con-
troller.
Destination entry59
Navigation
Z
Page 63 of 174
XTo select a POI category orOther: turn and
press the controller.
After selecting one of the eight POI catego-
ries, available POIs are displayed:
Ralong the route
Rin the vicinity
The multimedia system first searches for des-
tinations on the route. The search for desti-
nations is then initiated in the area around the
current vehicle position.
XAfter selecting Other, select one of the des-
tination entry options.
SelectionStep
AddressEntryXEnter a destination by
address (Ypage 52).
KeywordSearchXSelect a destination
using a keyword search
(
Ypage 55).
From Previ‐ous Destina‐tions
XSelect a destination
from the list of last des-
tinations (
Ypage 56).
From Con‐tactsXSelect a contact from
the address book as the
destination (
Ypage 57).
From POIsXSelect a point of interest (Ypage 59).
Using MapXEnter a destination using
the map (Ypage 60).
From MemoryCardXSelect a personal POI
(Ypage 65).
FromMercedes-Benz Apps
XEnter a destination from
Mercedes-Benz Apps
(
Ypage 62).
Using Geo-CoordinatesXEnter a destination using
the geo-coordinates
(
Ypage 63).
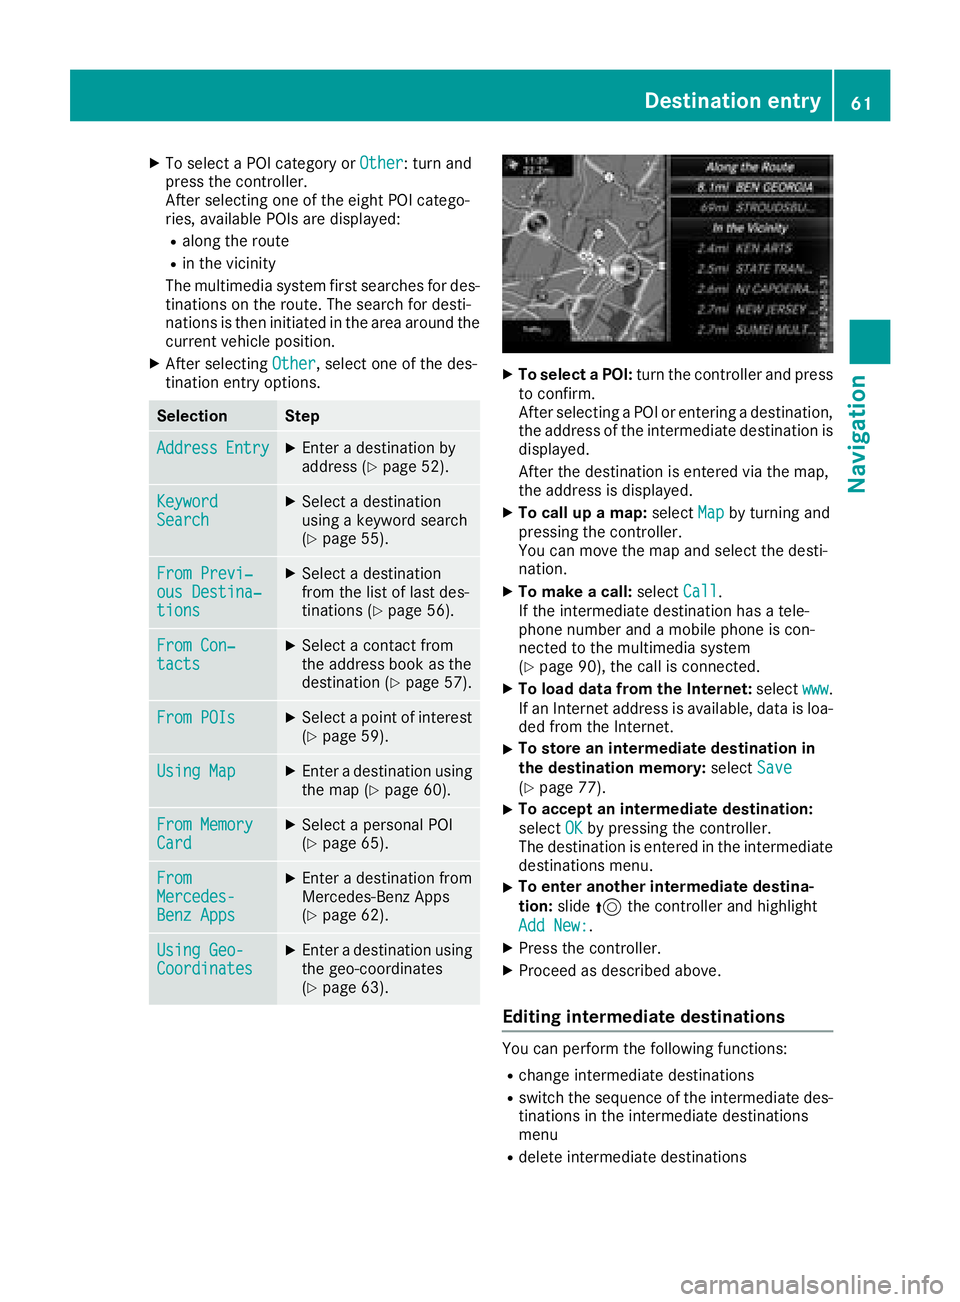
XTo select a POI: turn the controller and press
to confirm.
After selecting a POI or entering a destination,
the address of the intermediate destination is
displayed.
After the destination is entered via the map,
the address is displayed.
XTo call up a map: selectMapby turning and
pressing the controller.
You can move the map and select the desti-
nation.
XTo make a call: selectCall.
If the intermediate destination has a tele-
phone number and a mobile phone is con-
nected to the multimedia system
(
Ypage 90), the call is connected.
XTo load data from the Internet: selectwww.
If an Internet address is available, data is loa- ded from the Internet.
XTo store an intermediate destination in
the destination memory: selectSave
(Ypage 77).
XTo accept an intermediate destination:
selectOK
by pressing the controller.
The destination is entered in the intermediate
destinations menu.
XTo enter another intermediate destina-
tion: slide5the controller and highlight
Add New:
.
XPress the controller.
XProceed as described above.
Editing intermediate destinations
You can perform the following functions:
Rchange intermediate destinations
Rswitch the sequence of the intermediate des-
tinations in the intermediate destinations
menu
Rdelete intermediate destinations
Destination entry61
Navigation
Z
Page 68 of 174

The example shows a personal POI.
XInsert the SD memory card (Ypage 139).
XTo switch to navigation mode:slide5the
controller.
XTo select Navi: turn and press the controller.
The map displays the current vehicle position
or the navigation menu appears.
XIf the navigation menu appears, press the
controller.
The map shows the vehicle's current position.
XTo show the menu: slide6the controller.
XTo select Destination: turn and press the
controller.
XSelect From Memory Card.
The menu displays the categories available on
the SD card.
XTo select a category or Personal Routes,
turn and press the controller.
The available personal POIs or route entries
are displayed.
XSelect personal POI or personal route.
The address of the personal POI appears or
the personal route is displayed in the map.
If a large number of entries are stored, a register
for quick selection appears. Personal POIs and
routes can be saved and sorted with different
character sets (e.g. Latin, Cyrillic, Arabic).
XTo select a register: slide9 the control-
ler.
XTo select a character: turn and press the con-
troller.
XTo select a character set for sorting: slide
9 the controller to select B.
XPress the controller.
The available character sets are displayed.
The#dot indicates the current setting.
XTurn and press the controller.
Editing
The example shows a personal route.
XSelect personal POI or personal route
(Ypage 65).
XTo explore a personal POI or personal
route: turn and press the controller to select
Map
.
The map with the crosshair appears and
shows the destination.
XScroll the map (Ypage 49).
XSet the map scale (Ypage 79).
XTo switch to the menu: press the %button.
XTo call the personal POI: turn and press the
controller to select Call
.
If a mobile phone is connected to the multi-
media system and the telephone number is
available, the call is connected (
Ypage 96).
XTo save a personal POI: turn and press the
controller to select Save
.
XContinue saving (Ypage 77).
XTo edit the name and symbol: turn and
press the controller to select Edit
.
XSelectChange NameorEdit Icon.
XCharacter entry (Ypage 28).
XSelect a symbol.
XTo delete a personal POI or route: turn and
press the controller to select Delete
.
A prompt will appear.
XSelect YesorNo.
If you select Yes, the personal destination or
personal route is deleted.
XTo select the outward and return route:
select Swap
by turning and pressing the con-
troller.
The starting and destination positions of your
personal route, and thus the direction for
route guidance, are switched round. One-way
streets or restricted intersections are taken
into consideration. Therefore, the outward
and return routes may differ from each other.
XTo start route guidance: turn and press the
controller to select Start
.
Recording the route
General notes
Routes are recorded using the SD card.
Requirements: the SD card has the FAT data
system format (e.g. FAT32).
66Personal POIs and routes
Navigation
Page 72 of 174

Starting route guidance to a POI
XTo select a POI:turn the controller and press
to confirm.
The POI details are displayed.
You can perform the following functions:
RStore in the address book (Ypage 77)
RView on the map (Ypage 82)
RCalled if a phone is connected and a phone
number is available (Ypage 96)
RSelect for route guidance and calculate a
route to it (Ypage 54)
Using the traffic jam function
Highway information enables the use of the traf-
fic jam function. The remaining route on the
highway in this case is blocked in the direction of
travel from the selected exit.
XTo select Detour: turn and press the control-
ler.
The traffic jam function appears
(
Ypage 73).
Destination reached
Once the destination is reached, you will see the
checkered flag. Route guidance is finished.
Navigation announcements
Repeating navigation announcements
If you missed the current navigation announce-
ment, you can call it up again.
XTo switch to navigation mode: slide5the
controller.
XTo select Navi: turn and press the controller.
The map displays the current vehicle position
or the navigation menu appears.
XIf the navigation menu appears, press the
controller.
The map shows the vehicle's current position.
XTo show the menu: slide6the controller.
XTo select +: turn and press the controller.
The navigation announcement is repeated.
iIf the Repeat Spoken Driving Recom‐mendationsfunction has previously been
added as a favorite, you can alternatively
select the function using the favorites button
(
Ypage 31).
Setting the volume manually
XDuring a navigation announcement, turn
Ä the control knob.
iWhen you start the engine, the volume is set
to the lowest setting.
70Route guidance
Navigation
Page 73 of 174
Switching navigation announcements
on/off
XTo switch off navigation announcements:
press the8button on the multifunction
steering wheel during a navigation message.
XTo switch navigation announcements
back on: slide6the controller.
XTo select +: turn and press the controller.
The multimedia system automatically switches
the navigation announcements back on when:
Ra new route is calculated
Rthe vehicle is started
A navigation message is given if the route is
recalculated during dynamic route guidance due
to new traffic reports (
Ypage 74).
Canceling/continuing route guidance
Canceling route guidance
XSlide 6the controller.
The menu is shown.
XTo select Destination: turn and press the
controller.
XSelect Cancel Active Route Guidance.
The blue route line is no longer shown on the
map.
Resuming route guidance
XSlide 6the controller.
The menu is shown.
XTo select Destination: turn and press the
controller.
XSelect Continue Route Guidance.
The multimedia system calculates the route.
Route information
Destination information
XTo switch to navigation mode: slide5the
controller.
XTo select Navi: turn and press the controller.
The map displays the current vehicle position
or the navigation menu appears.
XIf the navigation menu appears, press the
controller.
The map shows the vehicle's current position.
XTo show the menu: slide6the controller.
XTo select Route: turn and press the controller.
XSelectDestination Information.
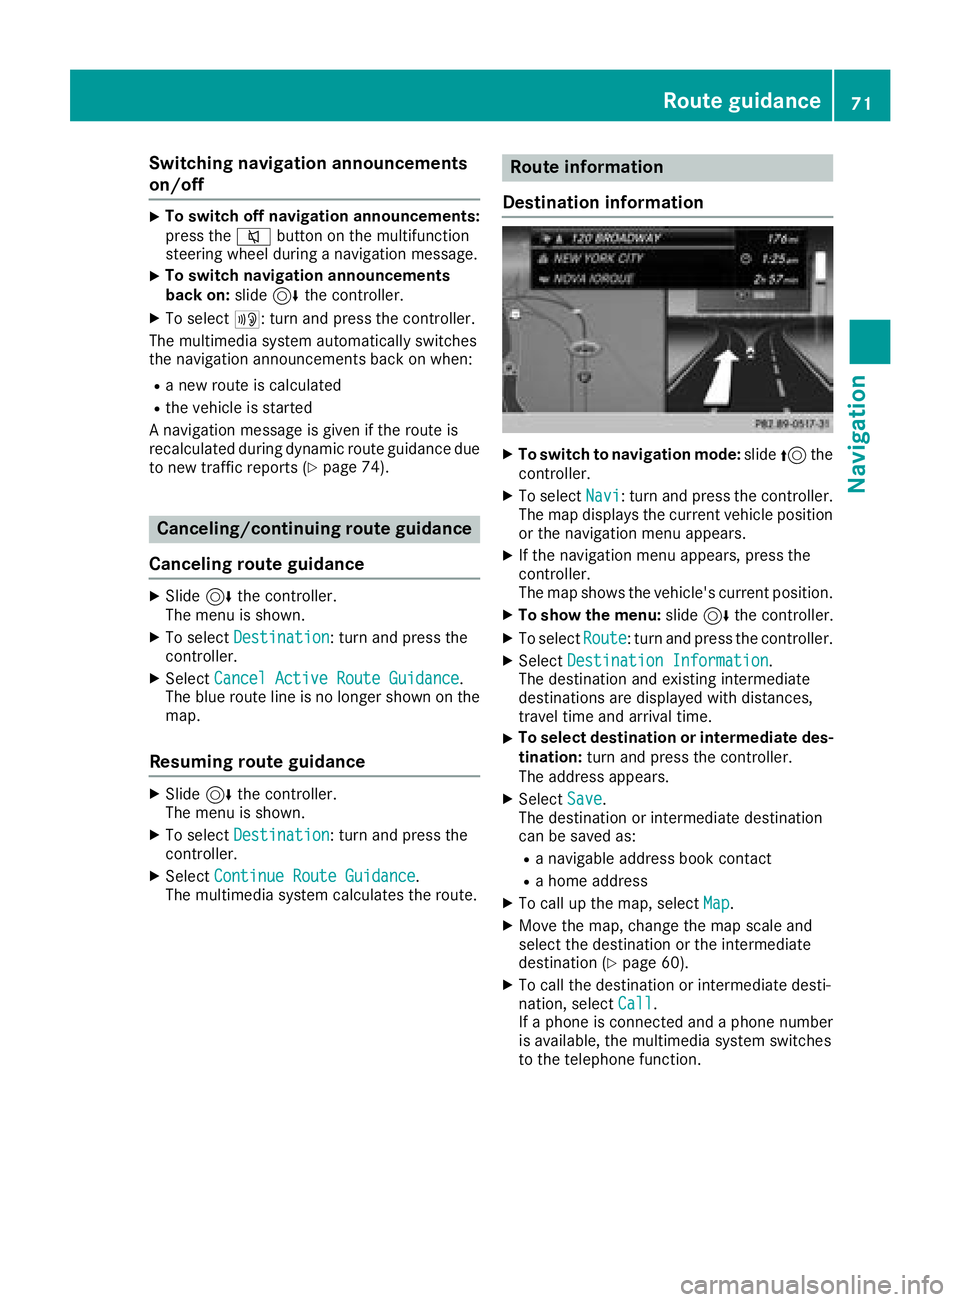
The destination and existing intermediate
destinations are displayed with distances,
travel time and arrival time.
XTo select destination or intermediate des-
tination: turn and press the controller.
The address appears.
XSelect Save.
The destination or intermediate destination
can be saved as:
Ra navigable address book contact
Ra home address
XTo call up the map, select Map.
XMove the map, change the map scale and
select the destination or the intermediate
destination (
Ypage 60).
XTo call the destination or intermediate desti-
nation, selectCall.
If a phone is connected and a phone number
is available, the multimedia system switches
to the telephone function.
Route guidance71
Navigation
Z
Page 80 of 174
XEnter a surname and first name. Character
entry (Ypage 28).
XTo selectOK: turn and press the controller.
The Saving Successfulmessage appears.
The destination address is saved in the
address book as a navigable contact.
XTo add to a contact: selectAdd to Con‐
tact.
The address book appears.
XSearch for a contact (Ypage 103).
XPress the controller.
The Saving Successfulmessage appears.
The destination address is allocated to a con-
tact in the address book.
Telephone numbers are not transferred to the
telephone number fields of the address book.
After selecting the destination address from
the address book for navigation, the associ-
ated telephone number will be displayed.
If the contact already has two destination
addresses, a prompt will appear asking if a
destination address should be overwritten.
XSelect YesorNo.
If you select Yes, a list showing both destina-
tion addresses appears.
XTo select the destination address: turn and
press the controller.
The destination address is overwritten.
XSelect Save as "My address" As "My
Address".
The destination is saved as your home
address.
Saving a destination to an SD card
XInsert the SD memory card (Ypage 139).
XSelect a POI, for example (Ypage 57).
XTo select Save: turn and press the controller.
A menu appears.
XSelect To Memory Card.
If no destination has been saved yet on the SD
card, an input menu will appear.
or
XSelect NotClassifiedor, if available, select
a category that you have created yourself.
An input menu appears.
XEnter a new name and a new category for the
destination in the input menu if required.
Character entry (
Ypage 29).
XSelect OK.
The Saving Successfulmessage appears.
The destination is saved to the SD card.
Saving the current vehicle position
XTo switch to navigation mode: slide5the
controller.
XTo select Navi: turn and press the controller.
The map displays the current vehicle position
or the navigation menu appears.
XIf the navigation menu appears, press the
controller.
The map shows the vehicle's current position.
XTo show the menu: slide6the controller.
XTo select Position: turn and press the con-
troller.
XSelect Save.
The current vehicle position is saved in "Last
destinations".
Saving the crosshair position
XTo switch to navigation mode: slide5the
controller.
XTo select Navi: turn and press the controller.
The map displays the current vehicle position
or the navigation menu appears.
XIf the navigation menu appears, press the
controller.
The map shows the vehicle's current position.
XTo display the crosshair: press the control-
ler.
XMove the map to the desired position
(Ypage 49).
XTo show the menu: press the controller.
XTo select Position: turn and press the con-
troller.
XSelect Save.
The crosshair position is saved in the last des-
tinations.
78Storing destinations
Navigation
Page 86 of 174
The area currently blocked is displayed as a
red square.
XTo move the area to a new location: slide
1,4,2the controller.
XTo change the size of the area: press the con-
troller.
XTurn the controller.
XTo accept changes: press the controller.
A message appears stating that the area has
been set.
Deleting one/all areas
XTo switch to navigation mode: slide5the
controller.
XTo select Navi: turn and press the controller.
The map displays the current vehicle position
or the navigation menu appears.
XIf the navigation menu appears, press the
controller.
The map shows the vehicle's current position.
XTo show the menu: slide6the controller.
XTo select Options:turn and press the con-
troller.
XSelect Route Settings.
XSelectAvoid Options.
XSelectAvoid Area.
A list appears.
XTo delete an area: mark an area by turning
the controller.
XSlide 9the controller.
XSelect DeleteorDelete All.
A prompt appears asking whether you wish to
delete the area.
XSelect YesorNo.
After selecting Yes, the area is deleted.
XTo delete all areas: when the list appears,
slide 9 the controller.
XSelect Delete All.
A prompt appears asking whether you wish to
delete all areas.
XSelect YesorNo.
After selecting Yes, all areas are deleted.
SIRIUS XM service
Displaying SIRIUS XM service informa-
tion
You can display the SIRIUS XM service informa-
tion.
XTo switch to navigation mode: slide5the
controller.
XTo select Navi: turn and press the controller.
The map displays the current vehicle position
or the navigation menu appears.
XIf the navigation menu appears, press the
controller.
The map shows the vehicle's current position.
XTo show the menu: slide6the controller.
XTo select Traffic: turn and press the con-
troller.
XSelect SIRIUS Service.
The provider's phone number (SIRIUS XM)
and the serial number of your service module
are displayed.
iAlternatively you can call up this function
using the touchpad (Ypage 22).
Registering for the SIRIUS XM traffic
report service
XCall the provider telephone number shown on
the multimedia system display.
iYou can also have the satellite service acti-
vated online. To do so, visit the SIRIUS XM
Radio website at http://www.sirius.com
(USA).
XThe connection is established: follow the
service employee's instructions.
The activation process may take up to ten
minutes.
iIf registration is not included when purchas-
ing the system, your credit card details will be
required to activate your account.
Updating the digital map
Introduction
The digital maps generated by the map software
become outdated in the same way as conven-
tional road maps. Optimal route guidance can
only be provided by the navigation system in
84Map functions
Navigation
Page 87 of 174

conjunction with the most up-to-date map soft-
ware.
Information about new versions of the digital
map can be obtained from an authorized
Mercedes-Benz Center. You can have the digital
map updated there using a data medium, or you
can update it yourself.
Carrying out a manual update
You can carry out the update yourself.
The update process may take some time (up to
45 minutes), depending on the size of the digital
map. The update will be completed more quickly
if the vehicle is stationary. If you begin the
update while the vehicle is stationary and the
starter battery has insufficient power, the mul-
timedia system may switch off automatically.
This protects the battery. In order to prevent
this, a suitable power supply to the vehicle must
be maintained.
Navigation functions
Calling up the navigation system
menu
XTo switch to navigation mode:slide5the
controller.
XTo select Navi: turn and press the controller.
The navigation menu appears or the map dis-
plays the current vehicle position.
XIf the map appears, slide 5the controller.
XPress the controller.
The navigation menu appears.
XTo return to the map: turn the controller
until Navigation
appears and then press the
controller.
Calling up the online map display
Requirement for online map display (USA):
mbrace must be activated for Internet access
(
Ypage 118).
Requirement for the online map display (Can-
ada): a mobile phone is connected to the multi-
media system via Bluetooth
®(Ypage 90) or
USB (Ypage 151).
XCall up the navigation menu (Ypage 85).
XTurn the controller until Online Map Dis‐playis brought to the front.
XPress the controller.
The online connection is established. Once
the connection is established, the Google
Maps™ map shows the vicinity of the current
vehicle position.
iAlternatively you can call up this function
using the touchpad (Ypage 22).
XTo exit the online map display: press the %
button.
Calling up the compass display
XCall up the navigation menu (Ypage 85).
XTurn the controller until Compassis brought to
the front.
XPress the controller.
The compass display provides the following
information:
RThe current direction of travel with bearing
(360 degree format) and compass direction
RLongitude and latitude coordinates in
degrees, minutes and seconds
RHeight (rounded off) above sea level
RNumber of GPS satellites from which a sig- nal can be received
iAlternatively you can call up this function
using the touchpad (Ypage 22).
XTo exit the compass display: press the %
button.
Navigation functions85
Navigation
Z