2018 MERCEDES-BENZ AMG GT R-ROADSTER display
[x] Cancel search: displayPage 201 of 473
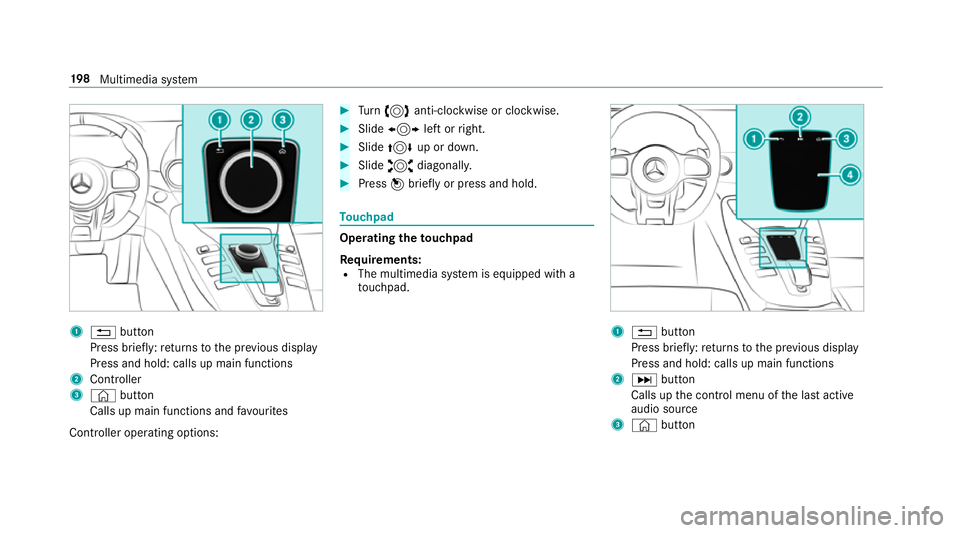
1
% button
Press brief ly:re turns tothe pr evious display
Press and hold: calls up main functions
2 Cont roller
3 © button
Calls up main functions and favo urites
Controller operating options: #
Turn 3 anti-clockwise or clo ckwise. #
Slide 1 left orright. #
Slide 4 up or down. #
Slide 2 diagonally. #
Press 7brief lyor press and hold. To
uchpad Operating
theto uchpad
Re quirements:
R The multimedia sy stem is equipped with a
to uchpad. 1
% button
Press brief ly:re turns tothe pr evious display
Press and hold: calls up main functions
2 D button
Calls up the control menu of the last active
audio source
3 © button 19 8
Multimedia sy stem
Page 205 of 473
Ad
just this in thefo llowing situations:
R during a traf fic announcement
R during a navigation announcement
The volume of the navigation announce‐
ment changes in accordance with thevo l‐
ume of the cur rent media sou rce.
R during a telephone call
R when entering or exiting a parking space
while using Active Parking Assist #
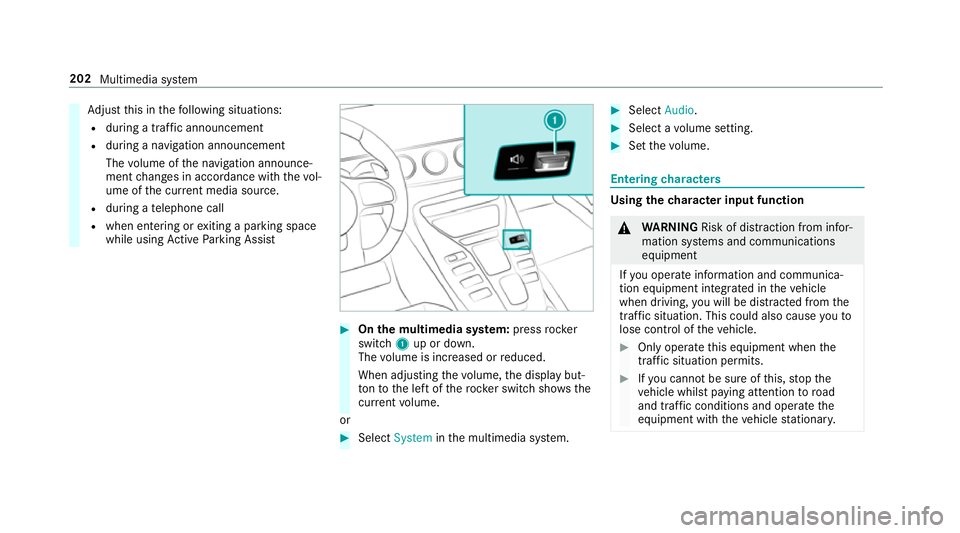
On the multimedia sy stem: press rocker
switch 1up or down.
The volume is inc reased or reduced.
When adjusting thevo lume, the display but‐
to nto the left of thero ck er switch sho ws the
cur rent volume.
or #
Select System inthe multimedia sy stem. #
Select Audio. #
Select a volume setting. #
Set thevo lume. Entering
characters Using
thech aracter input function &
WARNING Risk of di stra ction from infor‐
mation sy stems and communications
equipment
If yo u operate information and communica‐
tion equipment integ rated in theve hicle
when driving, you will be distracted from the
traf fic situation. This could also cause youto
lose control of theve hicle. #
Only operate this equipment when the
traf fic situation permits. #
Ifyo u cannot be sure of this, stop the
ve hicle whilst paying attention toroad
and traf fic conditions and ope rate the
equipment with theve hicle stationar y. 202
Multimedia sy stem
Page 207 of 473
#
Todel ete a character: swipe left when the
cursor is loca ted in the input line. #
Toconfirm the entr y:press theto uchpad. #
Tofinish character entr y:swipe upwards.
or #
Press the% button.
Example: entering a destination (navigation) #
Ente rth e POI or address (/ page 220).Sy
stem settings Display
Configuring display settings
Multimedia sy
stem:
4 System 5
G Display and styles
Setting the display brightness #
Select Display brightness .#
Select a brightness value.
Switching the display off/on #
Off: select Display off . #
On: press a button, %,forex ample.
Displ aydesign #
Select Day/night design. #
Select Automatic, Day design orNight
design.
Ad ditional displ ayarea
Depending on theve hicle, various items of addi‐
tional information can be shown. The additional
display area comprises the left-hand or right-
hand third of the displa y. #
Select Additional display area .
The following display con tent can be selected:
R Dynamic
R Navigation map
R Consumption
R Time and date Time and date
Setting the time and date automatical
ly
Multimedia sy stem:
4 System 5
& Time and date #
Deactivate ªManual time adjustment.
The time and date are set automatically for
th e selected time zone and summer time
option.
% The cor rect time is requ ired forth efo llowing
functions:
R Route guidance with time-dependent
traf fic guidance.
R Calculation of expected time of ar riva l.
Setting the time zone
Multimedia sy stem:
4 System 5
& Time and date
5 Time zone:
The list of count ries is displa yed. #
Select a count ry#.
Depending on the count ry, time zones are
displa yed. 204
Multimedia sy stem
Page 211 of 473
Setting up a
Wi-Fi hotspot
Multimedia sy stem:
4 System 5
ö Connectivity
Configuring the multimedia sy stem as a Wi-
Fi hotspot
The type of connection es tablished depends on
th e device tobe connec ted. The function must
be suppor tedby the multimedia sy stem and by
th e device tobe connec ted. The type of connec‐
tion es tablished must be selected on the multi‐
media sy stem and on the device tobe connec‐
te d. #
Select Set up hotspot. #
Highlight Connect device to vehicle hotspot.
Generating a WPS PIN #
Select ¥Connect using WPS PIN genera-
tion . #
Ente rth e PIN shown in the media display on
th e device tobe connec ted and con firm.
Connecting using a WPS PIN #
Select ¥Connect using WPS PIN input. #
Select Enter WPS PIN. #
Enterth e PIN that is shown on theex tern al
device's display on the multimedia sy stem. #
Select Continue.
Connecting using a button
Re quirements:
R This function is only available in a Wi-Fi fre‐
qu ency of 2.4 GHz. #
Select ¥Connect via WPS PBC. #
Press the WPS button on the device tobe
connec ted or select Connect. #
Select Continue inthe multimedia sy stem.
Connecting using a security key #
Select Connect device to vehicle hotspot .
A secu rity key is displa yed. #
Select theve hicle from the device tobe con‐
nec ted. The vehicle is displa yed with the
SSID MB Hotspot XXXXX . #
Enter the security key which is shown in the
media display on the device tobe connec ted. #
Confirm the entry. Genera
ting a new security key: #
Select Set up hotspot . #
Select Generate security key .
A connection will be es tablished with the
newly crea ted security key. #
Tosave a security key:select Save.
When a new security key is sa ved, all existing
Wi -Fi connections are then disconnected. If
th eWi -Fi connections are being re-es tab‐
lished, the new security key must be en tere d. Managing COMAND
Touch devices Re
quirements:
R The COMAND Touch app is ins talled on the
ex tern al device (e.g. tablet or smartphone).
R Wi-Fi is acti vated (/ page 206) and the mul‐
timedia sy stem is confi gured as a Wi-Fi hot‐
spot (/ page 208). 208
Multimedia sy stem
Page 212 of 473
Multimedia sy
stem:
4 System 5
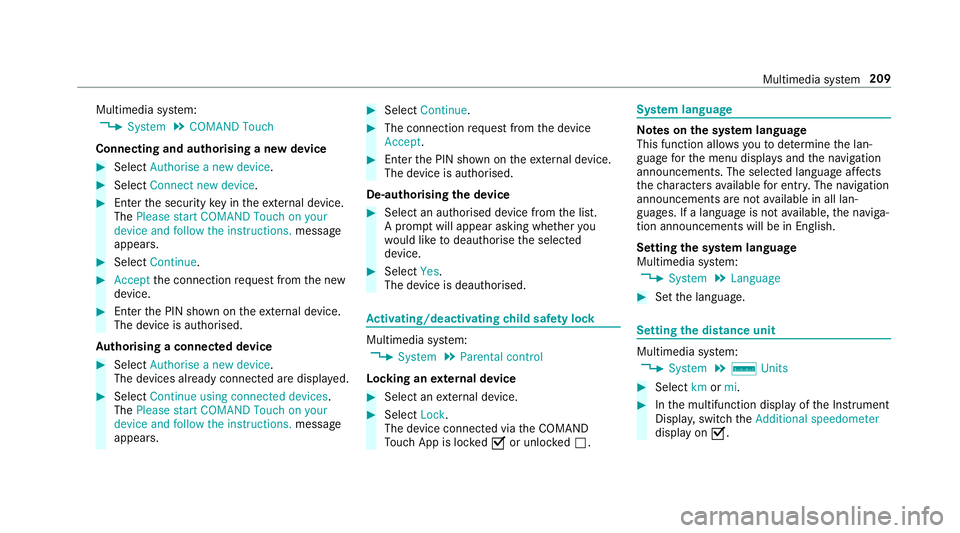
COMAND Touch
Connecting and authorising a new device #
Select Authorise a new device. #
Select Connect new device. #
Ente rth e security key in theex tern al device.
The Please start COMAND Touch on your
device and follow the instructions. message
appears. #
Select Continue. #
Accept the connection requ est from the new
device. #
Ente rth e PIN shown on theex tern al device.
The device is authorised.
Au thorising a connected device #
Select Authorise a new device.
The devices already connec ted are displa yed. #
Select Continue using connected devices.
The Please start COMAND Touch on your
device and follow the instructions. message
appears. #
Select Continue. #
The connection requ est from the device
Accept. #
Ente rth e PIN shown on theex tern al device.
The device is authorised.
De-authorising the device #
Select an authorised device from the list.
A prom ptwill appear asking whe ther you
wo uld like todeauthorise the selected
device. #
Select Yes.
The device is deauthorised. Ac
tivating/deactivating child saf ety lock Multimedia sy
stem:
4 System 5
Parental control
Locking an extern al device #
Select an extern al device. #
Select Lock.
The device connec ted via theCO MAND
To uch App is loc kedO or unloc kedª. Sy
stem language Note
s onthe sy stem language
This function allo wsyouto determ ine the lan‐
guage forth e menu displa ysand the navigation
announcements. The selected language af fects
th ech aracters available for entr y.The navigation
announcements are not available in all lan‐
guages. If a language is not available, the naviga‐
tion announcements will be in Engl ish.
Setting the sy stem language
Multimedia sy stem:
4 System 5
Language #
Set the language. Setting
the distance unit Multimedia sy
stem:
4 System 5
% Units #
Select kmormi. #
Inthe multifunction display of the Instrument
Displa y,switch theAdditional speedometer
display on O. Multimedia sy
stem 209
Page 214 of 473
Ac
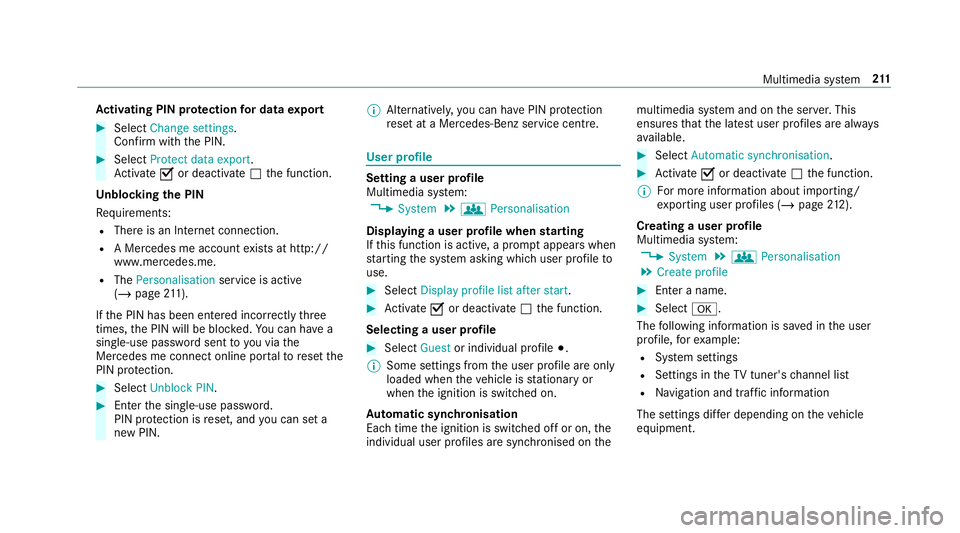
tivating PIN pr otection for data export #
Select Change settings .
Confirm wi th the PIN. #
Select Protect data export.
Ac tivate Oor deacti vate ª the function.
Un blocking the PIN
Re quirements:
R There is an Internet connection.
R A Mercedes me account exists at http://
www.me rcedes.me.
R The Personalisation service is active
(/ page 211).
If th e PIN has been entered incor rectly three
times, the PIN will be bloc ked. You can ha ve a
single-use password sent to you via the
Mercedes me connect online por talto reset the
PIN pr otection. #
Select Unblock PIN. #
Ente rth e single-use password.
PIN pr otection is reset, and you can set a
new PIN. %
Alternativel y,yo u can ha vePIN pr otection
re set at a Mercedes-Benz service centre. User profile
Setting a user profile
Multimedia sy
stem:
4 System 5
g Personalisation
Displaying a user profile when starting
If th is function is active, a prom ptappears when
st arting the sy stem asking which user profile to
use. #
Select Display profile list after start . #
Activate Oor deacti vate ª the function.
Selecting a user profile #
Select Guestor individual profile #.
% Some settings from the user profile are only
loaded when theve hicle is stationary or
when the ignition is switched on.
Au tomatic syn chronisation
Each time the ignition is switched off or on, the
individual user profiles are synchronised on themultimedia sy
stem and on the ser ver.This
ensures that the latest user profiles are alw ays
av ailable. #
Select Automatic synchronisation. #
Activate Oor deacti vate ª the function.
% For more information about importing/
ex porting user profiles (/ page212).
Crea ting a user profile
Multimedia sy stem:
4 System 5
g Personalisation
5 Create profile #
Ente r a name. #
Select a.
The following information is sa ved in the user
profile, forex ample:
R System settings
R Settings in theTV tuner's channel list
R Navigation and traf fic information
The settings di ffer depending on theve hicle
equipment. Multimedia sy
stem 211
Page 218 of 473
Setting
Track Race Multimedia sy
stem:
4 vehicle 5
TRACK PACE 5
Track Race
Re cording a track #
Select New track. #
Atthe desired starting point, select Start.
The track recording starts at this point. Dur‐
ing track recording, sectors can be set to
de term ine inter vals. #
Tofinish track recording, select Stopor cross
th est arting line again. #
Enterth ewe ather and the track name.
Sear ching bytrack name #
Select All tracks . #
Select ªSearch . #
Enter the tra ckname.
Tr ac ks with the sear ched name are dis‐
pla yed.
Measuring the time on the track #
Select Timekeeping.
An ove rview of near bytrac ksappears. The dis
tance and di rection tothest arting
line of the track is displa yed. #
Select the desired trac k.
If yo u ha vealready driven on this trac k,you
can select a driven time as a refere nce time.
Ti mekeeping begins auto maticallywhen the
st arting line has been crossed.
% When Zoomis selec ted, the tra ckdisplay
can be switched from 2D to3D.
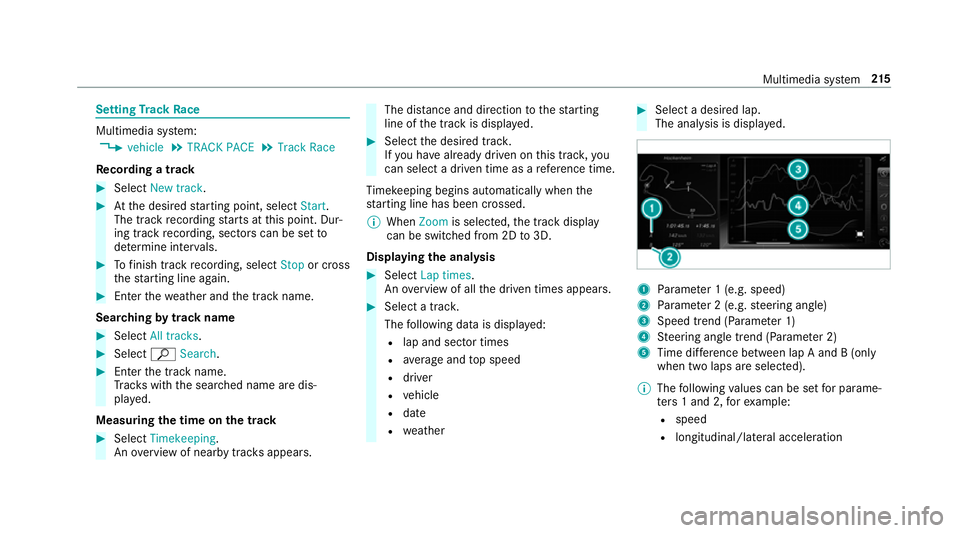
Displaying the ana lysis #
Select Lap times.
An ove rview of all the driven times appears. #
Select a tra ck.
The following data is displa yed:
R lap and sector times
R average and top speed
R driver
R vehicle
R date
R weather #
Select a desired lap.
The anal ysis is displa yed. 1
Parame ter 1 (e.g. speed)
2 Parame ter 2 (e.g. steering angle)
3 Speed trend (Parame ter 1)
4 Steering angle trend (Parame ter 2)
5 Time dif fere nce between lap A and B (only
when two laps are selected).
% The following values can be set for parame‐
te rs 1 and 2, forex ample:
R speed
R longitudinal/lateral acceleration Multimedia sy
stem 215
Page 220 of 473
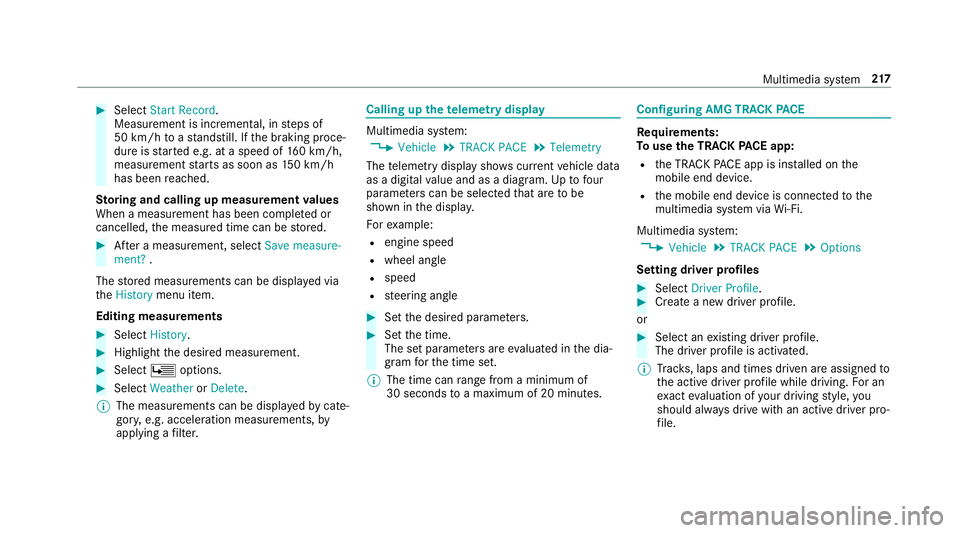
#
Select Start Record .
Measu rement is incremental, in steps of
50 km/h toast andstill. If the braking proce‐
dure is star ted e.g. at a speed of 160 km/h,
measurement starts as soon as 150 km/h
has been reached.
St oring and calling up measurement values
When a measurement has been comple ted or
cancelled, the measured time can be stored. #
After a measu rement, select Save measure-
ment? .
The stored measurements can be displa yed via
th eHistory menu item.
Editing measu rements #
Select History . #
Highlight the desired measurement. #
Select Üoptions. #
Select Weather orDelete.
% The measurements can be displa yedby cate‐
gor y,e.g. acceleration measurements, by
applying a filter. Calling up
thete lemetry display Multimedia sy
stem:
4 Vehicle 5
TRACK PACE 5
Telemetry
The telemetry display sho wscurrent vehicle data
as a digital value and as a diagram. Uptofour
parame ters can be selected that are tobe
shown in the displa y.
Fo rex ample:
R engine speed
R wheel angle
R speed
R steering angle #
Set the desired parame ters. #
Set the time.
The set parame ters are evaluated in the dia‐
gram forth e time set.
% The time can range from a minimum of
30 seconds toa maximum of 20 minutes. Configuring AMG TR
ACKPA CE Re
quirements:
To use the TRACK PACE app:
R the TRA CKPACE app is ins talled on the
mobile end device.
R the mobile end device is connected tothe
multimedia sy stem via Wi-Fi.
Multimedia sy stem:
4 Vehicle 5
TRACK PACE 5
Options
Setting driver profiles #
Select Driver Profile. #
Create a new driver profile.
or #
Select an existing driver profile.
The driver profile is activated.
% Trac ks, laps and times driven are assigned to
th e active driver profile while driving. For an
ex act evaluation of your driving style, you
should alw ays drive with an active driver pro‐
fi le. Multimedia sy
stem 217