2018 MERCEDES-BENZ AMG GT COUPE change wheel
[x] Cancel search: change wheelPage 349 of 465

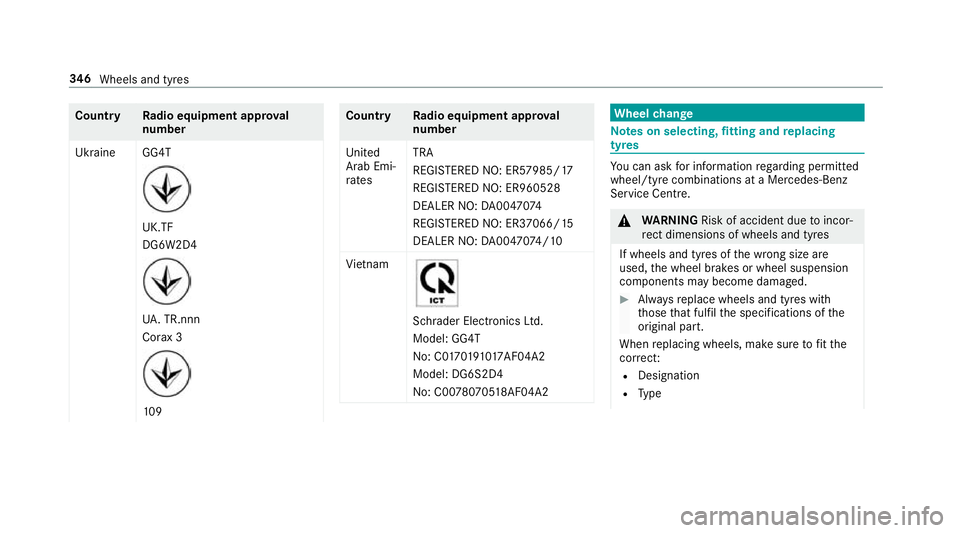
Count
ryRadio equipment appr oval
number
Ukraine GG4T UK.TF
DG6W2D4
UA
. TR.nnn
Co rax 3 109 Count
ryRadio equipment appr oval
number
United
Arab Emi‐
ra tes TRA
REGISTERED NO: ER57985/17
REGISTERED NO: ER960528
DEALER NO:
DA00470 74
REGI STERED NO: ER37066/ 15
DEALER NO: DA00470 74/10
Vi etnam Schrader Electronics Ltd.
Model: GG4T
No: C0
17019101 7AF04A2
Model: DG6S2D4
No: C00 78070518 AF04A2 Wheel
change Note
s on selecting, fitting and replacing
tyres Yo
u can ask for information rega rding permit ted
wheel/tyre combinations at a Mercedes-Benz
Service Cent re. &
WARNING Risk of accident due toincor‐
re ct dimensions of wheels and tyres
If wheels and tyres of the wrong size are
used, the wheel brakes or wheel suspension
components may become damaged. #
Alw aysre place wheels and tyres with
th ose that fulfil the specifications of the
original part.
When replacing wheels, make sure tofit the
cor rect:
R Designation
R Type 346
Wheels and tyres
Page 351 of 465

#
Avoid obs tacles or drive pa rticular ly
carefully. *
NO
TEDama getoelectronic component
parts from the use of tyre-fitting tools Ve
hicles with a tyre pressure monitoring
sy stem: electronic component parts are
located in the wheel. Tyre-fitting tools should
not be applied in the area of theva lve.
The tools could damage the electronic com‐
ponent parts. #
Have the tyres changed at a qualified
specialist workshop onl y. *
NO
TEDama getosummer tyres at low
ambient temp eratures At
low ambient temp eratures, tears could
fo rm when driving with summer tyres, caus‐
ing permanent damage tothe tyre. #
Attemp eratures below 7 °C, use M+S
tyres. Ac
cessory pa rts th at are not appr ovedfo ryo ur
ve hicle byMercedes-Benz or are not being used
cor rectly can impair the operating saf ety.
Before pu rchasing and using non-appr oved
accesso ries, visit a qualified specialist workshop
and enquire about:
R Suitability
R Legal stipulations
R Factory recommendations &
WARNING Risk of accident wi thhigh
per form ance tyres
The special tyre tread in combination with
th e optimised tyre compound, means that
th erisk of skidding or hydroplaning on wet
ro ads is inc reased.
In addition, the tyre grip is greatly reduced at
a low outside temp erature and tyre running
te mp erature. #
Switch on the ESP ®
and adapt your
driving style accordingly. #
Use M+S tyres at outside temp eratures
of less than 50 °F. Obse
rveth efo llowing when selecting, fitting and
re placing tyres:
R Countr y-specific requirements for tyre
appro valth at define a specific tyre type for
yo ur vehicle.
Fu rthermore, the use of cer tain tyre types in
cer tain regions and areas of operation can
be highly beneficial.
R Only use tyres and wheels of the same type
(summer tyres, winter tyres, MOEx tended
tyres) and the same make.
R Only fit wheels of the same size on one axle
(left and right).
It is only permissible tofit a di fferent wheel
size in theeve nt of a flat tyre in order to
drive tothe specialist workshop.
R Only fit tyres of the cor rect size onto the
wheels.
R Do not make any modifications tothe brake
sy stem, the wheels or the tyres.
The use of shims or brake dust shields is not
permitted and may in validate theve hicle's
ge neral operating pe rmit. 348
Wheels and tyres
Page 353 of 465

On
vehicles with the same front and rear wheel
size, you can inter change the wheels every
5,000 to10,000 km, depending on thewe ar.
Ensure the direction of rotation is maintained for
th e wheels.
It is imperative toobser vethe instructions and
saf ety no tes on "Changing a wheel" when doing
so Preparing theve hicle for a wheel
ch ange(/ page 350). Note
s onstoring wheels When
storing wheels, obser vethefo llowing
no tes:
R Afterre moving wheels, store them in a cool,
dry and preferably dark place.
R Protect the tyres from conta ct withoil,
grease or fuel. Overview of
the ty re-change tool kit Apart from some countr
y-specific variants, vehi‐
cles are not equipped with a tyre-change tool kit.
Fo r more information on which tyre-changing
to ol kits are requ ired and appr ovedfo r per form‐ ing a wheel
change on your vehicle, consult a
qu alified specialist workshop.
Re quired tyre-change tools may include, for
ex ample:
R jack
R chock
R wheel wrench
R centri ng pin
% The jack weighs appr oximately 3.4 kg.
The maximum load capacity of the jack can
be found on thest icke r af fixe dto the jac k.
The jack is maintenance-free. If there is a
malfunction, please conta ct aqualified spe‐
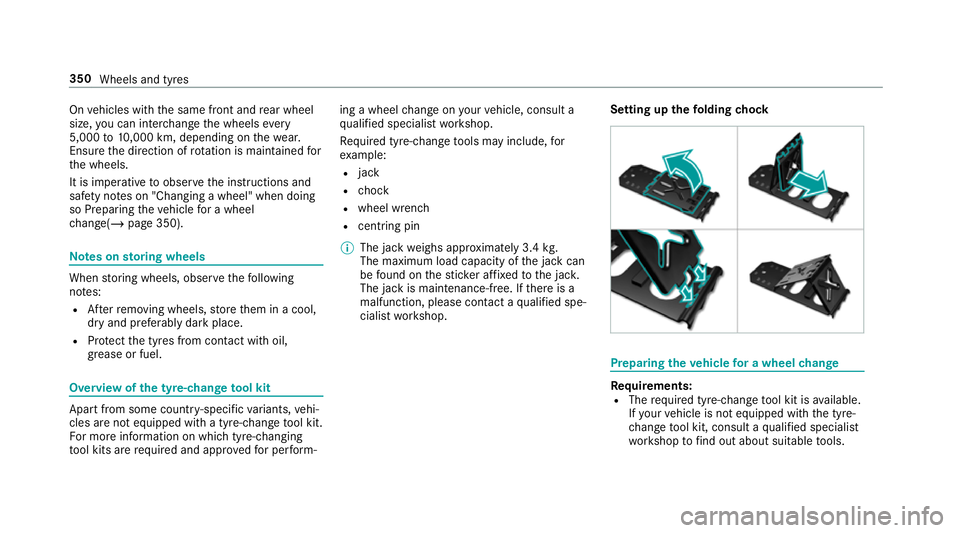
cialist workshop. Setting up
thefo lding chock Prepa
ring theve hicle for a wheel change Re
quirements:
R The requ ired tyre-change tool kit is available.
If yo ur vehicle is not equipped with the tyre-
ch ange tool kit, consult a qualified specialist
wo rkshop tofind out about suitable tools. 350
Wheels and tyres
Page 354 of 465

R
The vehicle is not on a slope.
R The vehicle is on solid, non-slippery and le vel
ground. #
Apply the electric parking brake manually. #
Movethe front wheels tothest ra ight-ahead
position. #
Shift the transmission toposition j. #
Switch off the engine. #
Make sure that the engine cann otbe star ted. #
Place choc ks orother suitable items under
th e front and rear of the wheel that is diago‐
nally opposite the wheel you wish tochange. #
Remo vethe hub caps if necessary . #
Raise theve hicle (/ page 351). Fi
tting/ removing pla stic hub caps Re
moving #
Remo vesoc ket2 and wheel wrench 3
from theve hicle tool kit (/ page 350). #
Position soc ket2 on hub cap 1. #
Position wheel spanner 3on soc ket2. #
Using wheel spanner 3, turn hub cap1
anti-clo ckwise and remo veit.
Fi tting #
Before fitting, check hub cap 1and the
wheel area for dirt, and clean if necessar y. #
Position hub cap 1and turn until it is in the
ri ght position. #
Position soc ket2 on hub cap 1. #
Position wheel wrench 3on soc ket2 and
tighten hub cap 1.
Speci fied tigh tening torq ue: 25 Nm. Ra
ising theve hicle when changing a wheel Re
quirements:
R There are no persons in theve hicle.
R The vehicle has been prepared for a wheel
ch ange (/ page 350).
Important no tes on using the jack:
R Only use theve hicle-specific jack that has
been tested and appr oved byMercedes-Benz
to raise theve hicle.
R The jack is only designed forra ising and
holding theve hicle for a short time while a
wheel is being changed and not for mainte‐
nance workunder theve hicle. Wheels and tyres
351
Page 355 of 465

R
The jack must be placed on a firm ,fl at and
non-slip sur face. If necessar y,use a lar ge,
fl at, load-bearing, non-slip unde rlay.
R The foot ofthe jack must be positioned verti‐
cally under the jack support point. Ru
les of conduct when theve hicle is raised:
R Never place your hands or feet under the
ve hicle.
R Never lie under theve hicle.
R Do not start the engine and do not release
th e electric parking brake.
R Do not open or close any doors or theta il‐
gate. #
Using the wheel wrench, loosen the wheel
bolts on the wheel you wish tochange by
about one full turn. Do not unscr ewthe bolts
comple tely. The jack support point is in
the cent rebetween
th e front and rear wheel ar ches (ar row). Before positioning
the jac k,you must remo ve
th e co verfo rth e jack support point. #
Toremo ve:pull the co ver down until the lugs
are released from the holder. #
Foldthe co veraw ay in a forw ard direction. #
Tofit: fold the co verto wa rdsth e body. #
Pull the co ver down and push it in until the
lugs engage. 352
Wheels and tyres
Page 356 of 465

&
WARNING Risk of inju ryfrom incor rect
positioning of the jack
If yo u do not position the jack cor rectly at
th e appropriate jacking point of theve hicle,
th e jack could tip with theve hicle raised. #
Only position the jack at the appropri‐
ate jacking point of theve hicle. The
base of the jack must be positioned
ve rtically under the jacking point of the
ve hicle. *
NO
TEVehicle damage from the jack If
yo u do not position the jack cor rectly at
th e appropriate jack support point of the
ve hicle, the jack could tip over with theve hi‐
cle raised. #
The jack is designed exclusively for
jacking up theve hicle at the jack sup‐
port points. #
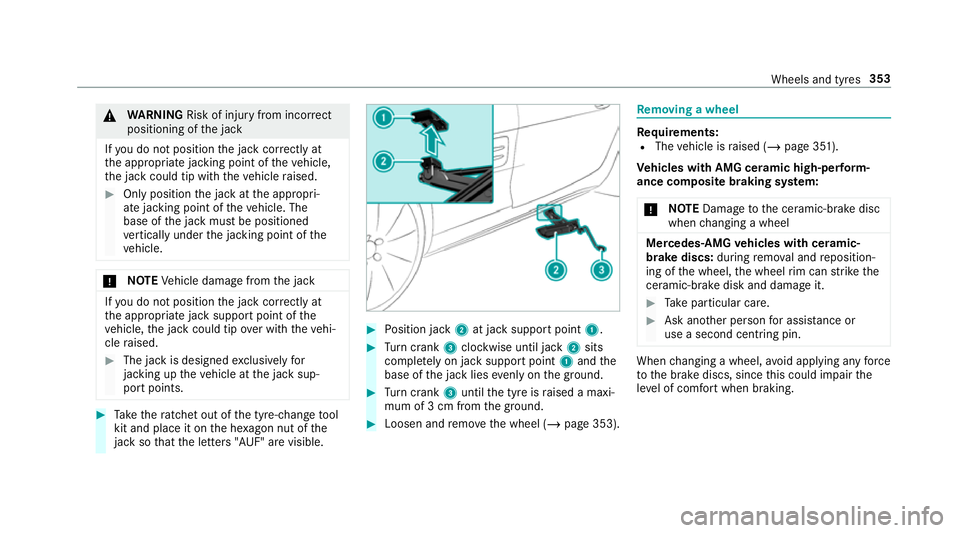
Take thera tchet out of the tyre-change tool
kit and place it on the he xagon nut of the
jack so that the letters "AUF" are visible. #
Position jack 2at jack support point 1. #
Turn crank 3clockwise until jack 2sits
compl etely on jack support point 1and the
base of the jack lies evenly on the ground. #
Turn crank 3until the tyre is raised a maxi‐
mum of 3 cm from the ground. #
Loosen and remo vethe wheel (/ page 353). Re
moving a wheel Re
quirements:
R The vehicle is raised (/ page 351).
Ve hicles with AMG cera mic high-perform‐
ance composite braking sy stem:
* NO
TEDama getothe ceramic-brake disc
when changing a wheel Mercedes
-AMG vehicles with cera mic-
brake discs: during remo val and reposition‐
ing of the wheel, the wheel rim can strike the
ceramic-brake disk and damage it. #
Take particular care. #
Ask ano ther person for assi stance or
use a second centring pin. When
changing a wheel, avoid applying any force
to the brake discs, since this could impair the
le ve l of com fort when braking. Wheels and tyres
353
Page 358 of 465

#
Unscr ew the cent ring pin. #
Tighten the last wheel bolt until it is finger-
tight. #
Ifth e collapsible emer gency spa rewheel has
been fitted, infla tethe collapsible emer gency
spa rewheel (/ page 357). #
Lowe rth eve hicle (/ page 355). Lo
weri ngtheve hicle af ter a wheel change Re
quirements:
R The new wheel has been fitted
(/ page 354).
* NO
TEDama getothe emer gency spa re
wheel when lo wering theve hicle Lo
we ring theve hicle without pr eviously
inflating the emer gency collapsible spa re
wheel can damage its rim. #
Inflate the emer gency collapsible spa re
wheel using the tyre inflation compres‐
sor before lo wering theve hicle. #
Tolowe r the vehicle: turnthe crank of the
jack anti-clo ckwise until theve hicle is once
again standing firm lyon the ground. #
Tighten the wheel bolts evenly in a diagonal
pattern in the order indicated (1 to5 ).
Specified tightening torq ue: 180 Nm. &
WARNING Risk of inju rythro ugh incor‐
re ct tigh tening torque
The wheels could come loose if the wheel
bolts or wheel nuts are not tightened tothe
prescribed tightening torque. #
Makesure the wheel bolts or wheel
nuts are tightened tothe prescribed
tightening torque. #
Ifyo u are not sure, do not mo vethe
ve hicle. Consult a qualified specialist
wo rkshop and ha vethe tightening tor‐
qu ech ecked immediately. #
Check the tyre pressure of the newly moun‐
te d wheel and adjust according ly. #
Vehicles with a tyre pressure monitoring
sy stem: restart the tyre pressure monitoring
sy stem (/ page 342).
Make sure toobser vethefo llowing fur ther rela‐
te d subjec t:
R Notes on tyre pressure (/ page 339) Wheels and tyres
355
Page 407 of 465

Display messages
Possible causes/consequences and M
MSolutions
Electronic rear axle differ-
ential lock currently
unavailable *T
he mo tor of the electronic rear axle locking dif fere ntial is overheating. #
Let the electronic rear axle locking dif fere ntial cool down bydriving defensively.
Electronic rear axle differ-
ential lock inoperative *T
he electronic rear axle locking dif fere ntial is inope rative. #
Consult a qualified specialist workshop.
Ð Rear axle steering Malfunc-
tion Visit workshop *T
herear axle steering is malfunctioning.
The rear axle has no steering capability.
When driving in a stra ight line, thesteering wheel may tilt. #
Continue driving carefully at a changed speed. #
Consult a qualified specialist workshop immediatel y.
Ð
Rear axle steering cur-
rently unavailable *T
herear axle steering is temp orarily una vailable. The turning circle may enlar ge. #
Stop theve hicle, paying attention toroad and traf fic conditions, and restart the engine.
If th e display message does not disappear: #
Drive on carefull y. #
Consult a qualified specialist workshop.
Rear spoiler inoperative
Limit XXX mph *T
hevehicle's speed is limited totheva lue displa yed. Therefore, there ar wing cannot reach the end position during
ex tension and only extends as far as is possible.
If ex tension of there ar wing is bloc ked, e.g. byice: 404
Display messages and warning/indicator lamps