2018 MERCEDES-BENZ AMG GT COUPE start stop button
[x] Cancel search: start stop buttonPage 125 of 294
positionhork, otherwise park position j
is engaged automatically.
The transmission could be damaged.
!Always secure the vehicle correctly against
rolling away. Otherwise, the vehicle or its driv-
etrain could be damaged.
To ensure that the vehicle is secured against
rolling away unintentionally:
Rthe electric parking brake must be applied.
Rthe transmission must be in position j.
Rthe SmartKey must be removed from the igni-
tion lock or the Start/Stop button must be
pressed.
Rthe front wheels must be turned towards the
curb on steep uphill or downhill gradients.
Rthe empty vehicle must be secured at the
front axle with a wheel chock or similar, for
example, on uphill or downhill gradients.
Ra laden vehicle must also be secured at the
rear axle with a wheel chock or similar, for
example, on uphill or downhill gradients.
Switching off the engine
Important safety notes
GWARNING
The automatic transmission switches to neu-
tral position Nwhen you switch off the engine.
The vehicle may roll away. There is a risk of an
accident.
After switching off the engine, always switch
to parking position P. Prevent the parked vehi-
cle from rolling away by applying the parking
brake.
AMG SPEEDSHIFT DCT 7-speed sport
transmission
!Do not remove the SmartKey while the vehi-
cle is in motion. Otherwise, at low speeds,
parking lock jwill be activated automati-
cally.
Do not open the driver's door while the vehi-
cle is in motion. At low speeds, transmission
position jis engaged automatically.
This could cause damage to the transmission
and the parking lock.
XApply the electric parking brake.
XShift the transmission to jusing the button
on the center console.
Using the Start/Stop button
XPress the Start/Stop button (Ypage 105)
The engine stops and all the indicator lamps in
the instrument cluster go out.
If the driver's door is closed, this is the same
as key position 1. If the driver's door is open,
this is the same as key position u, i.e. the
SmartKey having been removed.
If you switch the engine off with the trans-
mission in position korh, the transmis-
sion automatically shifts to i.
If you move the E-SELECT lever to ibefore
switching off the engine, the transmission
remains in ifor 30 minutes.
If you open the driver's or front-passenger
door during this period, the transmission
automatically shifts to jand the electric
parking brake is automatically applied.
The engine can be switched off in an emer-
gency while the vehicle is in motion by press-
ing and holding the Start/Stop button for
three seconds. This function operates inde-
pendently of the ECO start/stop automatic
engine switch-off function.
Using the SmartKey
XTurn the SmartKey to key position uin the
ignition lock and remove it.
The immobilizer is activated.
If you move the E-SELECT lever to ibefore
switching off the engine, the transmission
remains in ifor approximately 30 minutes.
If you open the driver's or front-passenger
door during this time, the transmission shifts
automatically to j.
The t
ransmission remains in iif:
Rthe SmartKey is in the ignition lock and
Ryou use the E ‑SELECT lever to shift the
transmission to ibefore switching the
engine off
This still applies if you open the driver's or
front-passenger door.
Further information on transmission position
i when operating with a SmartKey is avail-
able under "Automatic car wash"
(
Ypage 239).
Parking123
Driving and parking
Z
Page 126 of 294
Electric parking brake
General notes
GWARNING
If you leave children unsupervised in the vehi-
cle, they could set it in motion by, for example:
Rrelease the parking brake.
Rshift the automatic transmission out of the
parking position P.
Rstart the engine.
In addition, they may operate vehicle equip-
ment and become trapped. There is a risk of
an accident and injury.
When leaving the vehicle, always take the
SmartKey with you and lock the vehicle. Never
leave children unsupervised in the vehicle.
The function of the electric parking brake is
dependent on the on-board voltage. If the on-
board voltage is low or there is a malfunction in
the system, it may not be possible to apply the
released parking brake.
XIf this is the case, only park the vehicle on
level ground and secure it to prevent it rolling
away.
XShift the automatic transmission to position
j.
It may not be possible to release an applied
parking brake if the on-board voltage is low or
there is a malfunction in the system. Contact a
qualified specialist workshop.
The electric parking brake performs a function
test at regular intervals while the engine is
switched off. The sounds that can be heard while
this is occurring are normal.
Applying or releasing manually
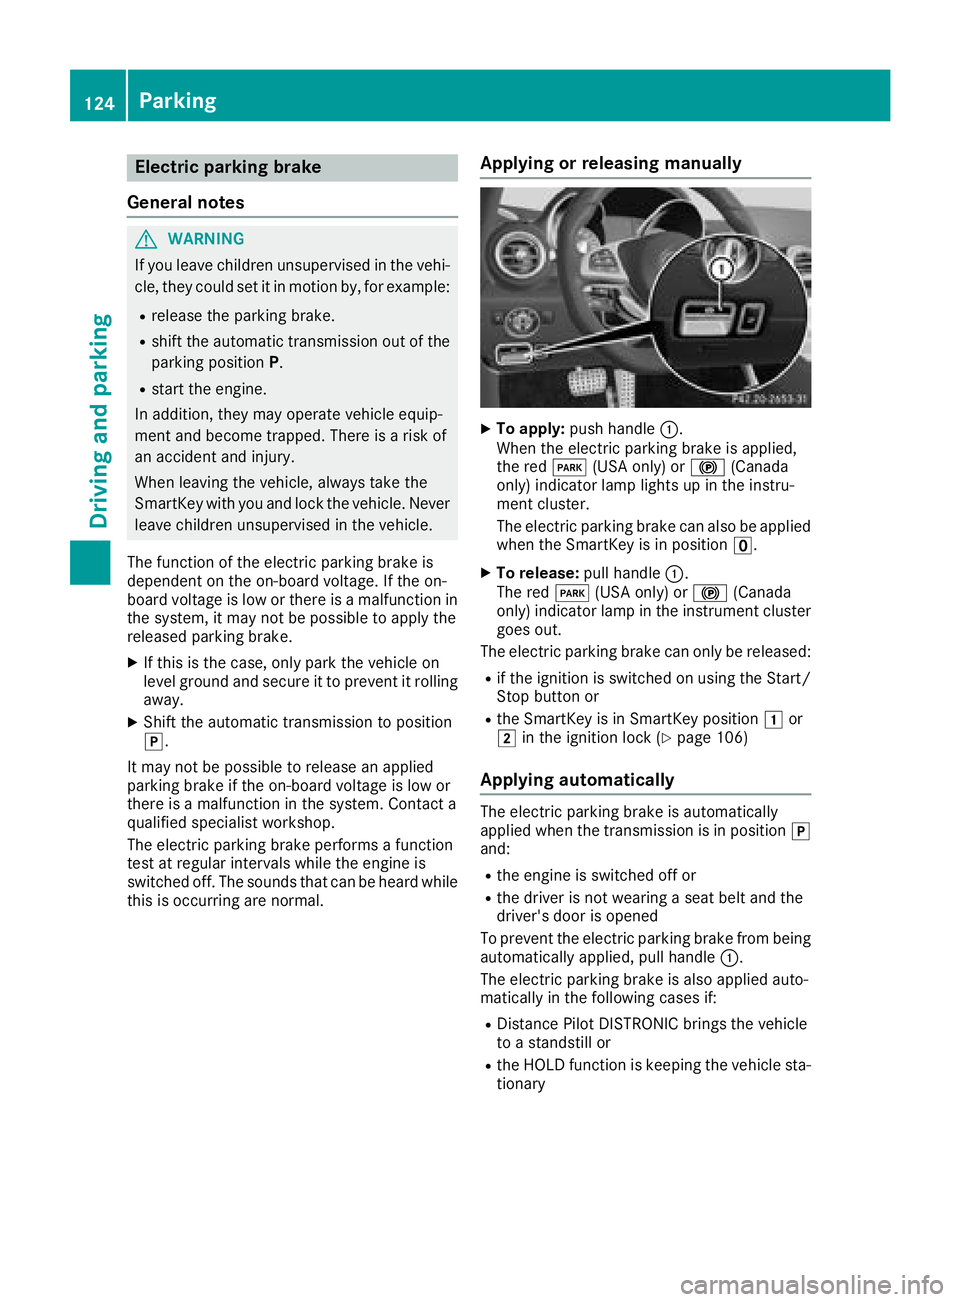
XTo apply: push handle :.
When the electric parking brake is applied,
the red F(USA only) or !(Canada
only) indicator lamp lights up in the instru-
ment cluster.
The electric parking brake can also be applied
when the SmartKey is in position u.
XTo release:pull handle:.
The red F(USA only) or !(Canada
only) indicator lamp in the instrument cluster goes out.
The electric parking brake can only be released:
Rif the ignition is switched on using the Start/
Stop button or
Rthe SmartKey is in SmartKey position 1or
2 in the ignition lock (Ypage 106)
Applying automatically
The electric parking brake is automatically
applied when the transmission is in position j
and:
Rthe engine is switched off or
Rthe driver is not wearing a seat belt and the
driver's door is opened
To prevent the electric parking brake from being
automatically applied, pull handle :.
The electric parking brake is also applied auto-
matically in the following cases if:
RDistance Pilot DISTRONIC brings the vehicle
to a standstill or
Rthe HOLD function is keeping the vehicle sta-
tionary
124Parking
Driving and parking
Page 144 of 294

START or if any of the activation conditions are
no longer fulfilled. TheRACE START Not Pos‐
sible See Operator's ManualorRACESTART Canceledmessage appears in the mul-
tifunction display.
iIf RACE START is used repeatedly within a
short period of time, it is only available again
after the vehicle has been driven a certain
distance.
AMG adaptive sport suspension sys-
tem
General notes
The electronically controlled damping system
works continuously. This improves driving
safety and ride comfort.
The damping is tuned individually to each wheel
and depends on:
Ryour driving style, e.g. sporty
Rthe road surface condition, e.g. bumps
Ryour individual selection of Sport, Sport+ or
Comfort
Each time you start the engine with the Smart-
Key or the Start/Stop button, Comfort mode is
activated. Further information about starting
the engine (
Ypage 106).
Adjusting the suspension settings
:Adjusts AMG adaptive sport suspension sys-
tem
;Right indicator lamp
=Left indicator lamp
The suspension setting is adjusted using but-
ton :on the center console.
iThe suspension setting can also be adjusted
using the DYNAMIC SELECT controller
(
Ypage 111).
Setting "Sport" mode
XPress button :repeatedly until left indicator
lamp =lights up.
You have selected Sport mode.
The AMG Suspension System SPORT
mes-
sage appears on the multifunction display.
The firmer setting of the suspension tuning in
Sport mode ensures even better contact with
the road. Select this mode when employing a
sporty driving style, e.g. on winding country
roads.
Setting "Sport +" mode
XPress button :repeatedly until indicator
lamps ;and =light up.
You have selected Sport + mode.
The AMG
SuspensionSystemSPORT +mes-
sage appears on the multifunction display.
The very firm setting of the suspension setting in
Sport + mode ensures the best possible contact
with the road. Select this mode only when driv-
ing on race circuits.
Setting "Comfort" mode
XPress button :repeatedly until indicator
lamps ;and =go out.
You have selected Comfort mode.
The AMG
SuspensionSystemCOMFORTmes-
sage appears on the multifunction display.
In Comfort mode, the driving characteristics of
your vehicle are more comfortable. Select this
mode if you prefer a more comfortable driving
style, but also when driving at speed on straight
roads, e. g. highways.
Parking Assist PARKTRONIC
Important safety notes
Parking Assist PARKTRONIC is an electronic
parking aid with ultrasound. It monitors the area around your vehicle using six sensors in the
front bumper and four sensors in the rear
bumper. Parking Assist PARKTRONIC shows you
the distance between your vehicle and a detec-
ted obstacle visually and audibly.
Parking Assist PARKTRONIC is only an aid. It is
not a replacement for your attention to your
immediate surroundings. You are always
142Driving systems
Driving and parking
Page 146 of 294

If there is an obstacle within this range, the rel-
evant warning displays light up and a warning
tone sounds. If the distance falls below the min-
imum, the distance may no longer be shown.
Warning displays
:Segments on the left-hand side of the vehi-
cle
;Segments on the right-hand side of the vehi-
cle
=Segments showing operational readiness
The warning displays show the distance
between the sensors and the obstacle. The
warning display for the front area is in the instru-
ment cluster. The warning display for the rear
area is located on the cover behind the seats in
the rear compartment.
The warning display for each side of the vehicle
is divided into five yellow and two red segments.
Parking Assist PARKTRONIC is operational if
operational readiness indicator =lights up.
The selected transmission position and the
direction in which the vehicle is rolling deter-
mine which warning display is active when the
engine is running.
Transmission posi-
tionWarning display
hFront area activated
k, ior the vehicle
is rolling backwardsRear and front areas
activated
jNo areas activated
One or more segments light up as the vehicle
approaches a detected obstacle, depending on
the vehicle's distance from the obstacle:
From the:
Rsixth segment onwards, you will hear an inter-
mittent warning tone for approximately two
seconds.
Rseventh segment onwards, you will hear a
warning tone for approximately two seconds.
This indicates that you have now reached the minimum distance.
Deactivating or activating Parking
Assist PARKTRONIC
:Indicator lamp
;Deactivates or activates Parking Assist
PARKTRONIC
If indicator lamp :lights up, Parking Assist
PARKTRONIC is deactivated.
iParking Assist PARKTRONIC is automati-
cally activated when you set the Start/Stop
button to key position 2.
144Driving systems
Driving and parking
Page 148 of 294

Rif the camera lens is dirty or obstructed.
Observe the notes on cleaning
(
Ypage 242)
Rif the rear of your vehicle is damaged. In this
case, have the camera position and setting
checked at a qualified specialist workshop
The field of vision and other functions of the
reversing camera may be restricted due to addi-
tional accessories on the rear of the vehicle (e.g. license plate holder).
The guide lines in the multimedia system display
show the distances to your vehicle. The distan-
ces only apply to road level.
Activating/deactivating the rear view
camera
XTo activate: ensure that SmartKey position
2 has been selected with the Start/Stop
button.
XMake sure that the Activation by R gearfunction is selected in the multimedia system
(see the Digital Owner's Manual).
XEngage reverse gear.
The area behind the vehicle is shown with
guide lines in the multimedia system display.
The image from the rear view camera is avail-
able throughout the maneuvering process.
To deactivate: the rear view camera deacti-
vates if you shift the transmission to jor after
driving forwards a short distance.
Messages in the multimedia system dis-
play
The rear view camera may show a distorted view
of obstacles, show them incorrectly or not at all.
Obstacles are not shown by the rear view cam-
era in the following locations:
Rvery close to the rear bumper
Runder the rear bumper
!Objects not at ground level may appear to
be further away than they actually are, e.g.:
Rthe bumper of a parked vehicle
Rthe drawbar of a trailer
Rthe ball coupling of a trailer tow hitch
Rthe rear section of an HGV
Ra slanted post Use the guidelines only for orientation.
Approach objects no further than the bottom-
most guideline.
:Yellow guide line at a distance of approx-
imately 13 ft (4.0 m) from the rear of the
vehicle
;White guide line without steering input –
vehicle width including the exterior mirrors
(static)
=Yellow guide line for the vehicle width
including the exterior mirrors, at the current
steering wheel angle (dynamic)
?Yellow lane marking the course the tires will
take at the current steering wheel angle
(dynamic)
AYellow guide line at a distance of approx-
imately 3 ft (1.0 m) from the rear of the vehi-
cle
BVehicle center axle (marker assistance)
CBumper
DRed guide line at a distance of approximately
12 in (0.30 m) from the rear of the vehicle
The guide lines are shown when the transmis-
sion is in position k.
The distance specifications only apply to
objects that are at ground level.
146Driving systems
Driving and parking
Page 153 of 294
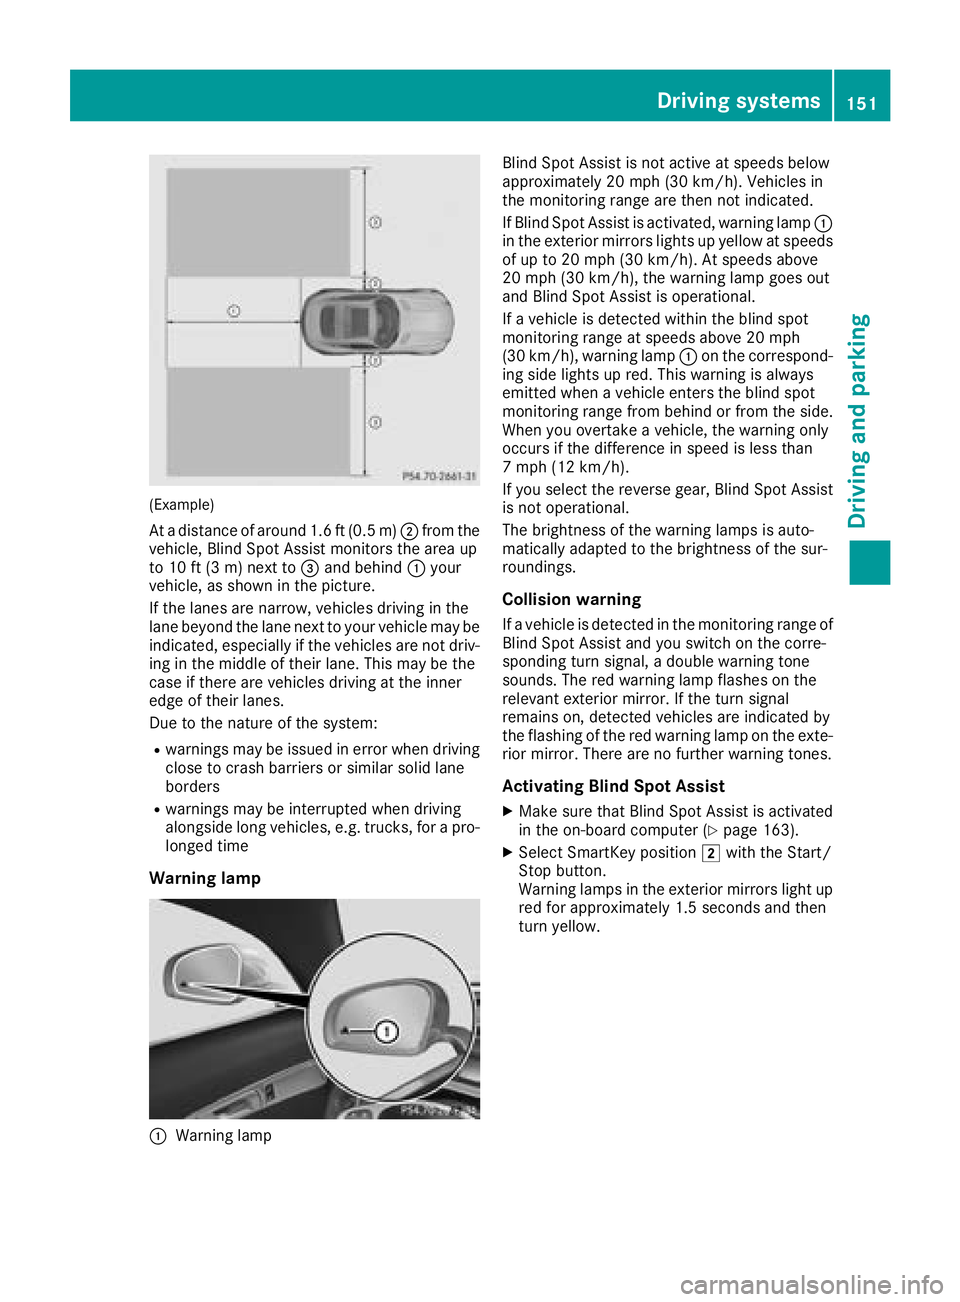
(Example)
At a distance of around 1.6 ft (0.5 m);from the
vehicle, Blind Spot Assist monitors the area up
to 10 ft (3 m) next to =and behind :your
vehicle, as shown in the picture.
If the lanes are narrow, vehicles driving in the
lane beyond the lane next to your vehicle may be
indicated, especially if the vehicles are not driv-
ing in the middle of their lane. This may be the
case if there are vehicles driving at the inner
edge of their lanes.
Due to the nature of the system:
Rwarnings may be issued in error when driving
close to crash barriers or similar solid lane
borders
Rwarnings may be interrupted when driving
alongside long vehicles, e.g. trucks, for a pro-
longed time
Warning lamp
:Warning lamp Blind Spot Assist is not active at speeds below
approximately 20 mph (30 km/h). Vehicles in
the monitoring range are then not indicated.
If Blind Spot Assist is activated, warning lamp
:
in the exterior mirrors lights up yellow at speeds
of up to 20 mph (30 km/ h). At speeds above
20 mph (30 km/h), the warning lamp goes out
and Blind Spot Assist is operational.
If a vehicle is detected within the blind spot
monitoring range at speeds above 20 mph
(30 km/h), warning lamp :on the correspond-
ing side lights up red. This warning is always
emitted when a vehicle enters the blind spot
monitoring range from behind or from the side.
When you overtake a vehicle, the warning only
occurs if the difference in speed is less than
7 mph (12 km/h).
If you select the reverse gear, Blind Spot Assist
is not operational.
The brightness of the warning lamps is auto-
matically adapted to the brightness of the sur-
roundings.
Collision warning
If a vehicle is detected in the monitoring range of
Blind Spot Assist and you switch on the corre-
sponding turn signal, a double warning tone
sounds. The red warning lamp flashes on the
relevant exterior mirror. If the turn signal
remains on, detected vehicles are indicated by
the flashing of the red warning lamp on the exte-
rior mirror. There are no further warning tones.
Activating Blind Spot Assist
XMake sure that Blind Spot Assist is activated
in the on-board computer (Ypage 163).
XSelect SmartKey position 2with the Start/
Stop button.
Warning lamps in the exterior mirrors light up
red for approximately 1.5 seconds and then
turn yellow.
Driving systems151
Driving and parking
Z
Page 157 of 294
!If the coolant temperature is too high, a dis-
play message is shown.
If the coolant temperature display is in the
area marked in red, do not continue driving.
Otherwise, the engine will be damaged.
The coolant temperature display is in the lower
section of the tachometer (
Ypage 34).
Under normal operating conditions and with the
specified coolant level, the coolant temperature
display may rise to the red marking.
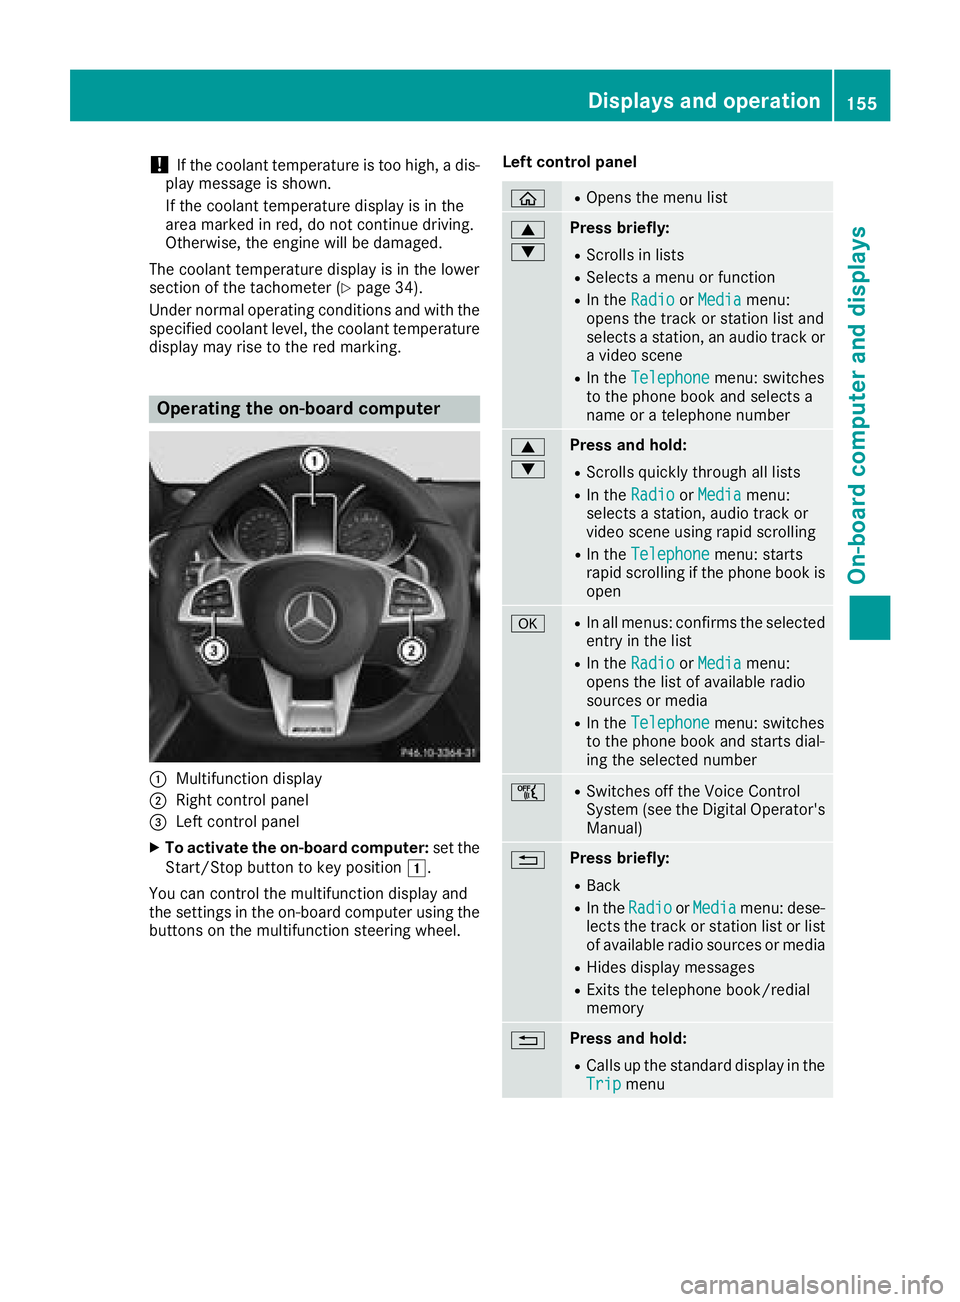
Operating the on-board computer
:Multifunction display
;Right control panel
=Left control panel
XTo activate the on-board computer: set the
Start/Stop button to key position 1.
You can control the multifunction display and
the settings in the on-board computer using the
buttons on the multifunction steering wheel. Left control panel
òROpens the menu list
9
:Press briefly:
RScrolls in lists
RSelects a menu or function
RIn the
RadioorMediamenu:
opens the track or station list and
selects a station, an audio track or
a video scene
RIn the Telephonemenu: switches
to the phone book and selects a
name or a telephone number
9
:Press and hold:
RScrolls quickly through all lists
RIn the RadioorMediamenu:
selects a station, audio track or
video scene using rapid scrolling
RIn the Telephonemenu: starts
rapid scrolling if the phone book is
open
aRIn all menus: confirms the selected
entry in the list
RIn the RadioorMediamenu:
opens the list of available radio
sources or media
RIn the Telephonemenu: switches
to the phone book and starts dial-
ing the selected number
ñRSwitches off the Voice Control
System (see the Digital Operator's Manual)
%Press briefly:
RBack
RIn the RadioorMediamenu: dese-
lects the track or station list or list
of available radio sources or media
RHides display messages
RExits the telephone book/redial
memory
%Press and hold:
RCalls up the standard display in the
Tripmenu
Displays and operation155
On-board computer and displays
Z
Page 158 of 294
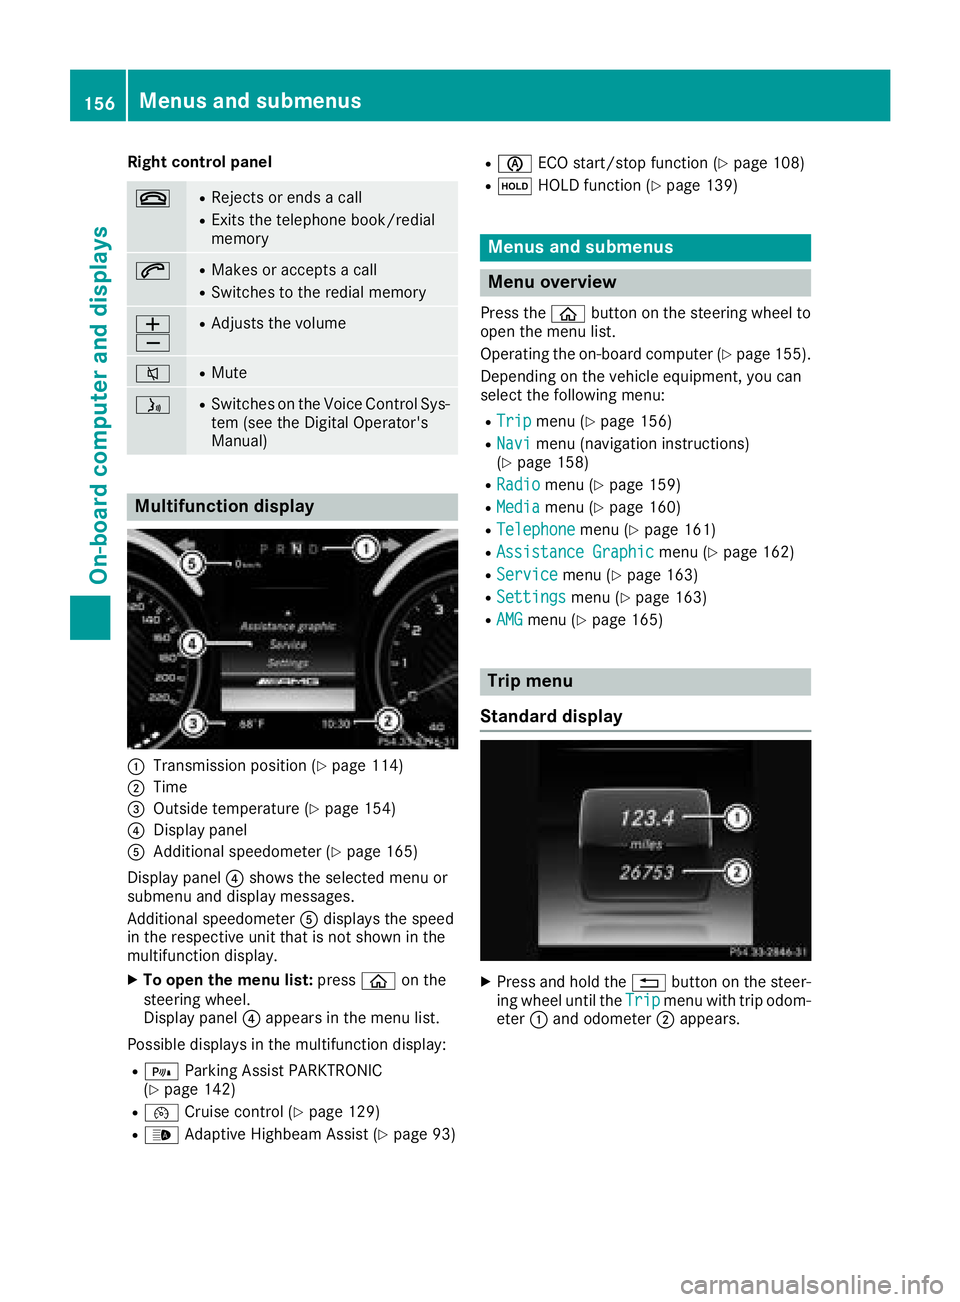
Right control panel
~RRejects or ends a call
RExits the telephone book/redial
memory
6RMakes or accepts a call
RSwitches to the redial memory
W
XRAdjusts the volume
8RMute
óRSwitches on the Voice Control Sys-
tem (see the Digital Operator's
Manual)
Multifunction display
:Transmission position (Ypage 114)
;Time
=Outside temperature (Ypage 154)
?Display panel
AAdditional speedometer (Ypage 165)
Display panel ?shows the selected menu or
submenu and display messages.
Additional speedometer Adisplays the speed
in the respective unit that is not shown in the
multifunction display.
XTo open the menu list: pressòon the
steering wheel.
Display panel ?appears in the menu list.
Possible displays in the multifunction display:
R= Parking Assist PARKTRONIC
(Ypage 142)
R¯ Cruise control (Ypage 129)
R_Adaptive Highbeam Assist (Ypage 93)
RèECO start/stop function (Ypage 108)
RëHOLD function (Ypage 139)
Menus and submenus
Menu overview
Press the òbutton on the steering wheel to
open the menu list.
Operating the on-board computer (
Ypage 155).
Depending on the vehicle equipment, you can
select the following menu:
RTripmenu (Ypage 156)
RNavimenu (navigation instructions)
(Ypage 158)
RRadiomenu (Ypage 159)
RMediamenu (Ypage 160)
RTelephonemenu (Ypage 161)
RAssistance Graphicmenu (Ypage 162)
RServicemenu (Ypage 163)
RSettingsmenu (Ypage 163)
RAMGmenu (Ypage 165)
Trip menu
Standard display
XPress and hold the %button on the steer-
ing wheel until the Tripmenu with trip odom-
eter :and odometer ;appears.
156Menus and submenus
On-board computer and displays